
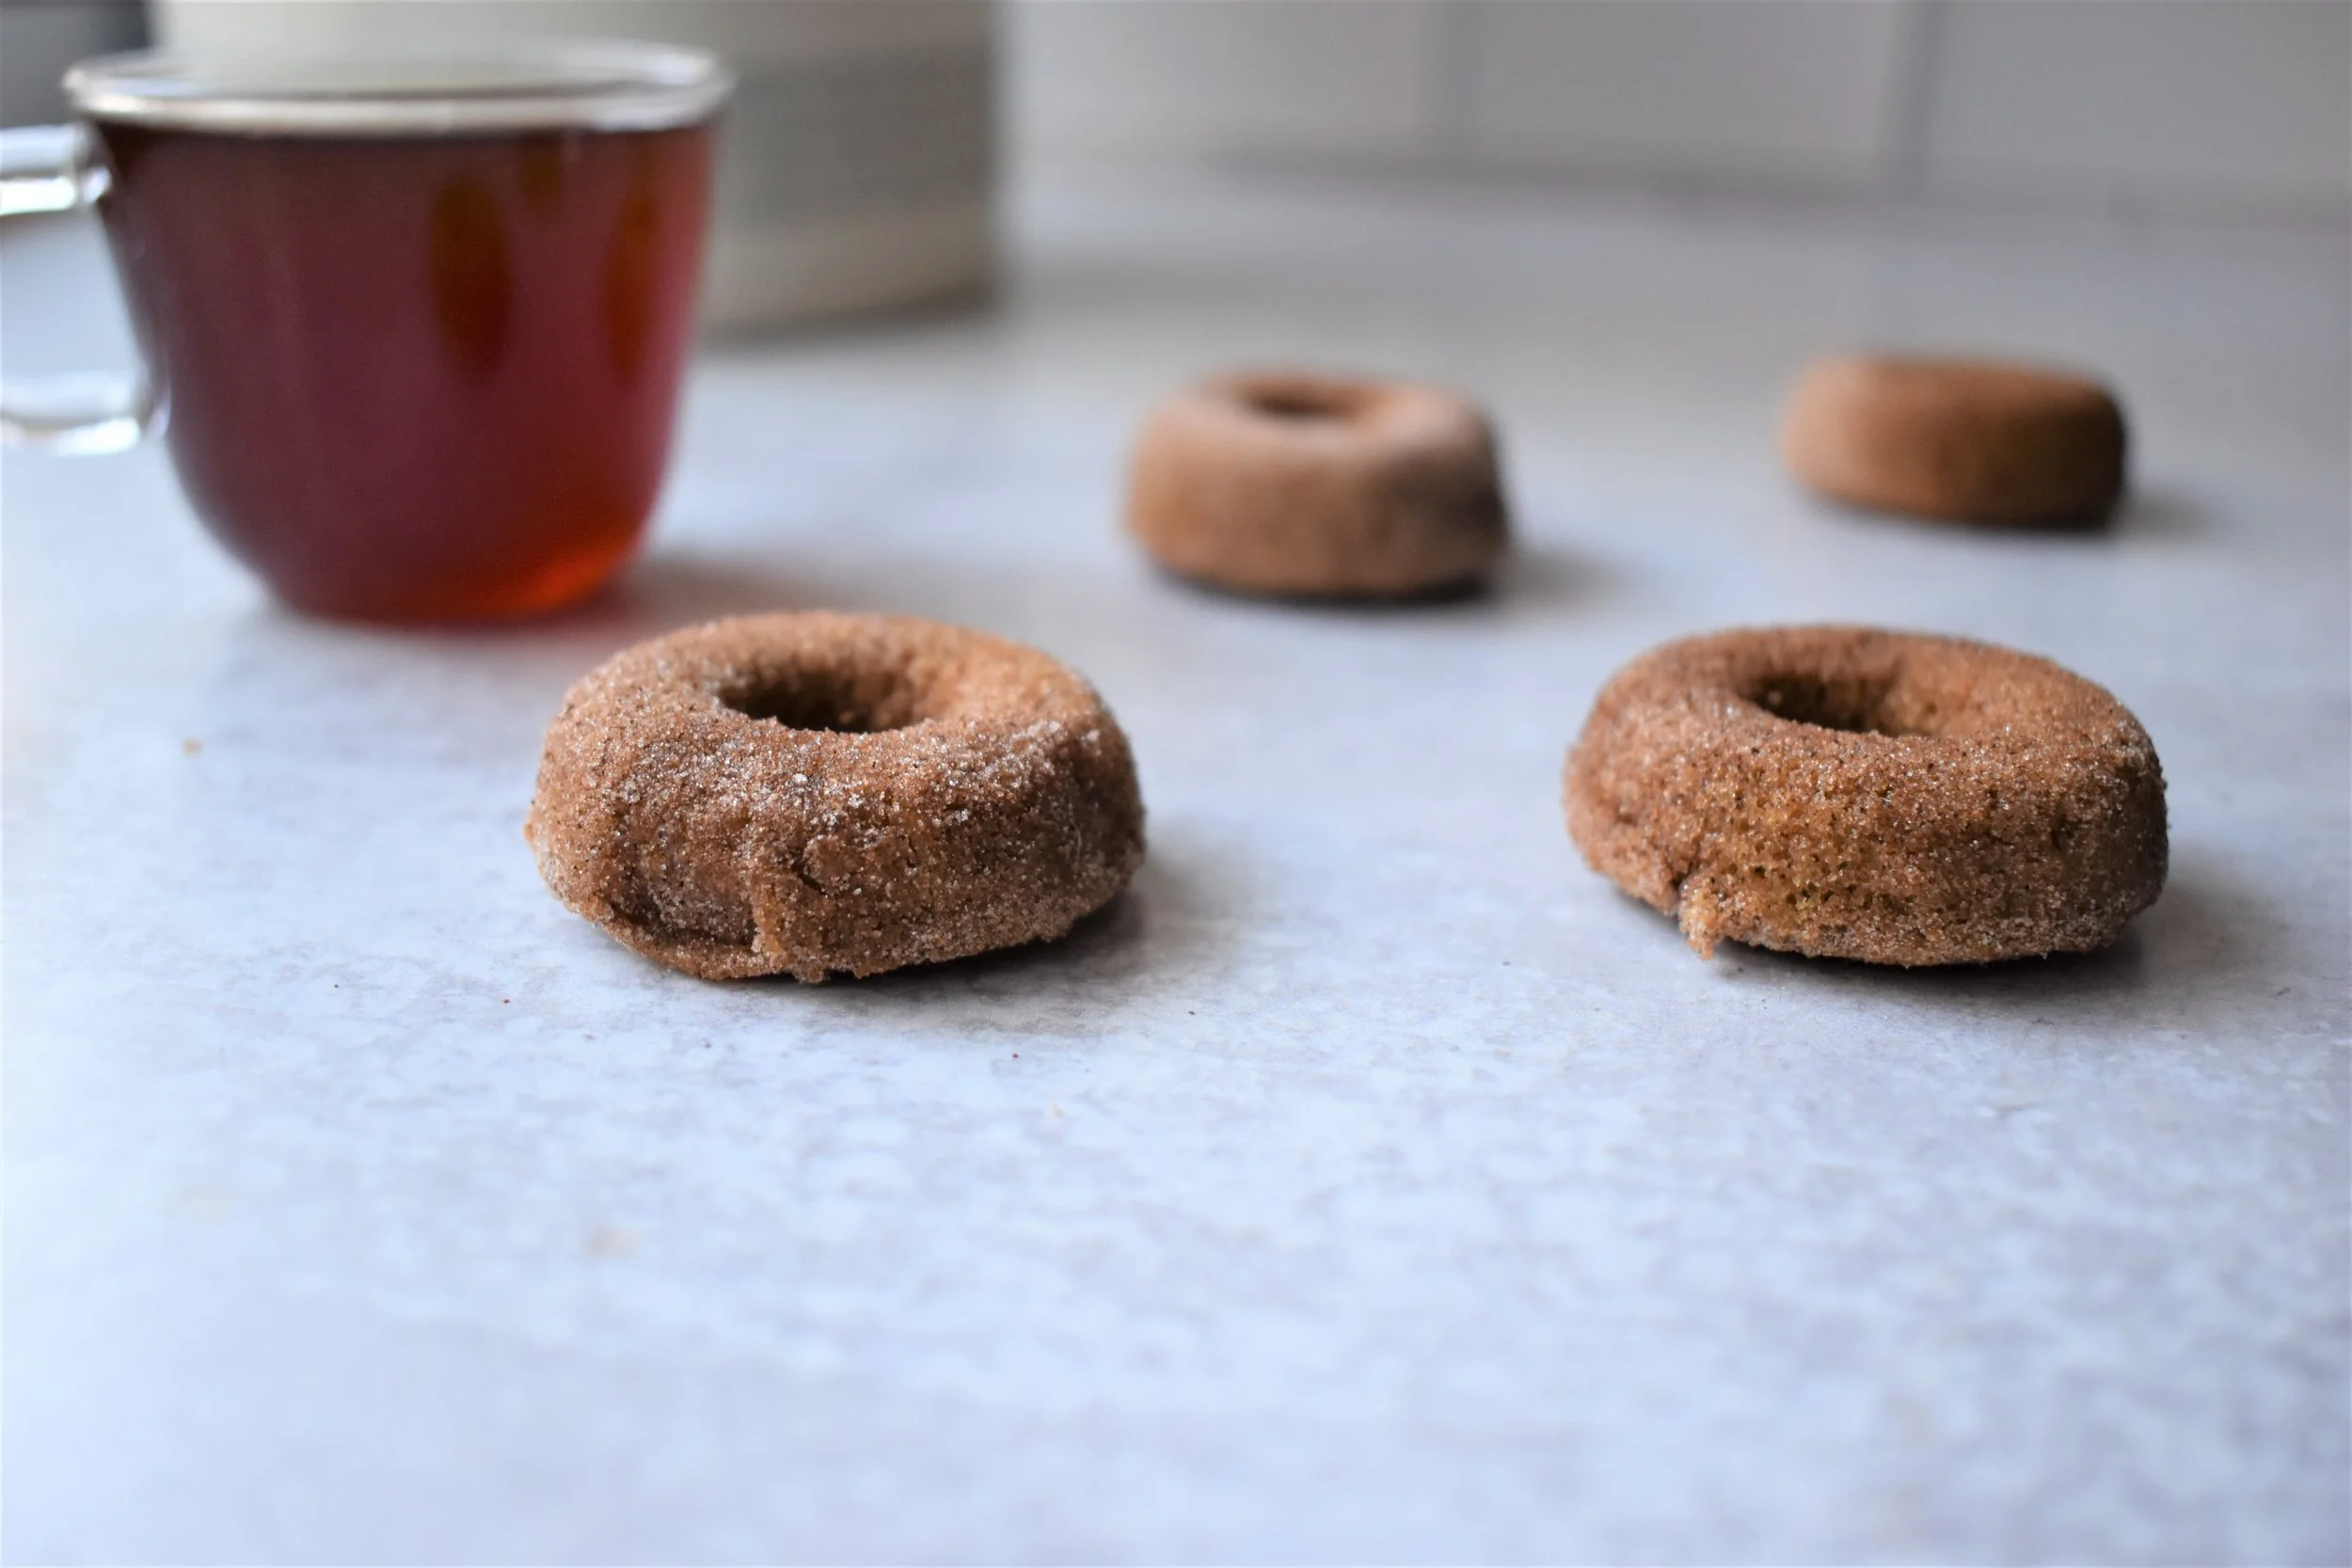
Mini Apple Cider Donuts
Happy November and welcome to a special recipe post! Not only will I be sharing this fun mini apple cider donut recipe, this recipe is part of a virtual tea party I was invited to join in on by Daniela of Tea Cachai!
At the end of this post I will link the rest of the menu from the other tea party chefs so that you can see and create their recipes as well!
If you were around last fall, I made apple cider donuts but I used my large pan! This time, in honor of the tea party I made them mini!
Mini donuts are so awesome because you can eat like 10 of them and it’s as if you only ate one big donut hehe.
For this recipe, I made my own apple cider. It’s super simple. The gist of it is that you cut up a bunch of apples throw them in a pot with enough water and add some spices! I actually had to switch pots after this photo. I have a full post here about how to make your own apple cider.
The changes I made this time were purely out of what I had. I used about 10 tiny honey crisp apples, I added peppercorn, cardamom and cinnamon and didn’t use cheese cloth because I ran out! I also infused this apple cider with oriental beauty oolong instead of green tea.

If you’re thinking - ain’t no body got time for that- you can also just buy apple cider from the store and reduce it a bit so that it’s stronger!
Last time, I used this recipe to make the donuts with a few additions. Check out the recipe here and below I’ll tell you about some of the changes I made.

1 and 1/2 cups (360ml) apple cider ——> I made my own tea infused apple cider
1/2 cup (100g) packed light or dark brown sugar —-> This recipe called to use 1 cup of sugar, 1/2 white and 1/2 brown. I used light brown sugar for the entire cup.
1/2 cup (120ml) milk, at room temperature* ——-> I used chasew Milk
Bake for 10 -11 minutes ———> while my timing with the smaller pan wasn’t much less, I would suggest baking time of 9-10 minutes
I used a mini donut pan instead of a larger one.

This recipe is great because it’s super simple. You mix dry ingredients and wet ingredients then combine them and bake!
When pouring the batter into the molds, i suggest something with a spout of a piping bag!

My mini donut pan has 12 spaces and this recipe allowed me to make 5 pans! You could probably stretch it to 6 if you make smaller donuts by not filling the pan entirely.

These are perfect for a tea party because they are simple, quick and a perfect size for a bite sized snack. These are great to dip in your tea, especially if you have a smaller cup and wont fill you up after a few.

Being Mini, there are also so many fun ways to display them! If you’re an apple lover, this is definitely something that you need to try!

But hey, don’t ruin your appetite with only donuts! We have a full menu of delicious treats! Check out all the other recipes that are part of this virtual tea party!
Chicken roasted red pepper AND Lapsang walnut vegan cream cheese tea sandwiches
Daniela - Tea Cachai
Lu Ann - The Tea Cup Of LIfe
Caroline - Pinch Me I’m Eating
Shortbread cookies
Mimi - The Capsule Kitchen
How I fell In love with tea

I want to take this journey back to the 90’s and my childhood. My love of tea started here. Noon panir and chayee shirin for breakfast - Persian bread and cheese with sweet tea. I’ve always been anti tea bag, my dad used to tell me that tea bags were the dregs of tea and that loose leaf was the only way to go!
We generally drank different black teas, mostly ceylon. The tea that strikes such fond memories and the one I still drink to this day is a loose leaf ceylon that is tossed with bergamot oil. While many people call this “earl grey” I guarantee you it’s a bit different. I’ve also had many versions of ceylon that are essentially blends. Some people put things like rose buds, cardamom and even saffron in their tea!
While these were the only things that I drank, I thought I was a tea expert. In reality I actually only knew about black tea and really, the black tea that I drank.

As I grew older, tea became more routine. As a kid, I drank it often but it wasn’t something I craved. High school definitely set off something in me. I drank tea like it was my job. It was a delicious thing in my daily routine and also something that I got to share with my mom and dad.
My parents divorced when I was younger and in High School I spent more time at my mom’s house. We drank tea together a lot. Once I started to make the tea “right” it became my job. She lovingly referred to me as kolfateh chayee - tea butler. The nickname became a family wide joke that is still used. My mom was especially sad when I moved out because she was losing her kolfateh chayee. My younger siblings tea making skills are not up to snuff !
Fast forward to college, in my dorm room you could always find grits, fruity pebbles, my electric tea kettle, mug, ceylon and a tea infuser. I drank tea all day and night. It was always something I was known for. I was a “tea” person as opposed to coffee like most everyone else. To me, tea was just a normal part of my routine. Still, I only drank my ceylon and railed against green teas because they were bitter. In reality, I just didn’t know how to brew it.

I always had a passion to start my own blog and shop but didn’t know what to do. I have so many passions but I always thought that nobody would care what I would have to say or buy what I create. After college and starting my current job (several years ago), I felt stuck. While I liked my job generally, I didn’t have the artistic creation that I so badly needed.
I decided that I would focus on tea and started a blog where I reviewed different teas. I really didn’t know much about tea other than what I drank! So I started trying teas I would find or that companies would send me. A lot of the time, these teas were different blends. Then, I was gifted a tea book where I started to read about the history of tea, how it’s brewed, the cultivars etc!
After “reviewing” blends for a while I decided to switch to cooking and baking with tea because I felt more excited about that and that I know more about it than trying to review teas. My taste for blends started to falter (except my ceylon) and I tried pu’er for the first time. The rest is history!!!
So, thanks to the lovely ceylon leaves my heart was primed for tea and that love has only grown more and more daily!
I wanted to share two things that you can find online. The candy above which is a delicious saffron candy with cardamom seeds in it can be found here. These are a great sweet with tea if that’s your thing and was also a cure all for stomach aches :)
The cheese I mentioned you can find here. If you’re weary about buying cheese online, take the brand name to your local international supermarket and see if they have it!
Finally, if you want to try the tea that started it all you can find it here.
What tea started your tea journey?!
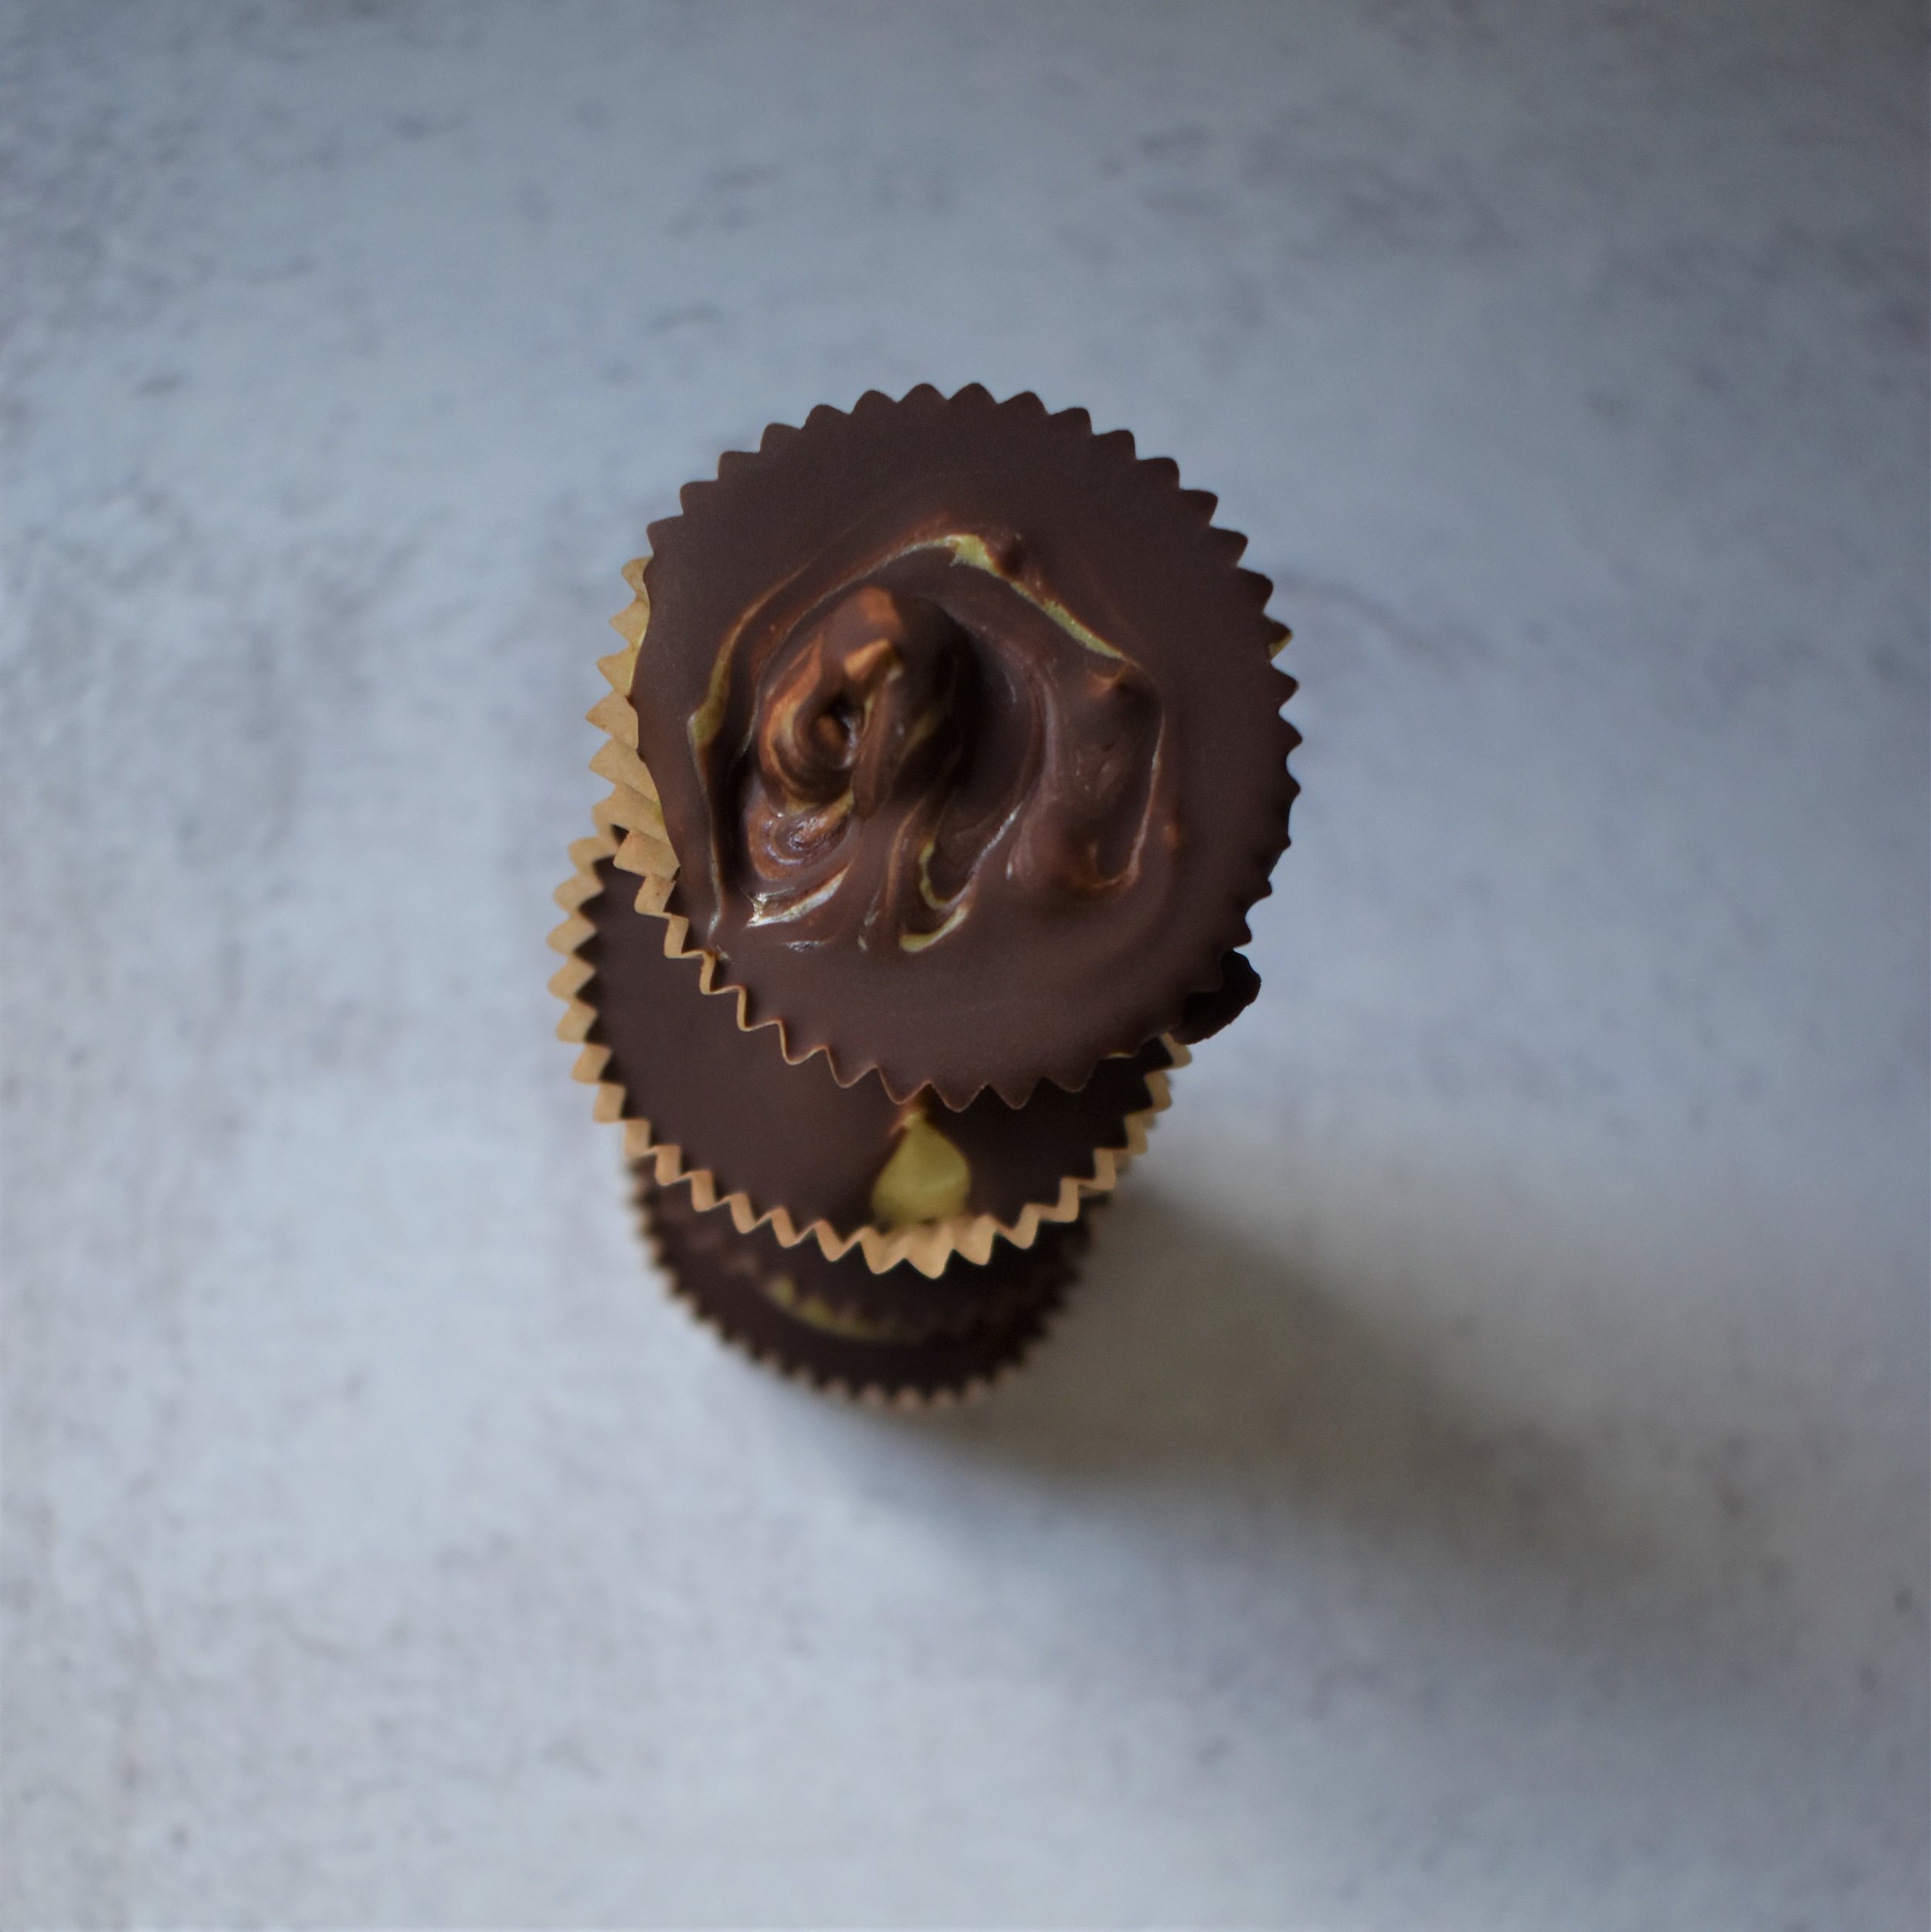
Matcha Cream Cups!
It’s Monday. Let’s face it, sometimes Monday’s aren’t that bad. It really comes down to your attitude about it but even on a good Monday there can be a sense of laziness. It’s Monday, the week is starting and your to do list is 3 miles long but you want a treat. You don’t want to work too hard for that treat though right?
I have the perfect treat for you!
I’m going to write this post in a really laid back, Monday way as well.

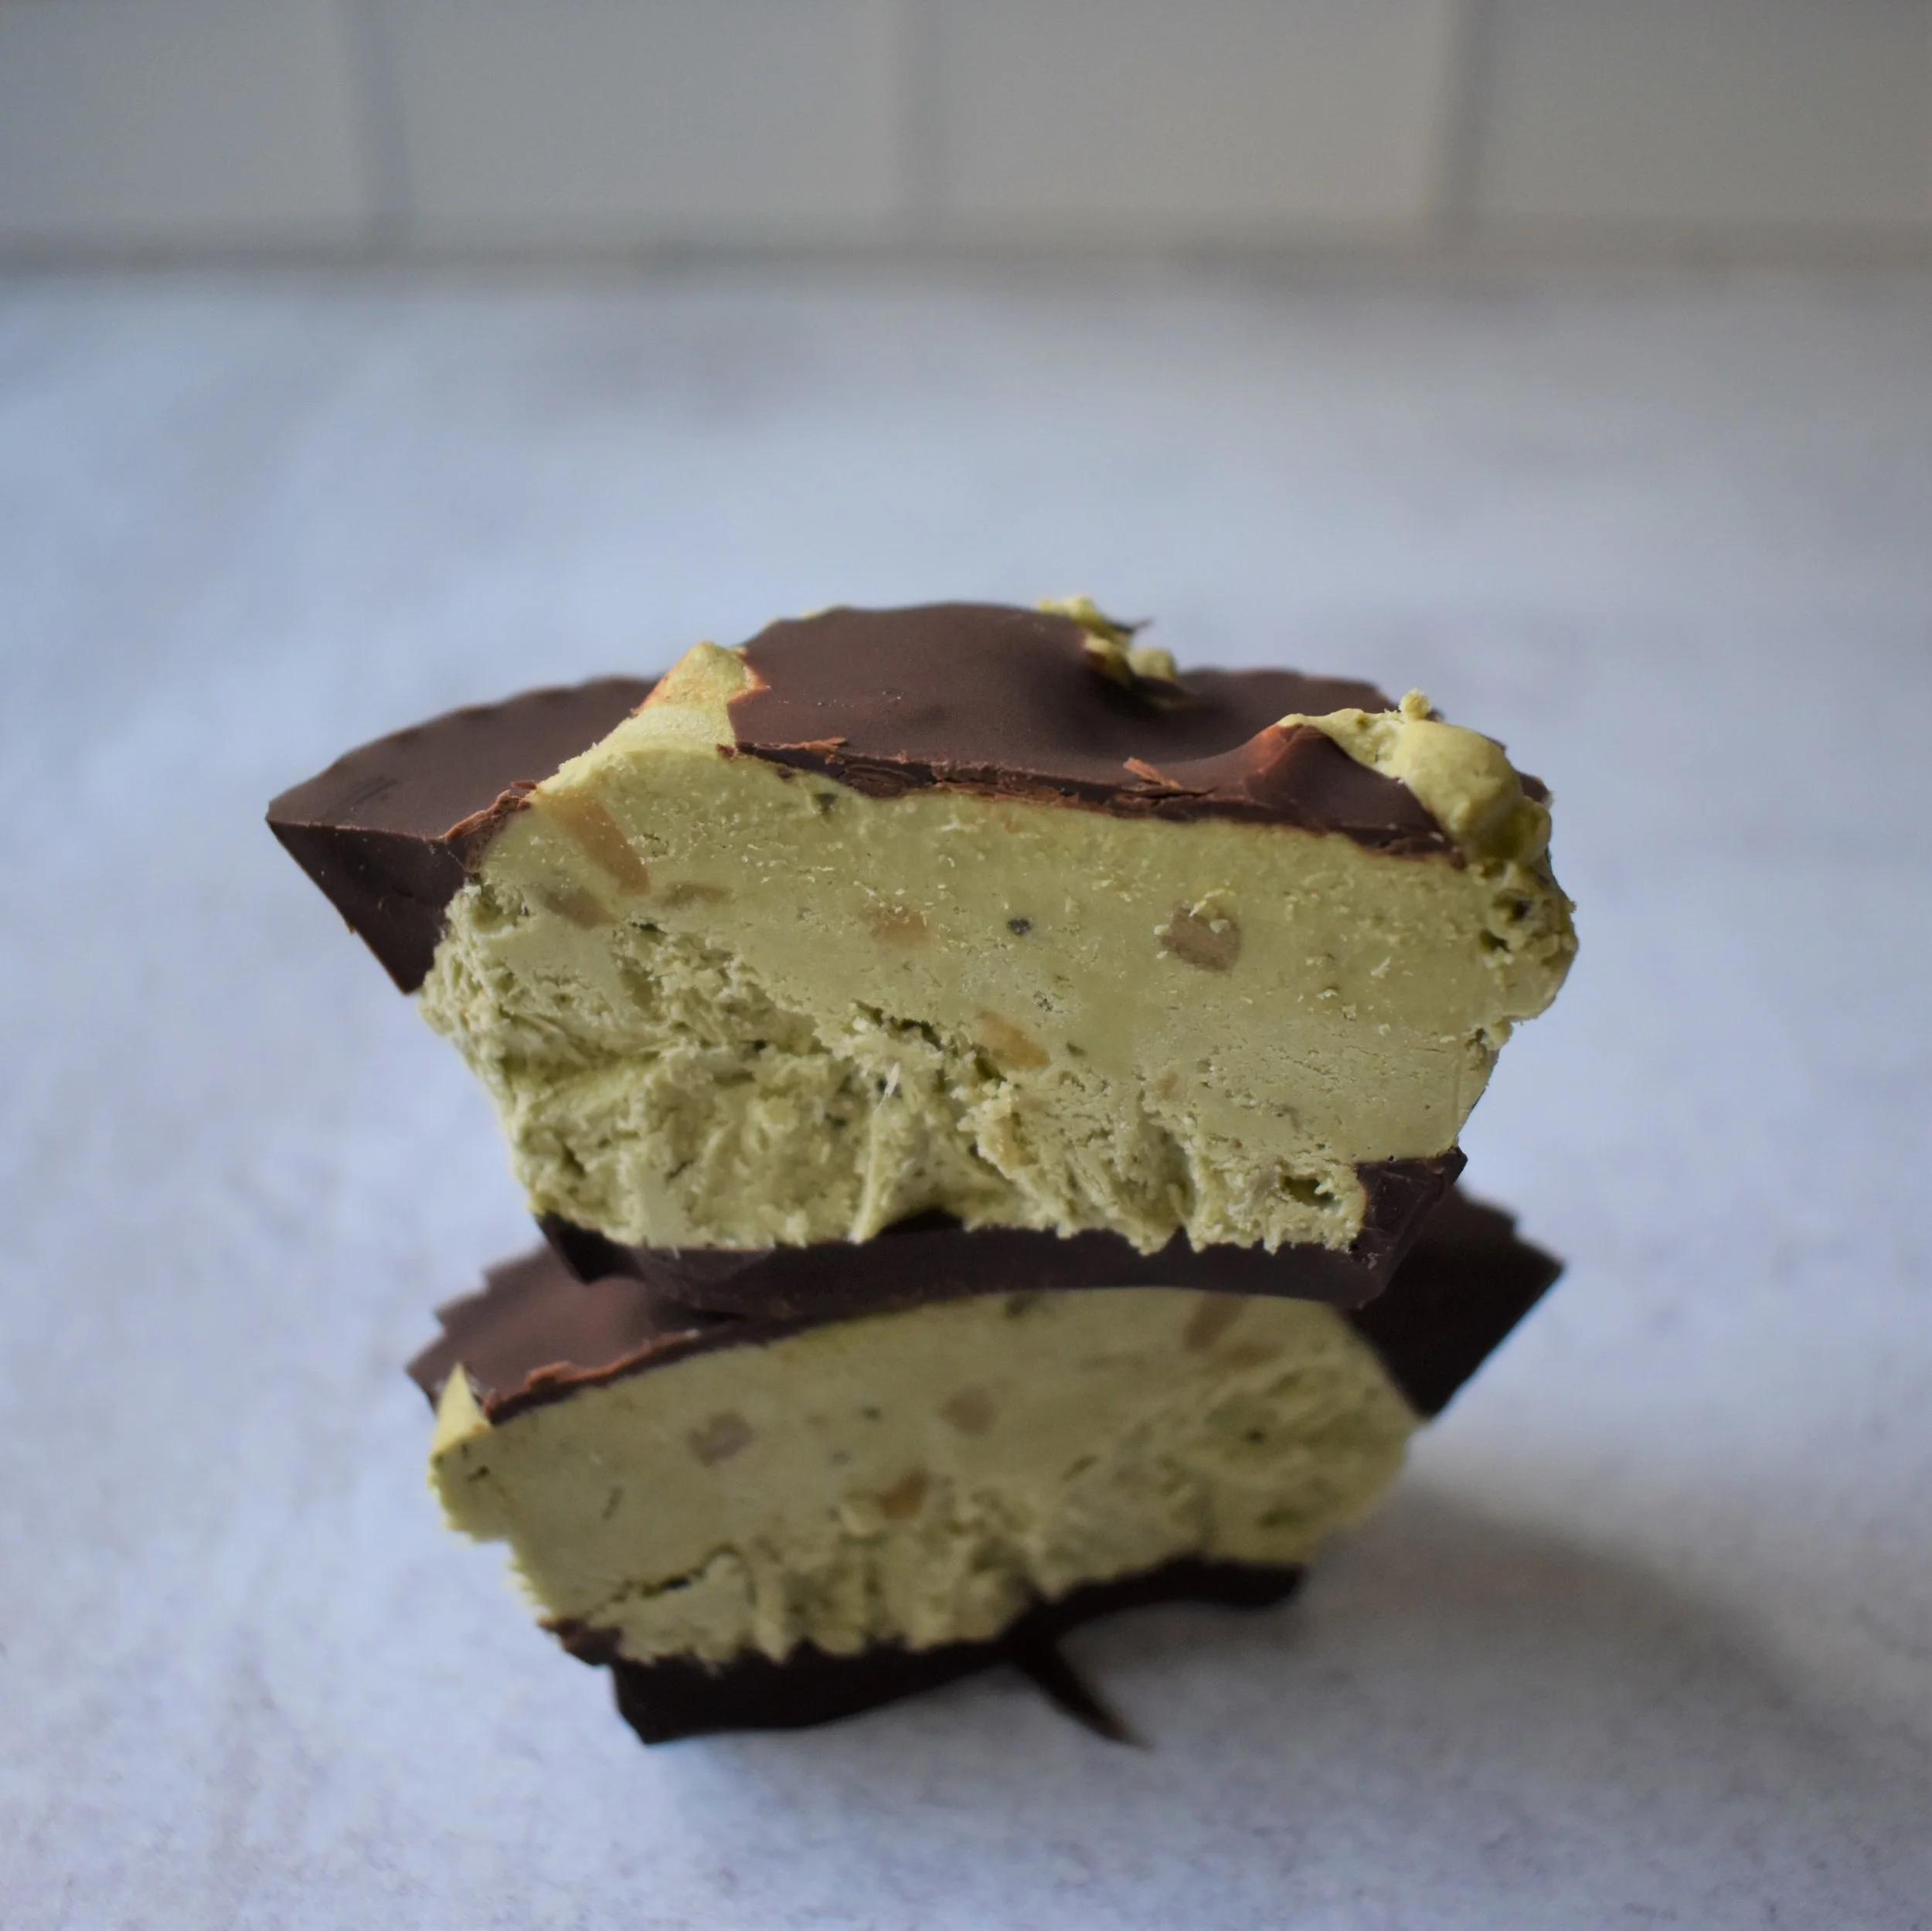
Think peanut butter cups, but instead of the peanut butter filling, you have matcha filling! My Mom’s birthday was earlier this month and she is obsessed with Matcha. Matcha to drink but also matcha in every form I can make it.
I wanted to make her a simple treat for her birthday so I decided to create these. They require only a few ingredients, no baking and not a lot of time either!
Here’s what you’ll need:
-Bittersweet or semi-sweet melting wafers
-Heavy Whipping cream - You can probably substitute this for coconut cream as well for a non dairy solution
-Sugar to taste
-Small or large cupcake papers
** Please note that while these are the actual ingredients I used, these are affiliate links and if you purchase through them I will make a small commission. **
A few notes:
-When choosing bittersweet or semi-sweet, gauge your bitterness limits. I tried these cups with both and if you need sweet, go with the semi-sweet chips. While the bittersweet was still good, it is very strong. The Semi-sweet was my preferred because it still wasn’t super sweet but I think it complimented the cream better. If you do use bittersweet, I would choose larger cups so that you can put more filling!
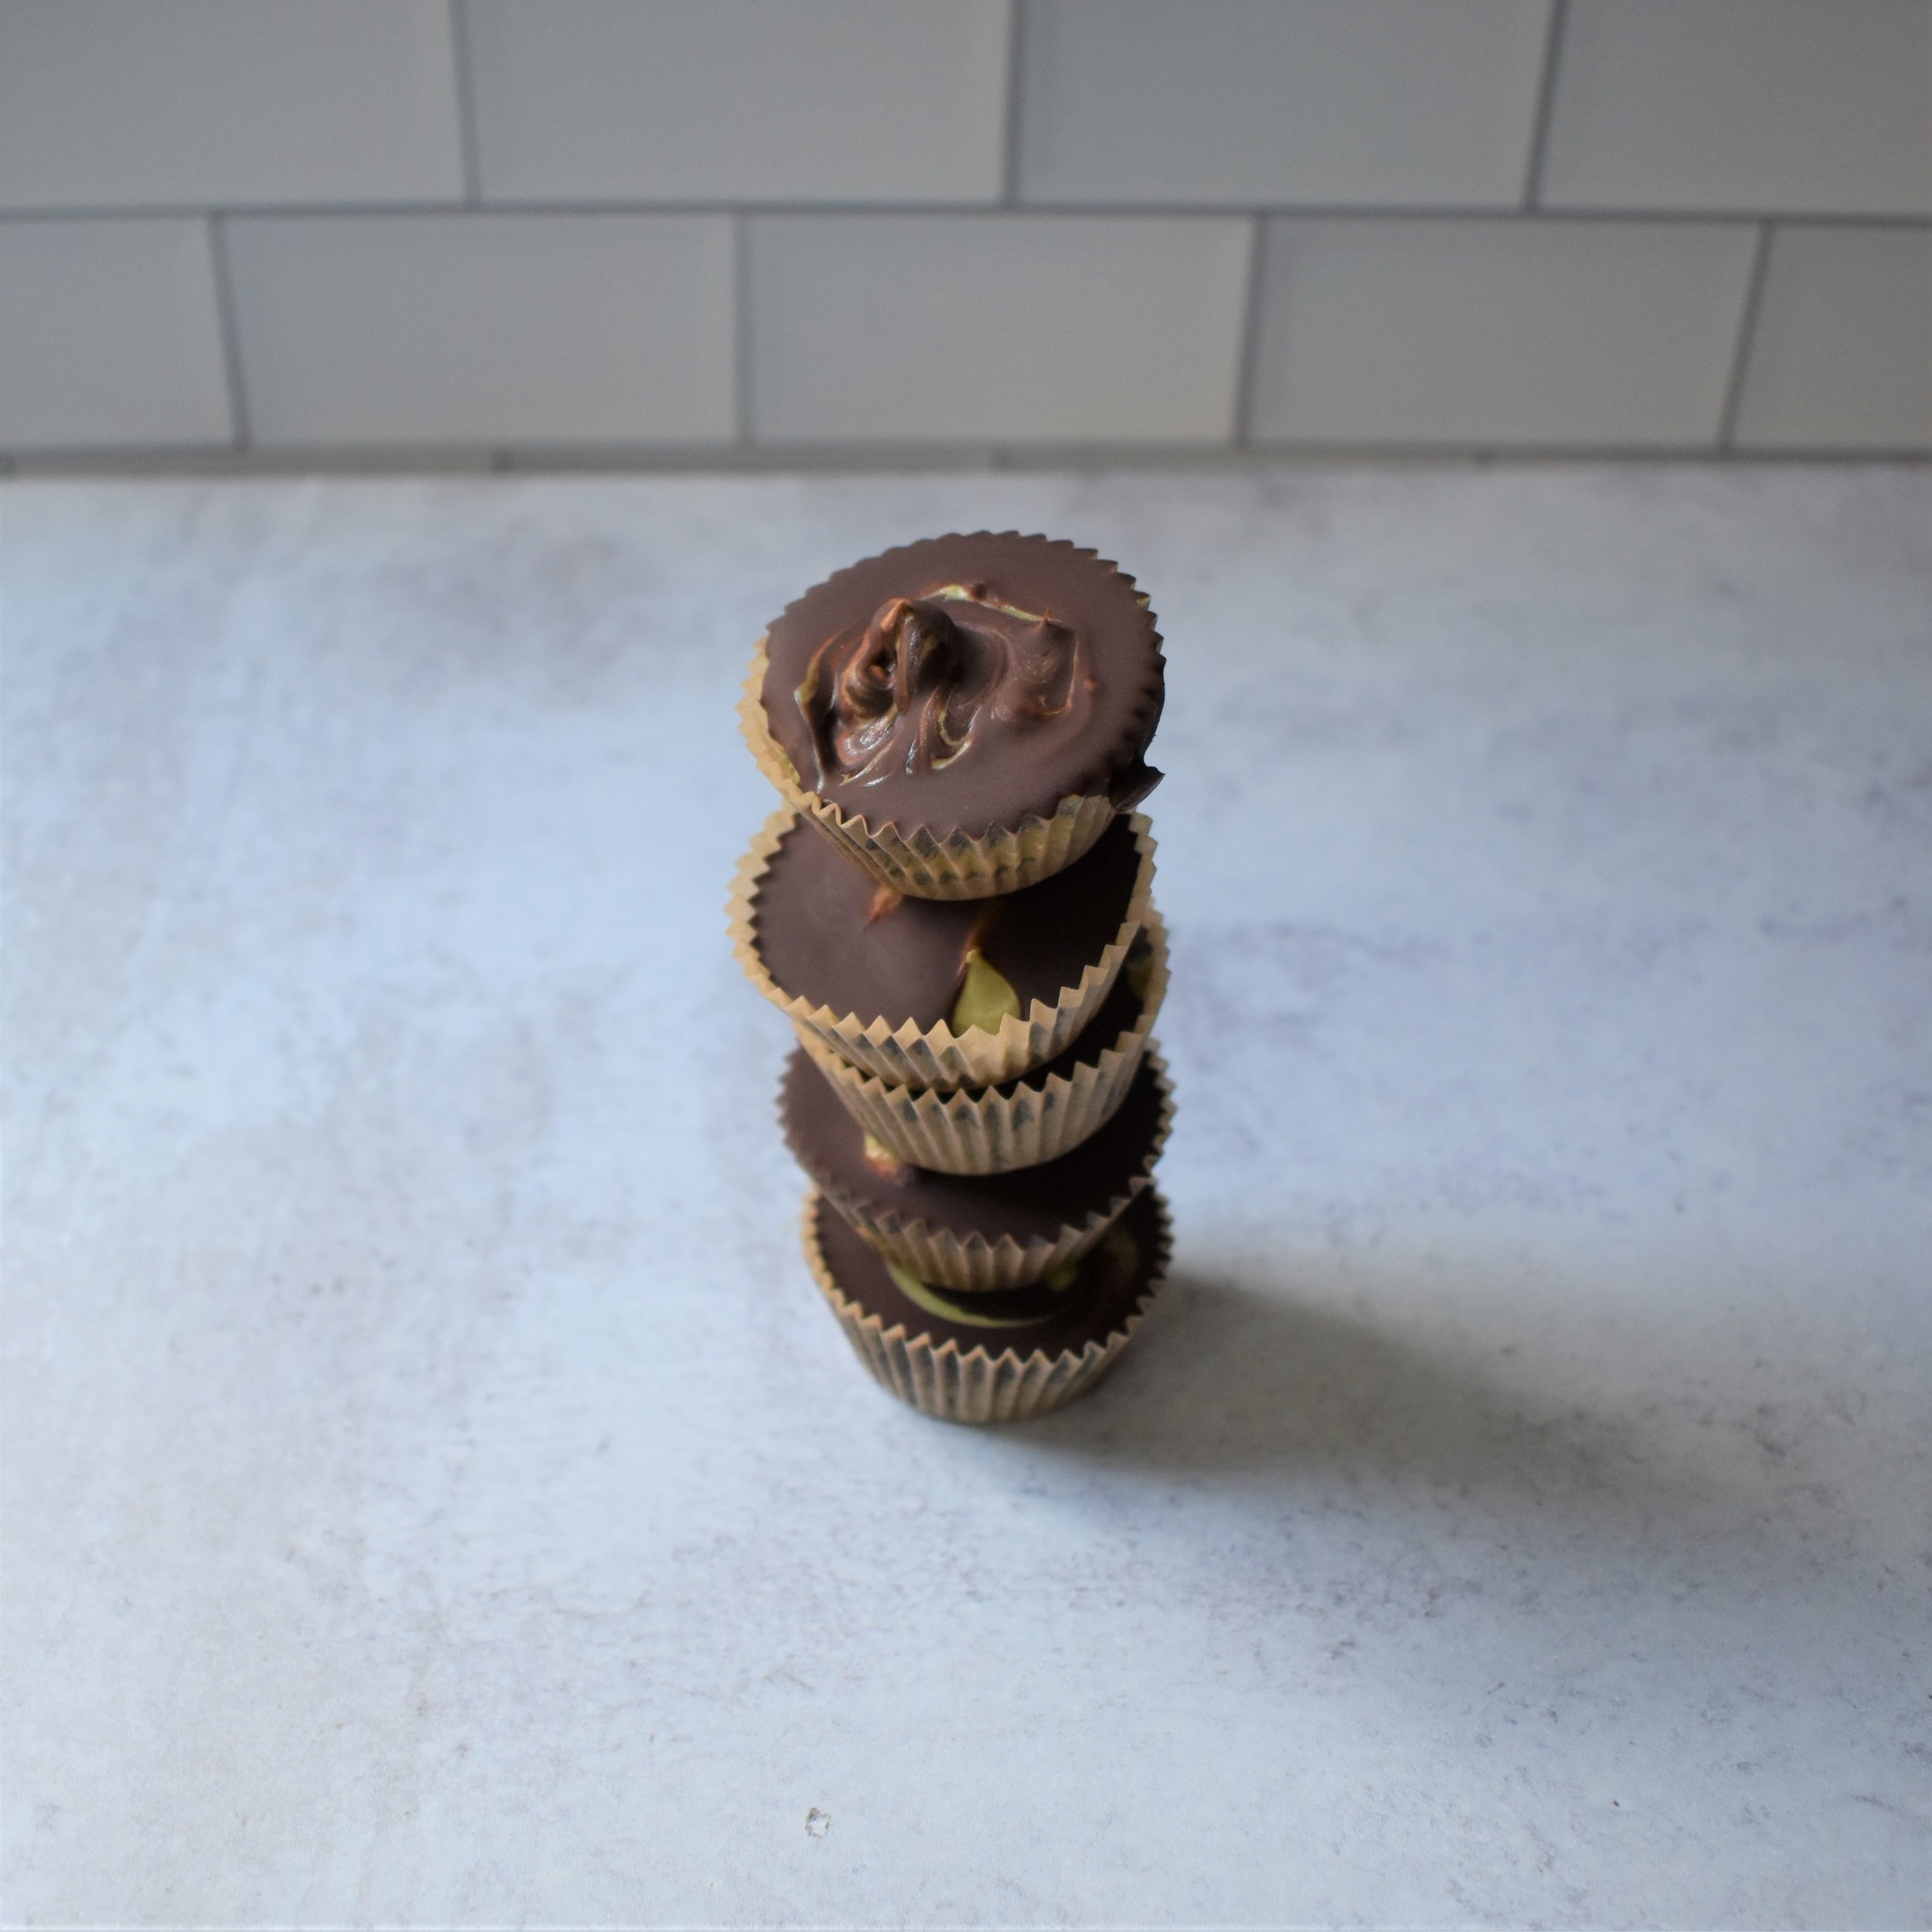
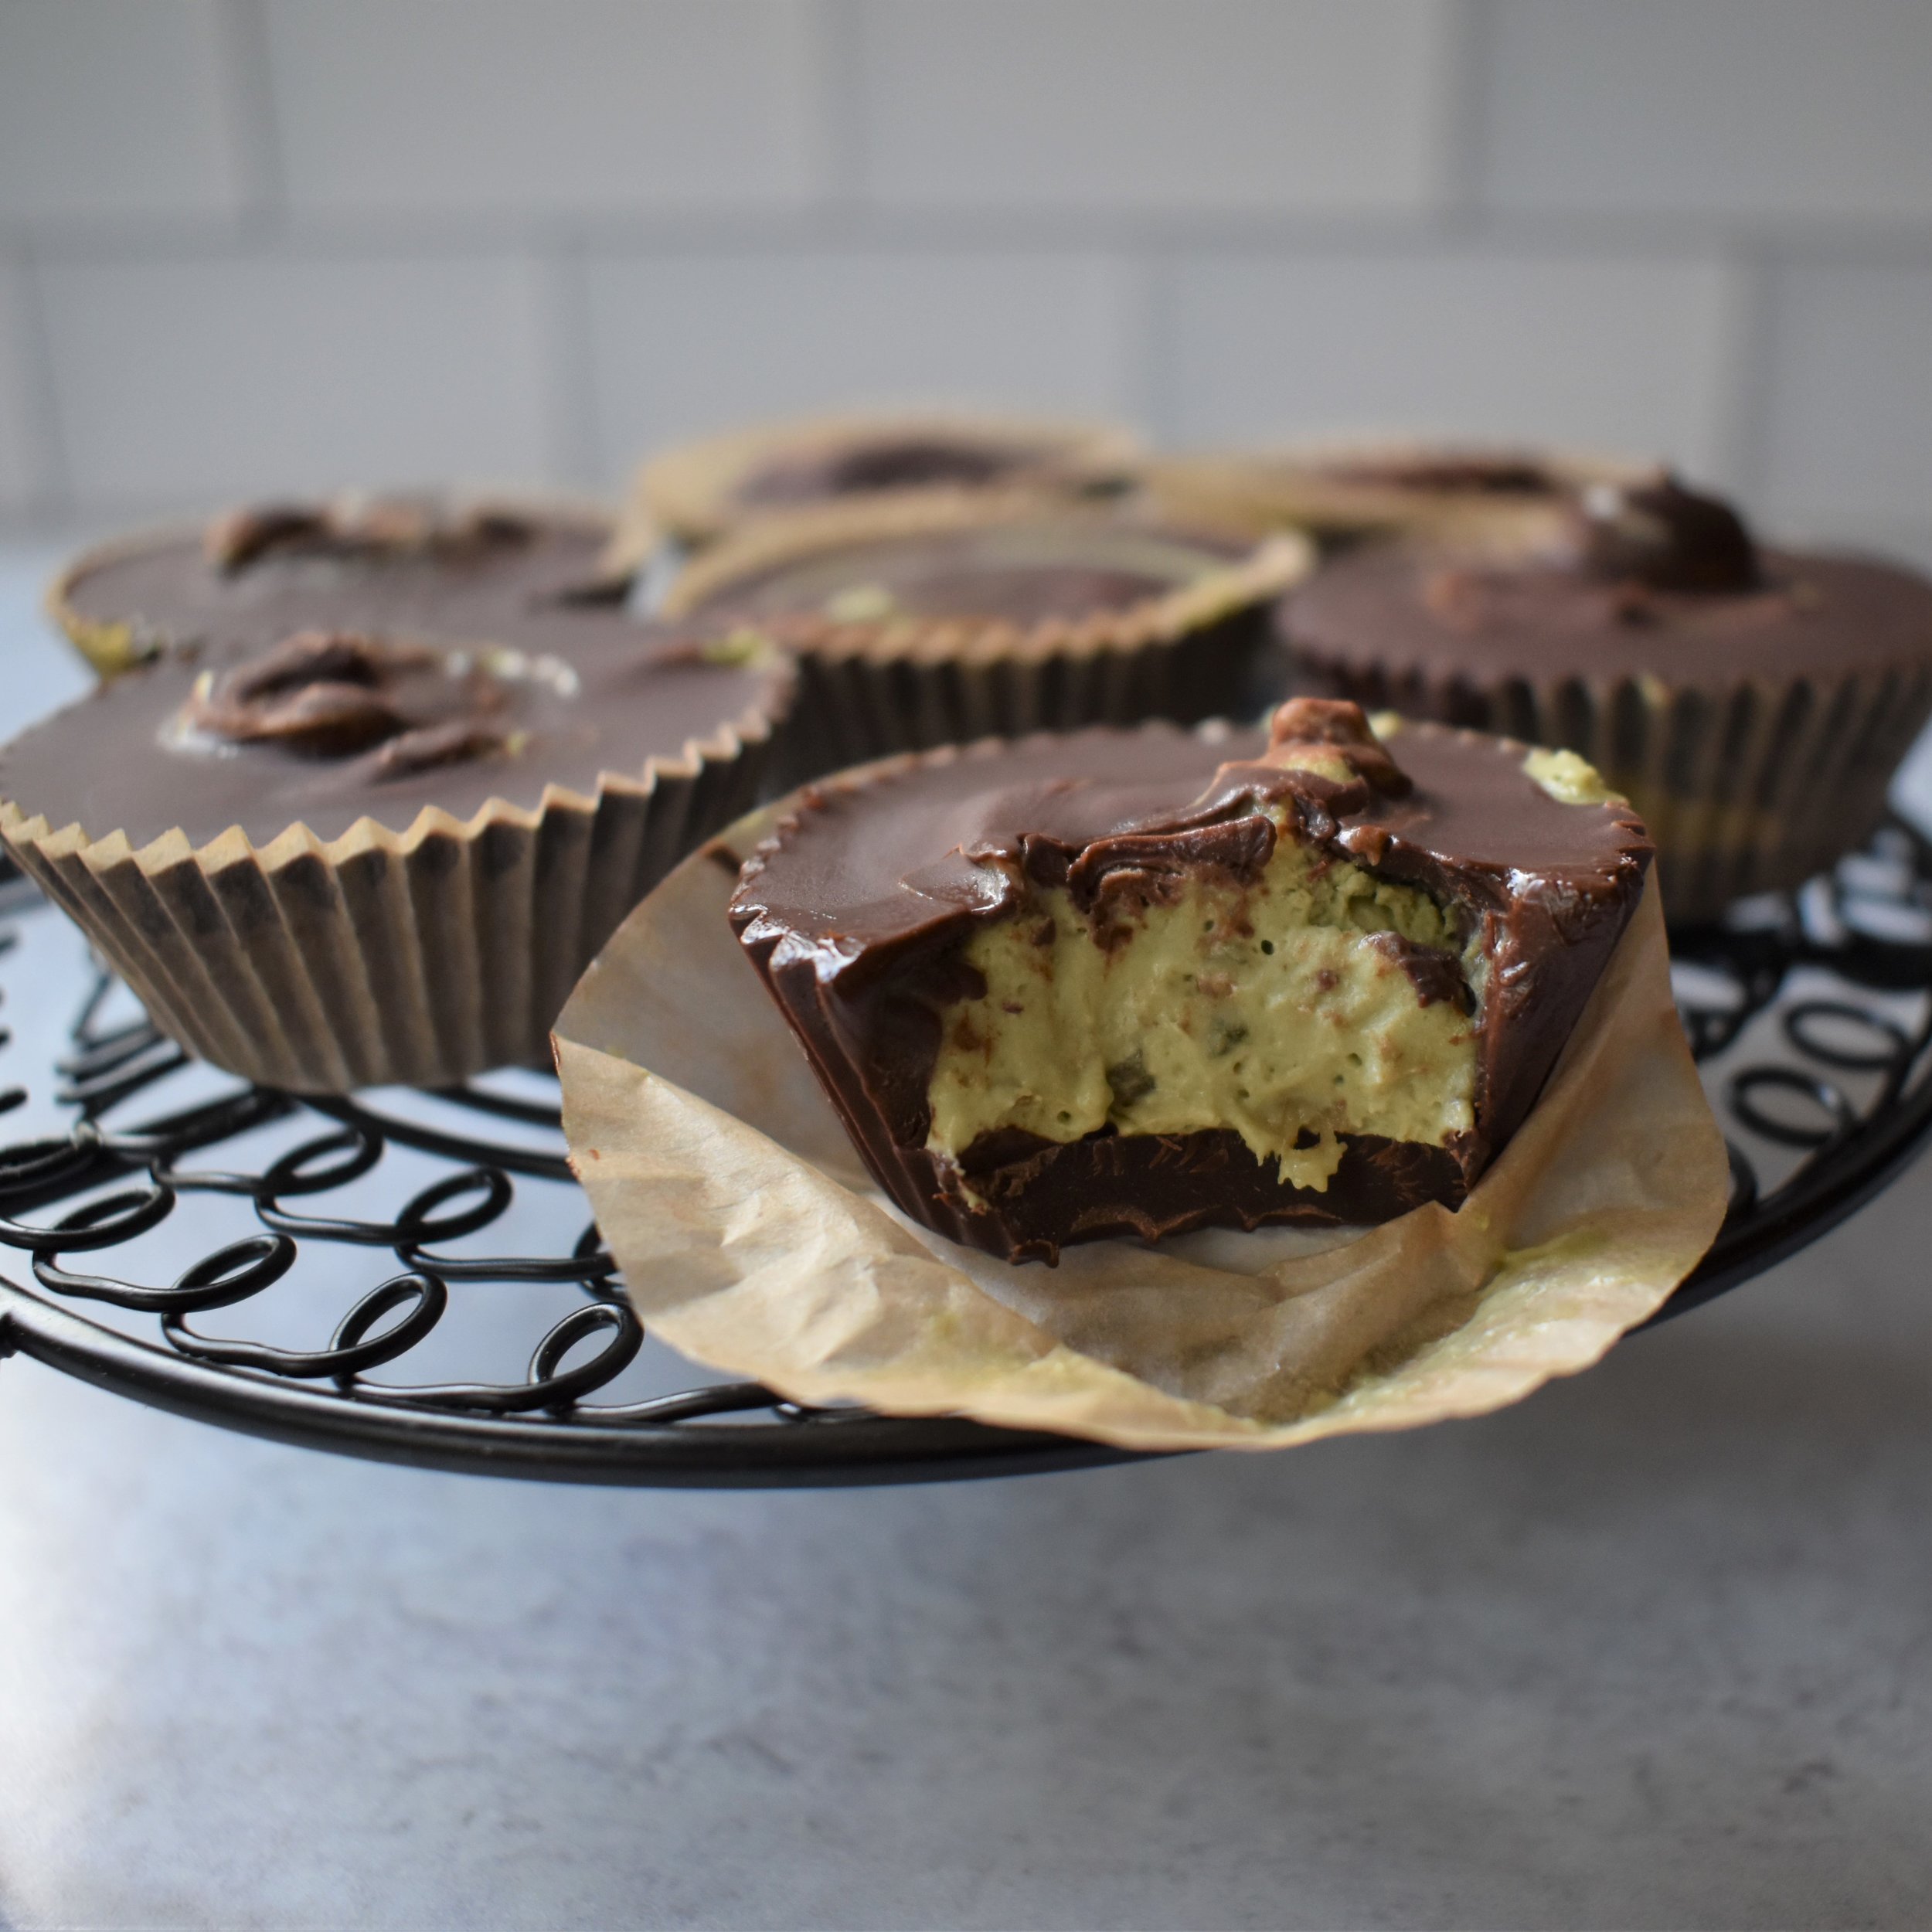
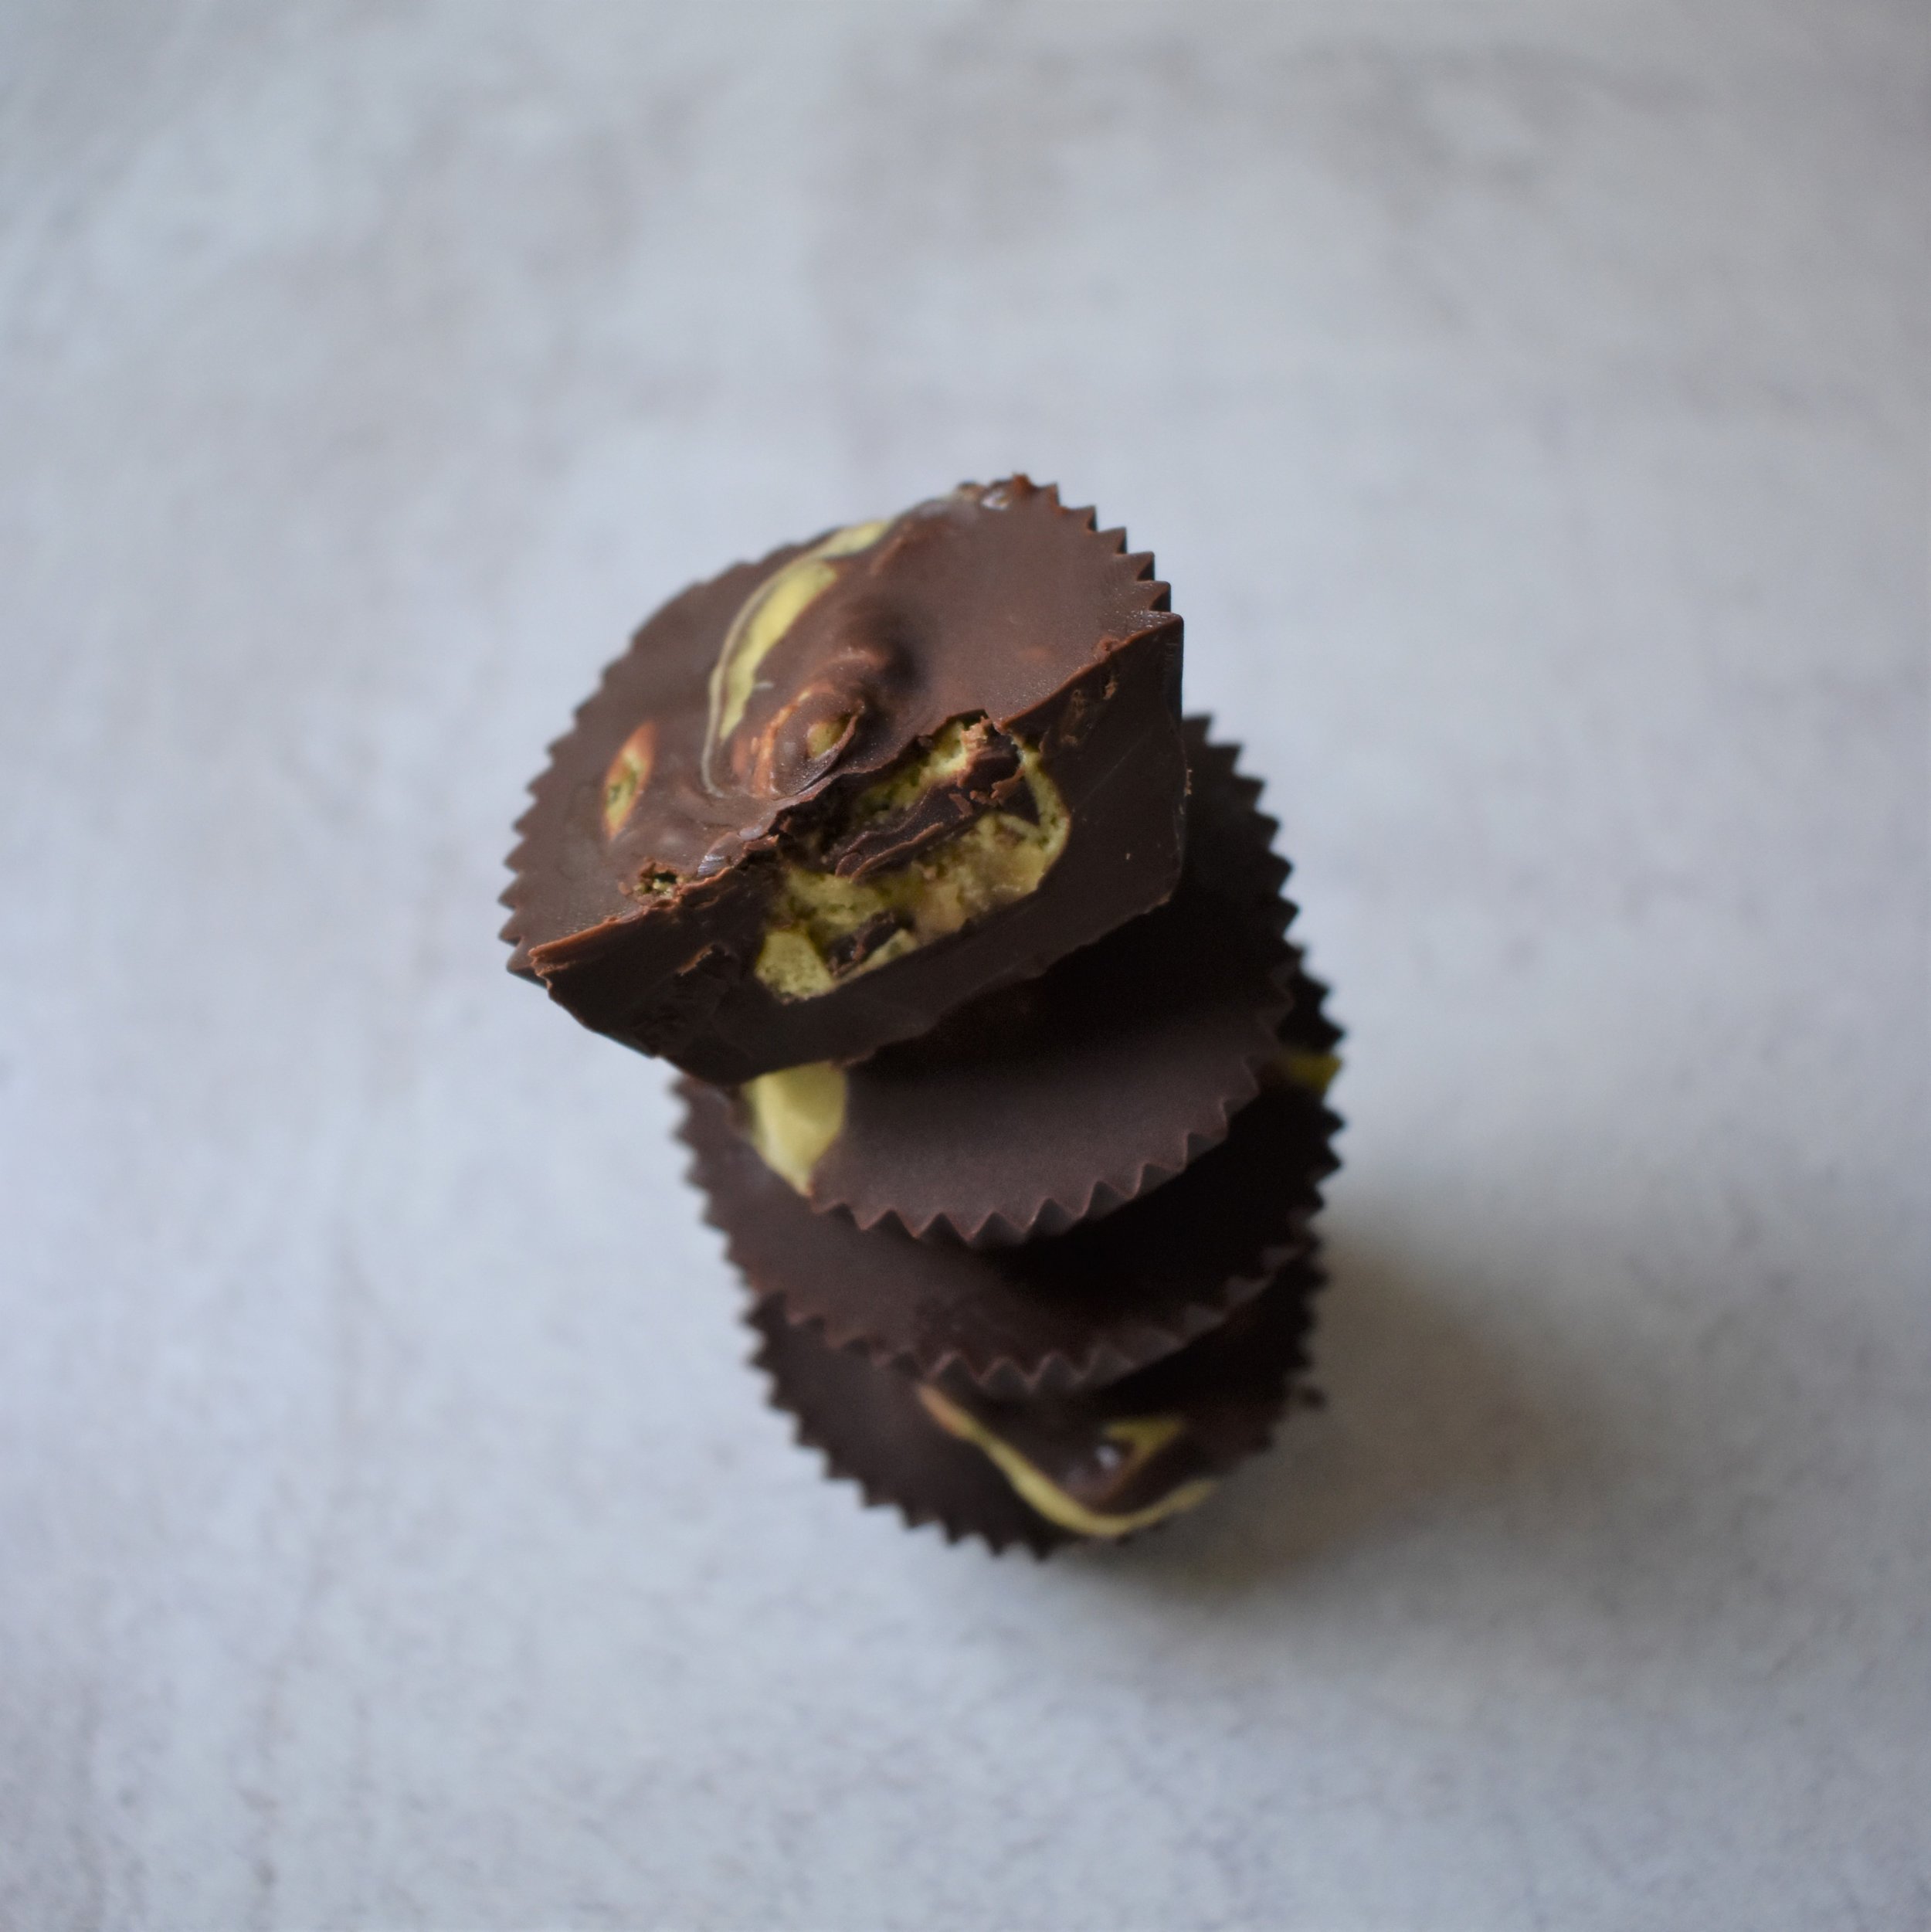
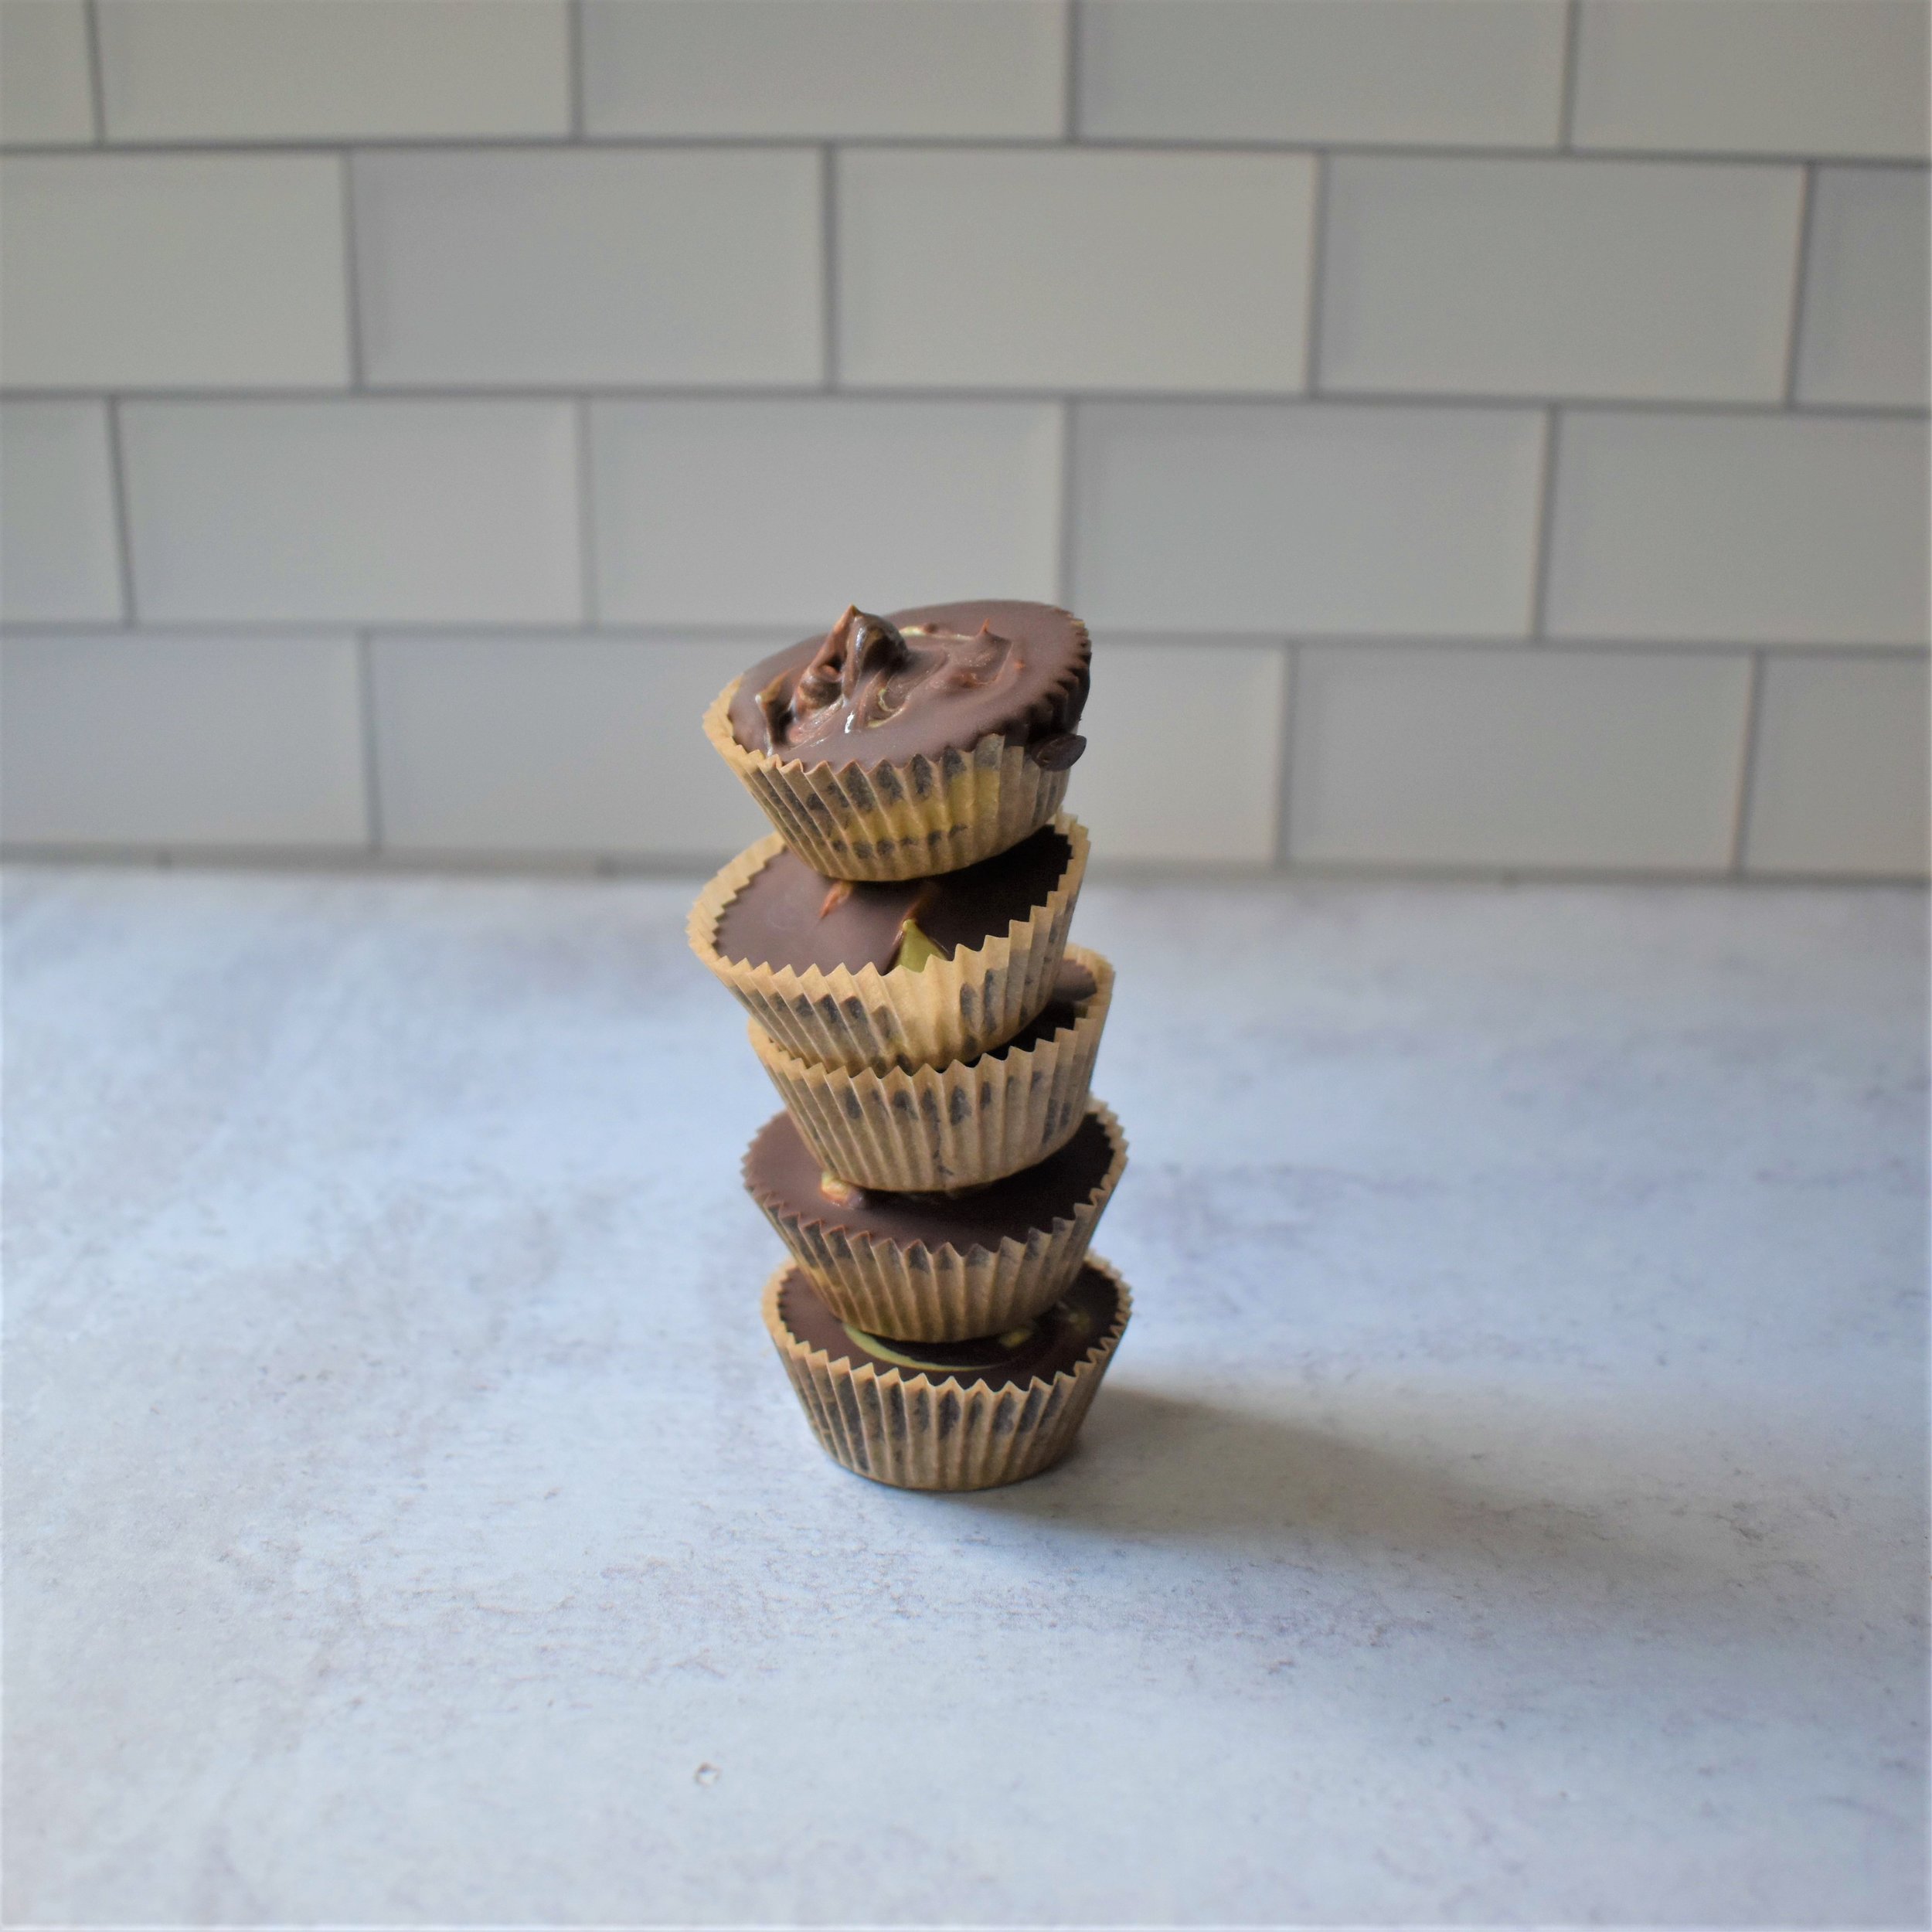
-Choosing small or large cups. I created these cups both ways. Directly below you will see small matcha cups. The last photo on this post is a large matcha cup. The difference is that you’re going to have more room for the cream in the larger cups. The smaller cups are more chocolate than cream. Both are good but it depends on your preference!
-Heavy whipping cream. I used an entire pint which created SO.MUCH.CREAM. I just kept making these cups until it ran out but unless you plan on making a lot of these, I would start with a smaller amount of heavy cream.
Matcha Cream
-Start off by putting the heavy cream into your stand up mixer and turn it on low. While it mixes, chop up the crystallized ginger and sift your matcha powder.
-Increase the mixer to medium and then high as the cream starts to thicken. Add in your matcha, ginger and sugar to taste. I basically kept adding matcha until it was a satisfying green color.
-Once you get your desired mixture, set aside the cream.
Chocolate
-Use a double boiler or two pots stacked on top of each other to melt your chocolate. I always put a little bit of coconut oil in my chocolate wafers to help the consistency.
-I like to keep mixing the chocolate as it melts to make sure it stays smooth.
-Once chocolate is melted, keep the heat on low and get ready to assemble.
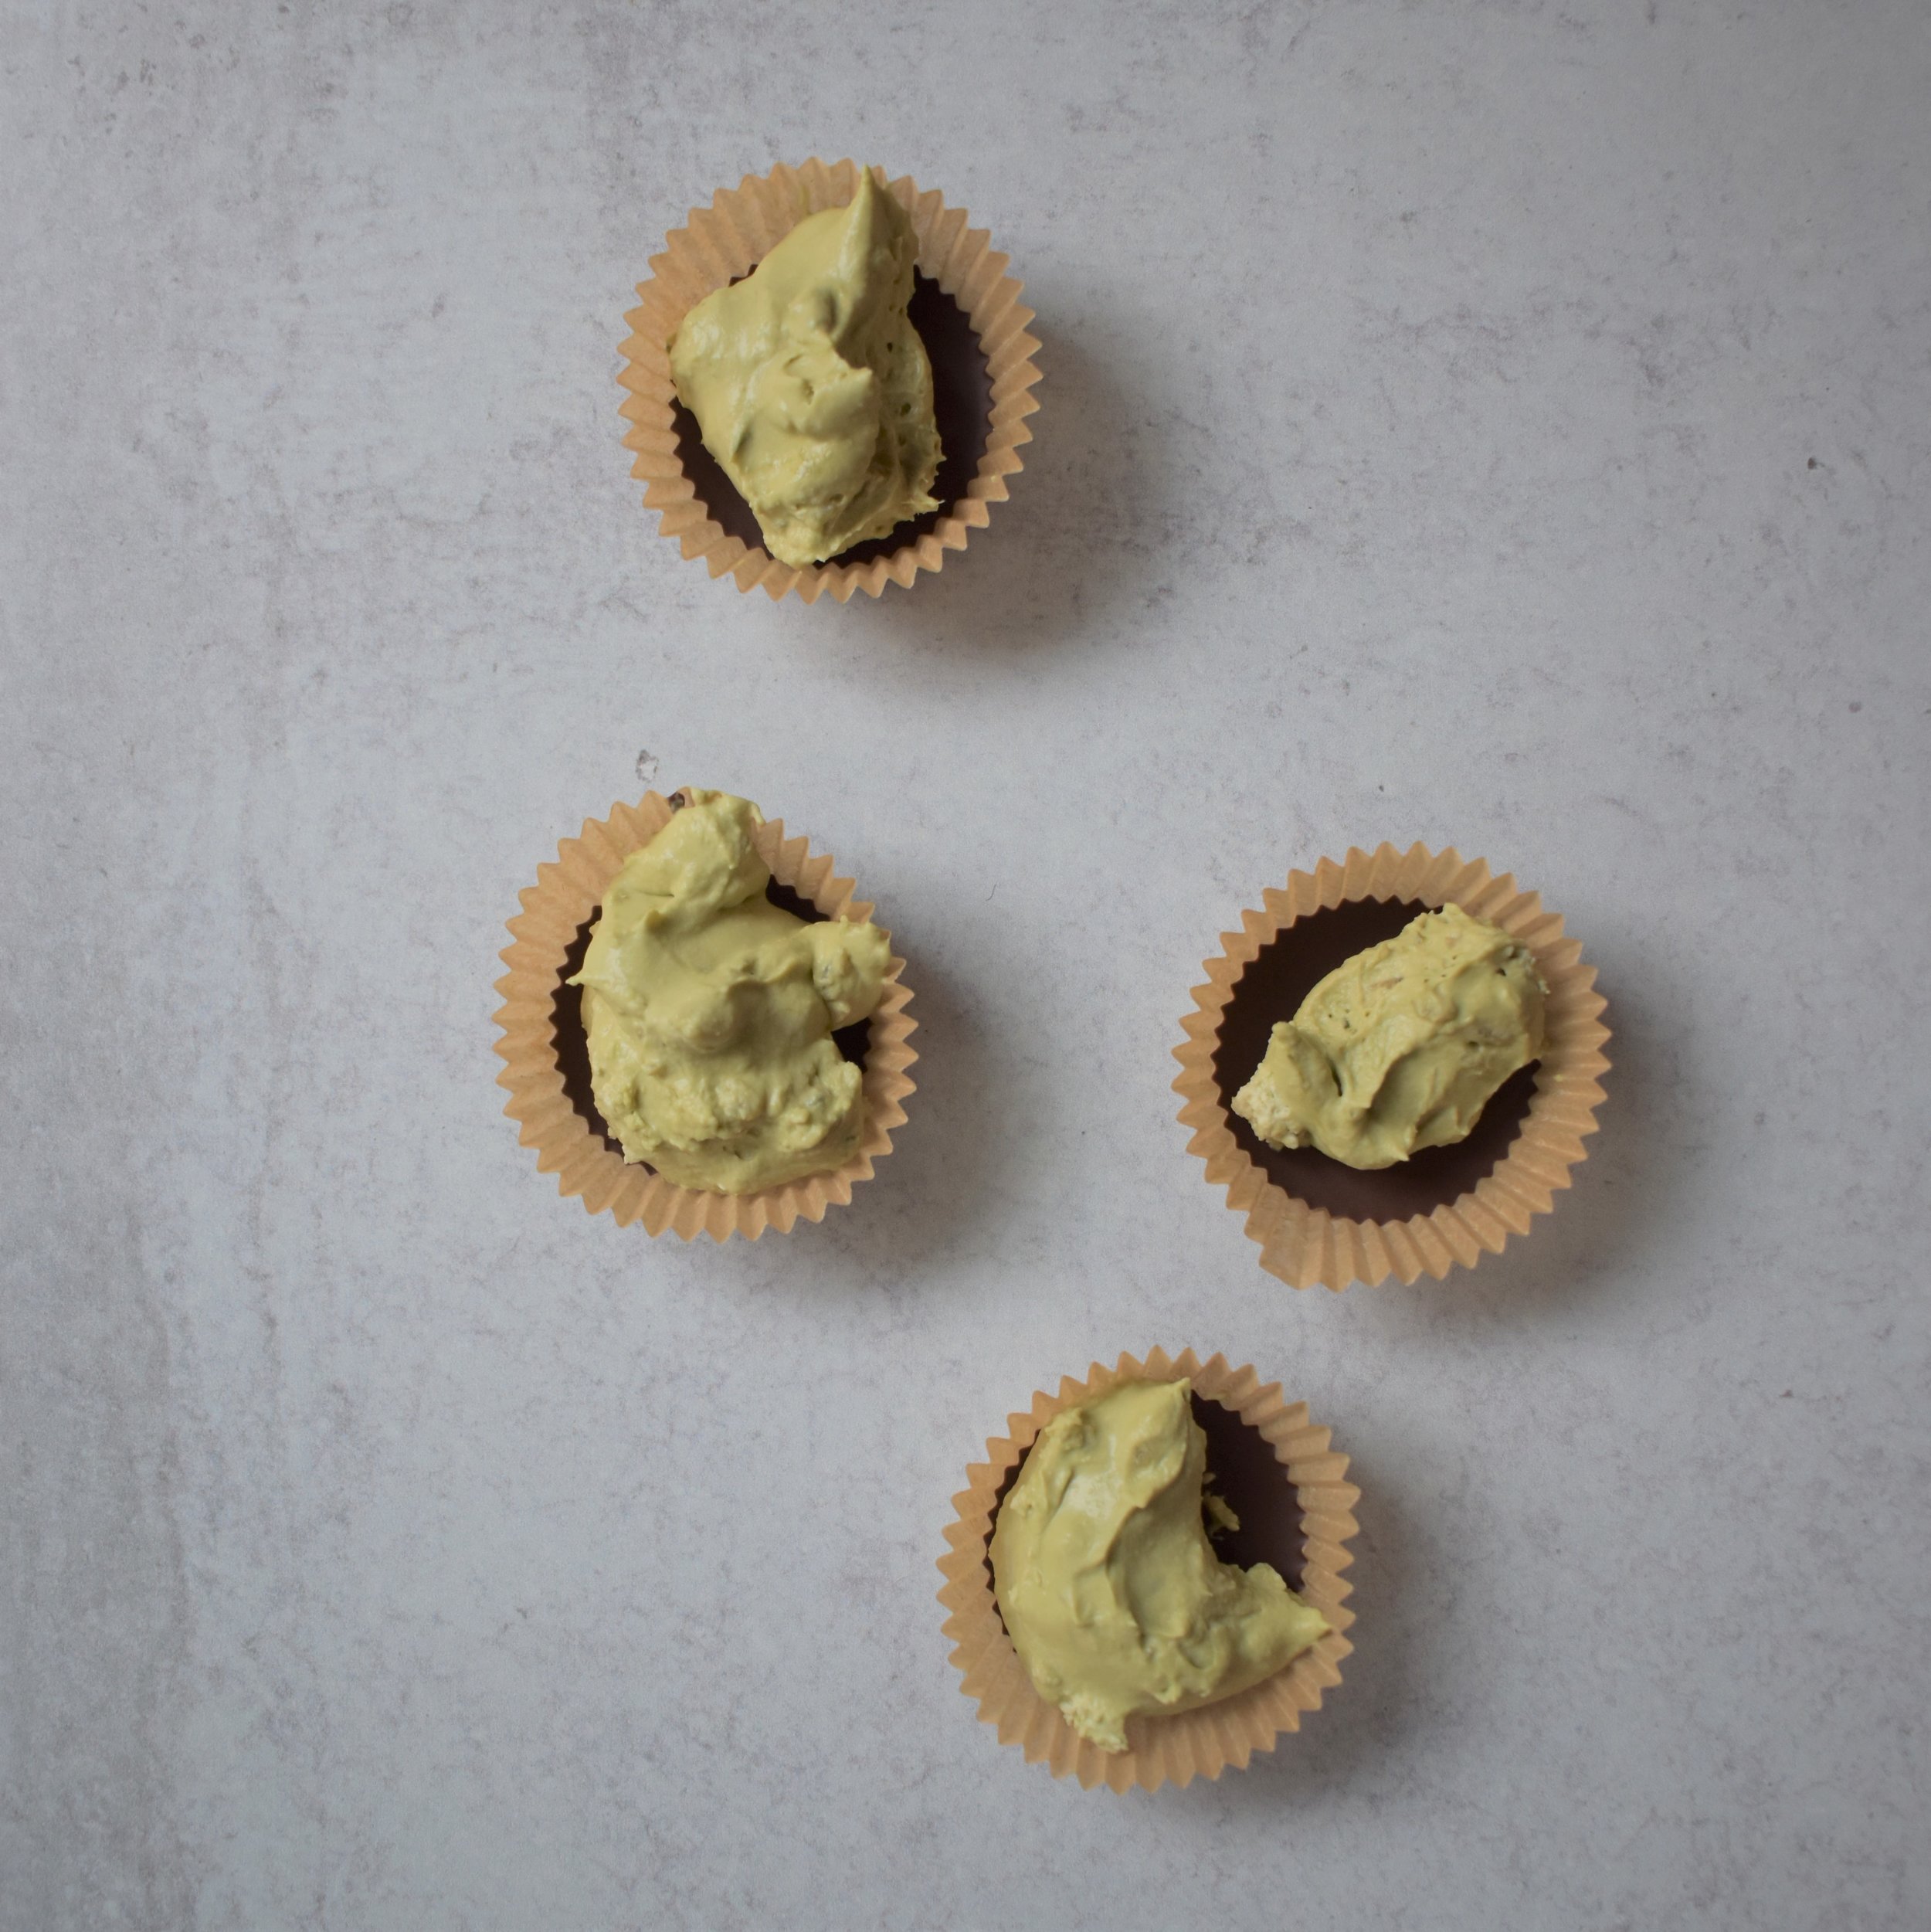
Make the Cups
-Put your desired cupcake paper size in a cupcake tin. The tin will help keep a little bit of structure when completing the cups.
-Pour 1/2 tbsp to 1 tablespoon chocolate into each cup, or enough to just cover the bottom well. Stick these in the freezer.
-Once the chocolate has hardened (should only take a few minutes), take the desired amount of matcha cream and put it in each cup.
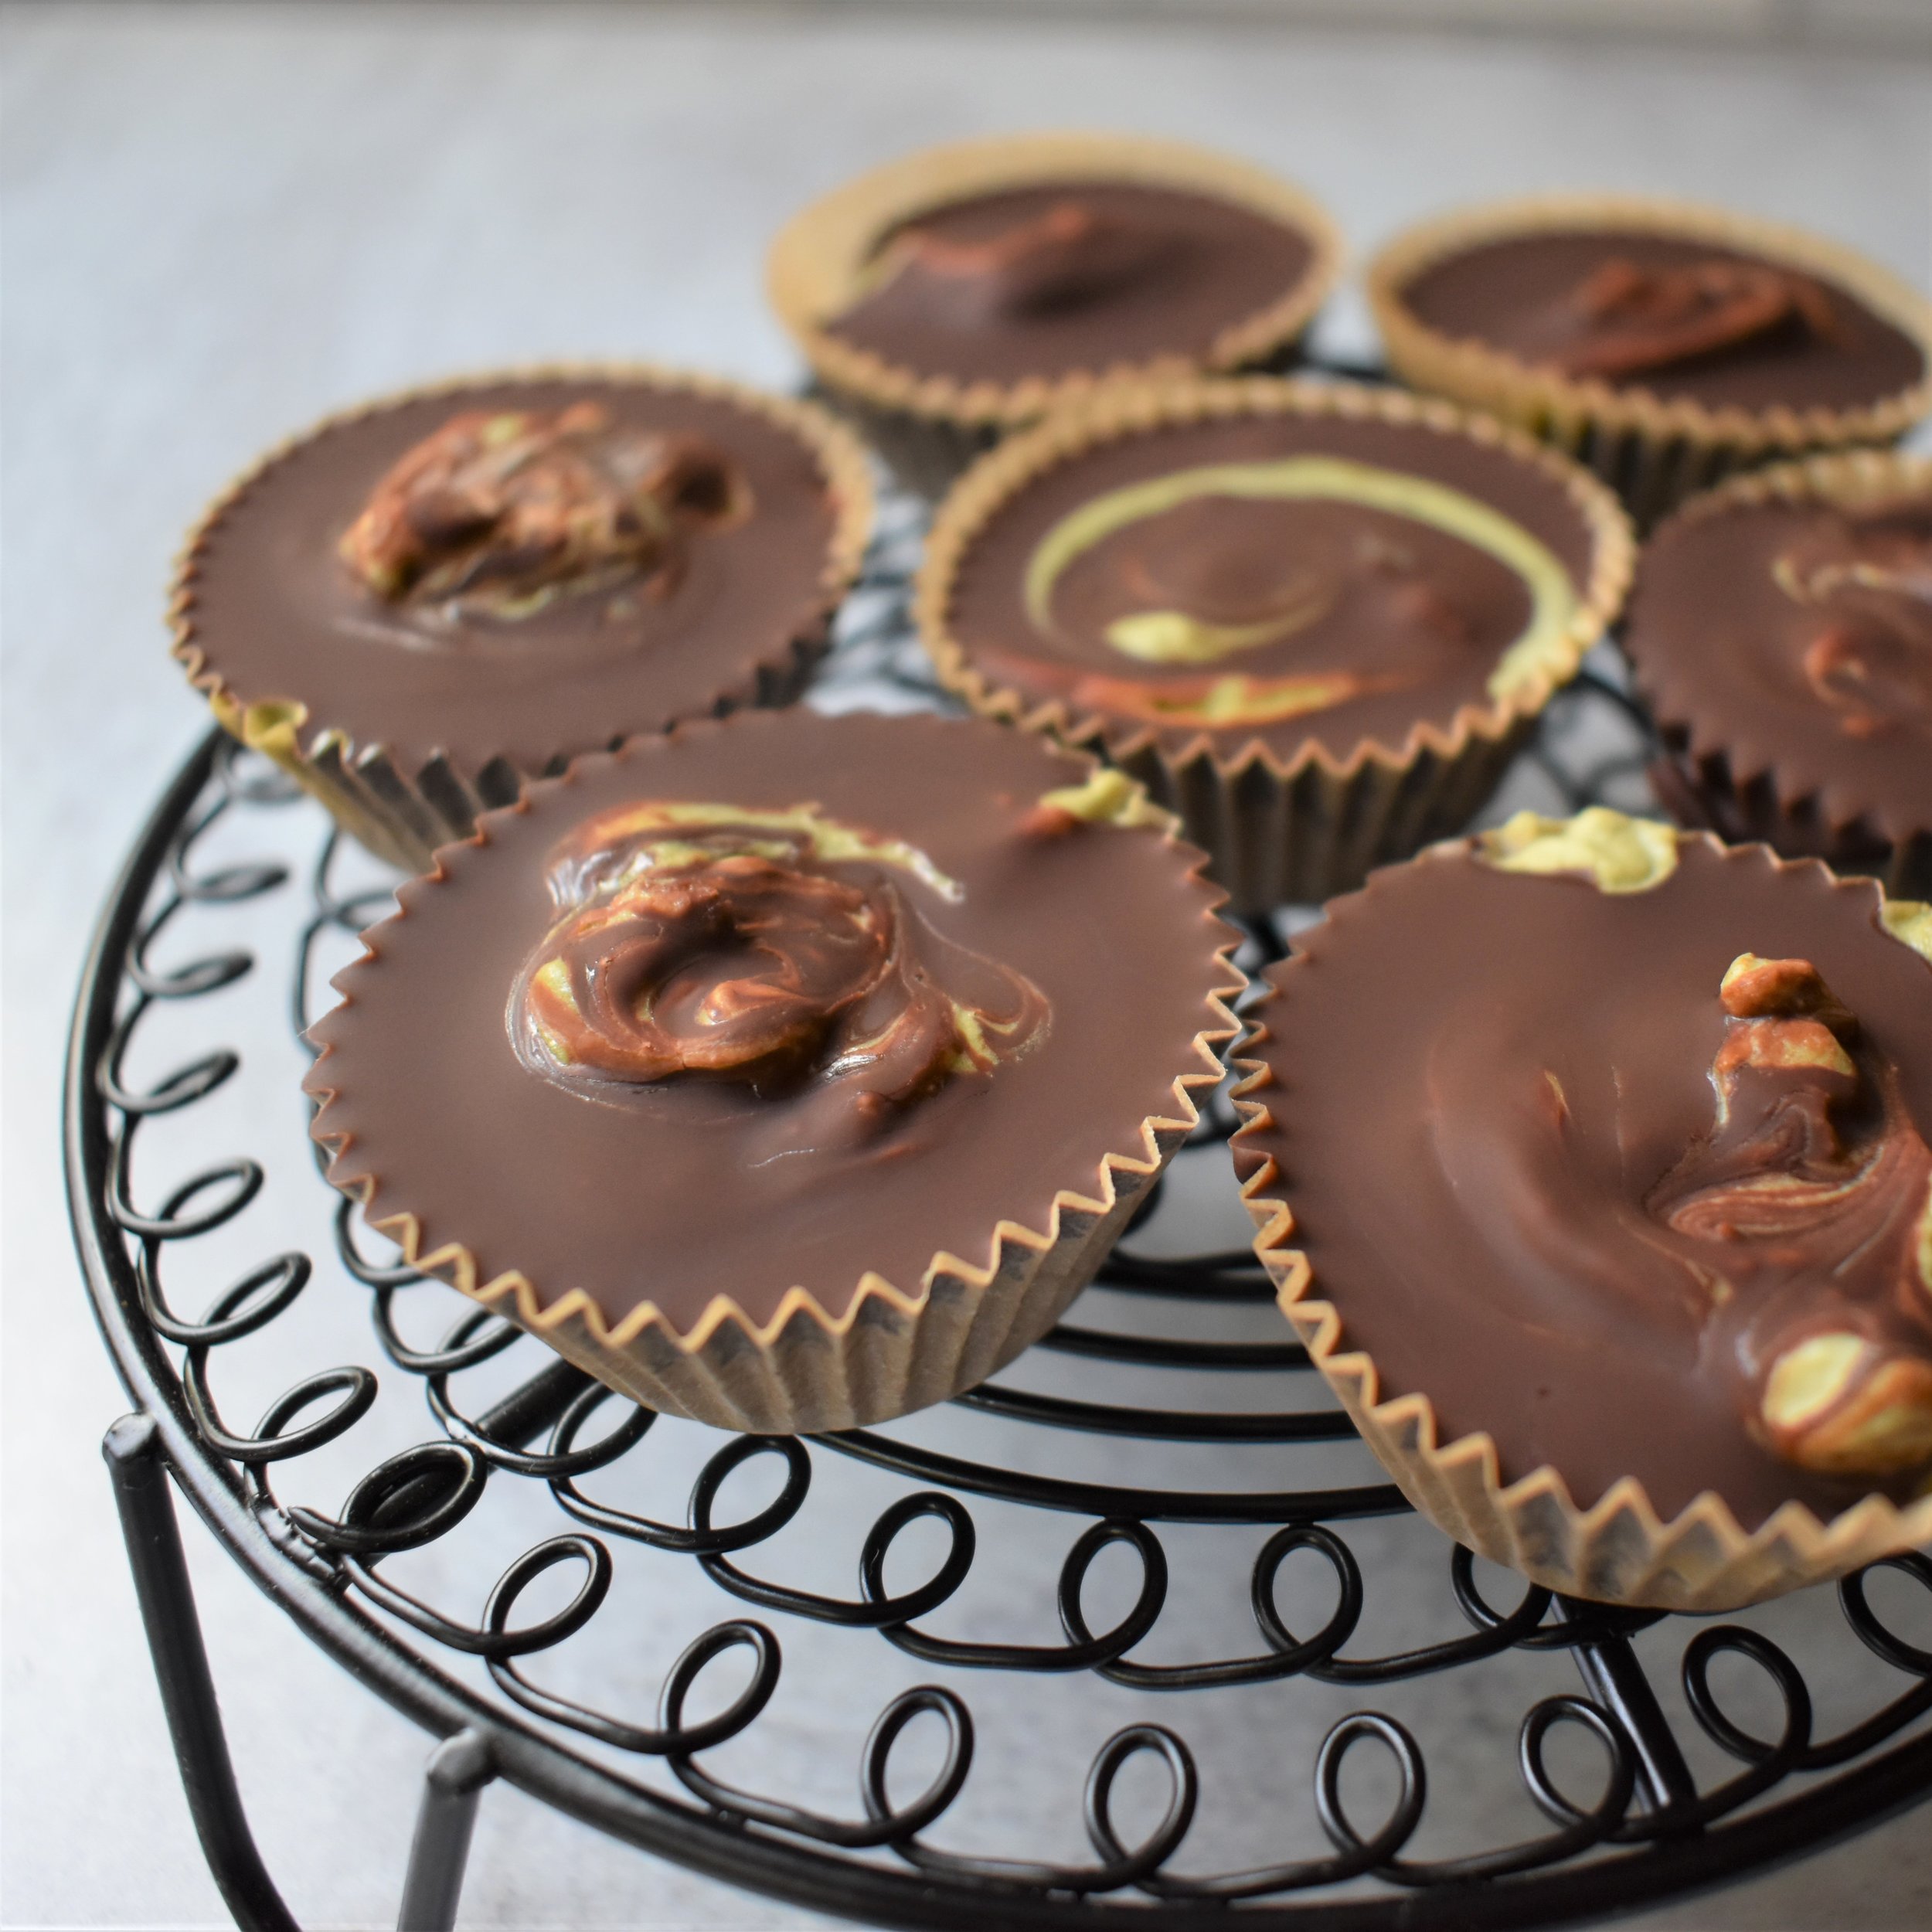
-Cover the cups with chocolate
-Optionally - take a toothpick and make a little swirl with the matcha cream and chocolate.
-Put in the freezer to harden. Can be kept in the fridge afterwards.
-Once served, eat immediately for this delicious and melty goodness!
Below you will see the larger cups that are mostly matcha cream. These are so fluffy and soft. You can see the pieces of candied ginger that give these a bit of a kick among all the sweetness!

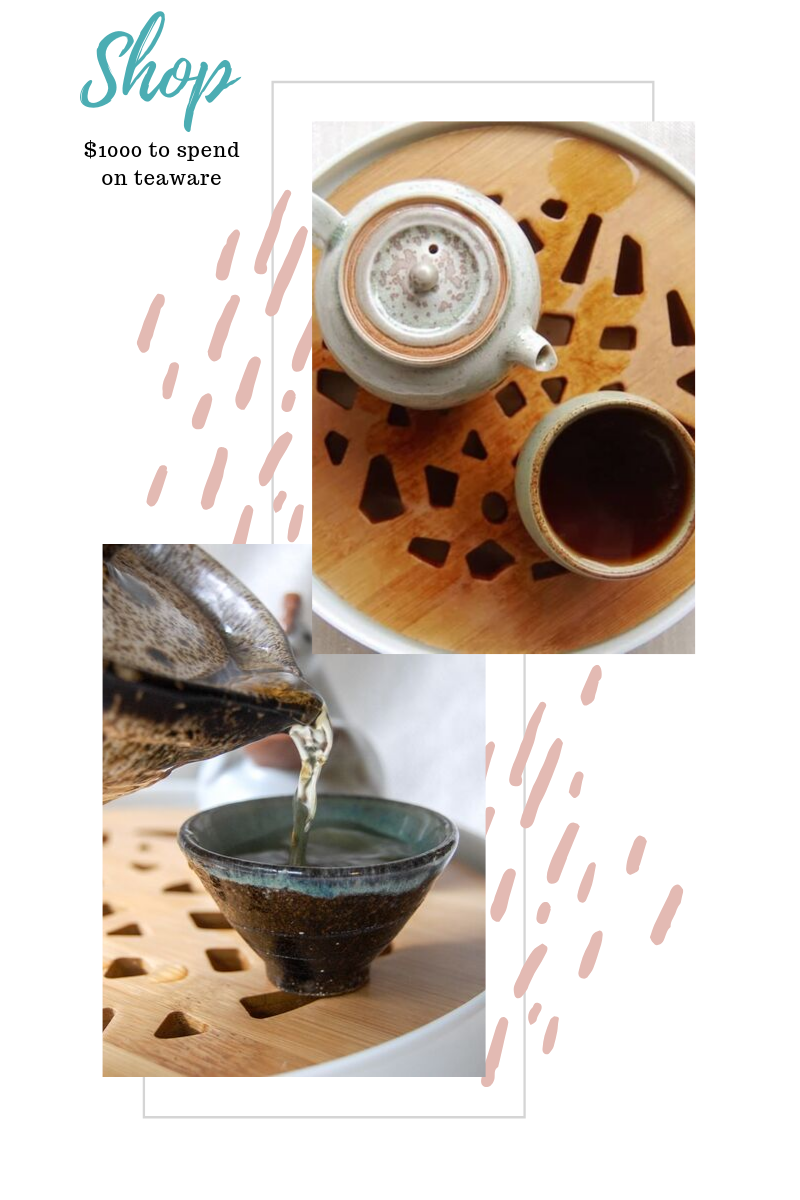
If I had $1000 to spend on teaware...

I am SO excited about this post. As I’ve journeyed deeper into my tea journey, my obsession with teaware has increased. I have a cabinet filled with pots and cups but I still always want more! Experimentation is an important part of tea time for me. I like to try different vessels with different teas and see how it changes the experience. I sometimes use the same gaiwan or tea pot a few days in a row but usually, I run through all of my teaware!
Additionally, just like any other collector I like to be able to add more artist’s work into my collection!
How did I decide where to shop? Well, I have a few favorite places and a few of them have come out with some new pieces that I’ve been admiring. As I move into the holiday season and I have to stock the shop with goodies, I unfortunately have to tie my hands so I don’t spend on teaware! I do like to buy myself something nice as a gift if the holiday season goes well so many some of these will end up in my collection! Maybe some of these will will end up in my collection!
Bitterleaf Teas - $230
Ok, they are pretty much my favorite shop. Their branding and aesthetic is so amazing and honestly it draws me in. I also appreciate the obvious effort they take to curate different pieces for all their different categories! Most of my current teaware comes from Bitterleaf. You could say I’m a little bit of a fan girl.
Please note that all credit for these photos goes to Bitterleaf teas, they are from their site.
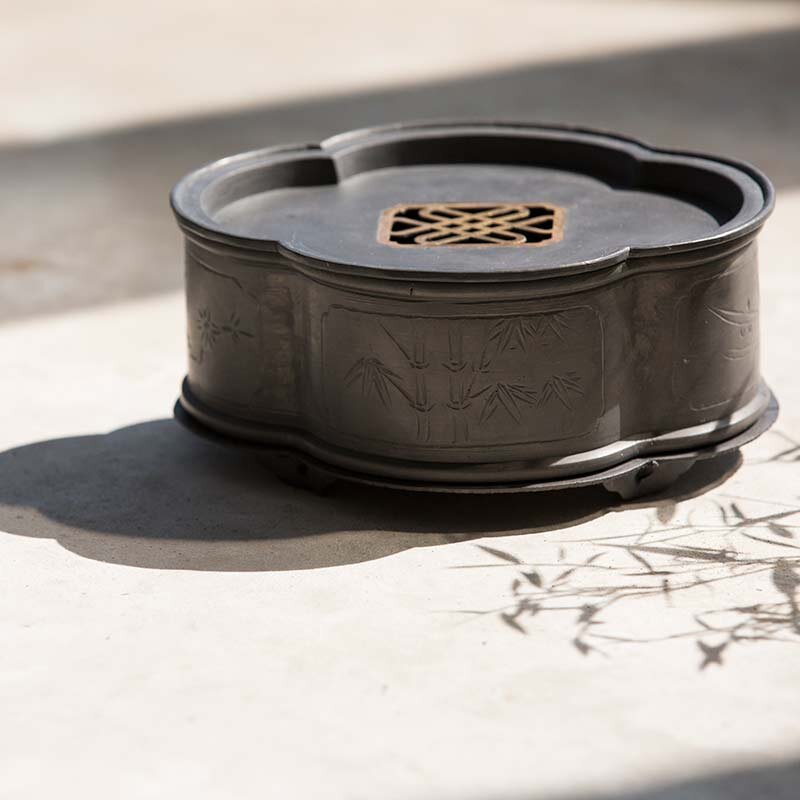
I’ve been wanting to add more tea trays to my collection and this vintage style tea tray really caught my eye. I love the shape and how it isn’t wood! I also don’t have a tea tray that is quite as tall!

I’ve always wanted a tea jar like this! I love the idea of making tea storage just as beautiful as the teaware. This design is simple in color but complex in design. The contrast between ceramics body and wood top is also nice.
Mansa Tea - $52
Mansa Tea is a brand I discovered on Instagram and we collaborated on a giveaway for one of their awesome tea sets. I love the way Mansa takes teas that people might otherwise feel are “out of reach” and presents them the way they should be, accessible for everyone. They also have really useful information sent out with their teas so even a novice tea drinker could brew them correctly! BUT, this post is about teaware :D
Please note that all credit for this photo goes to Mansa Tea, they are from their site.

I love the shape and size of this tea tray. It is pefect for a solo session and there is a sense of direction about it. I don’t have a tea tray that looks like this and would love to add this to my collection!

This photo displays exactly why this tray is so appealing to me for solo tea time!
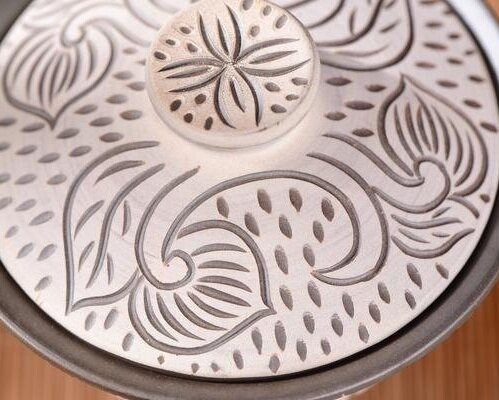
Koto Tea - $302
This is one of my favorite shops for Japanese teaware! I have a beautiful chawan and chasen from this shop and it is one of a kind! Recently on instagram, I saw a product in their shop, a tea box! I love the design of this basket. It is simple, useful and reminiscent of the classic picnic basket!
Please note that all credit for this photo goes to Koto Tea, they are from their site.

Obsesses with this box! I can imagine myself going on a picnic with my matcha and some delicious snacks :D

The simplicity of the design is so my speed and love how the handle can collapse as well!
Verdant Tea - $139
I’ve never personally bought anything from verdant tea but have definitely browsed their site before! I wanted to add a yixing pot to this list because I don’t own one! I love the simplicity of yixing pots but chose one with this beautiful lotus flower.
Please note that all credit for this photo goes to Verdant Tea, they are from their site.
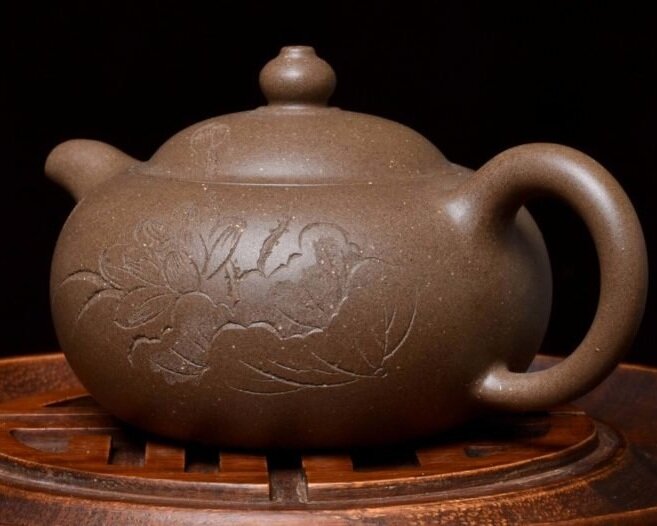
It’s about time to get a yixing pot! I’ve stayed away until now for a few reasons. For one, I like to switch tea into different vessels to see where they fit best and yixings are generally dedicated to one tea.
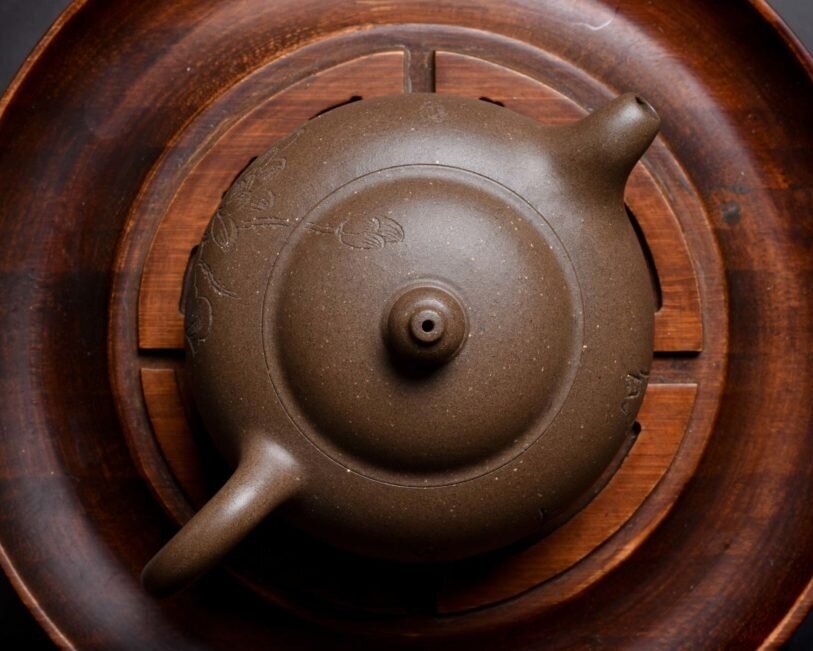
I also prefer gaiwans usually in my brewing so I don’t often go after tea pots but the carving on this was just too beautiful to pass up!
Yunnan Sourcing - $72
I’ve only every bought tea from yunnan sourcing but they also have a large teaware collection! Do I need more gaiwans? Probably not, but actually can you ever have too many gaiwans? The gaiwan is probably my favorite brewing vessel. I think it’s easy to use and the wide mouth enhances the tea experience with more accessible aroma. This gaiwan has a unique design and is unlike any other gaiwan that I have!
Please note that all credit for this photo goes to Yunnan Sourcing, they are from their site.
Shop Yunnan Sourcing

Ah, how gorgeous is this? I love floral/plant type designs on gaiwans and this one is so different from the ones I have!
I also love the raw look of this gaiwan as most of mine are very obviously glazed!
180andup -$146
This is a brand I discovered on instagram. Their curated collections have always drawn me in and after searching through their site I found these beautiful cups! I don’t have any octagonal cups. I also love the painted figures on the cups. Not only is it beautiful for making tea time more peaceful but I also love to photograph tea sessions and these cups would be an amazing model!
Please note that all credit for this photo goes to 180andup, they are from their site.
I only have one other fair cup shaped this way and it’s my favorite. The one that I have is glass so it would be nice to have a ceramic one as well! I love that it has a light color glaze so that I can still see my tea!

This shape is so cute and I can’t help but put these on the list! I love the colors in the design as well.
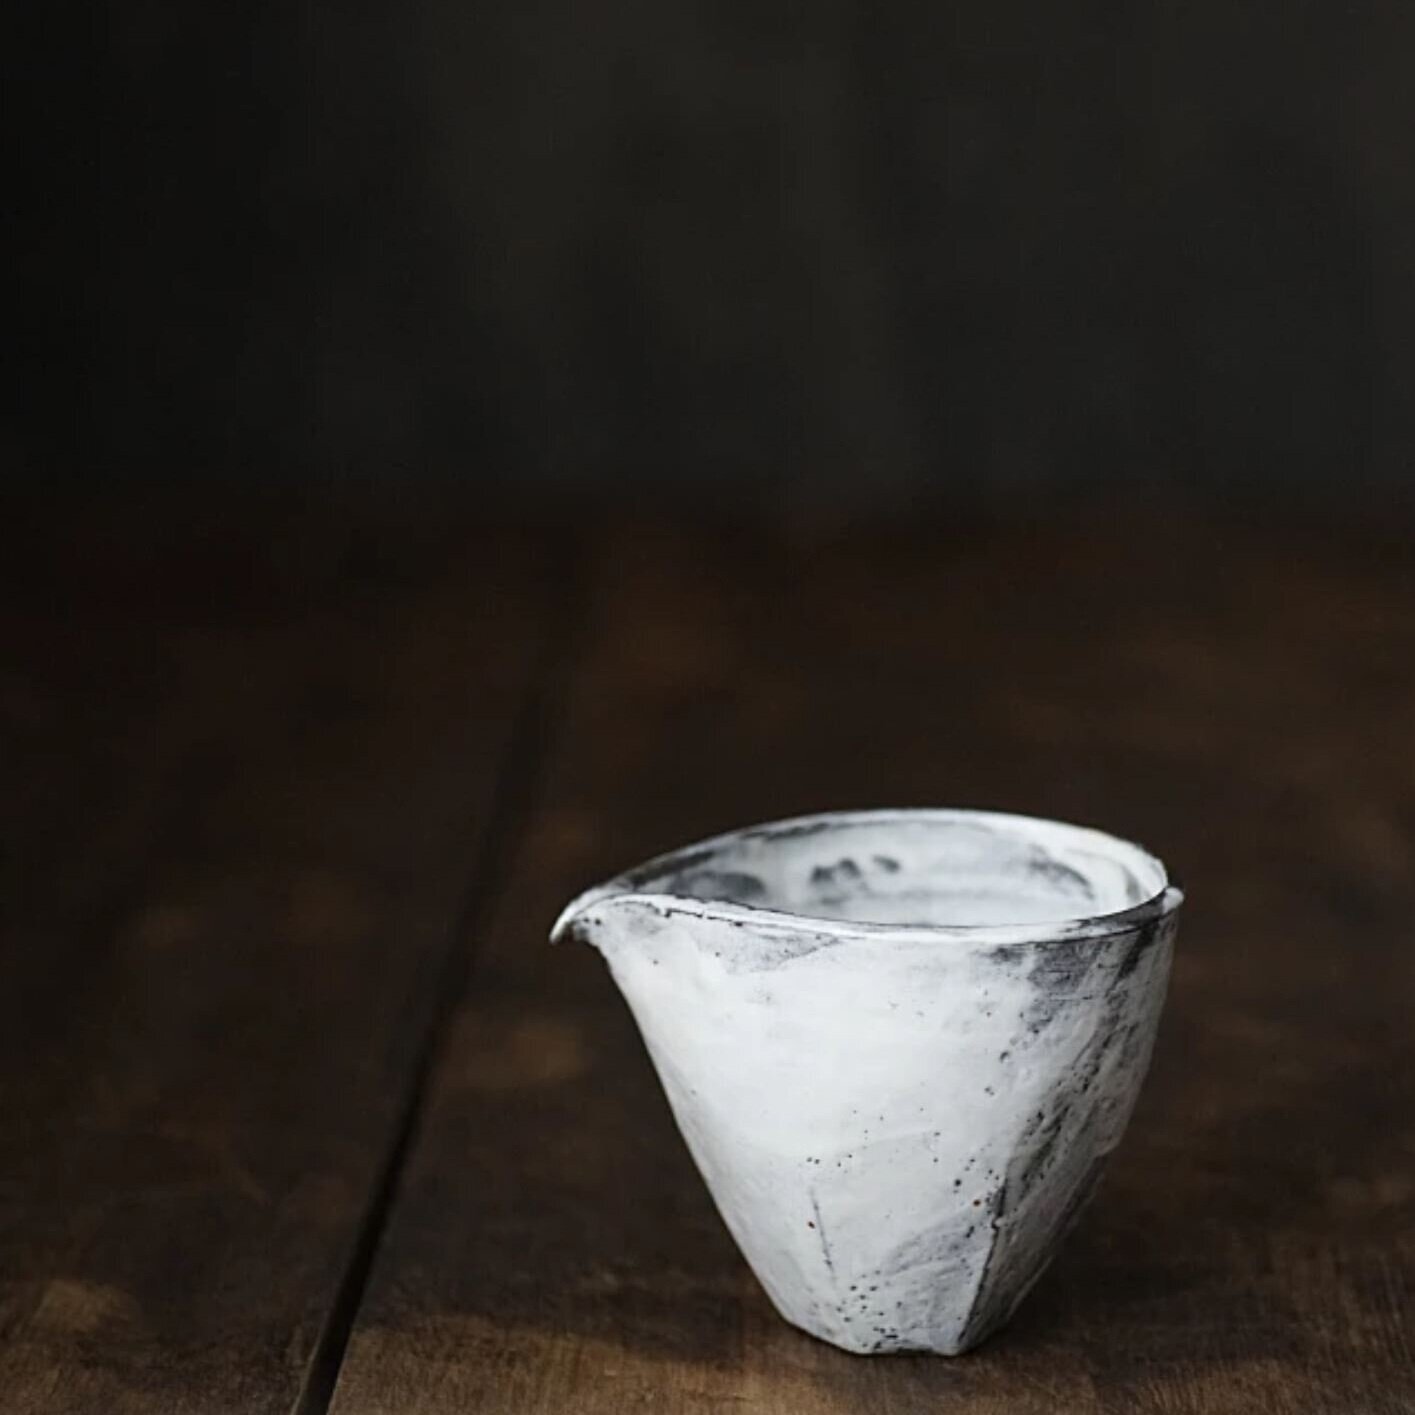
Esteemed Tea Co - $59
Love, love, love esteemed tea! They have a delicious selection of oolongs and I’ve featured their teas in my steep it real box because I loved it so much! I also used to have this gorgeous thin glass cup with gold rim from them and it was my favorite. The glass got stained with tea so easily because I used it so much. One day, I knocked it off my shelf by accident and because it was such a delicate cup it shattered :(
Confession. While looking these cups up for this post, I bought one. I couldn’t help but replace my beloved cup!
Please note that all credit for this photo goes to Esteemed Tea Co, they are from their site.
I have one of these but I could always use another. These strainers are so delicate and beautiful!

I’ve always wanted a tea strainer in this style!

I will hold onto this one for dear life because I love this style of cup so much!

How lovely that it also comes with a stand!
Total: $1000
I think it’s important to note that this was actually difficult. I wanted to be able to get several items but had to re-do my list several times because some of the items I initially wanted to put on this list were too expensive in the sense that I wasn’t able to add many other.
One day I will own a legit tetsubin!!
What would be on your list if you had $1000 to spend??!
Ways to make your tea time more calming

Sometimes tea time can’t be calm. You need tea but you don’t have time to sit somewhere and have an intentional practice. I’ll still take rushed tea over no tea at all!
When you do make the time for tea though, you want it to be used to the fullest. I think there are some ways that you can make tea time a calm and peaceful time.
One of the most important things you can do for tea time in my opinion is to set the right environment! Having a place where you’re comfortable is key. If it’s a cool day, make sure you’re warm. If it’s sweltering, make sure you’re cool!
I have a quick and simple guide in my shop where I go over some specifics for meTEAtation that I think can be really helpful if you don’t know where to start.
Besides being comfortable, the ambiance of your tea spot can help make tea time better. There are two different things I like to do to achieve this!
The first is good music. I will throw on whatever artists I’ve been into recently and jam out while I drink tea. Some days though, I need to unwind and one easy way for me to do that is to listen to “zen music.” I searched this one time on youtube and there are TONS of videos, some 6 hours long or more! These videos capture nature type sounds or soothing sounds. Have you ever had a massage? You know that calming music they play, that’s the stuff!
Without getting too scientific because this isn’t my area of expertise, music calming you down isn’t a coincidence! The types of music that I found under “zen” when searching youtube have specific sounds and style that can aid in lowering your heart rate, blood pressure and even helping with muscle relaxation. While listening to music we enjoy can also help us be happier and more relaxed sometimes you need the relaxing music !
Here is one of my favorite youtube videos
I also made a short playlist on spotify and will add to it as well!
Another way to bring calm to your tea time is by having fun! There are SO many different ways of doing this but I’ll go over some of the things I like to do. When you engage in some intentional activity during tea time, you’re putting all your attention into that and there is a break from stressful or damaging thoughts. It can be healthy to have temporary escape like this. I think it makes me a generally calmer person and less likely to explode when things go wrong. That’s not to say it NEVER happens ;) but I think since I started more routine and intentional tea practice, my mood is different.
Try a different way of brewing that you’re used to! I only ever knew one type of brewing and then I discovered the world of gongfucha! I always encourage people to try this style of brewing because there are so many elements to it that it can be a ton of fun!
I’ve shared a video below that shows someone brewing in gongfu style. You can see that there are many more elements involved than western brewing style. I think these additional elements make tea time more fun and intentional!
Some items you might see:
-Tea Tray
-Smaller tea pots and cups
If you want to get some of these things and don’t know where to start, check out BItterleaf Teas, one of my favorite shops! I also made an amazon list of tools if you want something at a lower price point.
Finally, I want to talk about something that might seem silly but it’s super important to me. Attire! I could never enjoy tea time in something tight or rough.
My ideal tea time is when I can throw on a pair of sweats or leggings, a loose top and either slipper socks or fun socks! These types of clothes engulf my body in comfort and allow me to be more relaxed. I’m also usually less upset if I spill tea on them!

What are some ways you like to make your tea time more relaxing ?!
Tamago Kake Gohan with Gyokuro Spent Leaves
Have you ever tried Gyokuro? It’s one of my favorite green teas to drink…and to cook with! I often feel bad getting rid of tea leaves after I brew them especially because I drink so much of it! I’ve used spent leaves in plenty of recipes but in my opinion, green tea is often the best for cooking. I’ve used gyokuro before sin a shrimp stir fry recipe here.

I was brewing this gyokuro to try before posting a giveaway with Sencha.app. You can find this gyokuro here.
I was trying to decide what to do with the gyokuro. I prefer to create simple dishes here on my blog because I want these recipes to be easy to create with accessible ingredients!
I was reminded about a chef’s table episode where the chef was talking about his time studying food and working in restaurants in Japan. He was taught about a classic Japanese comfort food called tamago kake gohan which translates to egg over rice!

The chef took hot rice and topped it with a beaten raw egg! He also added soy sauce and some seaweed type seasoning. It may have had some sesame seeds as well but I can’t remember. He mixed it together and ate it! This embodies the umami flavor. Umami meaning savory.
At first look, you think that eating a raw egg isn’t safe! After looking it up, it seems like if the egg is pasteurized it is ok. Consider also that if you are putting a raw egg on hot rice, it’s going to cook.
Unfortunately, after looking at all the eggs in my fridge, I noticed that none of them were pasteurized so I opted to do a poached egg so that I could feel a bit safer with my unpasteurized eggs but still get that delicious egg and rice flavor.

I also decided how to use the gyokuro. Instead of just the egg, rice and seaweed I wanted to be a little extra. I stirfried some garlic, salt, pepper, sambal olek and the gyokuro leaves! Once this became fragrant I set this aside with my other ingredients, the poached egg and soy sauce.
Confession: I had never poached an egg before so I found a video to help. It’s actually super easy. I found this video short and straight to the point.

The other modification I made was to use rice I had on hand and cooked which was a delicious red rice. If I were to do this again however I would definitely use a sushi or jasmine rice just for better texture.

Once you have all your ingredients prepped, add them all to the rice and mix with chopsticks vigorously until combined! Use soysauce to taste.
Here you get a hearty and comforting snack AND you don’t waste spent leaves :) The gyokuro gives this dish a nice bold flavor.

Would you try this??
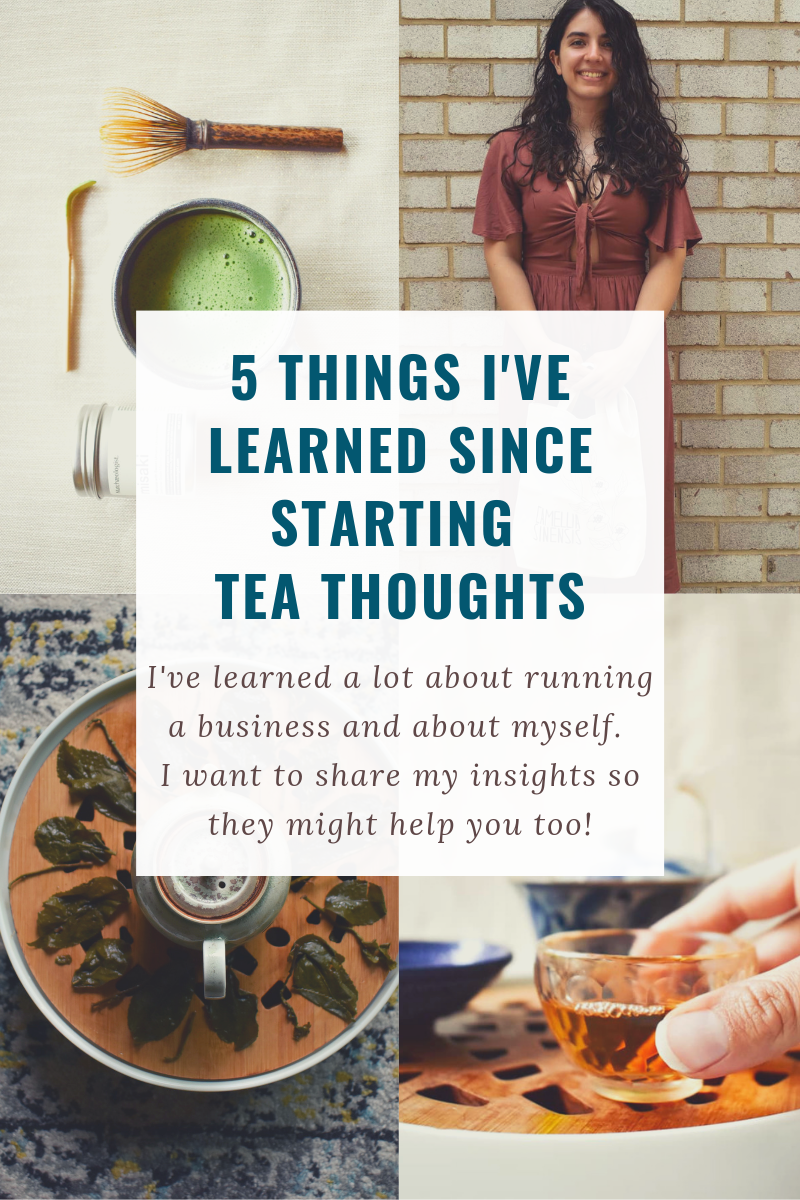
5 Things I've Learned Since Starting Tea Thoughts
I started Tea Thoughts several years ago and I wanted to share some important things that I’ve learned. I hope that these will help you in your own endeavors!

1) The Importance of a tribe
While creating content and/ or products can be satisfying to anyone trying to express themselves creatively, it doesn’t mean much if you don’t have an audience to share with! Tea Thoughts is still very, very small and has plenty of room to grow but one thing that Tea Thoughts has, is a tribe. Through social media, I’ve connected with the most amazing and supportive people. My tribe are the ones who pay attention to, engage with and support my content.
Even if your tribe is small, it’s way more important than having a bunch of followers who you never interact with. The tribe is there through all the algorithm changes. The tribe is there when you come back from not posting for a while because you needed a break. The tribe is there when you release new things. A tribe is actually just a family that you’ve created around your business. They aren’t just “customers” they are people who you can actually connect and share your passion with.
2) You can always do more
Sometimes it feels like I’m always working. I go to work then when I have breaks I’m doing things for Tea Thoughts and when I get home, I work on Tea Thoughts. Content creation or design is not the only task for my business. While I’ve gotten used to some of the other things I need to be doing like sales tax and managing bills, it’s so easy to neglect certain parts of a business.
For me, I often will focus on new designs and products and then my blog goes without an update for a while. This is something that happens all the time and it can lead to embarrassing things like having the link to your etsy shop on your blog in several places even though you don’t use etsy anymore !! A couple successes means that the work will continue to pile one. This is a good problem to have. It seems like the more you do the more you find out you can continue to do to improve. While I maintain my blog and shop as best as I can there are many aspects that I could go through and fine tune. It’s not the most fun but it’s important.
3) It’s not all sunshine and rainbows… and that’s ok.
I receive so much positive feedback about my blog and shop, it is sometimes emotionally overwhelming. I think when people see your online presence they make an assumption about your success. While you want people to view you in a positive light, their view doesn’t define your reality. In the communications I put out, I’m generally positive because I want to be and because I want to spread that to others. That positive attitude doesn’t always reflect what is happening in the background.
As a product shop owner, I haven’t reached a point where I’m sending out a bunch of orders every single day. Generally, I will have times where the orders roll in and then times in between that are quiet. These quiet times can be rough. As a small business owner, we can sometimes tie our self worth to the perceived success of our business whether that is views, sales, referrals etc. So when your your success is down, you often feel down on yourself.
Having these times aren’t all bad. When orders roll in, it’s generally a time of happiness and motivation. When sales are slow or non existent there is a different type of motivation. During these times, I take a deeper look at what I’m doing and see what I can change or fix. Great progress can also happen during these times. Trying to find positive aspects in times we perceive as “bad” can be healthy and productive for our businesses.
4) Follow your passion
It’s easy to get sucked into following trends in order to be successful. I don’t advise that you ignore trends but to make sure that everything you do is somewhat in the realm of your passion. When we are passionate about something, the result is always better. Creating a certain product or type of content can be more fruitful but only if it’s done right. If the trend is boxes, you can’t just throw together a box and expect it to do well.
Your passion will lead you on a journey and while on that path, there will be stops along the way where you can step off the path slightly to create something. When creating that something, make sure that one foot is still on the path. Ultimately, that path will lead you to success and you don’t want to stray too far from it. Passion makes us happy and happiness helps us be more successful.
5) You’re doing ok!
In all aspects of life we like to play this comparison game. Sometimes the comparison is against actual statistics like: my swim time was this and that other person’s was 3 seconds slower or faster than mine. The other more harmful type of comparison is when there isn’t a clear outline or what you “should” be doing and yet you compare yourself to others anyway. This type of comparison extinguishes parts of our passion. It brings us down. It makes us doubt ourselves. This is an illusion. When you’re on your own journey, the path is what you make it and just stepping out and being brave enough to follow your passion on a somewhat scary and undefined road is an accomplishment.
In times when the comparison bug won’t stop nagging, remember all the amazing things you’ve done. Little wins are worth acknowledging because all together they equal something great. Be motivated but be kind to yourself along the way!
Make it Fancy - Oatmeal Cream Pies
One of my favorite Tasty segments is “Make It Fancy” ! Rie is one of my favs and she does this fun challenge where she is given something not fancy and tried to make it fancy! I saw her do this with twinkies and I did my own version of it with oatmeal cream pies!
Confession: I’ve never had a twinkie so I didn’t want to use them. I wasn’t allowed snacks like this when I was a child but sometimes we got by with grabbing oatmeal cream pies from the shelf! I wanted to make this childhood treat a little fancier.
Confession #2: When I tried the Oatmeal Cream Pie, it wasn’t as delicious as I remember it!
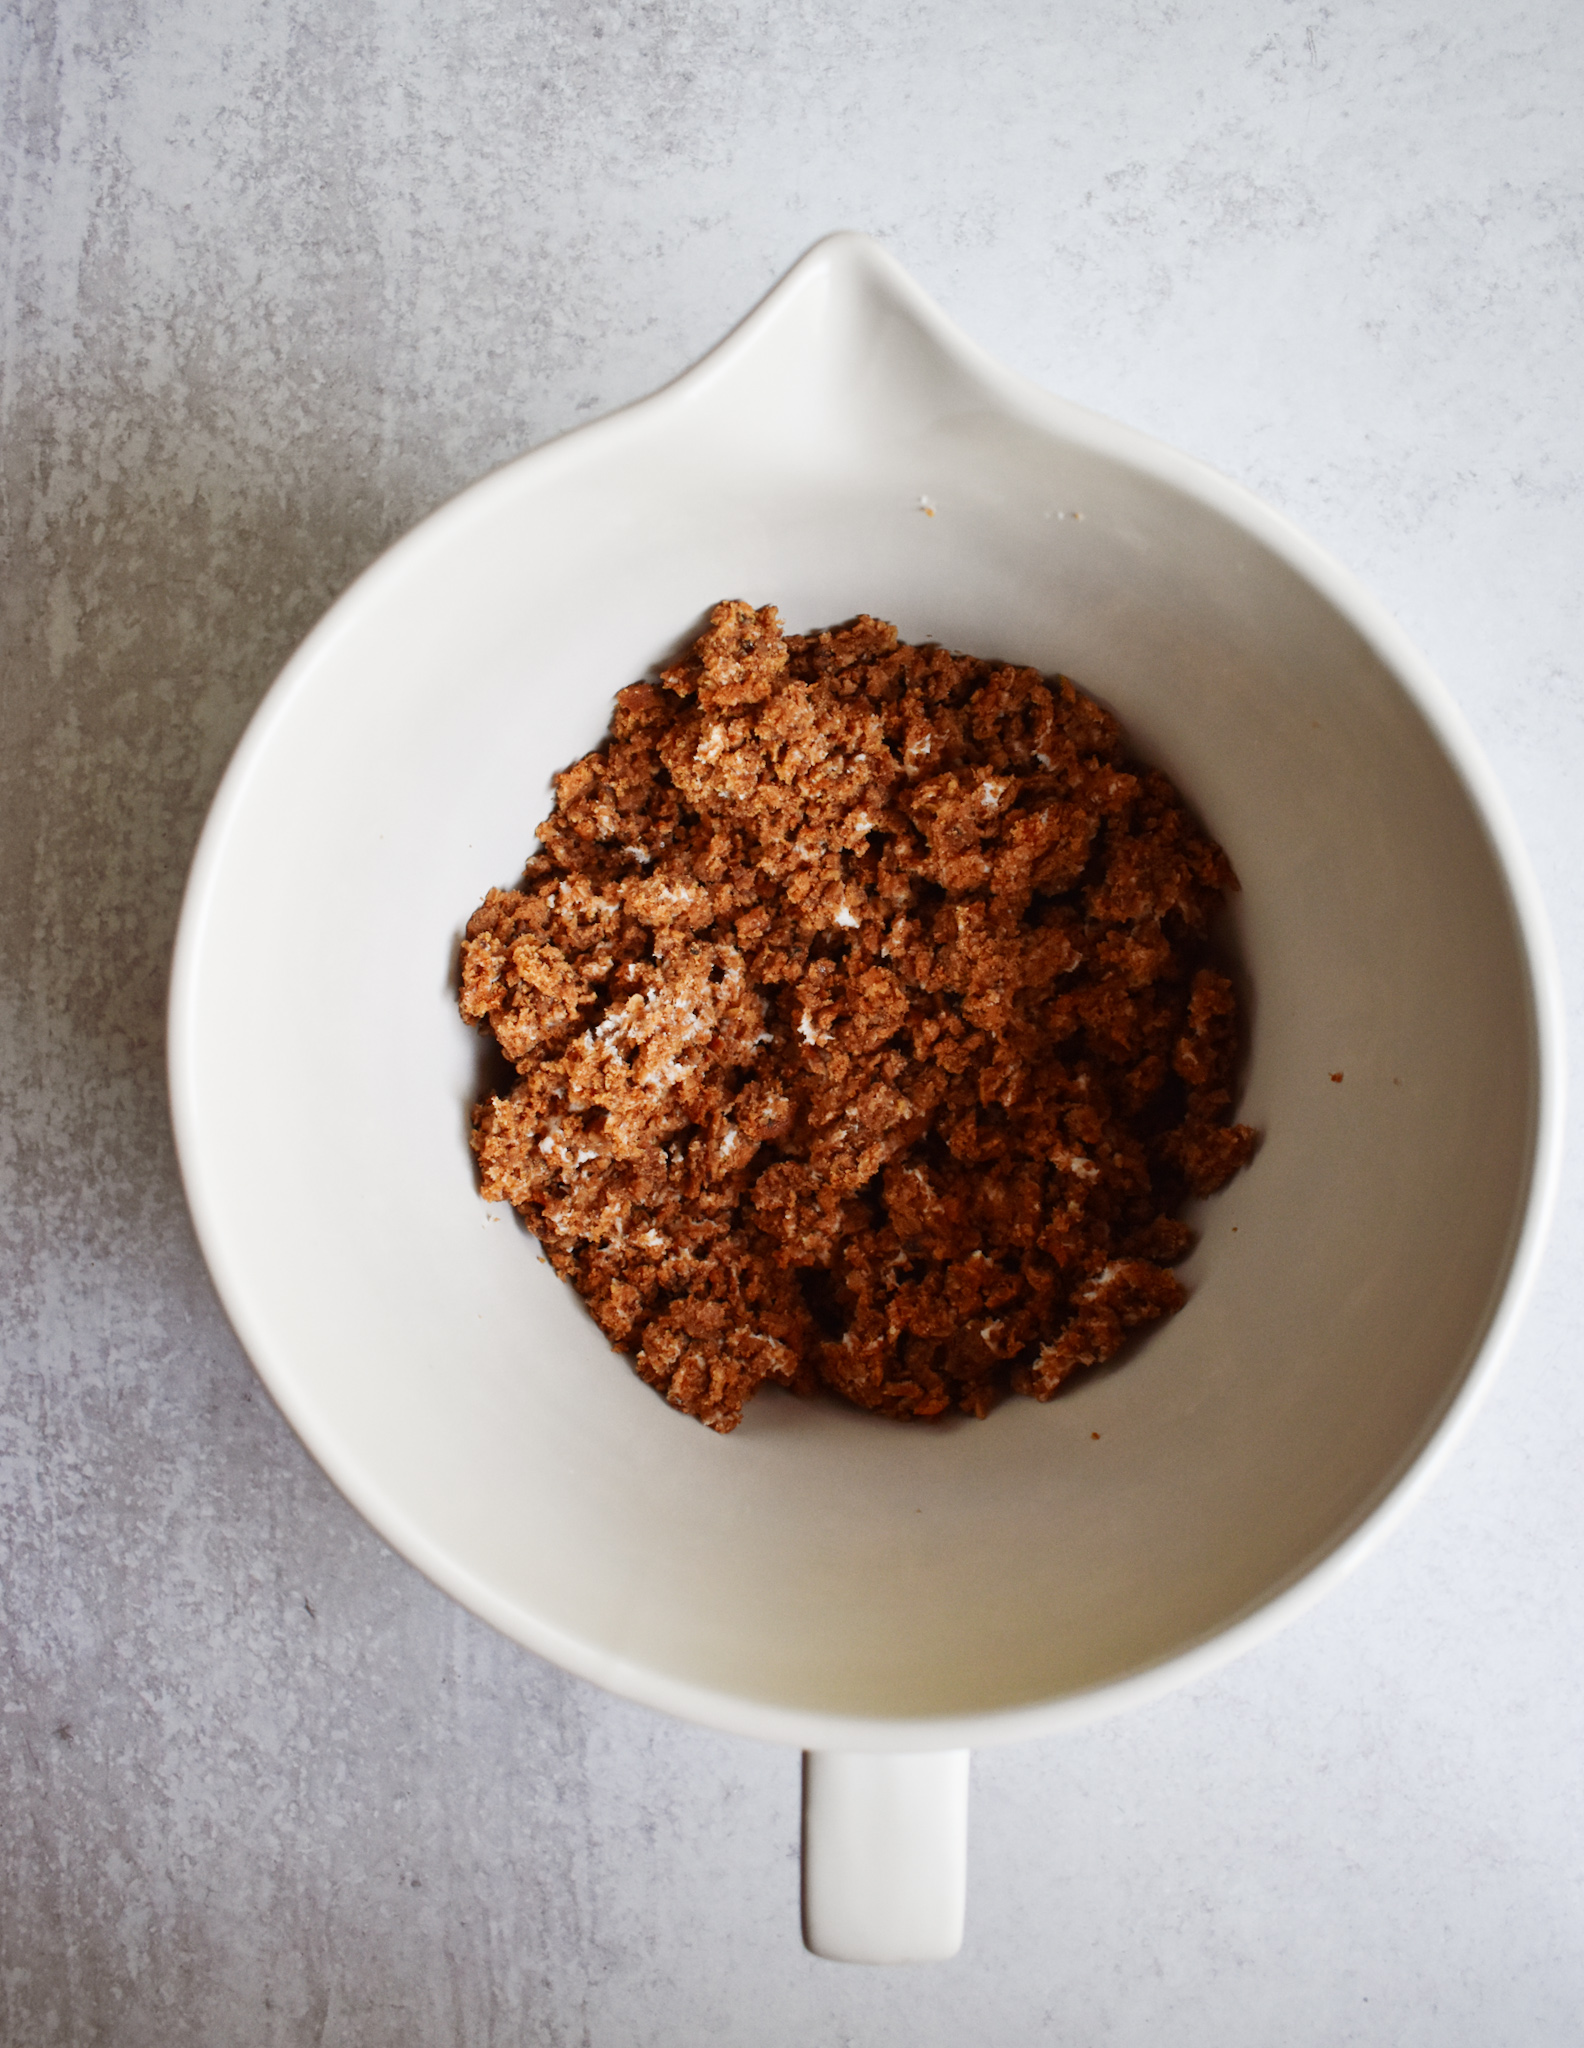
This is an entire box of oatmeal cream pies (12). I just smashed them up and to make them stick together I used 2 tablespoons of brewed hojicha.
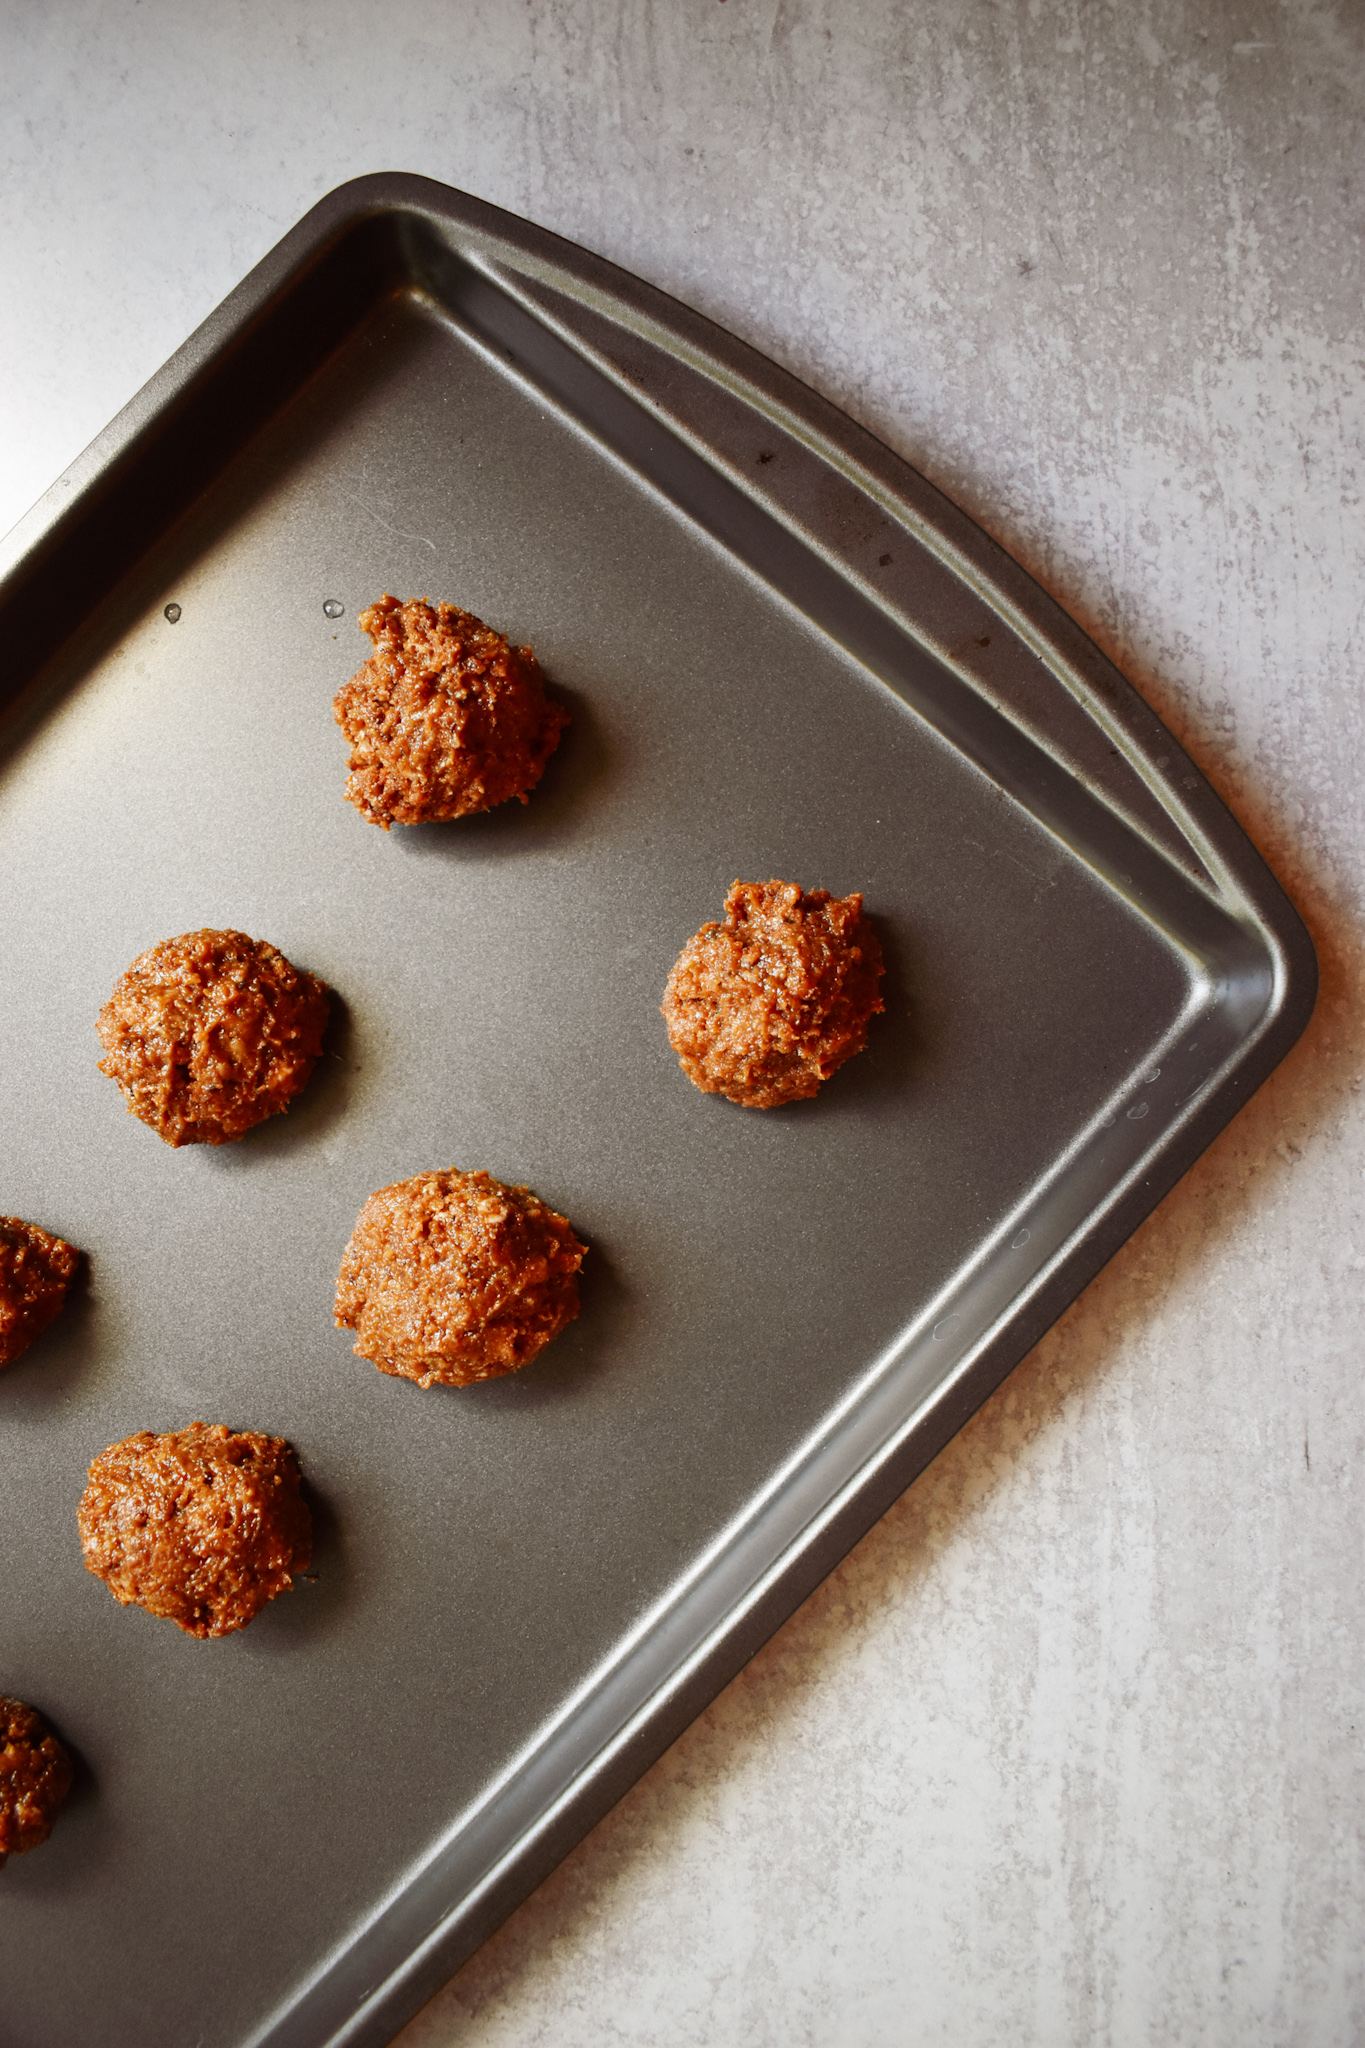
Once you make the balls whatever size you’d like, place them on a baking sheet and keep them in the freezer for 30 minutes to an hour until they are not sticky anymore.

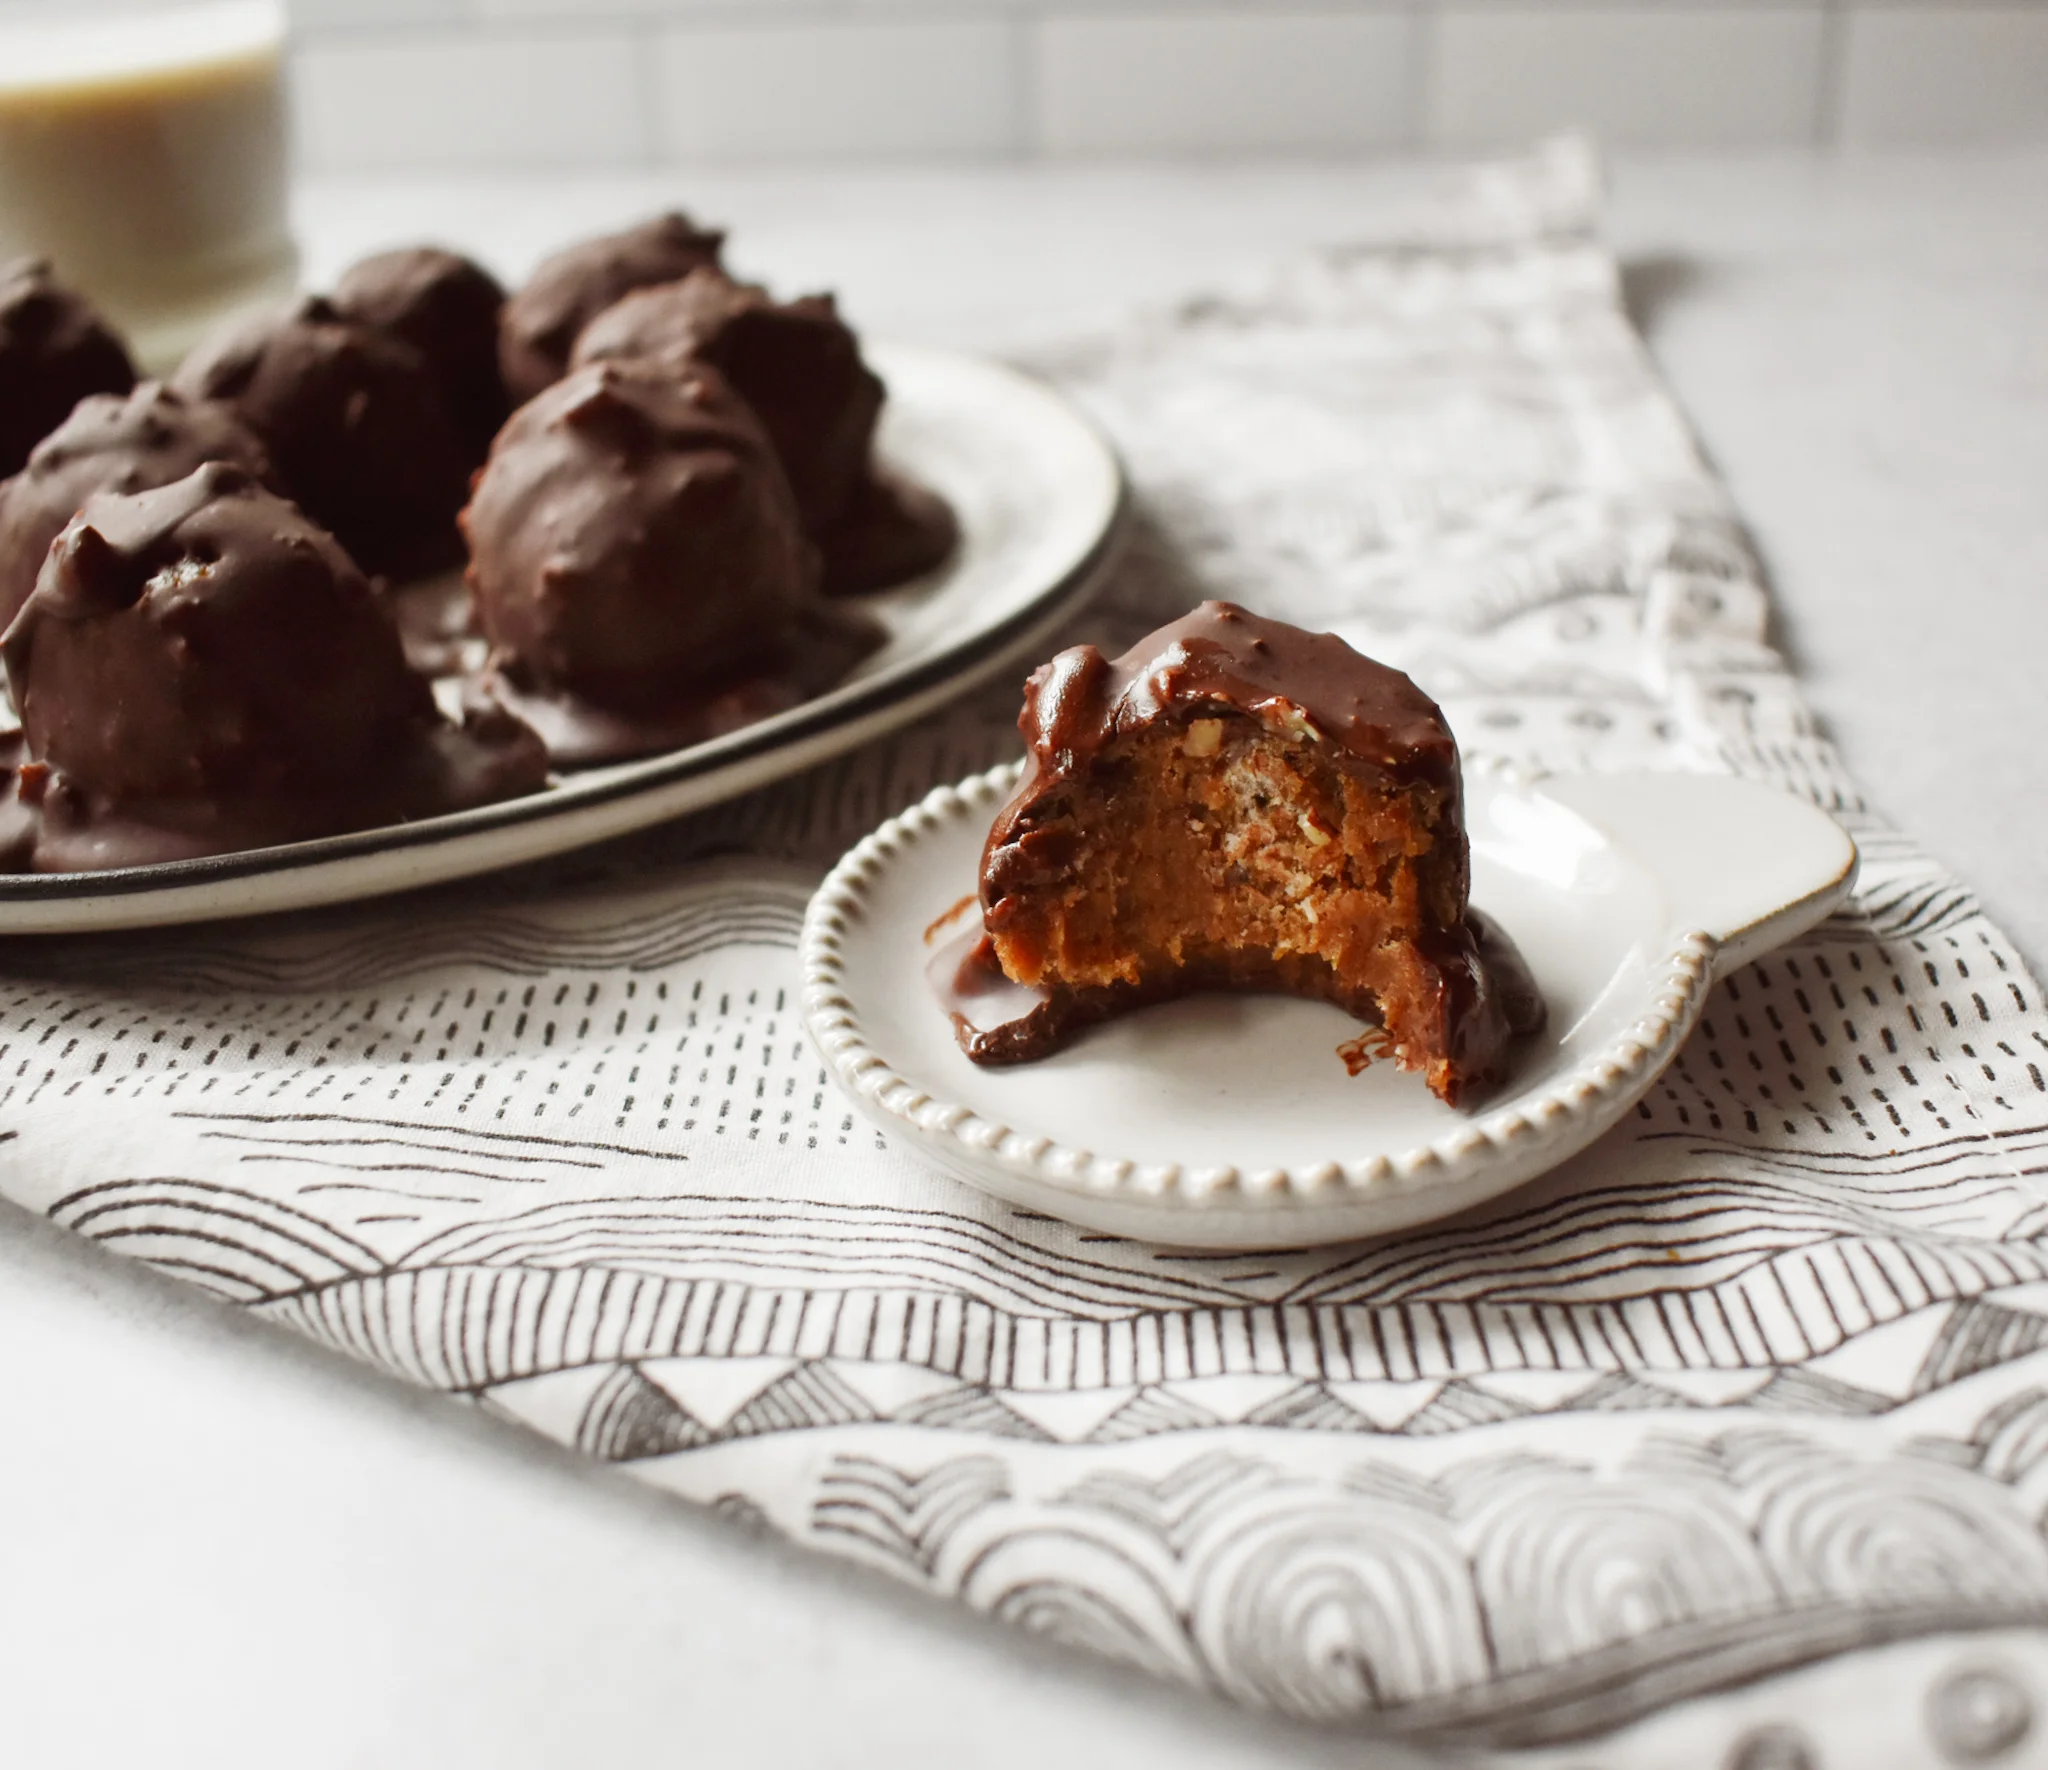
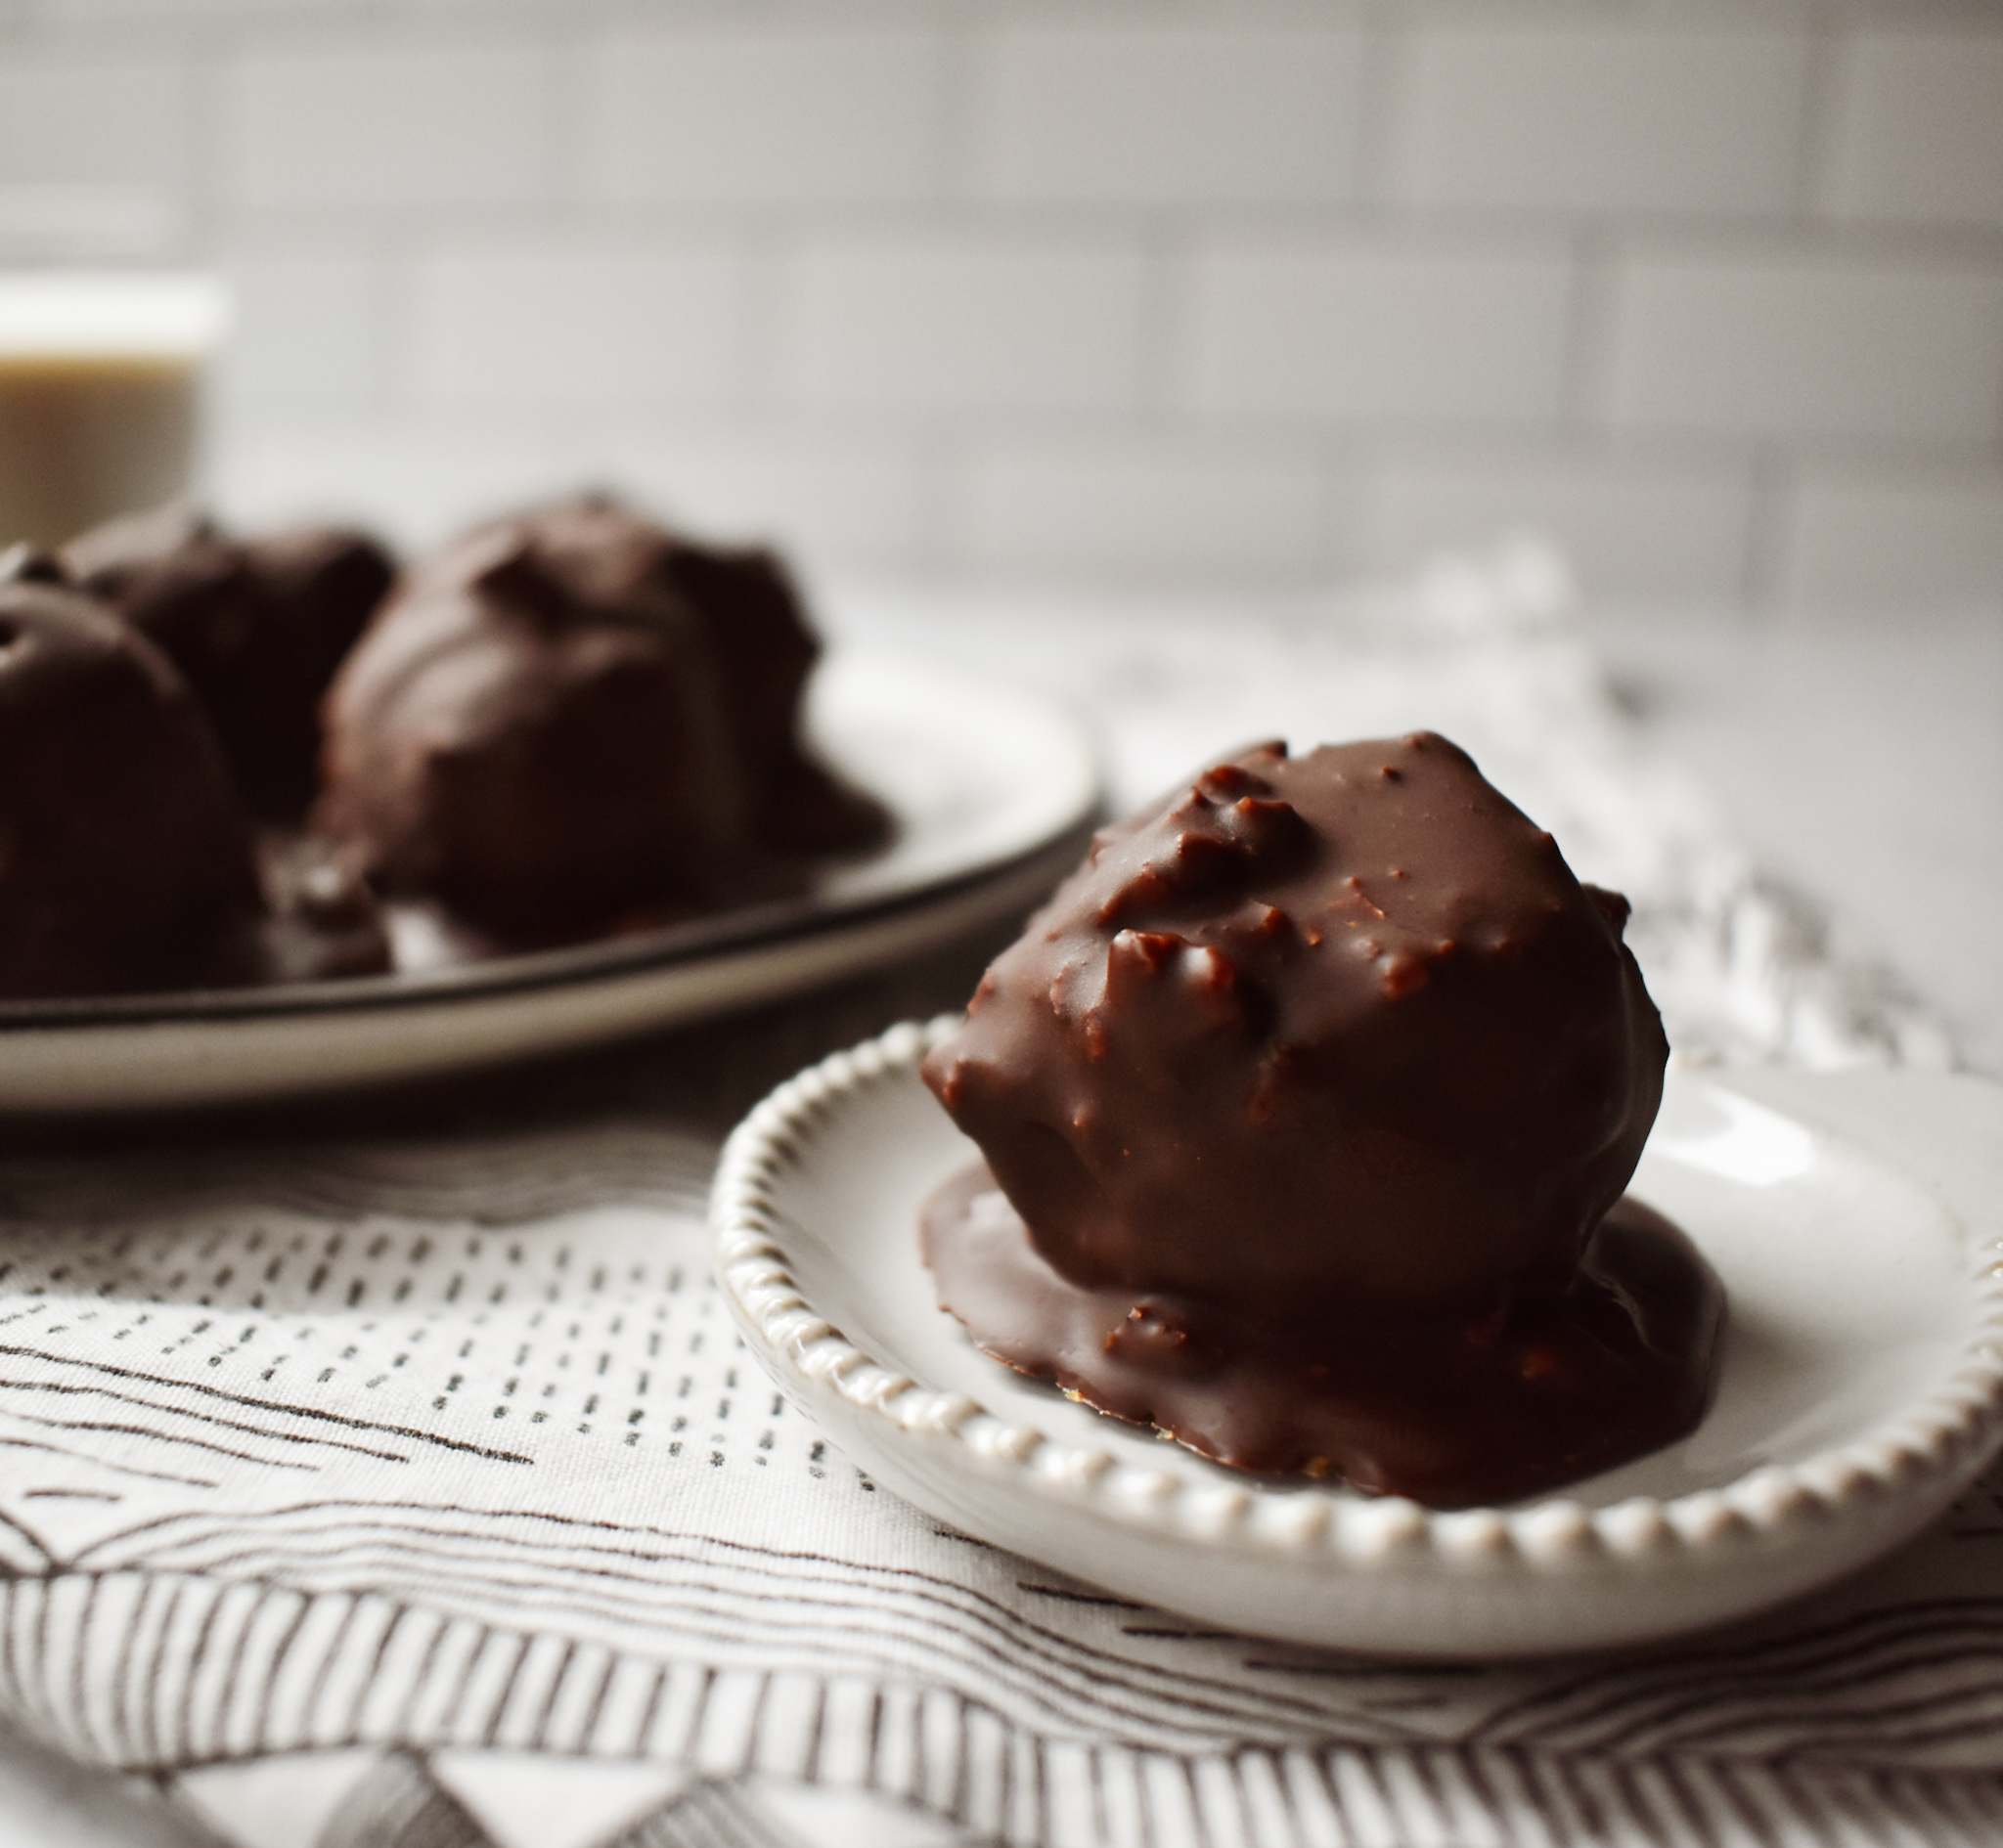
You can make these into cake pops like Rie did but I just wanted to make messy bite sized shapes. The chocolate I used was bittersweet melting wafers. The reason I used bittersweet chocolate was to counteract the sweetness of the oatmeal cream pies.

You might notice some bumps on this chocolate and that’s because I added in chopped walnuts. I think walnuts go really well with both the small amount of hojicha in these as well as the bittersweet chocolate. It also gives these a little bit of crunch!

Dipping these into the chocolate was a bit messy, as you can see there were small puddles created around them. While I like the extra chocolate you can totally use a cake pop stick to dip these like Rie did!
The combination of the very sweet oatmeal cream pies with the hojicha is offset by the bittersweet chocolate and walnuts. You get the right amount of sweet instead of sickly sweet!

Dip in your favorite type of milk for that extra childhood effect! :)

What do you think? Did I succeed in making oatmeal cream pies fancy?!
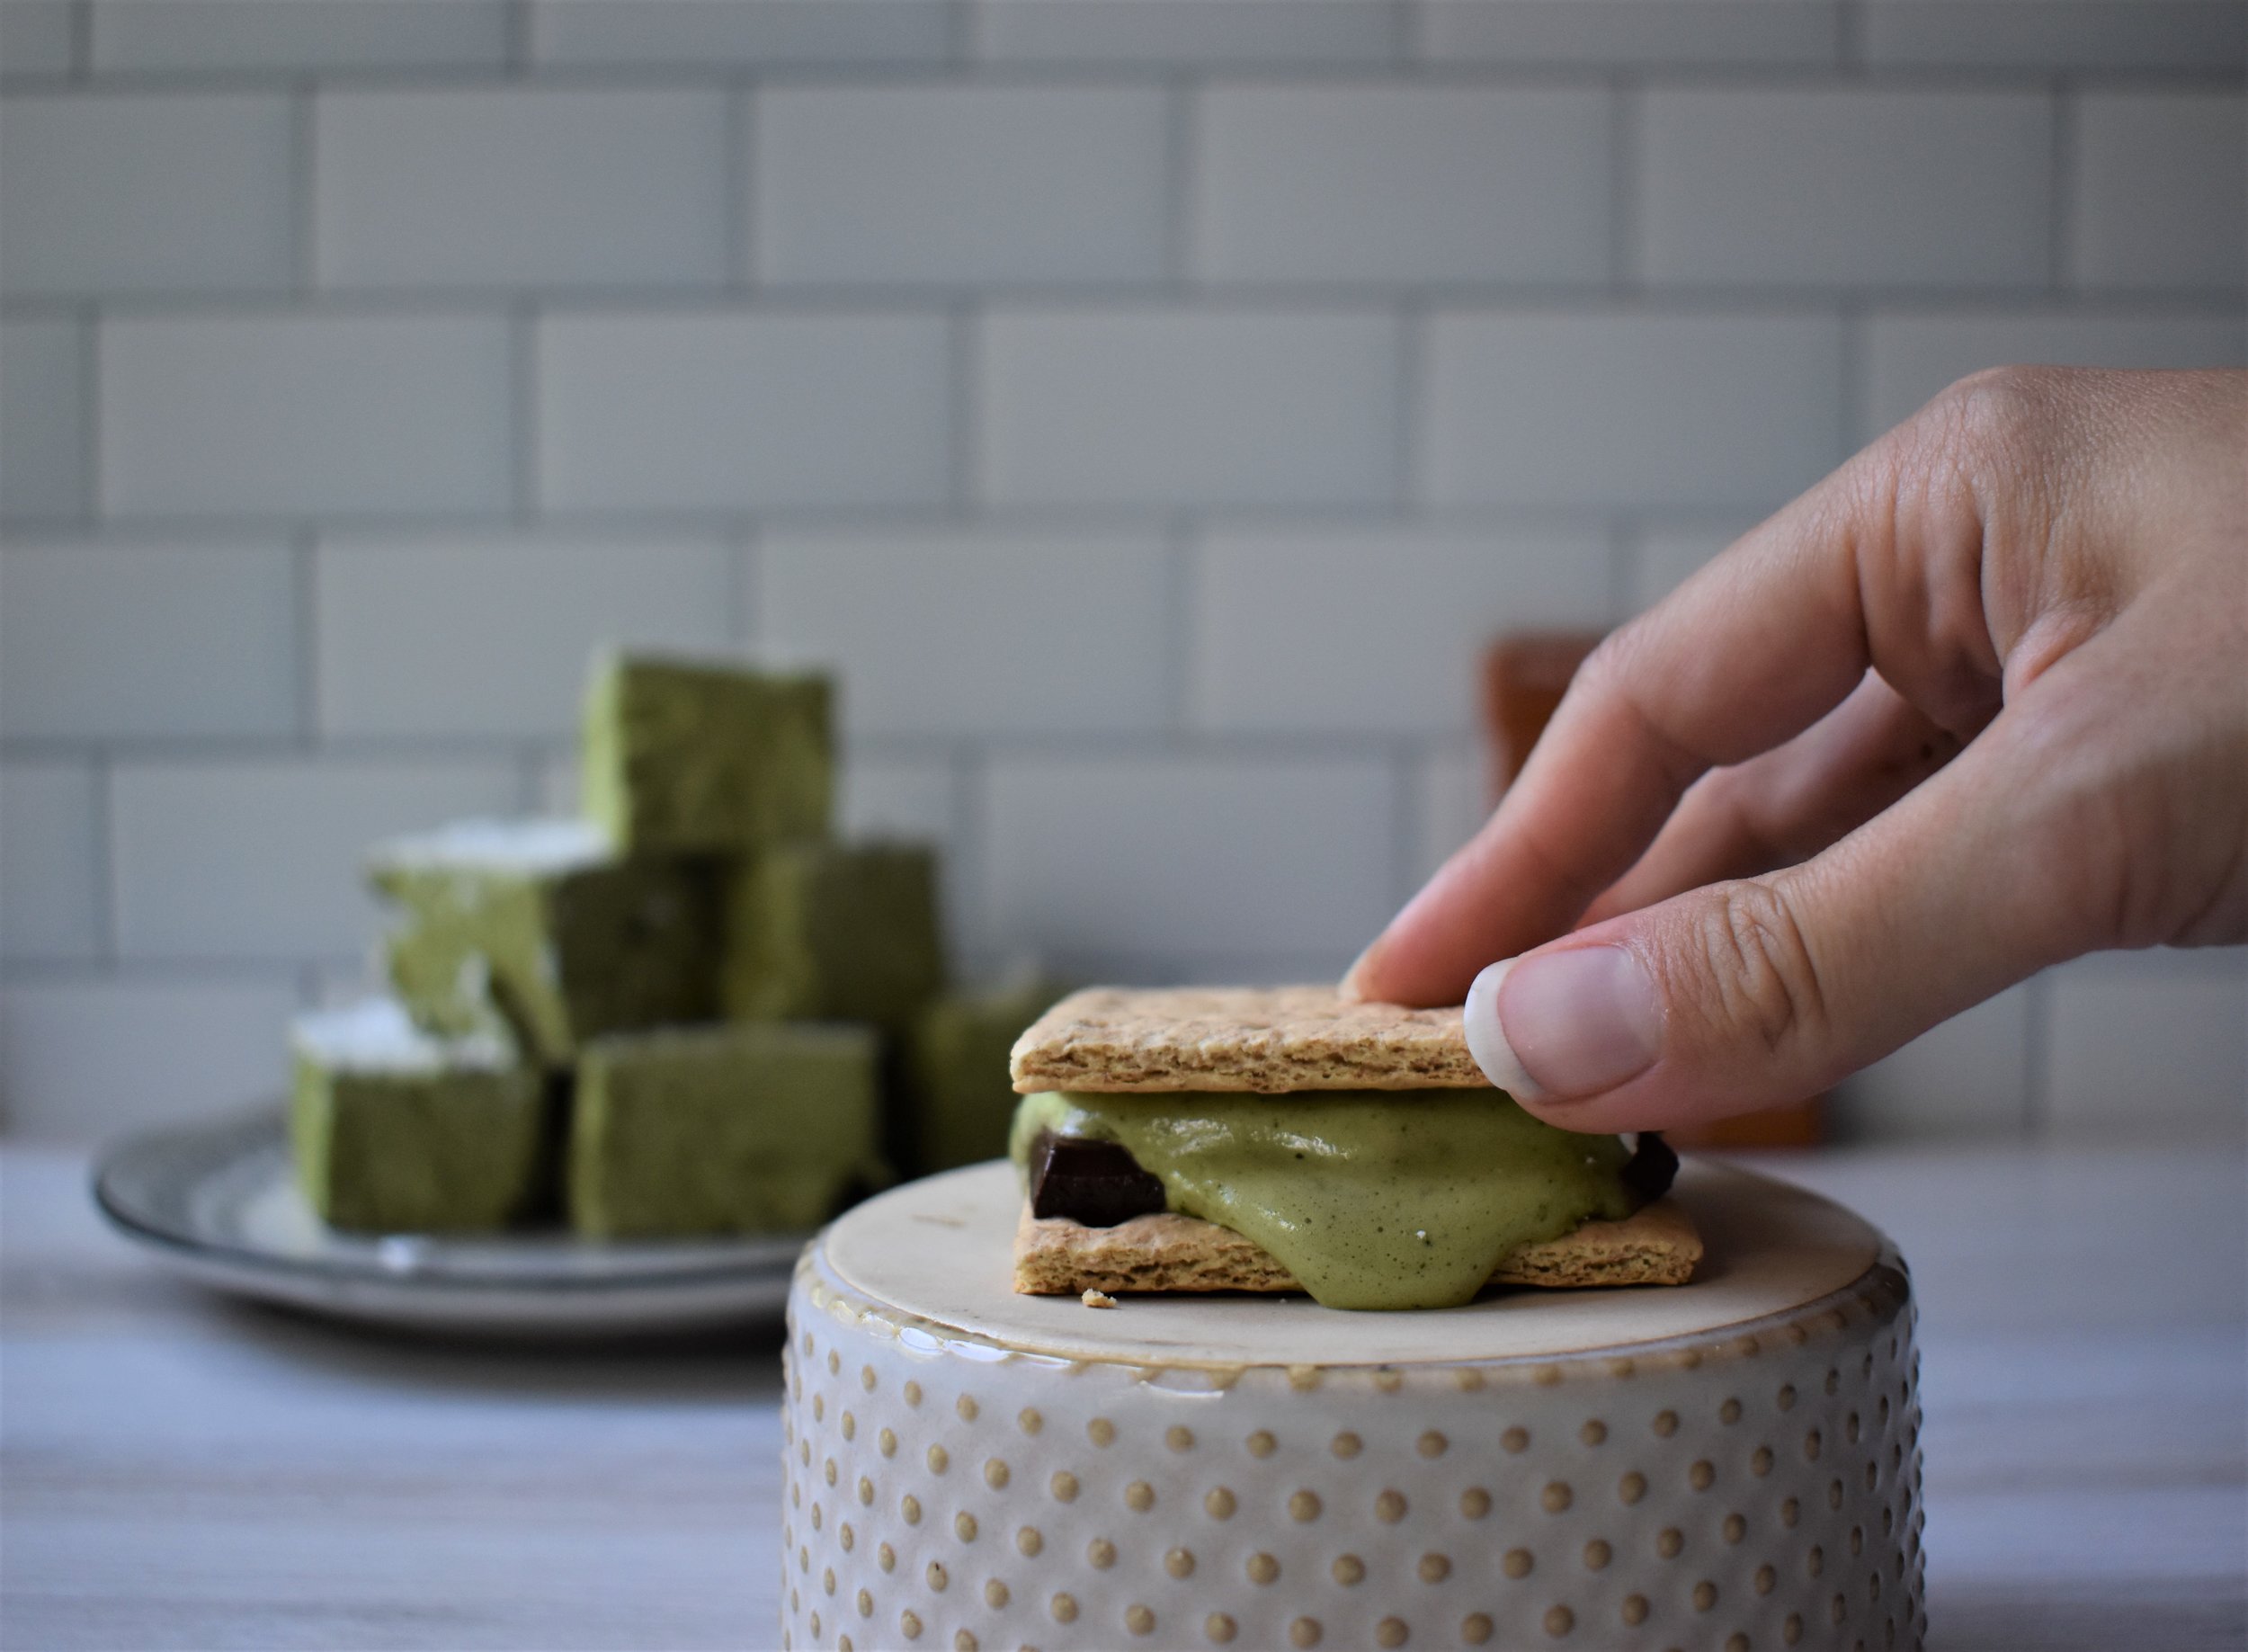
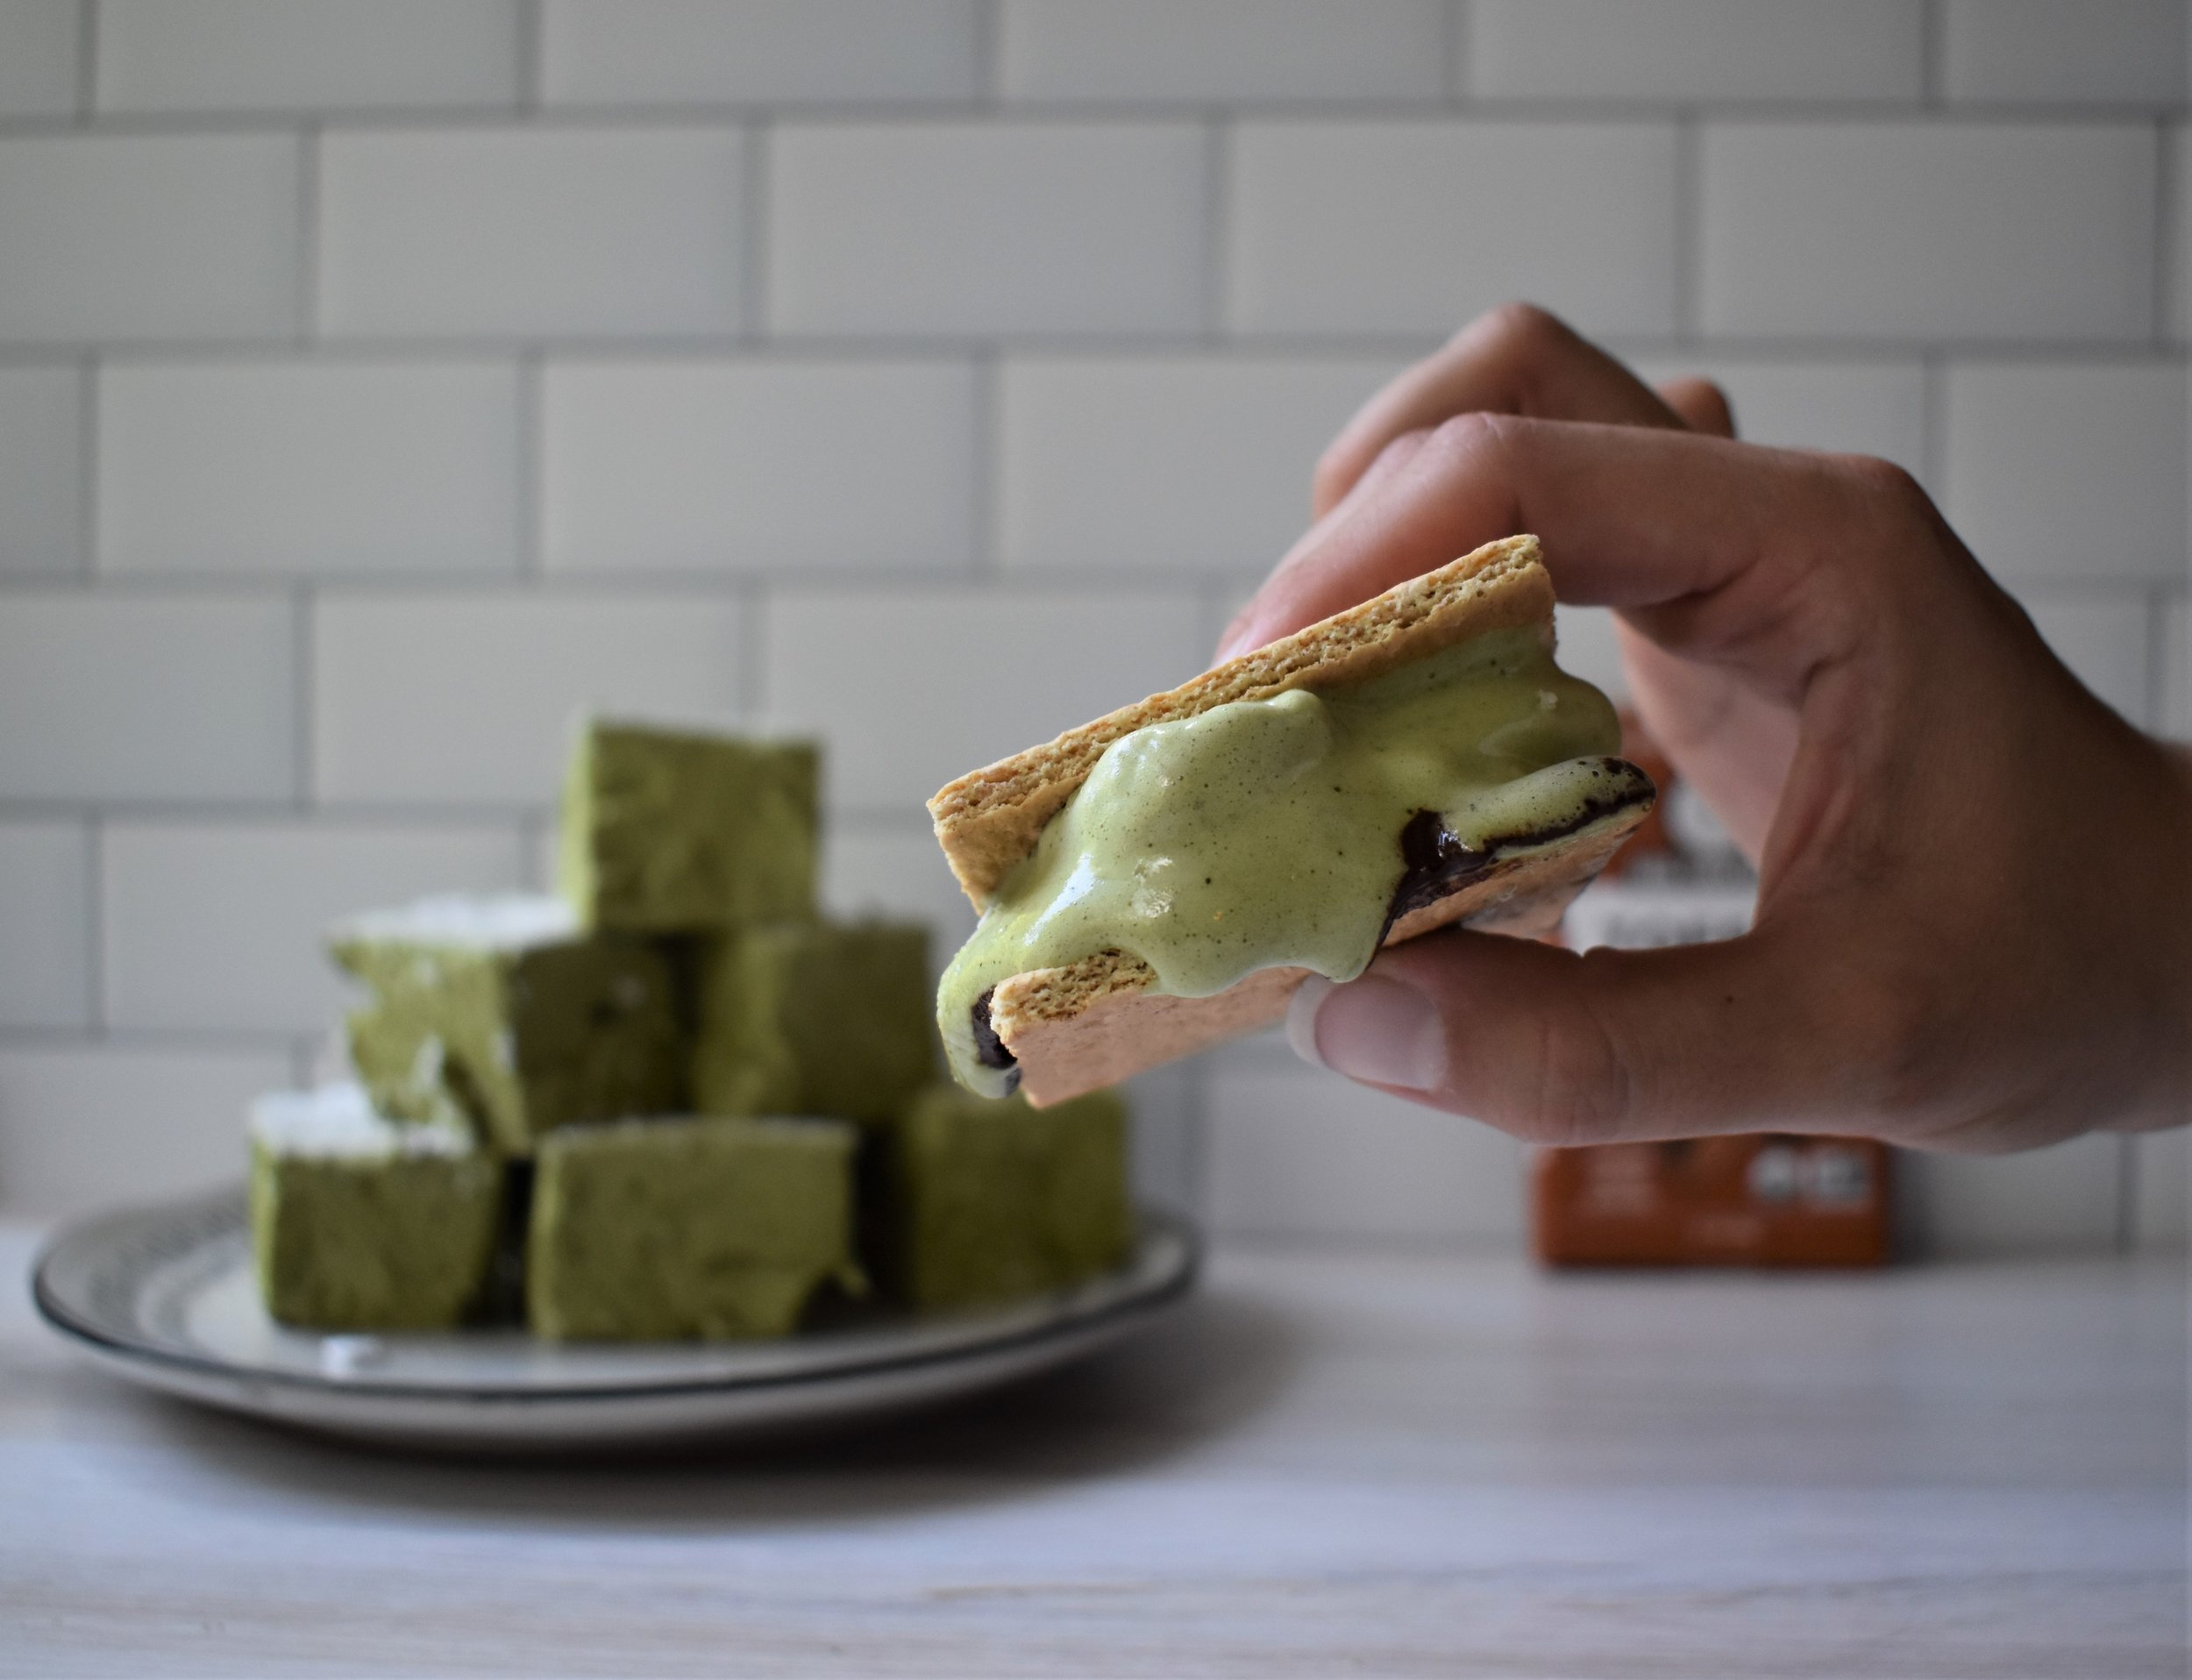
Matcha Marshmallow S'mores!
I was watching a feed feed video about making s’mores in the oven. I know, I know, it goes against everything that is wonderful about s’mores. Finding the perfect stick, getting your marshmallow too close to the coals so that is catches on fire by accident, and of course trying to find the perfect way to melt your chocolate slightly.
BUT, I don’t have access to a nice fire whenever I want but I do sometimes want s’mores so making them in the oven would be awesome. I then thought, how about matcha s’mores!

The most important thing is finding the right chocolate to go with the matcha marshamallow. I decided on this taza chocolate toffee with almond and sea salt because those flavors sound AMAZING with matcha.

My recipe below is for making the marshmallows but you will also need chocolate and graham crackers. Basically you want to put one side of the graham cracker on a baking sheet in the oven with a piece of chocolate and the marshmallow on top. Put the oven on high heat or use the broiler and dont walk away, make sure the marshmallow is soft enough to finish the sandwich !

A few notes about the recipe. You can certainly use corn syrup instead of cane sugar syrup and I have also seen recipes with honey but you’d need a few other ingredients to make that work. When mixing in the matcha, I put a range because I added little by little while it was mixing until I got the color I wanted. The color also darkens a bit after they dry out.
You might be thinking why put more sugar on top of something that is basically just made of sugar. I didn’t say this was the healthiest snack! The confectioner’s sugar on the bottom and top of the mixture make it so much easier to cut out squares. Without it, I think you just get a sticky mess.
I also wanted to mention that while I left these out uncovered for several hours, I covered them and put them in the fridge overnight and they were ok!
Here is the recipe I worked from!
If you like to order supplies online as I do sometimes, I have created a little list of supplies from amazon that you can take a look at here to get for this recipe or to spark ideas.
Please note: if you purchase anything from these two links I will receive a small commission.

Uncle Nearest Whiskey + Peach Infused Oolong
Ok, so I’ve discovered a new whiskey that I LOVE. I found it by chance, it had an incredible story so I decided to give it a try! I got sucked into learning about the greatest whiskey maker the world the never knew. Read about Uncle Nearest here!
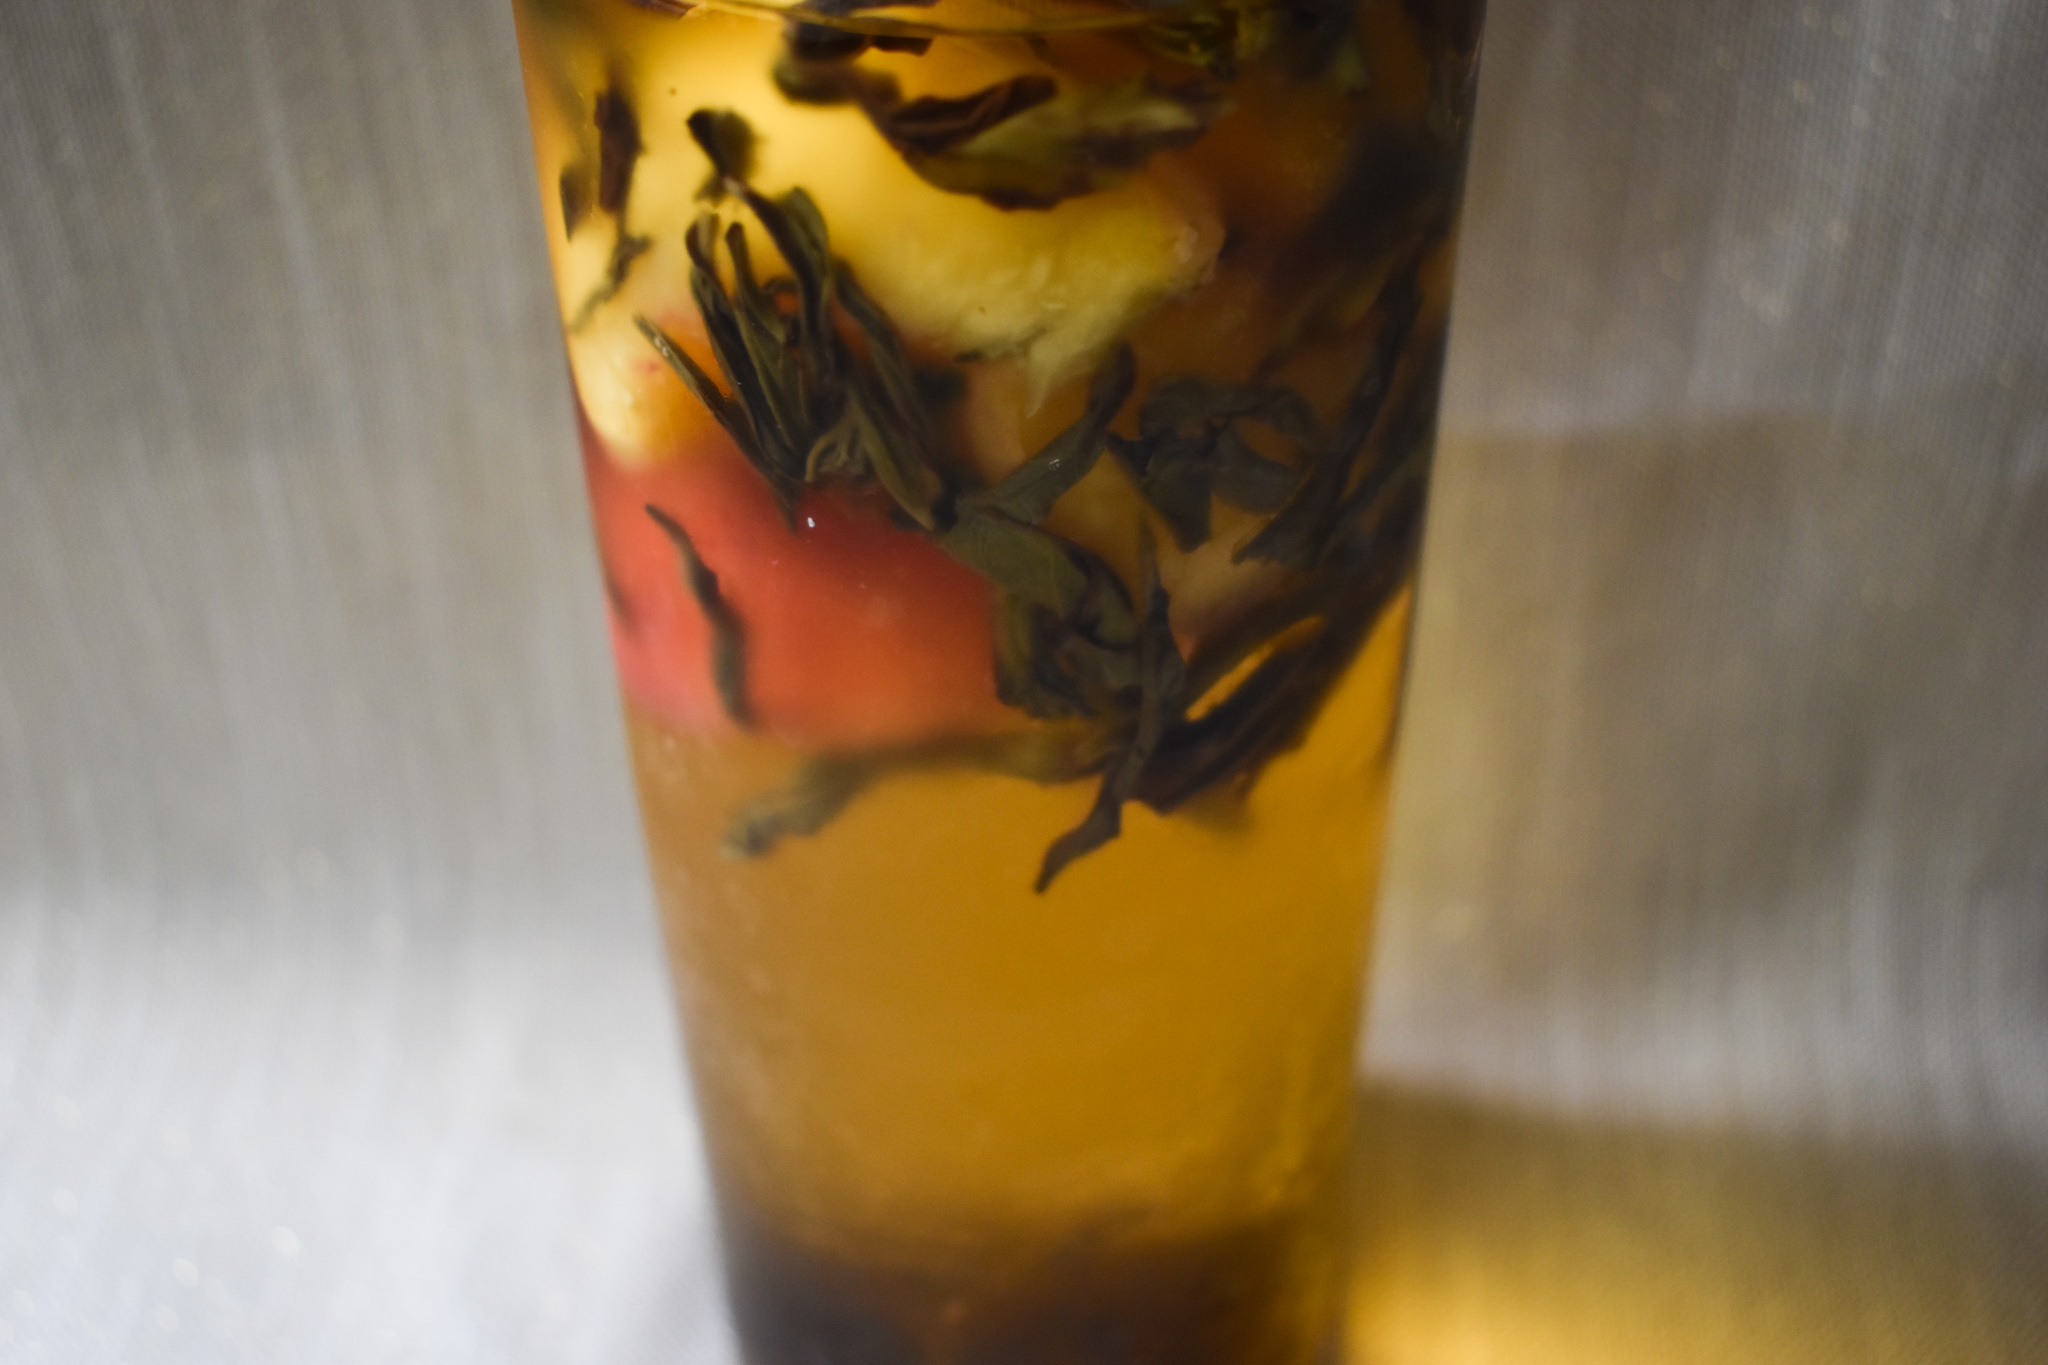
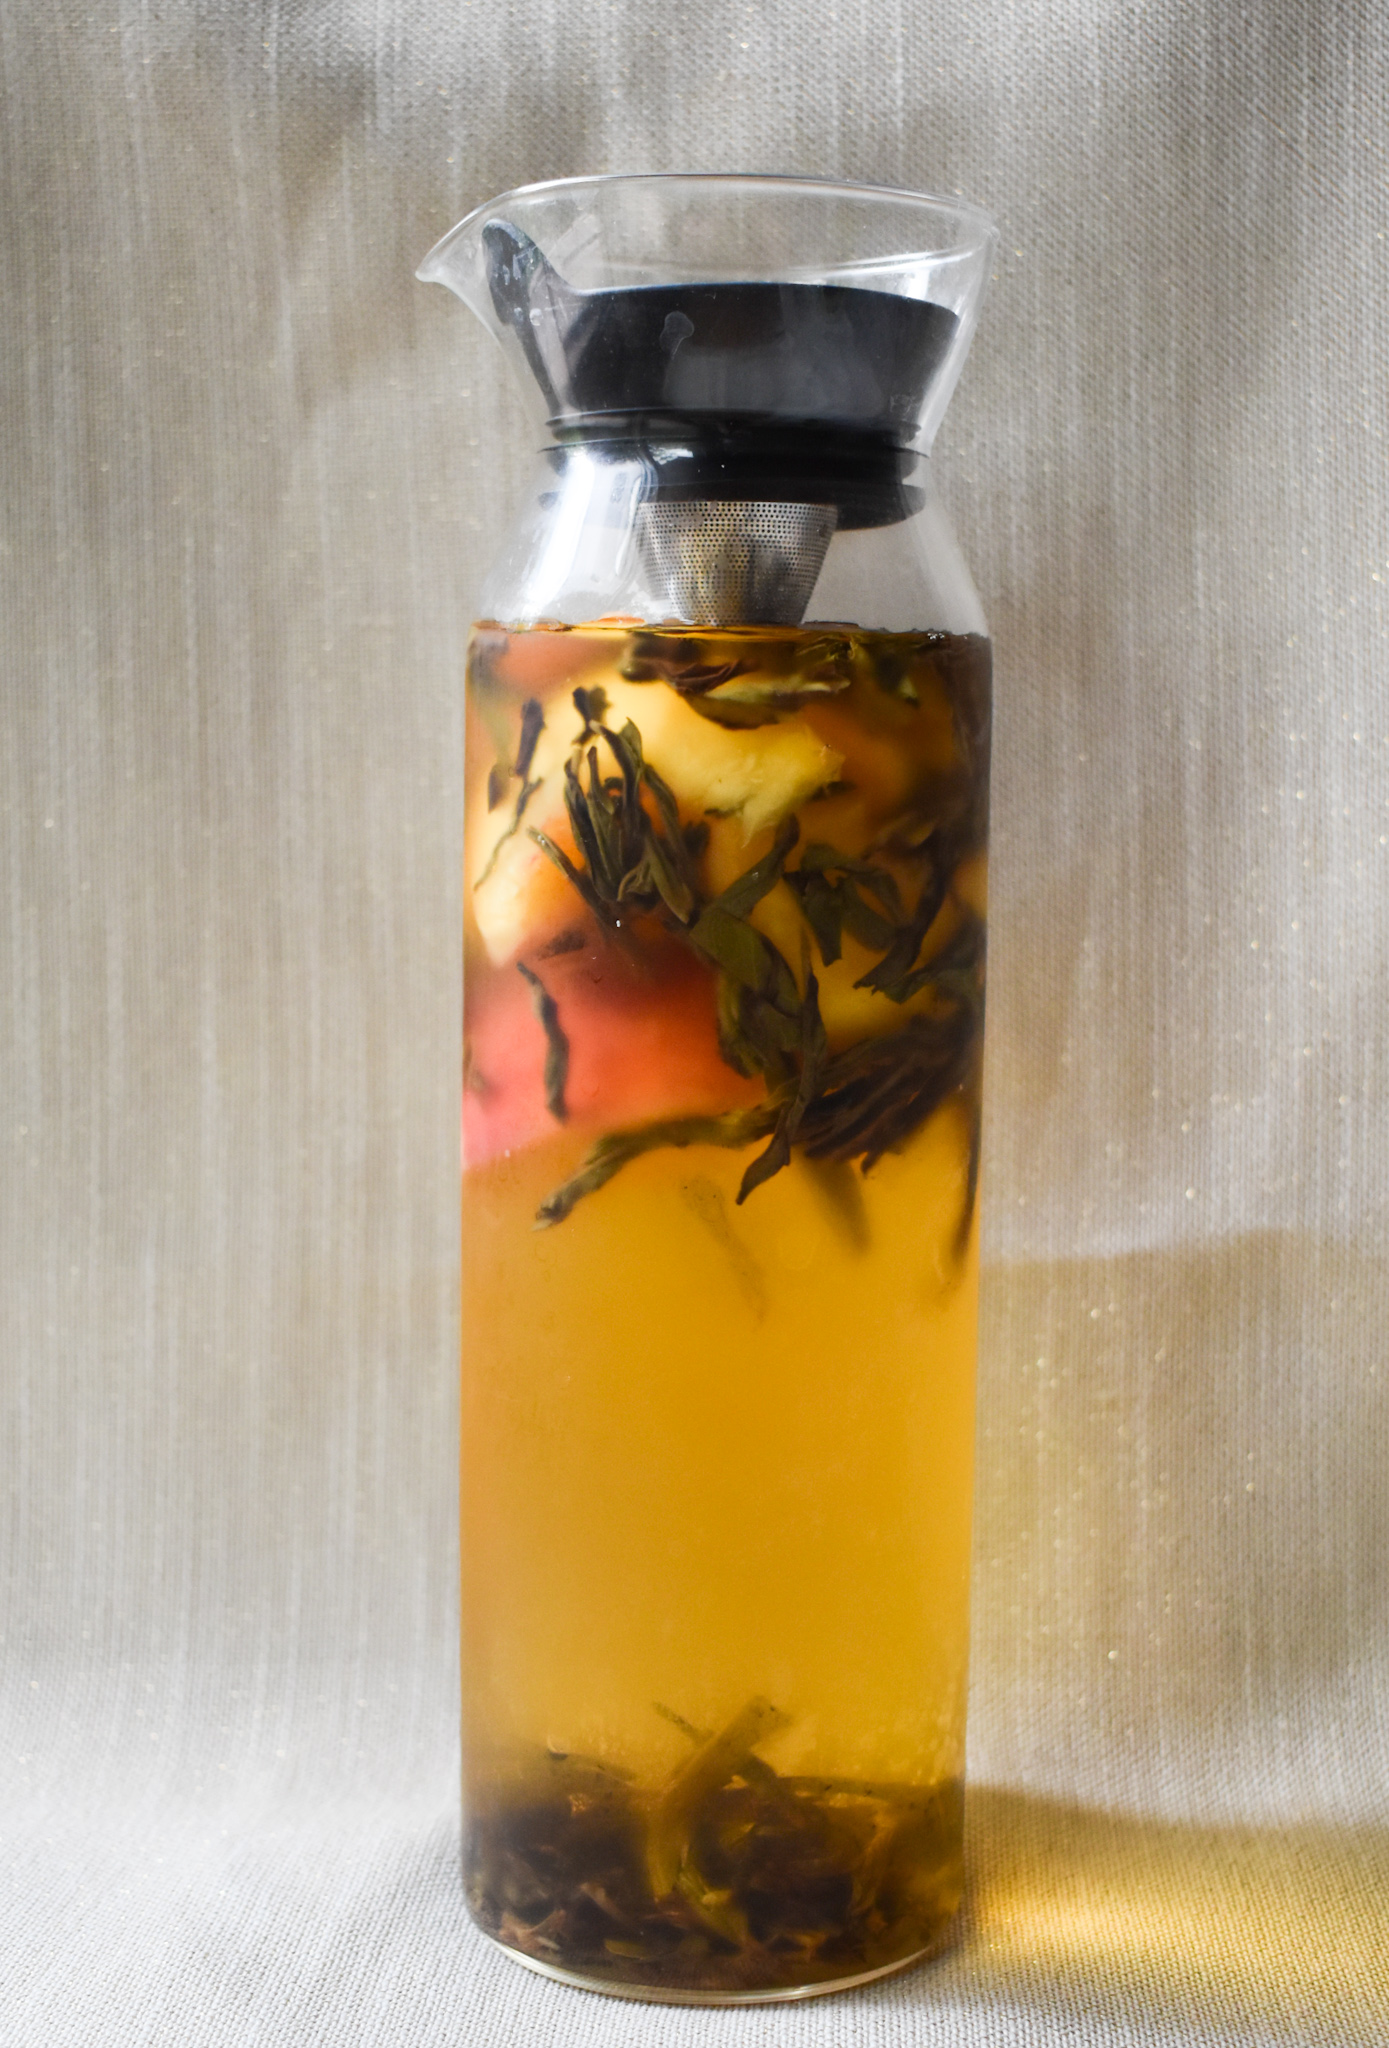
So, I broke two of my rules to make this cocktail but I’m not mad about it. A whiskey like Uncle Nearest is not one that I would create a cocktail with. It’s what I would enjoy neat. I also rarely ever drink blended tea or fruity tea but here I’ve infused the oolong with slices of peach. It turned out a lot better than I thought!

The idea I had for this drink was pretty simple. Oolong and whiskey go really well together because of their complimentary taste profiles. Peach is also a flavor that goes well with both oolong and whiskey. Peach also symbolizes the south in so many ways and because Uncle Nearest hails from Tennessee I thought this was fitting.

Cold brewing these two together gave the oolong a slightly sweeter flavor and softened the peaches even more. You could opt to sweeten this brew if you’d like but I personally decided not to as I don’t like super sweet cocktails.

When drinking this cocktail you get the punch of the whiskey that is then softened by the oolong and peach. On it’s own, it’s not very sweet at all but when you take a bite of the peach slice, it’s the perfect amount of sweet. The slice that is muddled at the bottom also has a whiskey kick!

While the pulp of the peach doesn’t make this the most attractive cocktail, I would argue that these three are an incredible mix. I can’t wait to get my hands on some more uncle nearest and make this again!

I think the flavor of uncle nearest goes well with the other flavors but you could use a whiskey of your choice. In terms of oolong, I would go with an unflavored, large leaf oolong for sure and a dancong oolong if you can as that is the type I used.

The container I used to cold brew the tea in took about 5 cups of water and that allowed me to create two glasses! You could split this up more into small glasses and have a more potent drink.
