
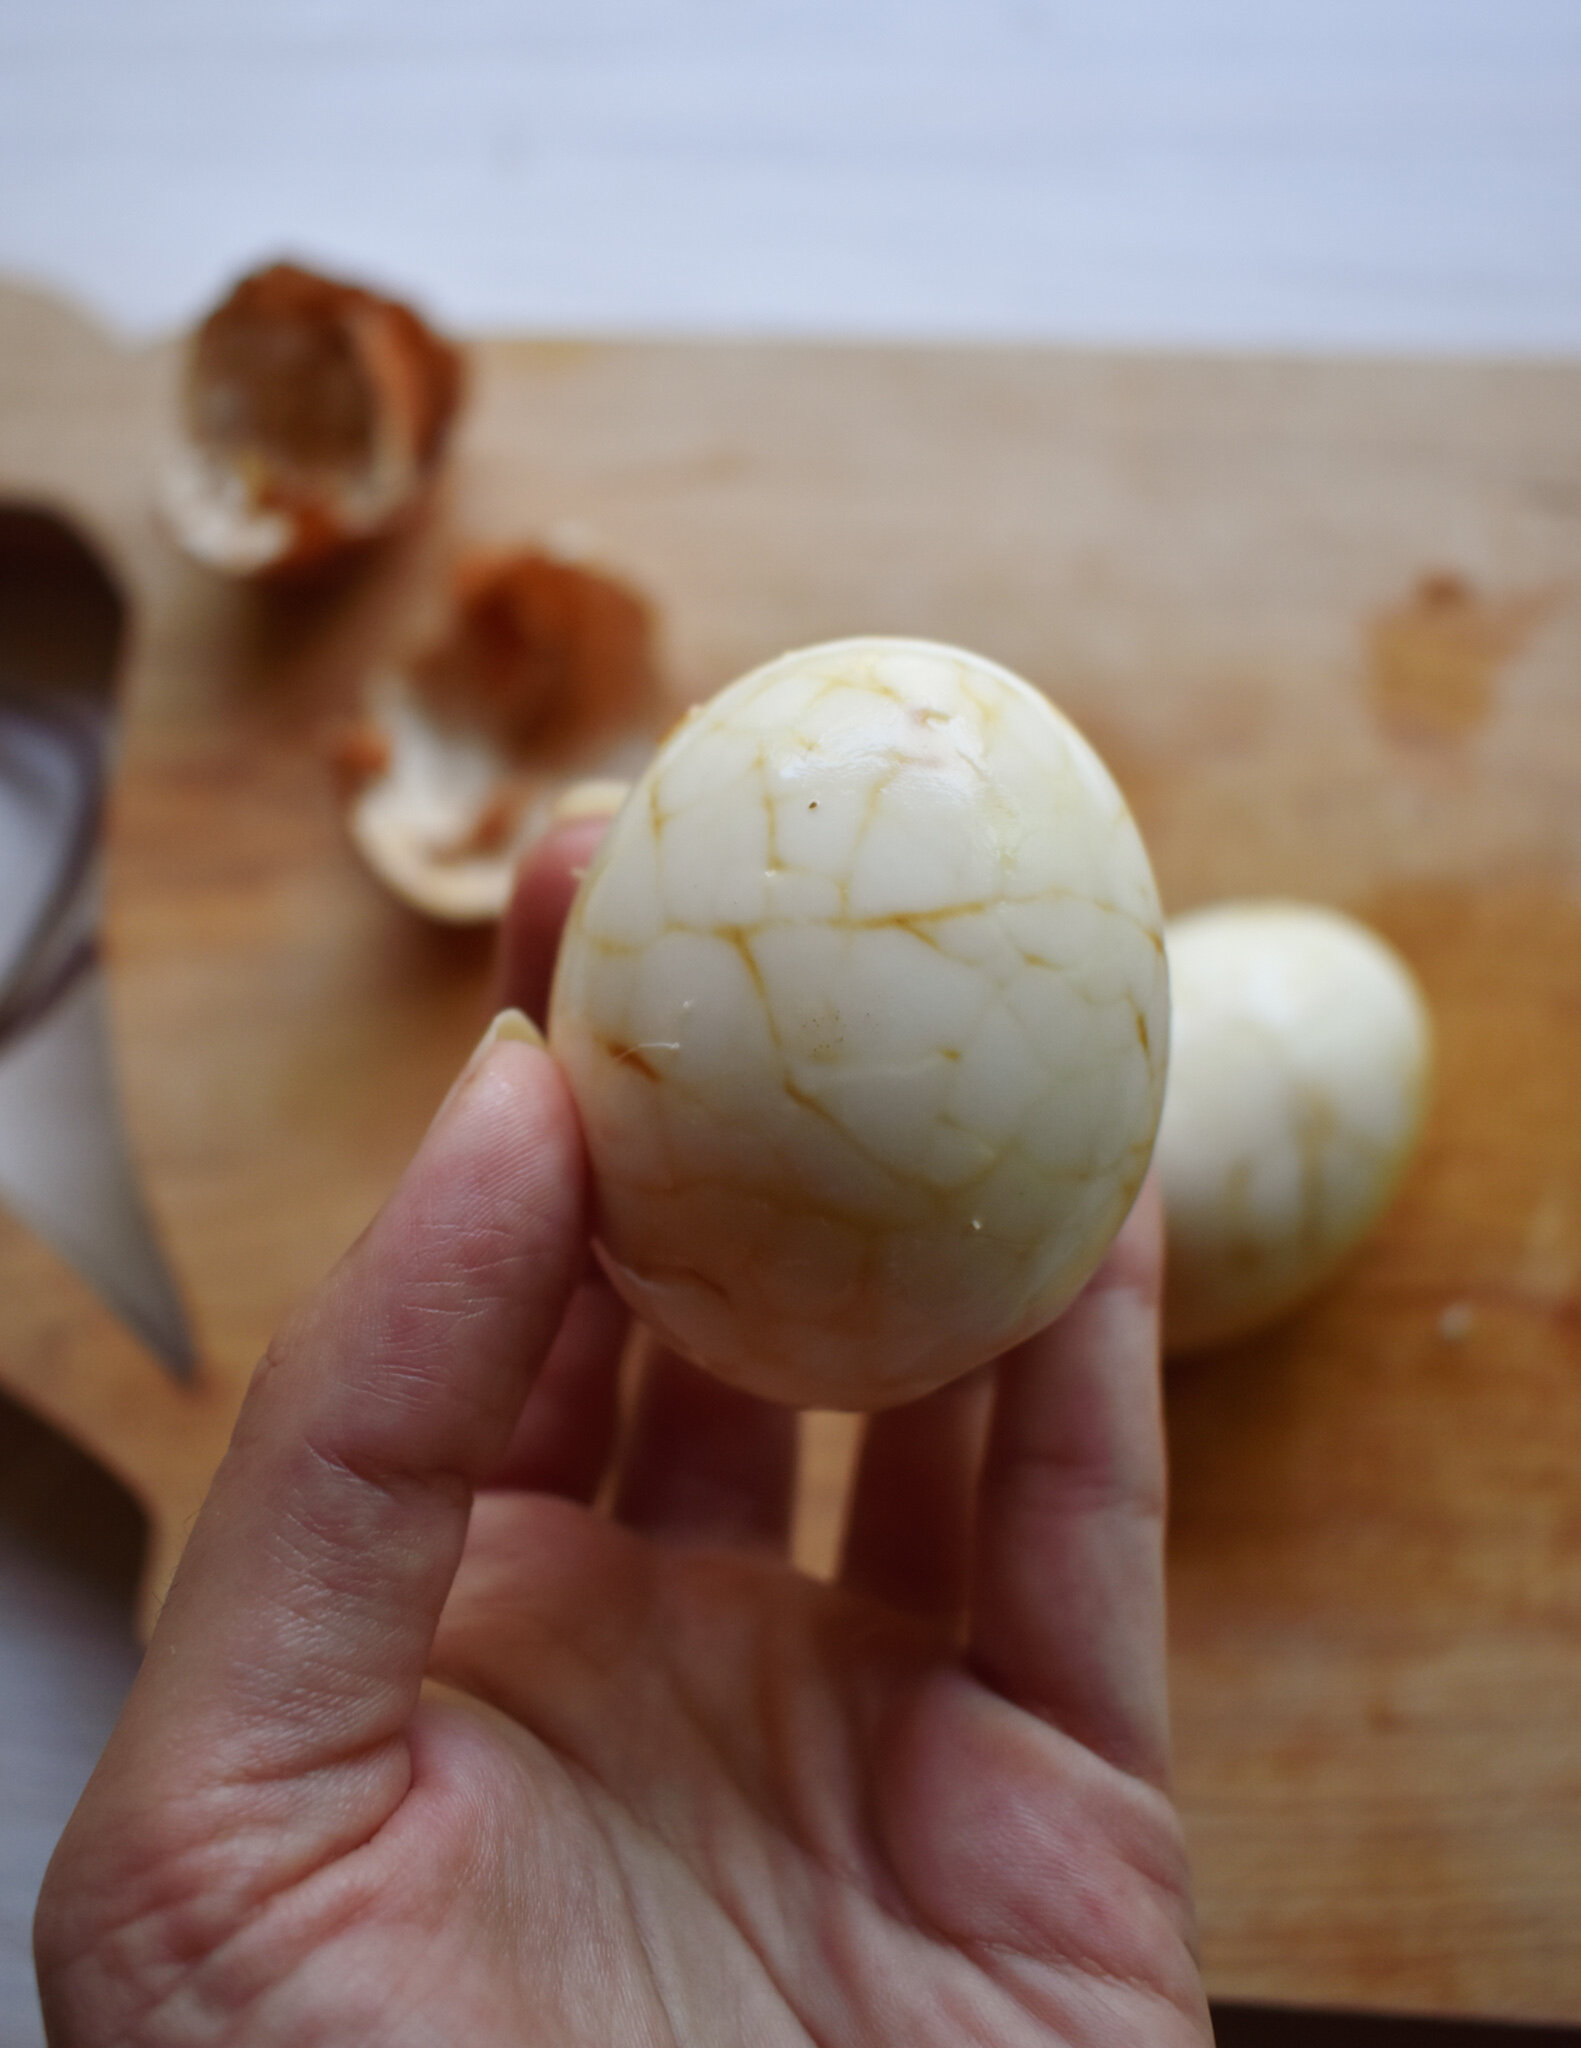
First Try at Tea Eggs!
Pre-COVID I frequented a Chinese tea house in DC pretty often called Ching Ching Cha. I’ve written about it before, you can check it out here!
One of the visits I tried their tea eggs and wow, they were good! They have this potent aroma and flavor that really elevated the eggs. Ever since then I wanted to try it but was afraid I would ruin a bunch of eggs.
Fast forward to last week and I found a recipe that was relatively simple and while I didn’t get ALL the ingredients, I got most of them and made a few tweaks.
Here is the original recipe!
One big change is that I made only 4 eggs instead of the 12 in the recipe. The recipe mentions 12 eggs but because you are essentially boiling the eggs then placing them in the broth, I think the number of eggs can vary without causing any problems.
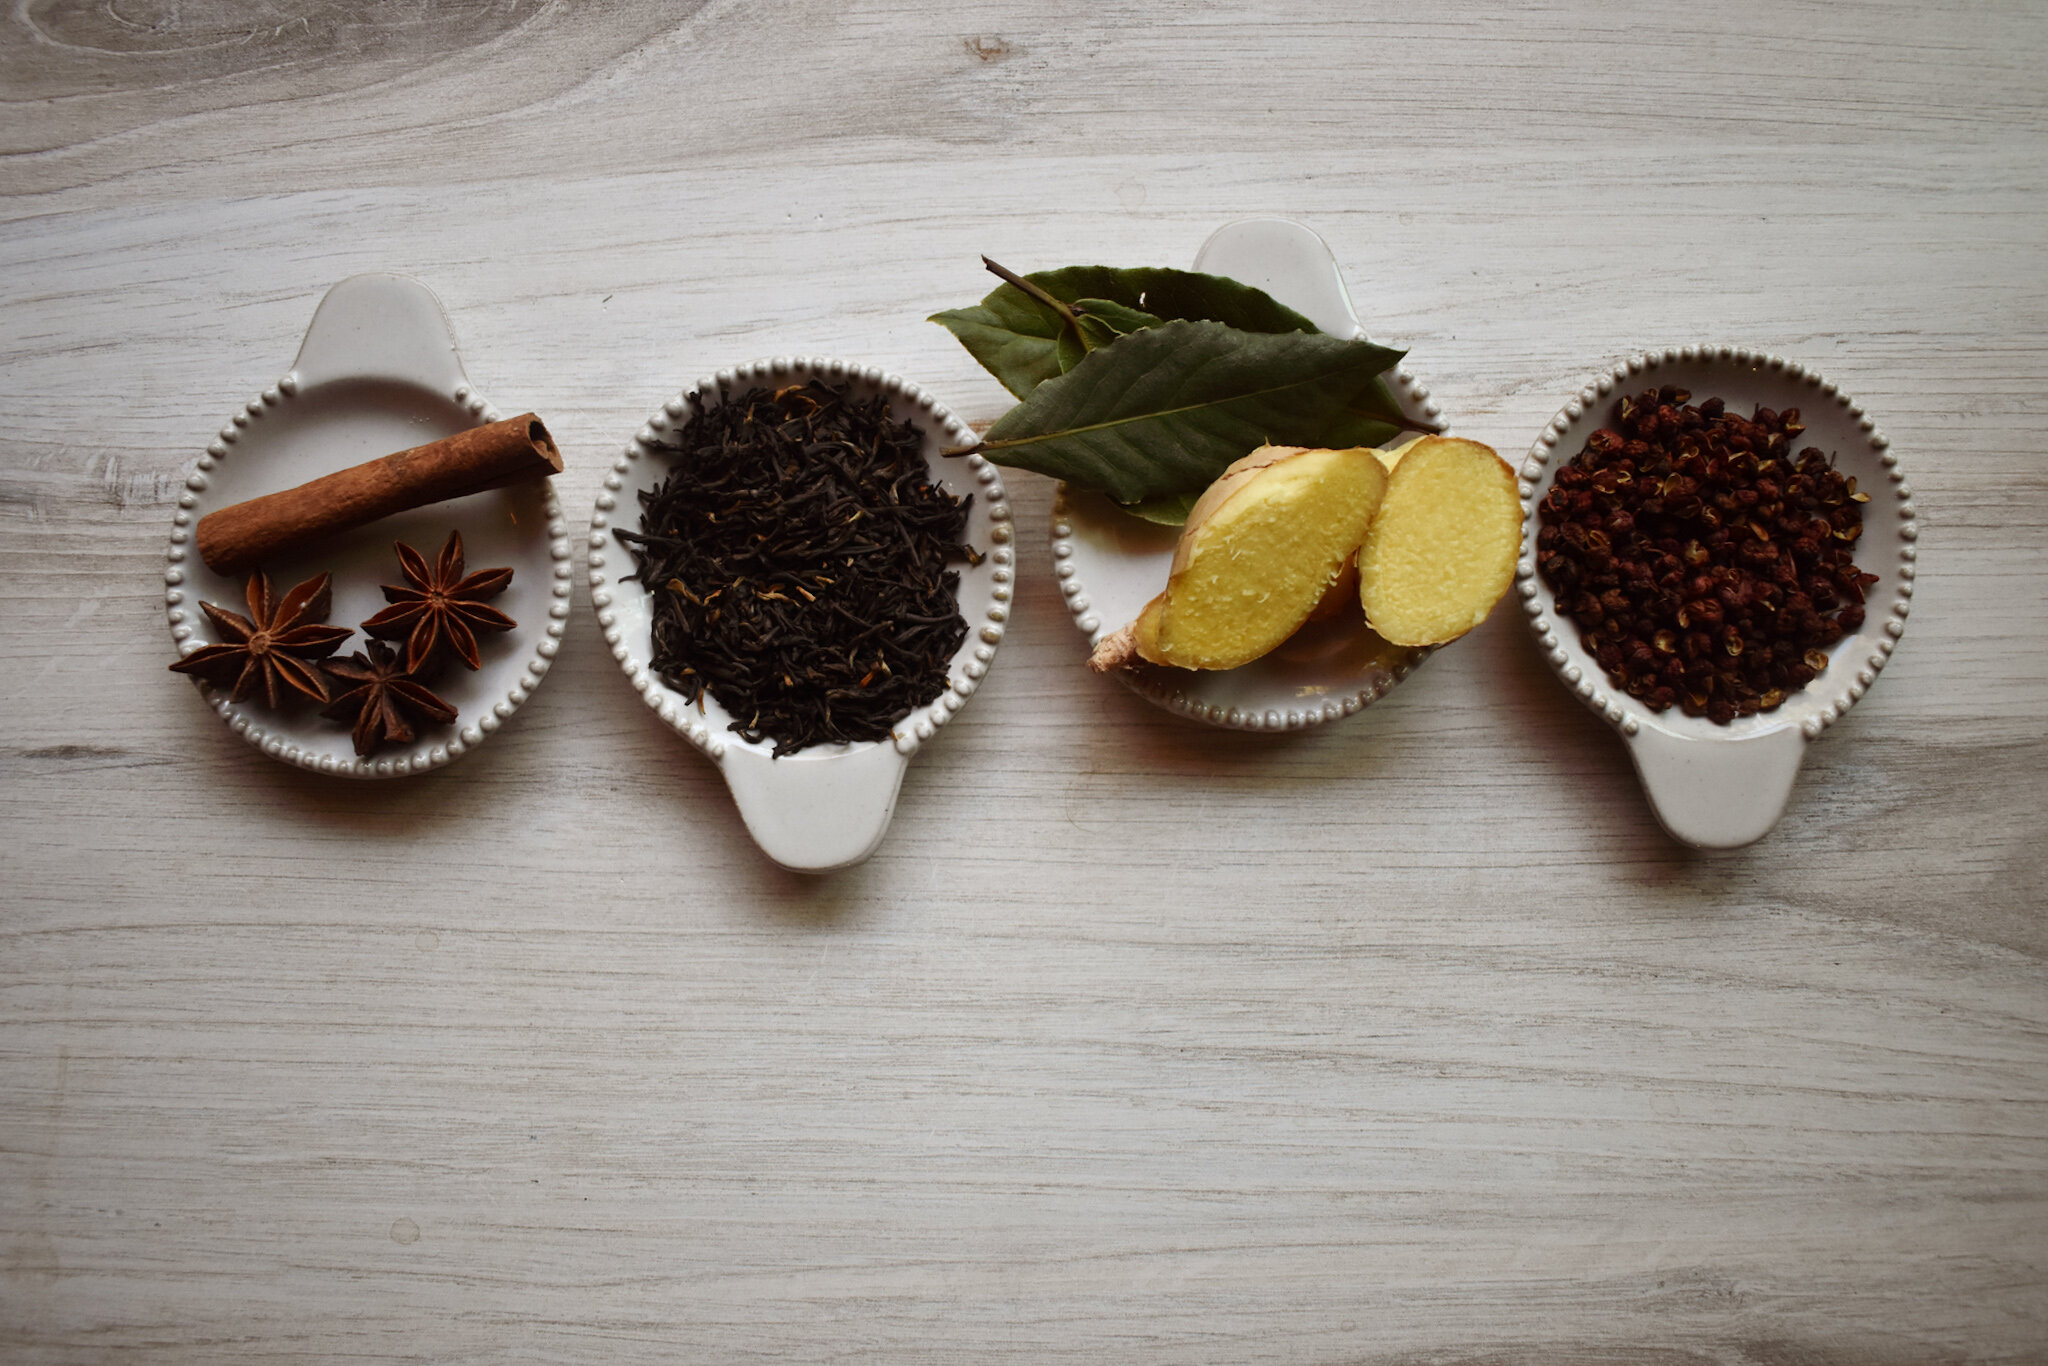
For my broth, here are the changes I made to the recipe based on availability of what I had.
4 eggs soft boiled
3 star anise
1 cinnamon stick
4 slices ginger
2 teaspoons sichuan peppercorns
2 tbsp Ritual from Aera Tea
3 Bay Leaves
4 tbsp soy sauce
2 tsp salt
A dash of mirin
A dash of rice vinegar

The method for this is very simple:
Bring the eggs to room temperature and boil them to your preference of hardness. Put them aside.
In a medium sized pot, take all your ingredients (minus the eggs) and bring that to a boil. Let it boil for a little bit. The original recipe called for 10 minutes but I left it a little longer until it was very fragrant. Turn it off and let it cool completely.
Crack the eggs all over to allow the broth to seep in. Place the eggs into the completely cooled broth.
Make sure the eggs are totally covered by the broth.
Let them sit in the broth in the fridge for 24 hours at least. You can leave them for longer! I took 2 out after 24 hours and left the other 2 for another day.
While my eggs didn’t come out as marbled as I would have liked, these were delicious!!!!! They are so fragrant and the flavors of the tea and spices seeped into the eggs well! I think these are a really simple and fun treat! If you have a lot of tea, this is a great experiment. I definitely want to try using other teas as well!

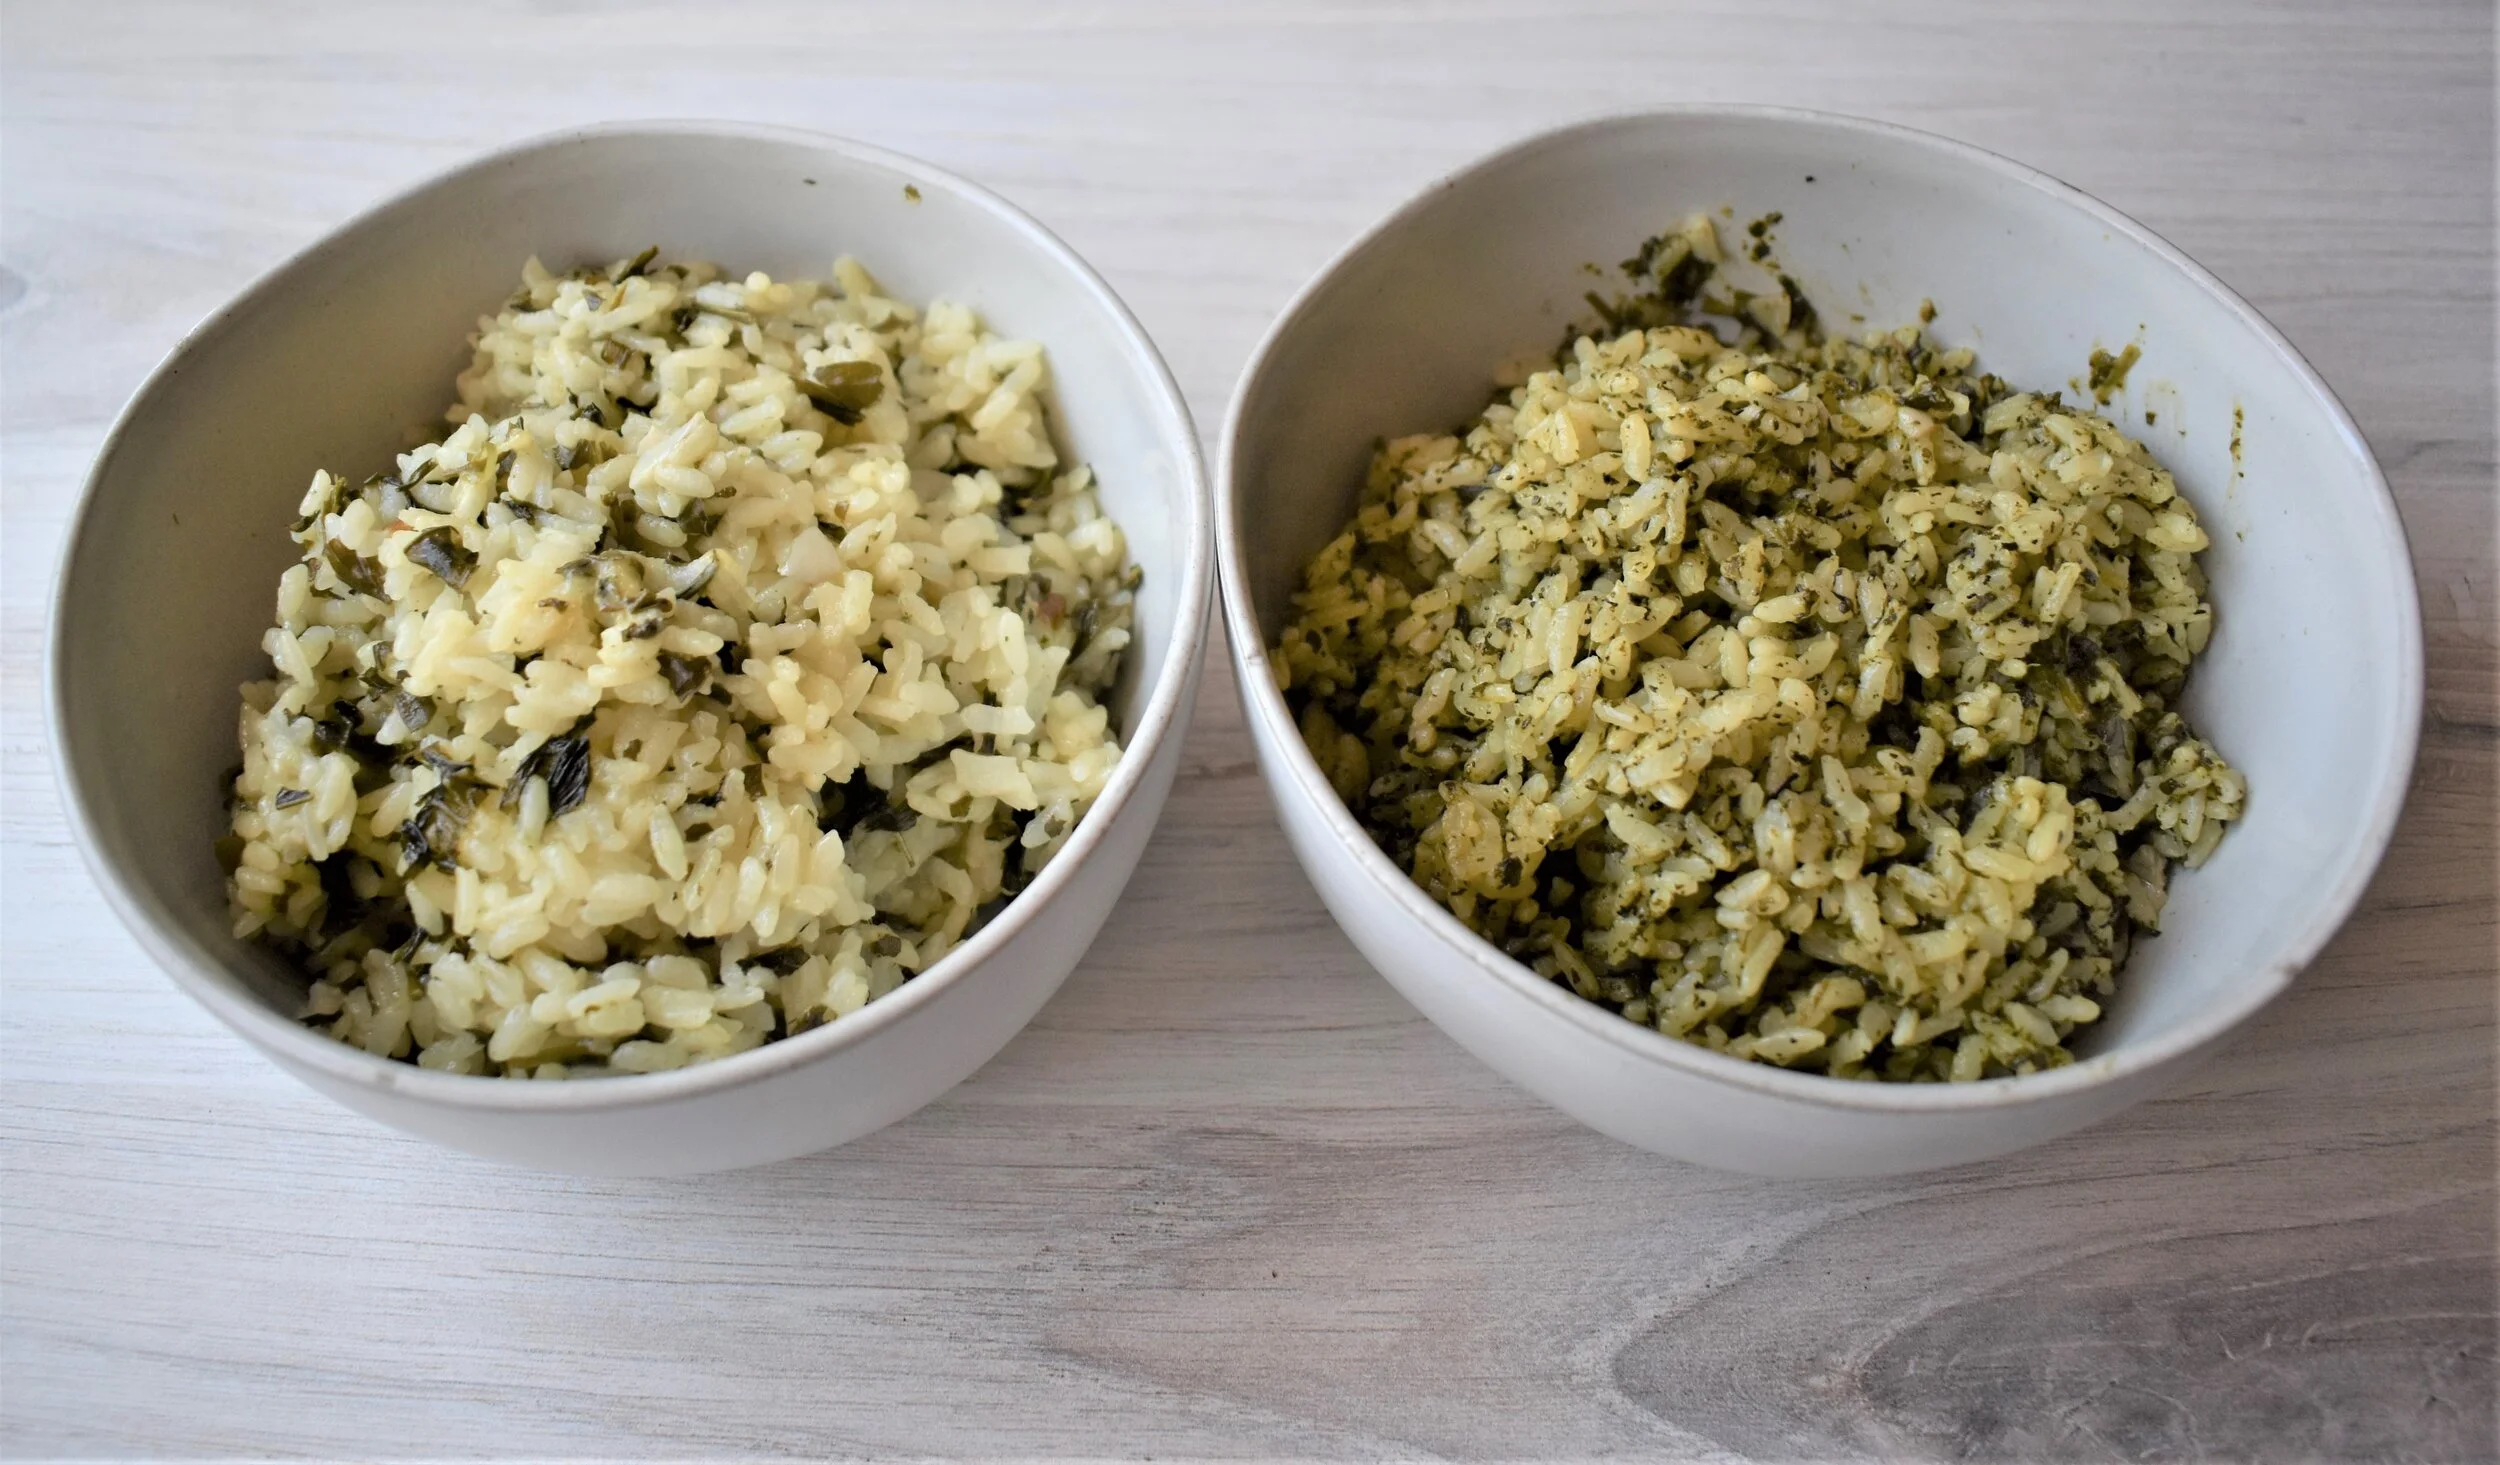
Genmaicha Rice Vs. Sencha Rice
If you aren’t following Tea Curious on instagram, you need to! She encourages experimenting with your tea instead of just accepting what people say about tea. She often tests ways of brewing, tasting etc! She recently had a challenge to drink down your green tea collection and guess what, I really needed to participate.
I started out with having some of my old, but surprisingly still good matcha every morning until that was finished and then I turned to my cabinet where I have a few green teas. I’ll be honest, while I don’t dislike green teas they aren’t what I reach for first so they often fall by the wayside. I actually really enjoy cold brewing green tea and drinking it out of a fancy glass with my dinner :)
Since today was the last day, I decided to help drink down my stash by experimenting with cooking! I was set on cooking rice in tea because I love doing that :) I’ve done it a few times and you can find those recipes here:
In this post, I will talk more about the teas as opposed to the cooking method, so if you’re interested in that make sure to check out the linked posts.
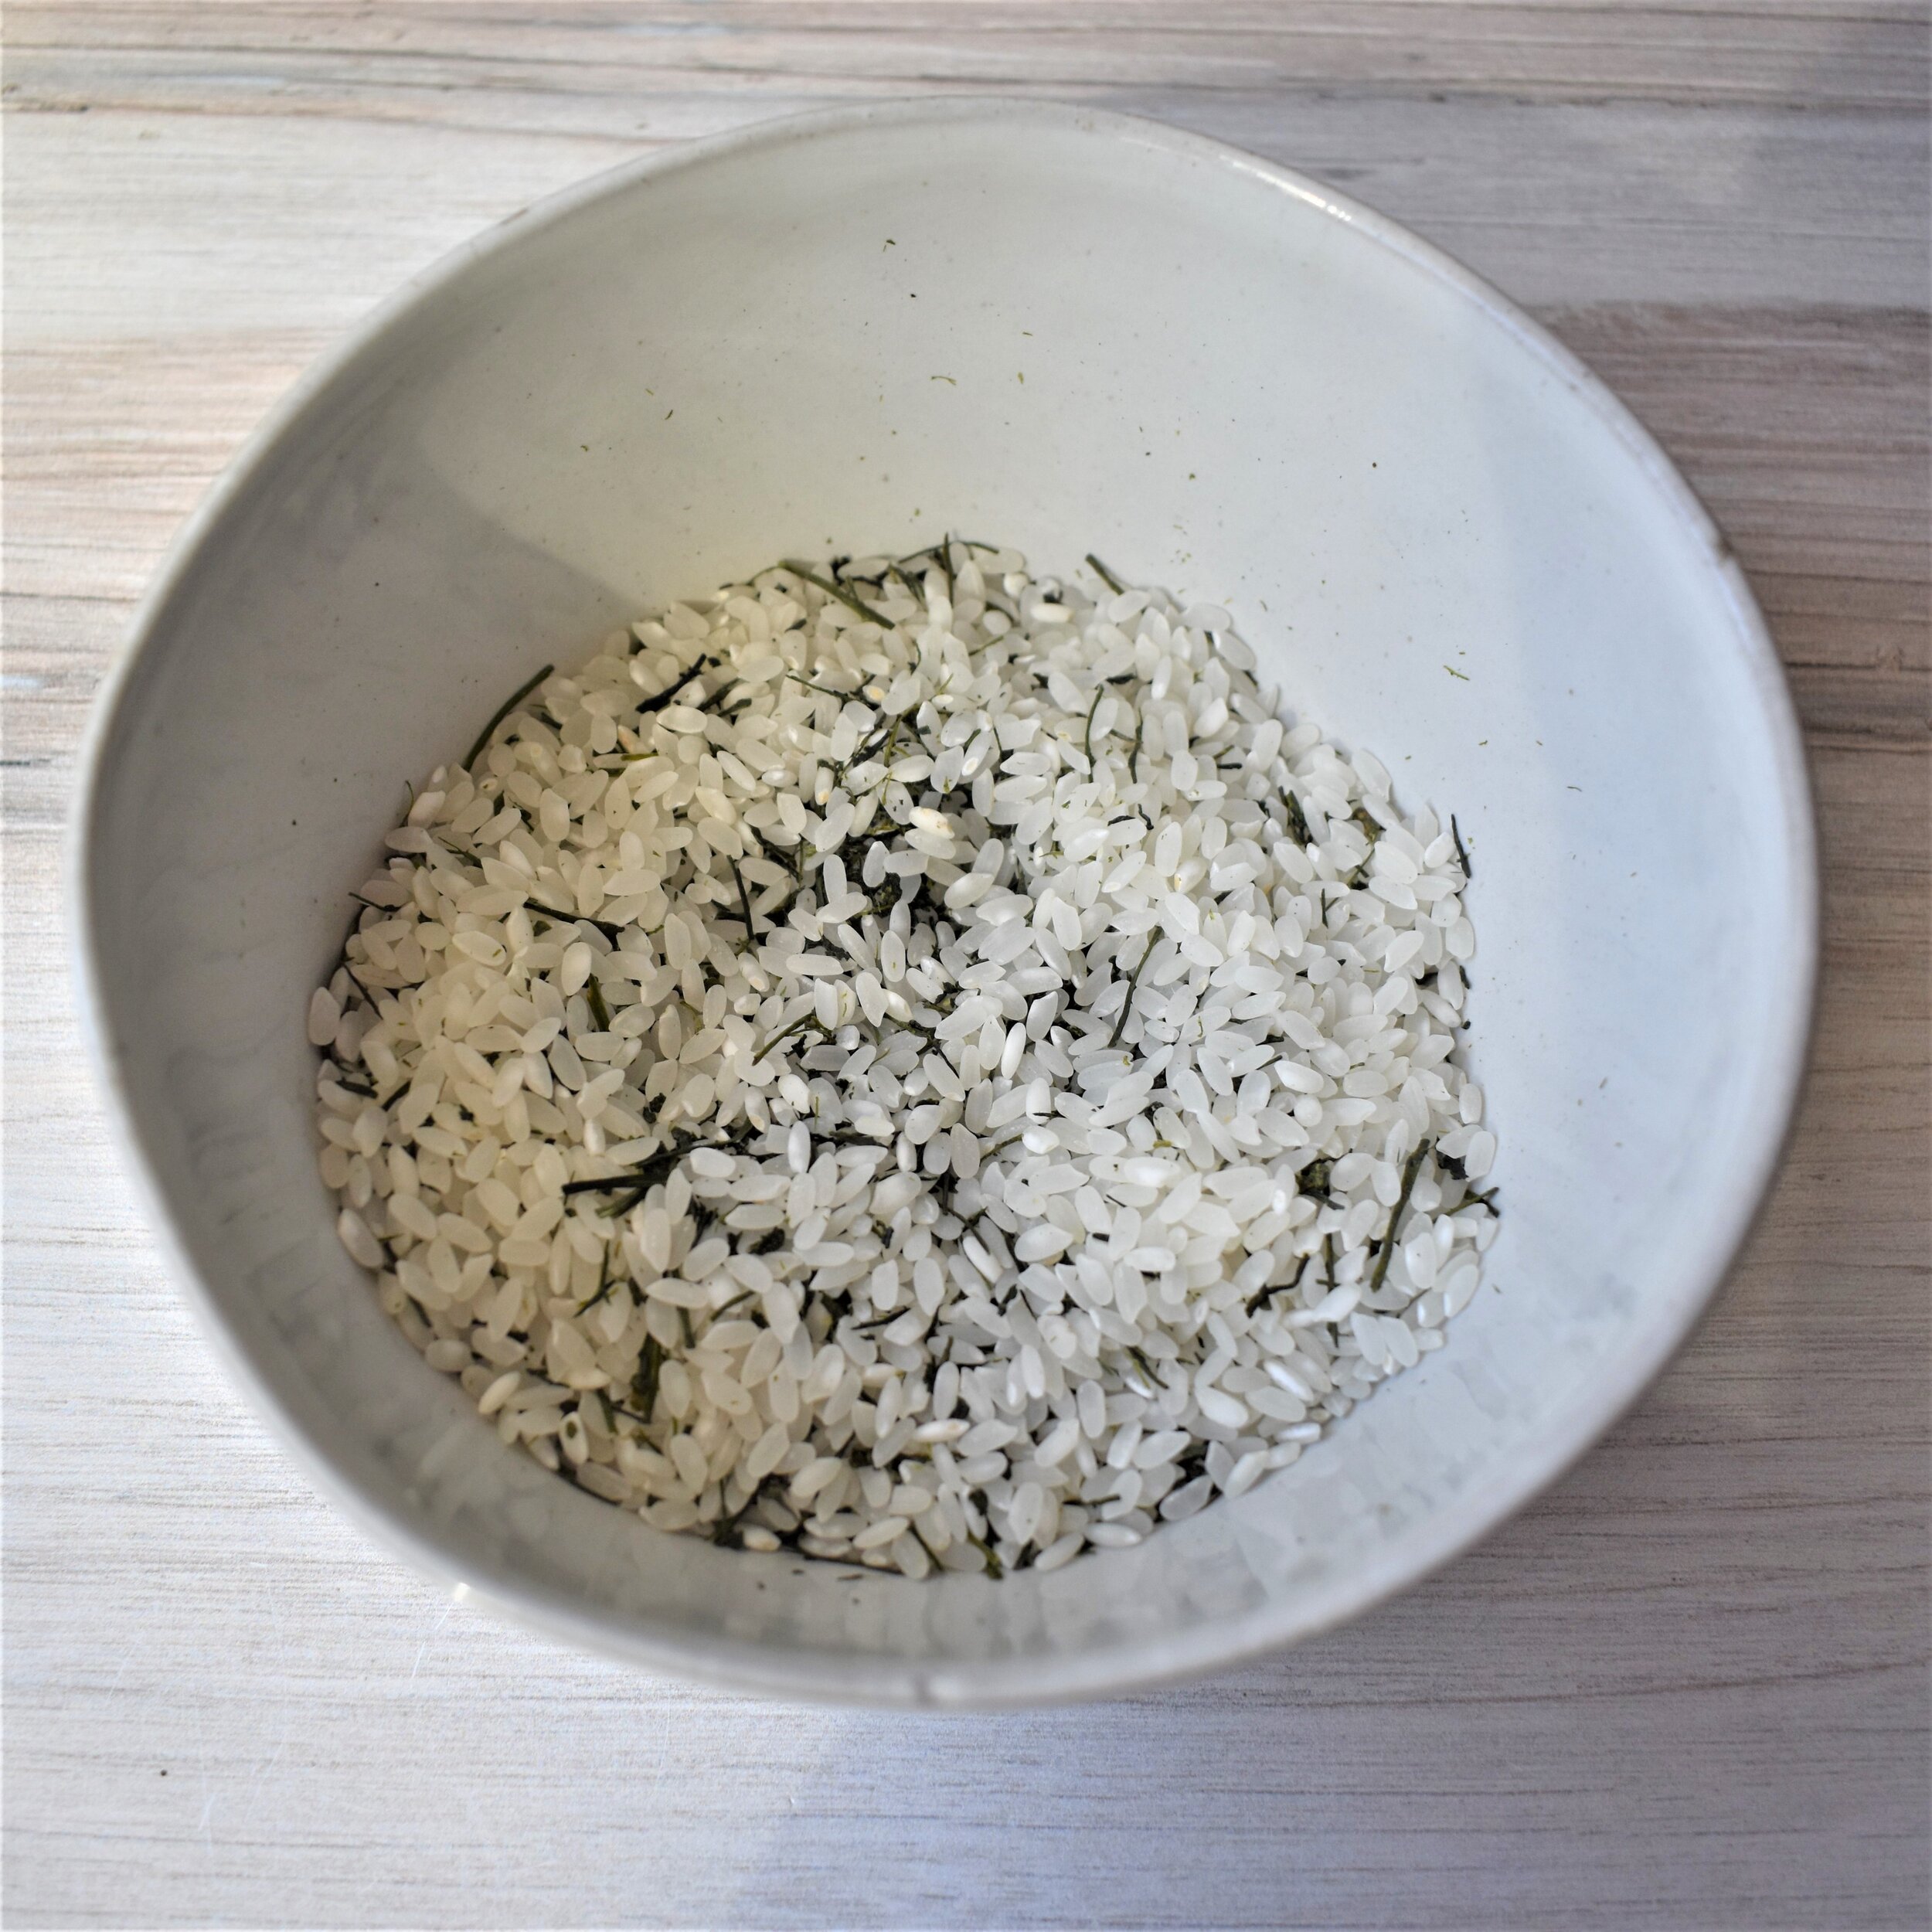
Let’s meet the teas: Genmaicha and Sencha.
Both of these teas are actually fairly fresh. The genmaicha is from ippodo tea that I was given to photograph for one of my birthday giveaways! The sencha is a gift that my cousin brought me from his recent trip to Japan. I’m almost 100% certain it is sencha after asking some friends who know Japanese and also comparing it to my other green teas.
Now, I broke several rules of here for the sake of the experiment. I’ve cooked with tea many times and there is a balance between bitterness and all the flavor cooking off. I decided to cold brew the tea with 3 tablespoons of tea to make sure I got a potent brew since I would be using the brew as the water for the rice. I know this sounds like a lot but I need it to be potent so that it isn’t all cooked off which can happen.


So, at first glance the Sencha (on the right) is way darker in color and looks like it will give more of that flavor into the rice. This is the first interesting part of the experiment because this also speaks to when brewing this tea. Both of these brews had the same amount of tea and water and cold crewed for about 10 hours. I didn’t open the leaves up with warm water first, I just filled with vessels with cold water. I cooked each 1/2 cup of rice with one cup of the brewed tea.
At this point, I also kind of knew which rice I would like better. But, let’s continue!
When I cooked the rice, I also put a little less than a tablespoon of the leaves into the dry rice. It may seem like overkill, but I wanted to see which tea would hold up best to the environment.
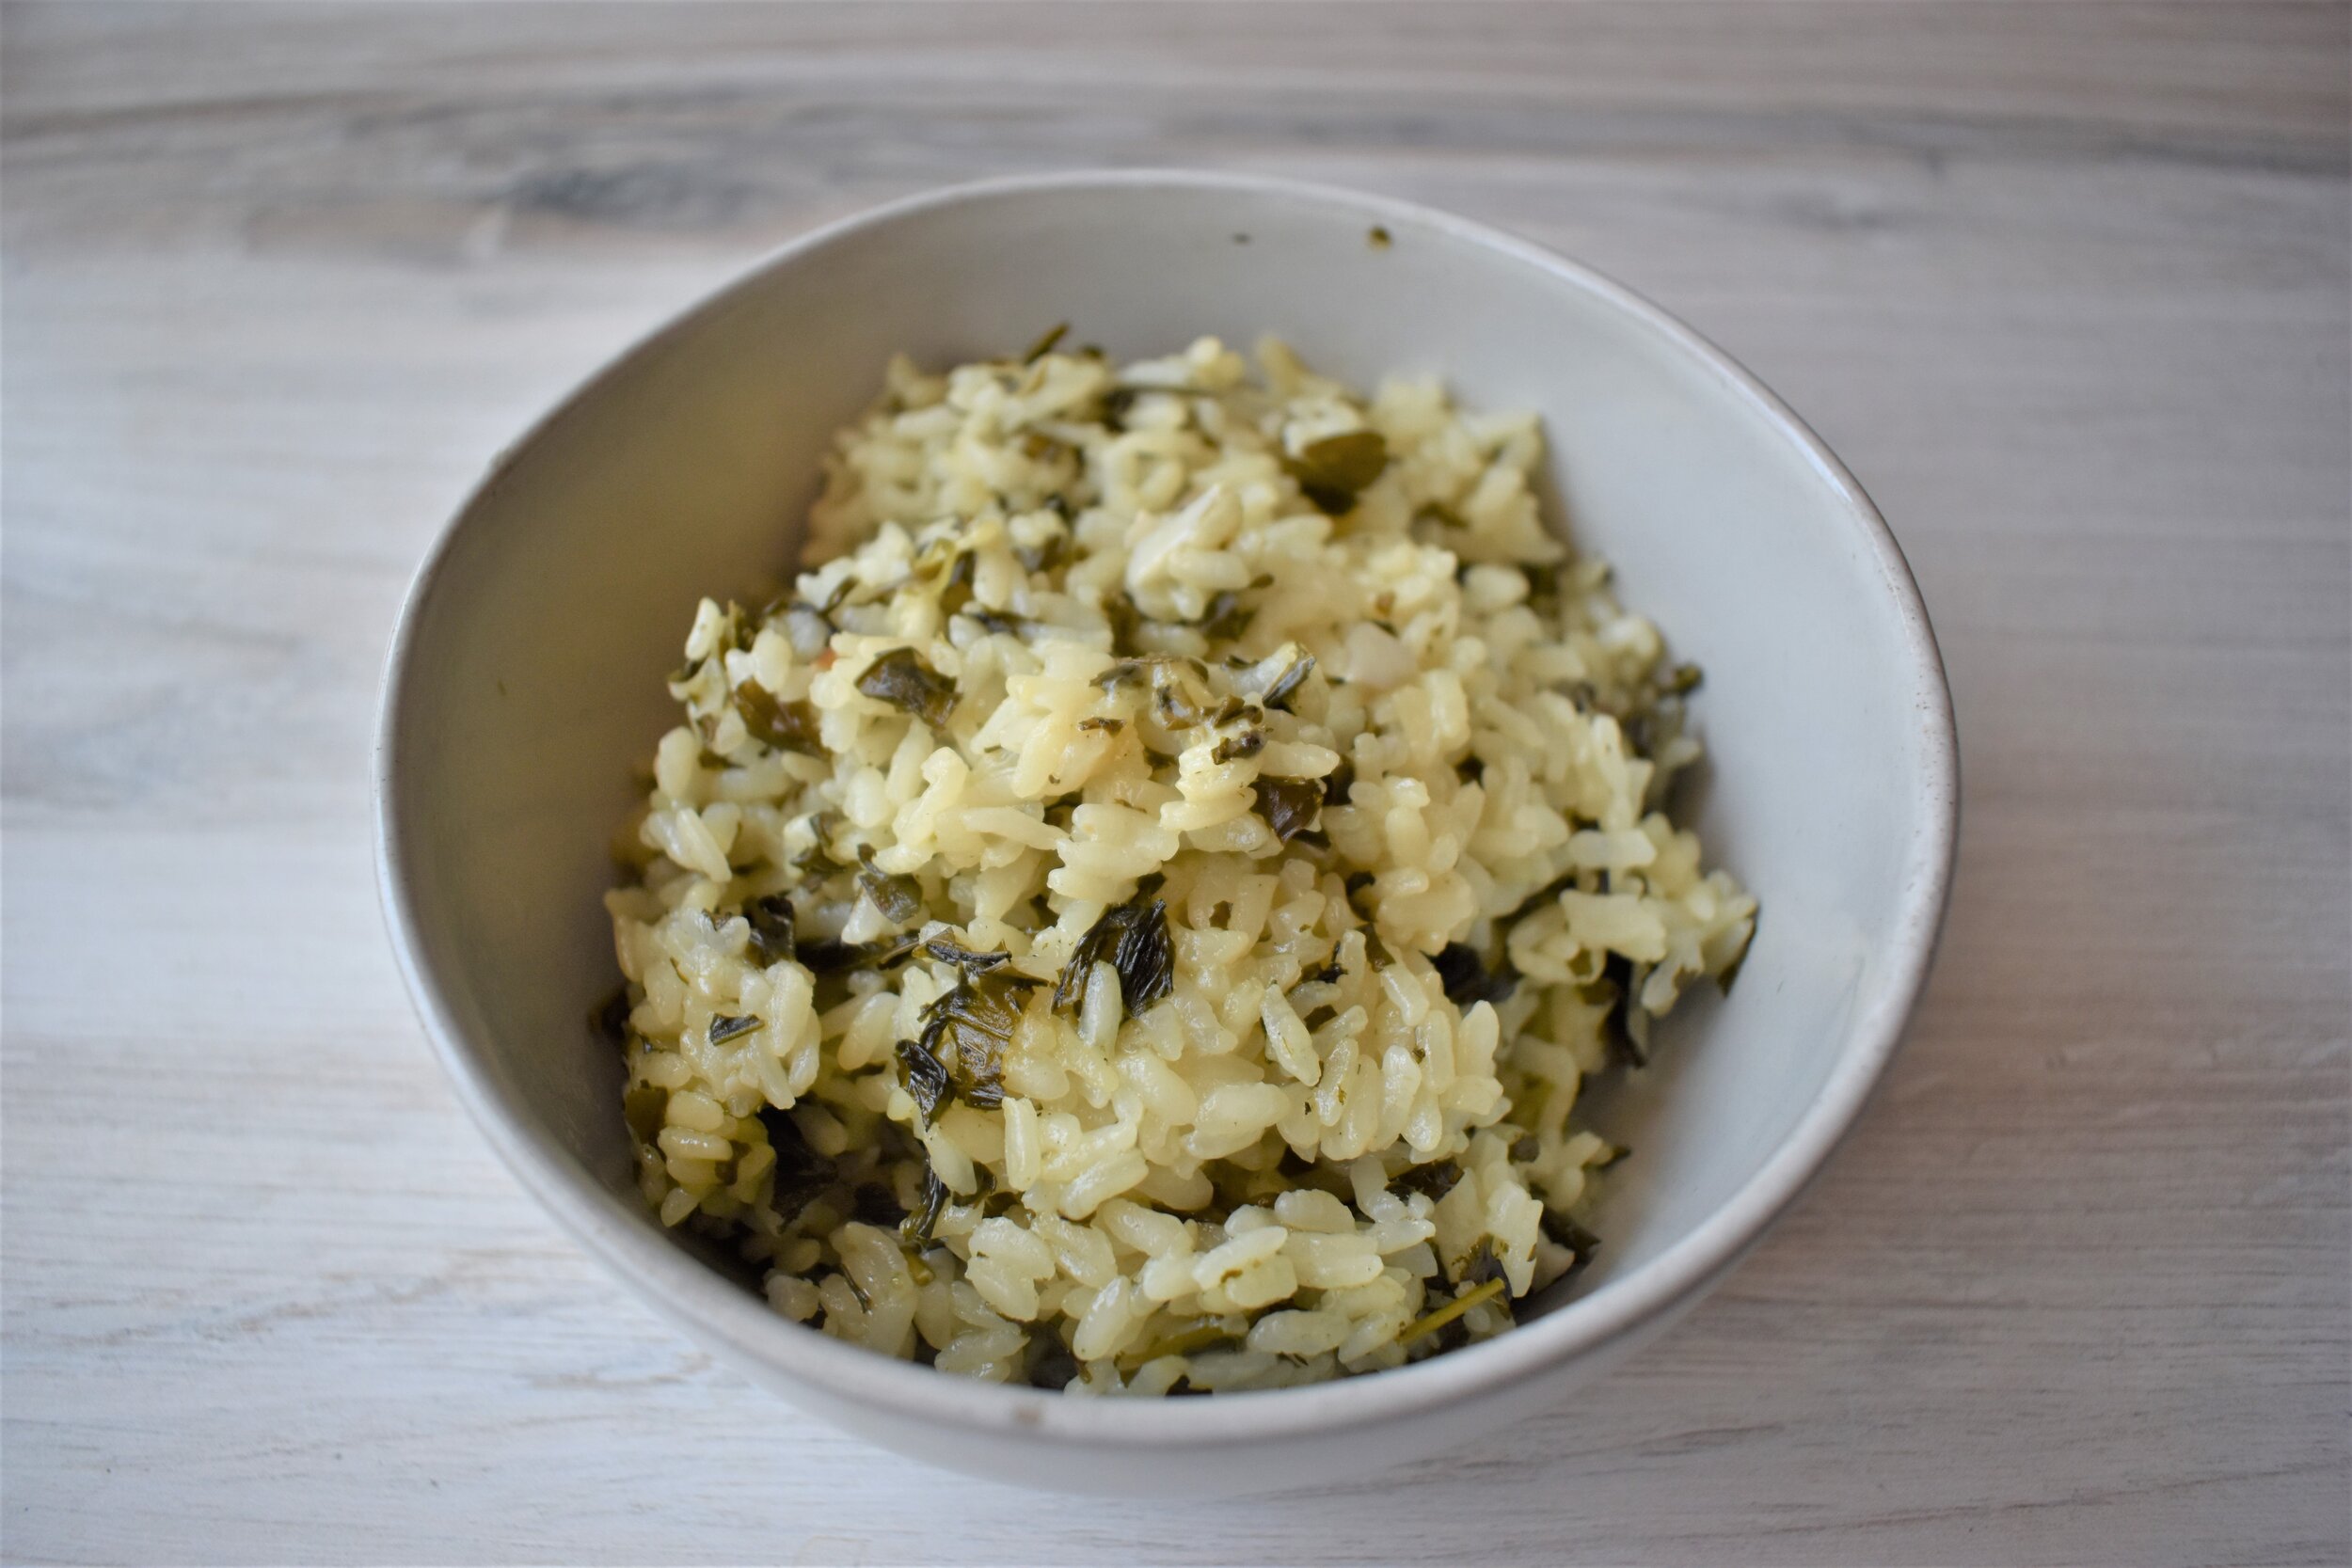
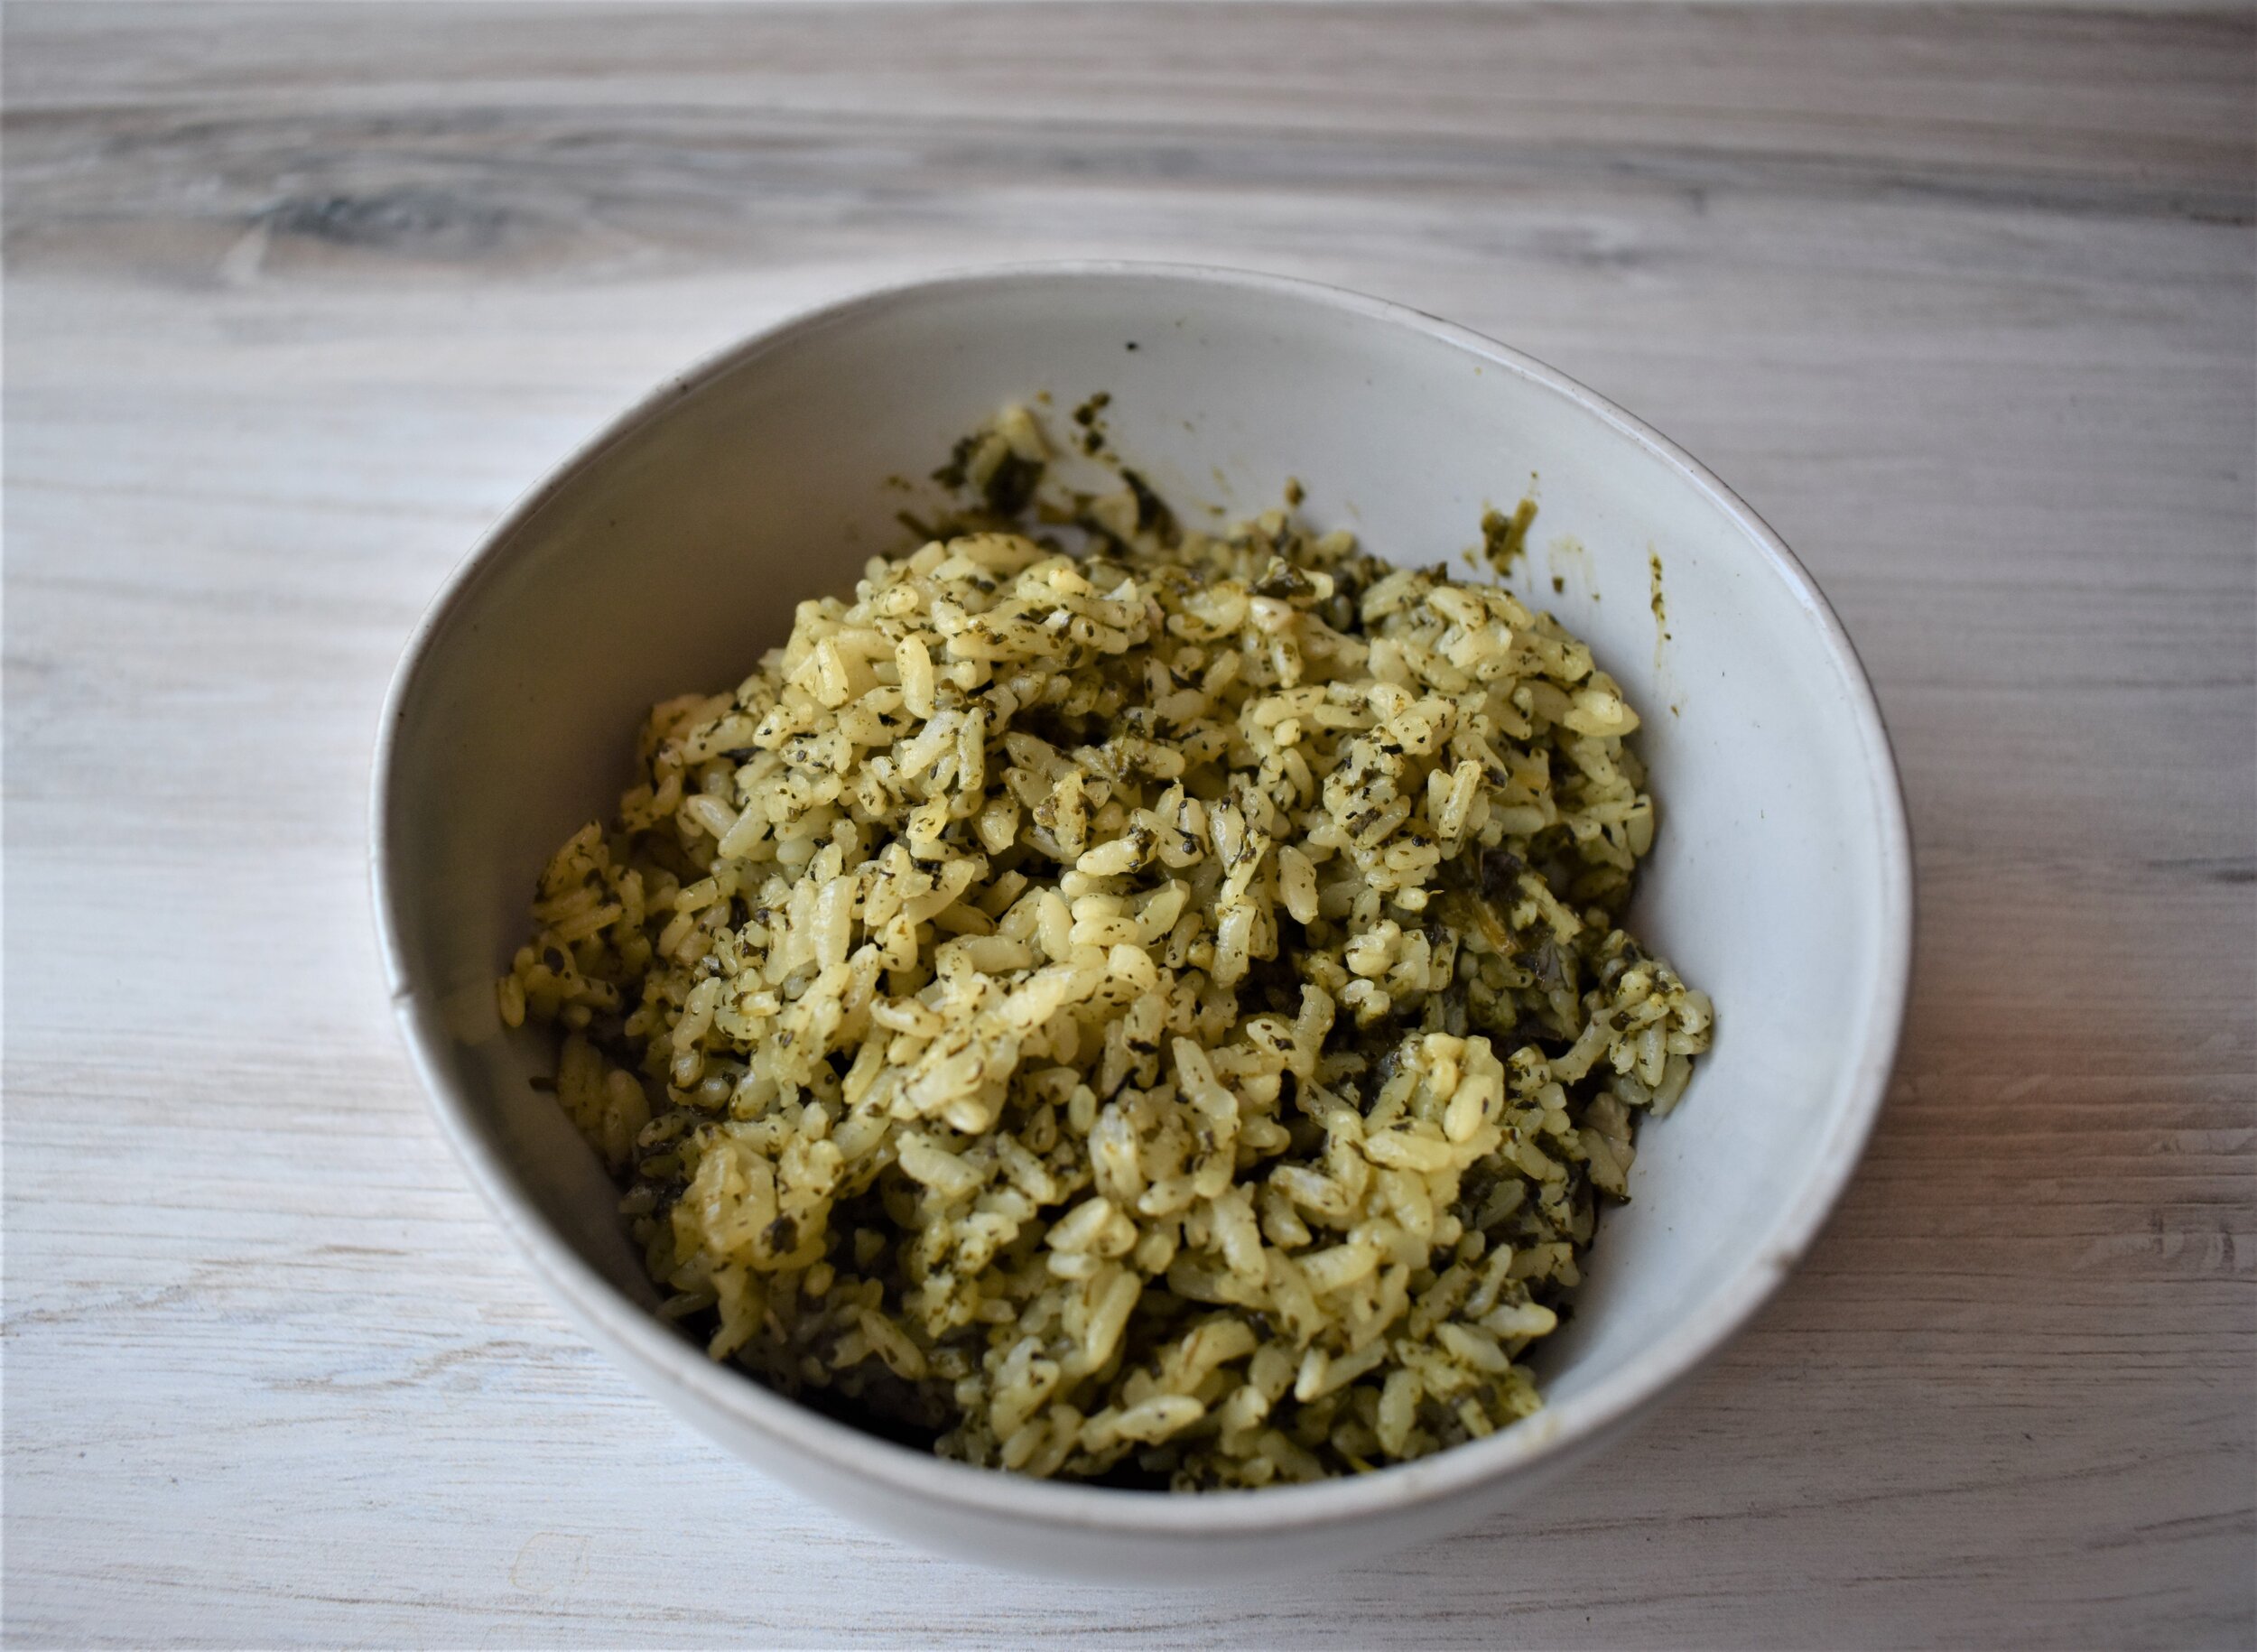
After cooking, there was a large difference in how green the two rices turned out. You may be able to guess based on the darkness of the brews above.
Since I used tea in the rice as well, the sencha was a little bit more potent in terms of turning the rice color.
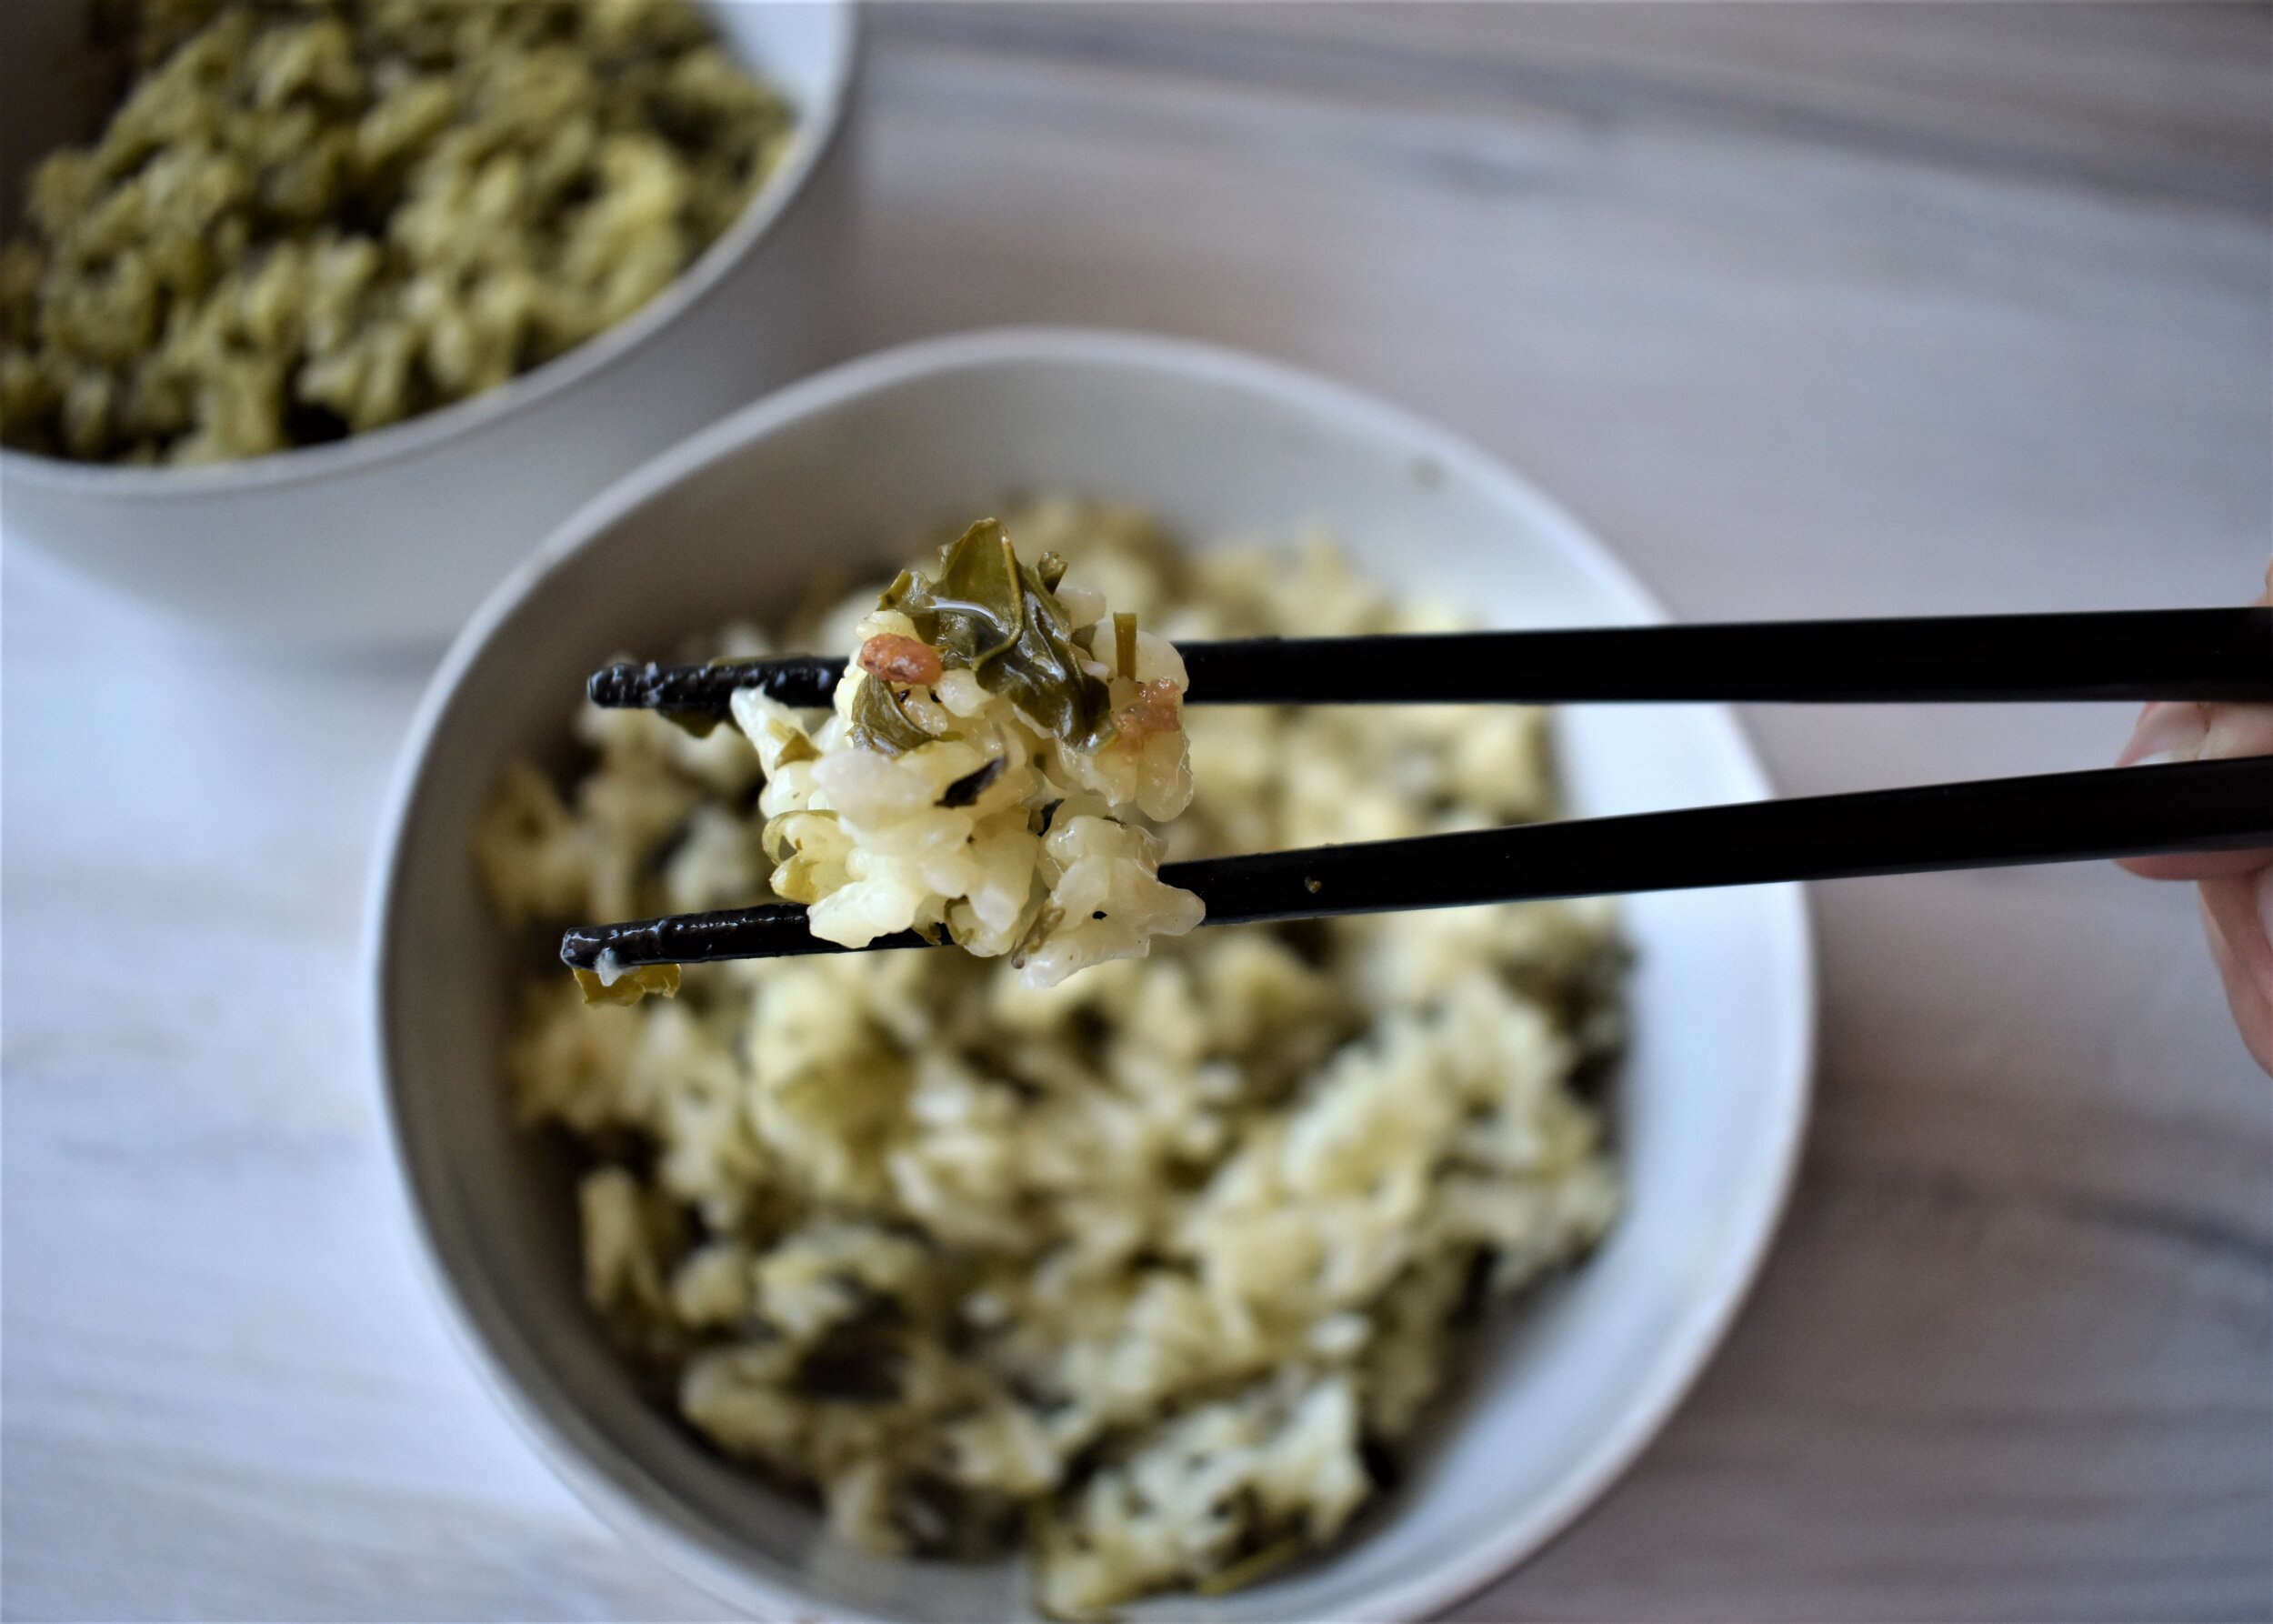
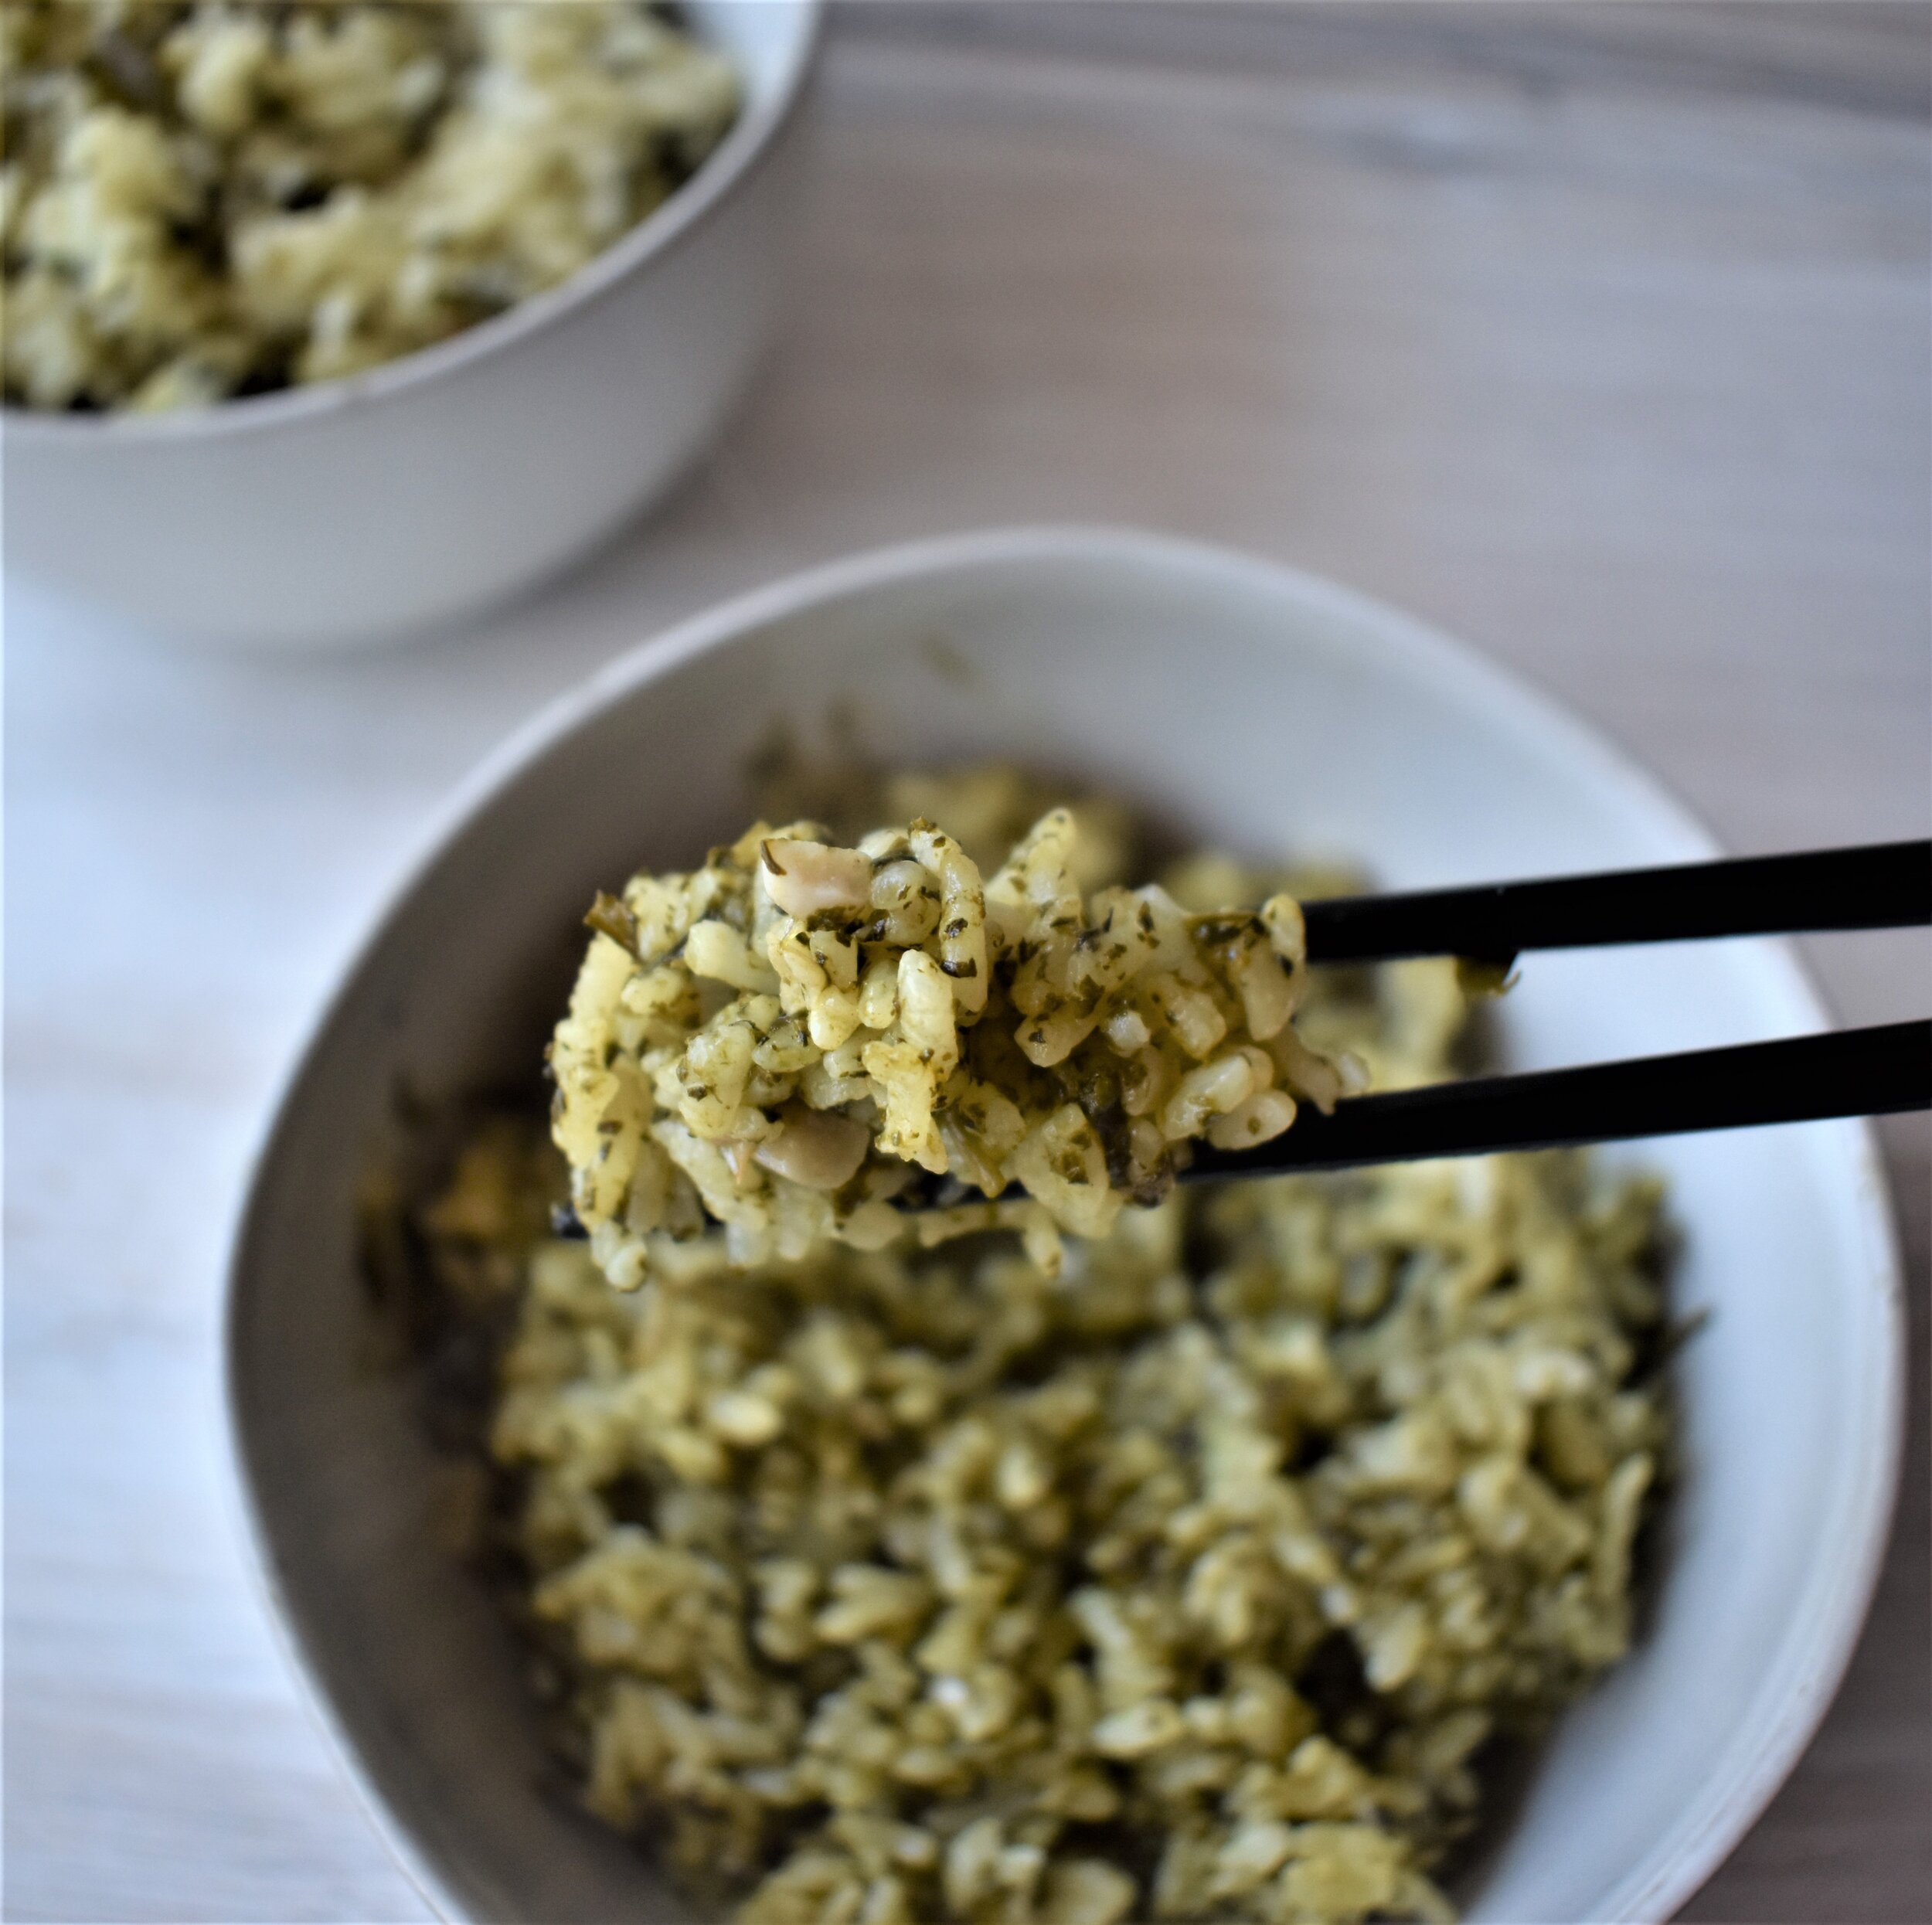
So after taking a few bites of each, here is what I thought. Genmaicha was the winner! If we talk about the flavor of green tea, the sencha rice is definitely more overpowering but it is present for the genmaicha but in a more pleasing way.
The sencha was strong but also a bit bitter. I would still totally eat this whole bowl and pairing it with either an egg or veggies and meat will be delicious. But on it’s own, it was just a bit too bitter and it seemed like the leaves kind of fell flat in the cooking process. The one thing that this rice did hold over the genmaicha is that the leaves incorporated better into the rice and it was a bit easier to eat.
The genmaicha rice was my favorite for a few reasons. First, I thing the brew was an nice, even flavor that really shows up in the rice. I think the genmaicha is much better quality tea than the sencha. The genmaicha flavor shows up in the rice but it is also mellow enough to let you enjoy the flavor of the rice as well. I think this would pair well with something a bit heavier. The one downside to the genmaicha was that the larger leaves and rice made it a bit more difficult to eat incorporated as there were some chewier aspects to it.
Tamago Kake Gohan with Gyokuro Spent Leaves
Have you ever tried Gyokuro? It’s one of my favorite green teas to drink…and to cook with! I often feel bad getting rid of tea leaves after I brew them especially because I drink so much of it! I’ve used spent leaves in plenty of recipes but in my opinion, green tea is often the best for cooking. I’ve used gyokuro before sin a shrimp stir fry recipe here.

I was brewing this gyokuro to try before posting a giveaway with Sencha.app. You can find this gyokuro here.
I was trying to decide what to do with the gyokuro. I prefer to create simple dishes here on my blog because I want these recipes to be easy to create with accessible ingredients!
I was reminded about a chef’s table episode where the chef was talking about his time studying food and working in restaurants in Japan. He was taught about a classic Japanese comfort food called tamago kake gohan which translates to egg over rice!

The chef took hot rice and topped it with a beaten raw egg! He also added soy sauce and some seaweed type seasoning. It may have had some sesame seeds as well but I can’t remember. He mixed it together and ate it! This embodies the umami flavor. Umami meaning savory.
At first look, you think that eating a raw egg isn’t safe! After looking it up, it seems like if the egg is pasteurized it is ok. Consider also that if you are putting a raw egg on hot rice, it’s going to cook.
Unfortunately, after looking at all the eggs in my fridge, I noticed that none of them were pasteurized so I opted to do a poached egg so that I could feel a bit safer with my unpasteurized eggs but still get that delicious egg and rice flavor.

I also decided how to use the gyokuro. Instead of just the egg, rice and seaweed I wanted to be a little extra. I stirfried some garlic, salt, pepper, sambal olek and the gyokuro leaves! Once this became fragrant I set this aside with my other ingredients, the poached egg and soy sauce.
Confession: I had never poached an egg before so I found a video to help. It’s actually super easy. I found this video short and straight to the point.

The other modification I made was to use rice I had on hand and cooked which was a delicious red rice. If I were to do this again however I would definitely use a sushi or jasmine rice just for better texture.

Once you have all your ingredients prepped, add them all to the rice and mix with chopsticks vigorously until combined! Use soysauce to taste.
Here you get a hearty and comforting snack AND you don’t waste spent leaves :) The gyokuro gives this dish a nice bold flavor.

Would you try this??
Gyokuro Rice with roasted herbs and tomatoes
My brother brought me some gyokuro from his trip to Japan. Gyokuro is one of my favorite green teas and I have had good luck cooking with it in the past! You can find a previous shrimp recipe here.

This time I decided to take my love of rice on another test ride and cook it in gyokuro! I didn’t want to just use gyokuro so I decided to use a few other flavors with it as well. I wanted something savory and herbed.

Starting small, I used one cup of rice and only a few tomatoes but after trying this recipe I think I would like to have even more of the roasted ingredients in the rice and would definitely add more or even double the amount! I have timing for the roasted vegetables in the recipe but really you just want to make sure that they start to break down and give it a few mixes so that they soak up the oil and herbs.
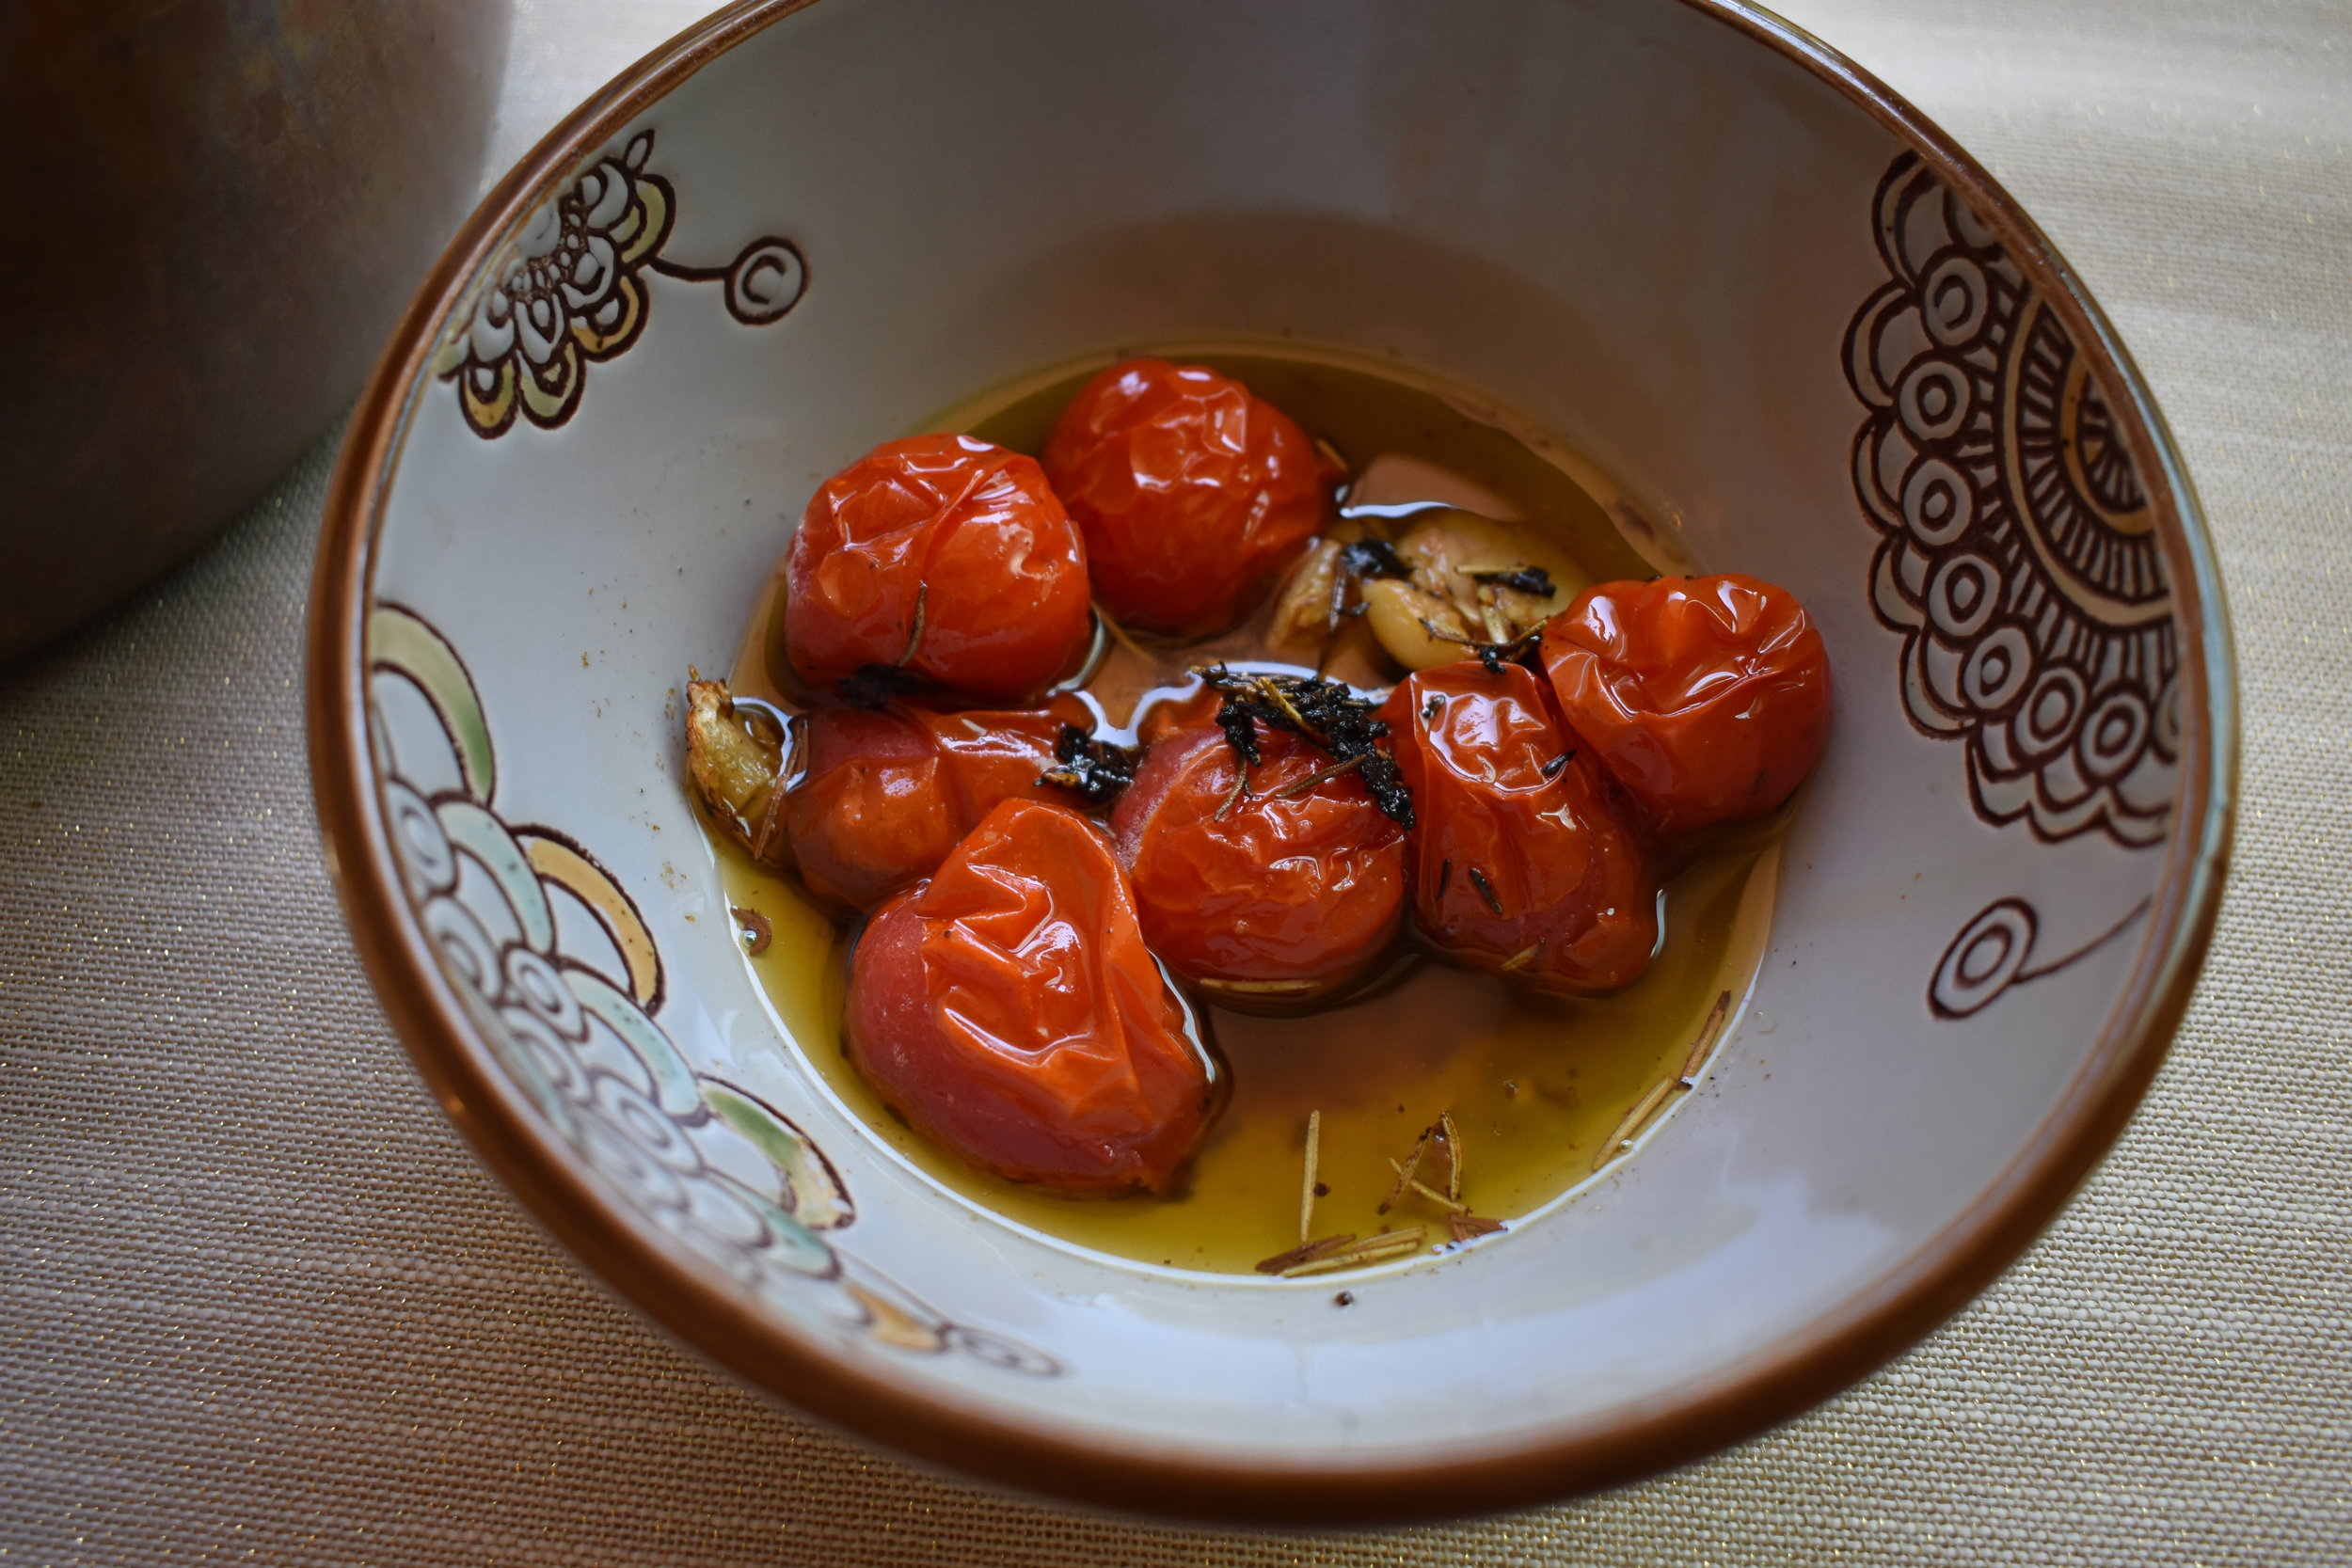
After you take the tomatoes and herbs out, place them in a bowl so that they can soak in the olive oil and herbs.

When making rice, olive oil at the start is important to make it tender and flavorful. Instead of adding olive oil plain, the tomatoes + herbs + olive oil are mixed into the rice + gyokuro mixture before cooking. In addition to mixing, I also smashed up some the tomatoes further before putting this on the stove.

When adding in the roasted ingredients, I would also suggest a taste test to manage the salt and pepper level. I didn’t add anything additional at this point because I added it to the roasting pan but I wish I had!

The result is a richer and more flavorful rice. I’ve combined a few favorites of mine here. First of all, rice. But the reason I added the roasted ingredients is because it is similar to many Persian rice dishes where the meal is in the rice. You have plenty of ingredients blended up in the rice and in this case it was herbs and tomatoes!


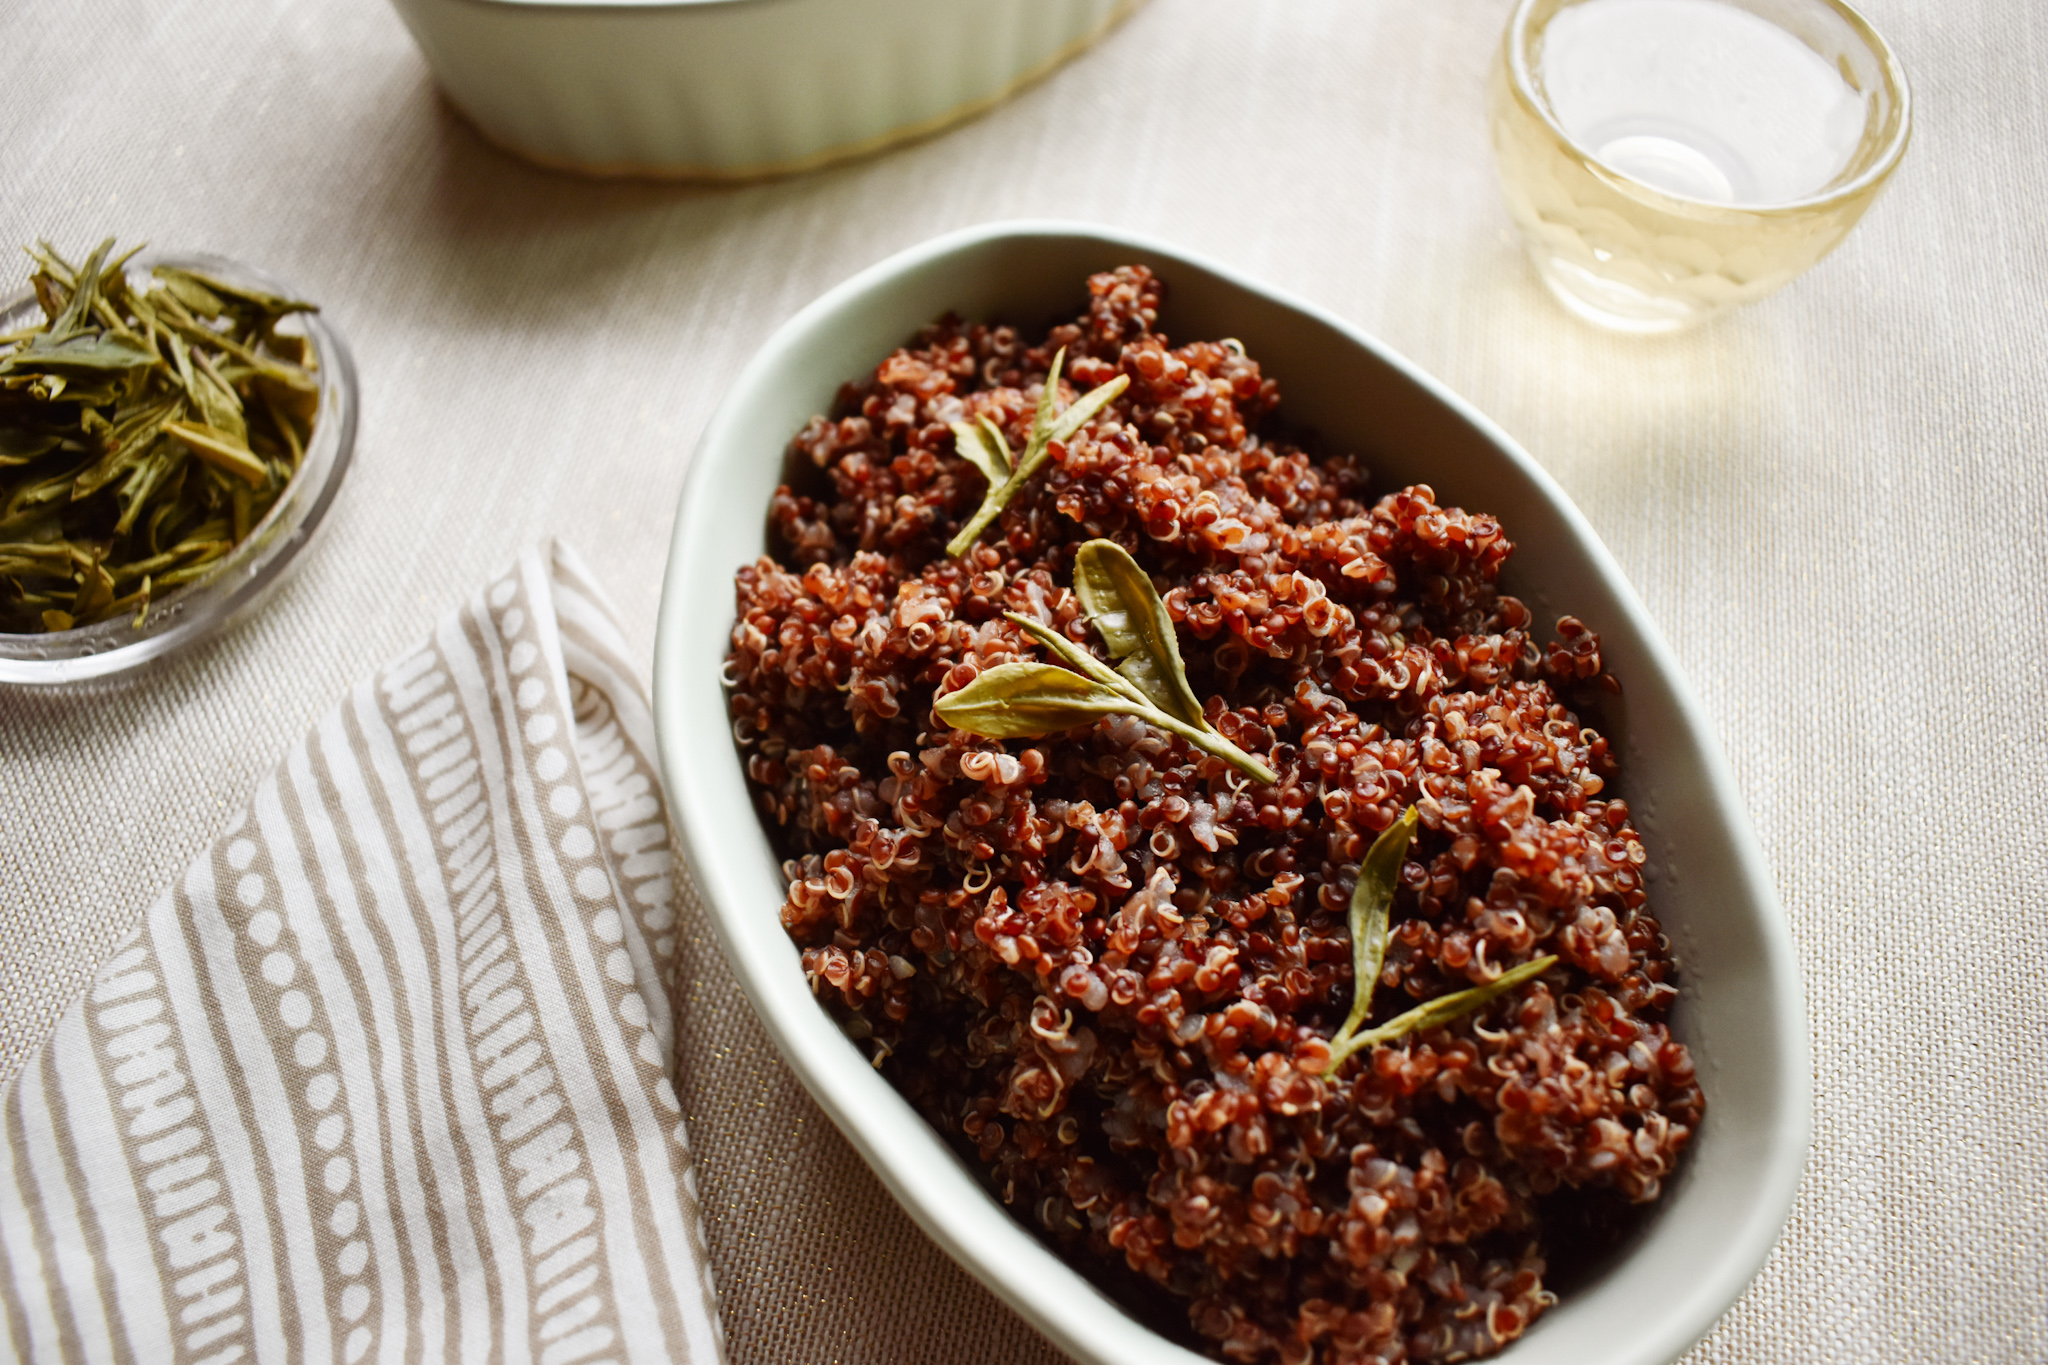
Long Jing Quinoa
Hey There! I’m finally back with another recipe and I thought that it was time to do something savory! I’ve done tea infused rice before so why not try quinoa!

I bought this red quinoa loose from safeway. They have a nice section where you can fill up a paper bag and the cost is by weight. I like how I can just recycle the bag afterwards, no plastic packaging! I want to start off by saying, I’m Persian so rice is like a love language to me but every once in a while I’ll have quinoa.

I had been making my way through some long jing that I got for my birthday and was towards the end of it so I decided to use that. I think this could go well an oolong, hojicha or something like genmaicha or gyokuro as well.
I didn’t have directions for this quinoa so I followed the general rule of doubling the amount of quinoa for how much water to use. Quinoa expands 3 times so 1 cup will make plenty !

The recipe is simply one cup quinoa to two cups water. Instead of using plain water I brewed two cups long jing and used that to cook the quinoa so that it would have a delicious green tea flavor!
Prepare your two cups of tea, I used this pot because it is so handy! Again, feel free to change up the tea to some of the suggestions mentioned above. Place the 1 cup quinoa and 2 cups tea in a pot. I added a bit of salt, pepper and liquid saffron as well.

With the lid off, bring the pot to a boil. Once boiling, cover and lower the heat and let the quinoa cook until the water has been absorbed (10-20 minutes). Once all the water is absorbed, turn off the pot and let the pot sit with the lid on for another 10 minutes then fluff the quinoa with a fork!

The result is a nicely flavored quinoa with a touch of green tea! The long jing gives the quinoa a bit of it’s roasted nutty flavor !
Voila!
Genmaicha Herbed Biscuits
So I totally love valentine’s day but I’m also a believer in showing the people you love that you love them everyday! What better way than with some delicious herb biscuits infused with genmaicha that are heart shaped!

Feel free to use whatever herbs you’d like but I used rosemary, thyme, dill and some garlic. I chopped them all together using a food processor!

I found that folding the dough is really important to get a tall and flaky biscuit!

These biscuits are so cute, buttery and the herbs add an incredible taste!


Start off by heating the oven to 450 F
Heat up the milk and when it starts to bubble, take it off the stove and mix in the genmaicha tea and let it sit for a minute then strain and set the milk aside for use later in the recipe.
Mix together the dry ingredients and the fresh herbs mixture!
Make sure the butter is cold and cut into cubes. Cut the butter into the flour mixture with a pastry cutter, 2 knives or even your hands! You want the butter and the flour to resemble crumbs but make sure than not ALL the butter is totally mixed in!
Add in the milk and stir to combine then take the dough and put it on a floured surface.
You want to take the dough and fold it half then smooth our a bit. Do that a few times and this will give the biscuits some volume!
Don’t roll out the dough, pat it down and then take a heart shaped cookie cutter and cut out your shapes.
Use some parchment paper on a baking sheet and cook the biscuits for 12 to 15 minutes or until golden brown!

These are really good with butter or probably with any other savory topping! I personally could have used a bit more salt in these biscuits so I suggest enjoying with salted butter or irish butter!


Roasted Eggplant with Genmaicha Sauce
Fall is here and I always crave squash and eggplant! I try my best to go to the local farmer’s market every weekend or every other weekend to support Maryland Farmers! I happened to pick up 3 nubia eggplants!
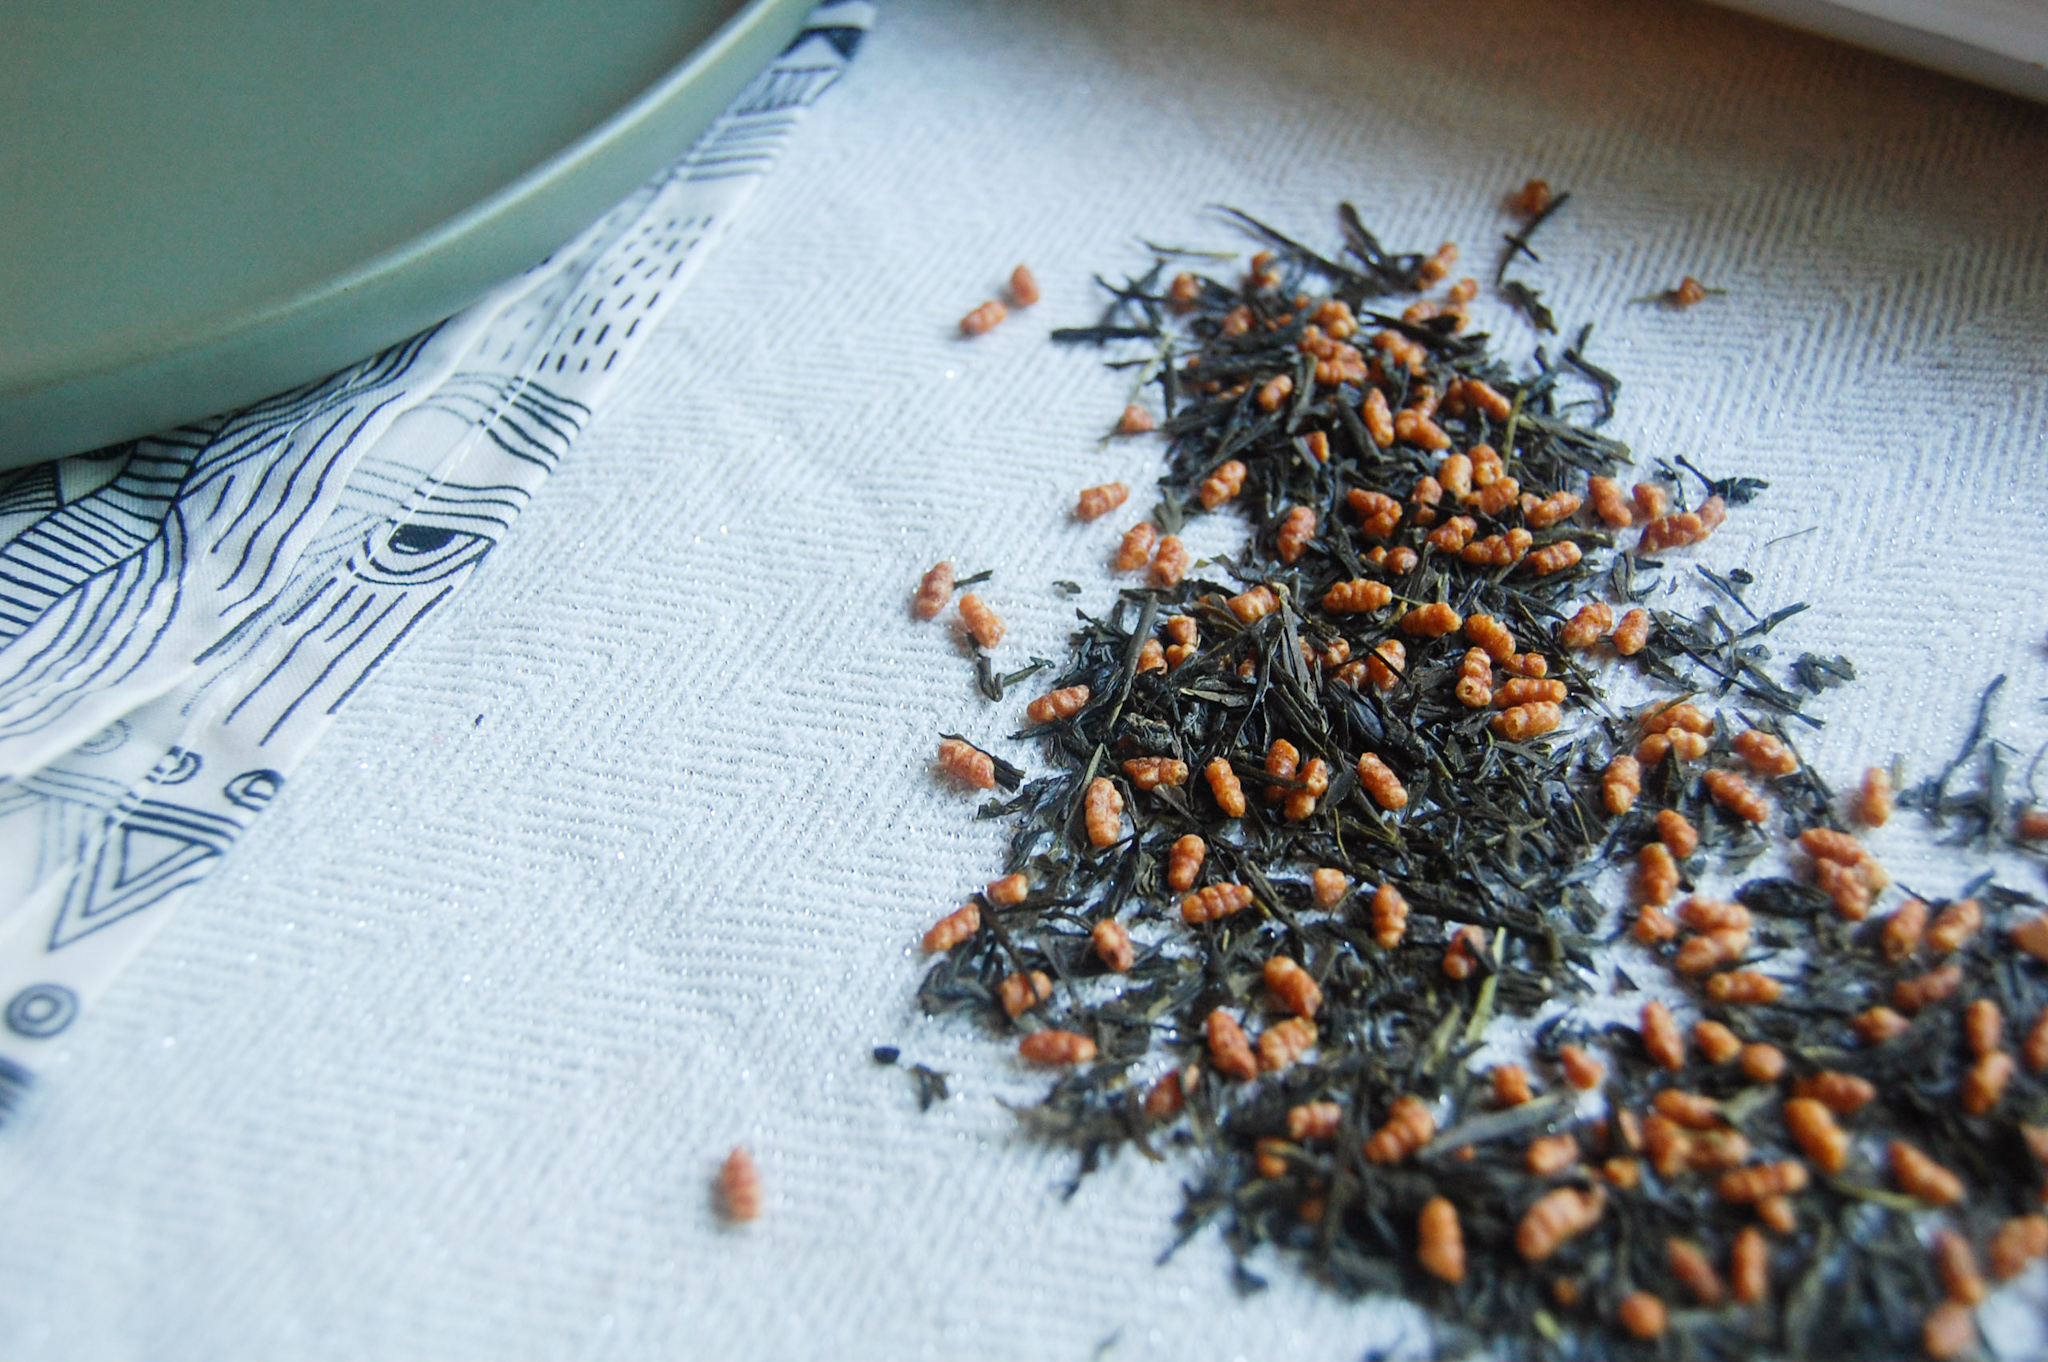
My original plan was to make khoresh bademjan which is an Iranian eggplant stew but when I got my Sipsby box and saw that there was genmaicha in it, an idea started brewing! Genmaicha is a Japanes green tea that also had puffed rice in it. This genmaicha is from Yannoko tea and is their organic variation which includes bancha as the green tea.

I love rice so the very first time I tried gemaicha I was in love! Genmaicha is definitely a tea that pairs well with savory food as it has the grassy green tea flavor as well as some roasted notes due to the rice. I decided to try a sauce using genmaicha to top the eggplants with!

In my recipe you’ll see that I said to let the eggplants “sweat".” When we prepare eggplants for the khoresh I mentioned above, you peel and slice the eggplants then salt them. After a little bit, you’ll see beads of liquid on them hence the “sweat"! This helps rid the eggplants of some of the bitterness. You are welcomed to fry the eggplants instead of baking but I love to bake them. With a little olive oil, S + P, they get browned and a bit crispy on the edges!

The baking time really depends on your preference and also how thick you sliced your eggplants. I wanted to give a little advice when slicing. Sometimes slicing thin can help things cook quicker, but with eggplant in the oven I’ve noticed that if they are sliced too thin you really lose most of the eggplant.

When doing this sauce I think it’s best to have all your ingredients prepared before you start so that you can focus on the sauce itself. When you brew the genmaicha tea, make sure to follow brewing instructions on the package. For reference, brewing temperature is 176F and steep for 30-60 seconds. You can do multiple infusions.
One other brewing note is about strength. In my other recipes I sometimes brew the tea on the longer side so that it is more potent in the dish since many times it is being cooked. Be cautious of applying that to genmaicha. I find genmaicha to be pretty delicate and you wouldn’t want the tea to be bitter and then transfer that taste to your meal!

The genmaicha helps cook the spinacha bit more and once it’s reduced use as much boursin as you’d like to thicken it. I could definitely use more cheese but was trying to keep this a semi helathy recipe :D I did want to note that I used boursin because I had some, it’s creamy texture and the fact that it is already flavored with garlic and herb which I think went well with everything else. You could definitely experiment with other cheeses but be careful of using one that is too strong as it will likely overpower any notes of the genmaicha.

I thought this sauce turned out well and it paired well with the eggplant! The sauce definitely has an earthy taste which is thanks to the genmaicha!

A fancy but easy meal for a day when you have time to make yourself a nice meal or use at a party!


Golden Tips Tea Topping + Pumpkin Pasta
Pumpkin + tea pasta whaaaaaattt?
I found a package of pumpkin pasta at marshalls and HAD to make a recipe with it!

I’ve already made pesto with tulsi tea before and wanted to try something else! I also try to use up whatever I have in my house at the moment and I pulled out some eggplant from the farmer’s market.

Eggplant is prominent in stews in Iranian cuisine and stews remind me of fall and winter so I thought it was the perfect addition to the sauce/topping I was making. I was sent the golden tips tea from Upton Tea to try and make a recipe with!
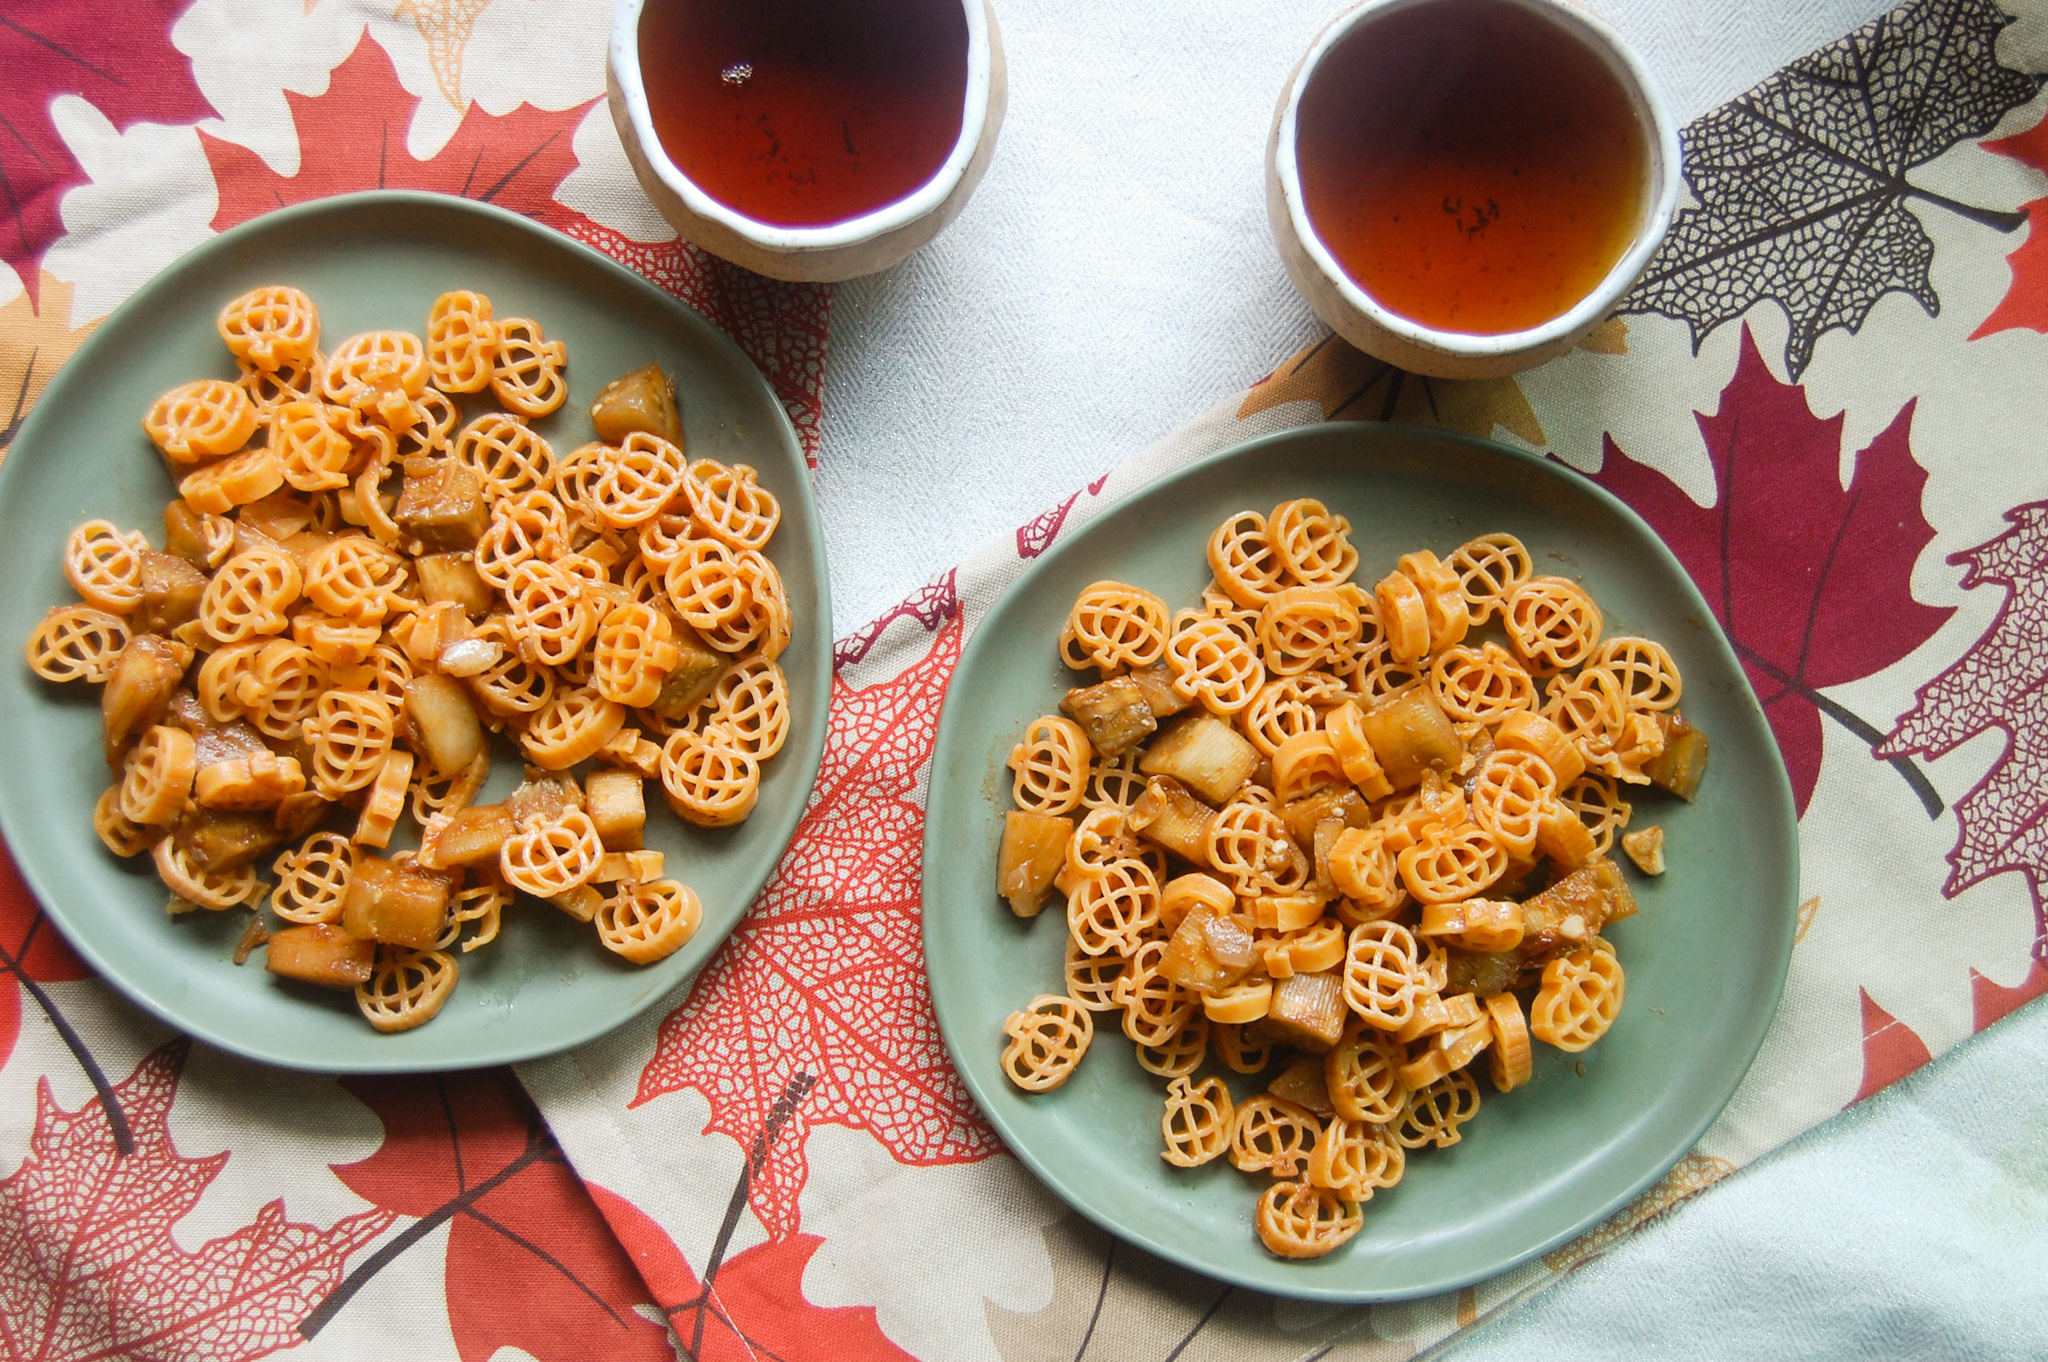
The golden tips tea is a black tea but it has such a lovely, sweet and light taste to it that I thought it could go well in the sauce/topping!

One tip I have for prepping the eggplants, salt them! When we prepare eggplants for the stews I mentioned earlier, we peel them and salt them. When they “sweat” it helps get some of the bitterness out of them!

Feel free to mess around with proportions of tea but this is what worked for me to be able to get it to reduce and become thicker!

Matcha Jasmine Rice
Green Rice!
It's been a long time since I've made a recipe with matcha and this one popped into my head the other day. I have been making this garlic jasmine rice ever since I got the recipe in a blue apron box. The water that is added to the pot is a perfect opportunity to add a type of tea!

I've used matcha in cocktails and sweets so I've been curious how it would taste in a savory dish! With the earthy flavor matcha has, I figured it's a great flavor to add to a meal. I essentially keep the jasmine rice recipe the same but instead of using plain water, I use the same amount of brewed matcha. For this recipe I use Midori matcha from matchaeologist, this is a culinary matcha that is perfect for cooking!
The matcha link is an affiliate link. Please consider purchasing with my link as it will help me keep this blog going!

A few things differ about this recipe than the one I've linked below. I specifically use sesame oil because I think it goes well with the other flavors and spices up the recipe a bit. You are welcome to use any other type of oil that you think might taste good!

In terms of the matcha, the amount is up to you. I used 3 tablespoons of matcha and that was plenty. The rice came out a beautiful green color and the flavor was not cooked away. If you make more rice, feel free to add matcha and if you want to try this recipe but aren't a HUGE matcha lover I would suggest trying it with 1 or 2 tablespoons.

Optionally, you can add tuxedo sesame seeds to the cooked rice for presentation but also because they are yummy! Depending on what you are pairing the rice with, you can also add soy sauce. I added soy sauce to try and liked the flavor combination. I think this rice can be eaten with almost anything but I feel as thought it would be most delicious paired with seafood!

Depending on the pot that you use, the cooking time I listed can vary. Make sure after you cover the lid that you turn the heat low. If it's not low you will most likely burn the bottom of the rice!

Another cooking note I wanted to mention was regarding the water/matcha. After about 14 minutes, I took the lid off and the rice seemed cooked but there was a little bit of matcha still on the top. Once I stirred the rice a bit in the pot, the matcha distributed itself around the rice.

Puer Pusheen Pancake
I'm not very good at hiding my pusheen obsession! I love this cute little cat so you're probably not surprised that I'm subscribed to the pusheen box :D The fall box had this cute little pan in it so I decided to create a pancake recipe!
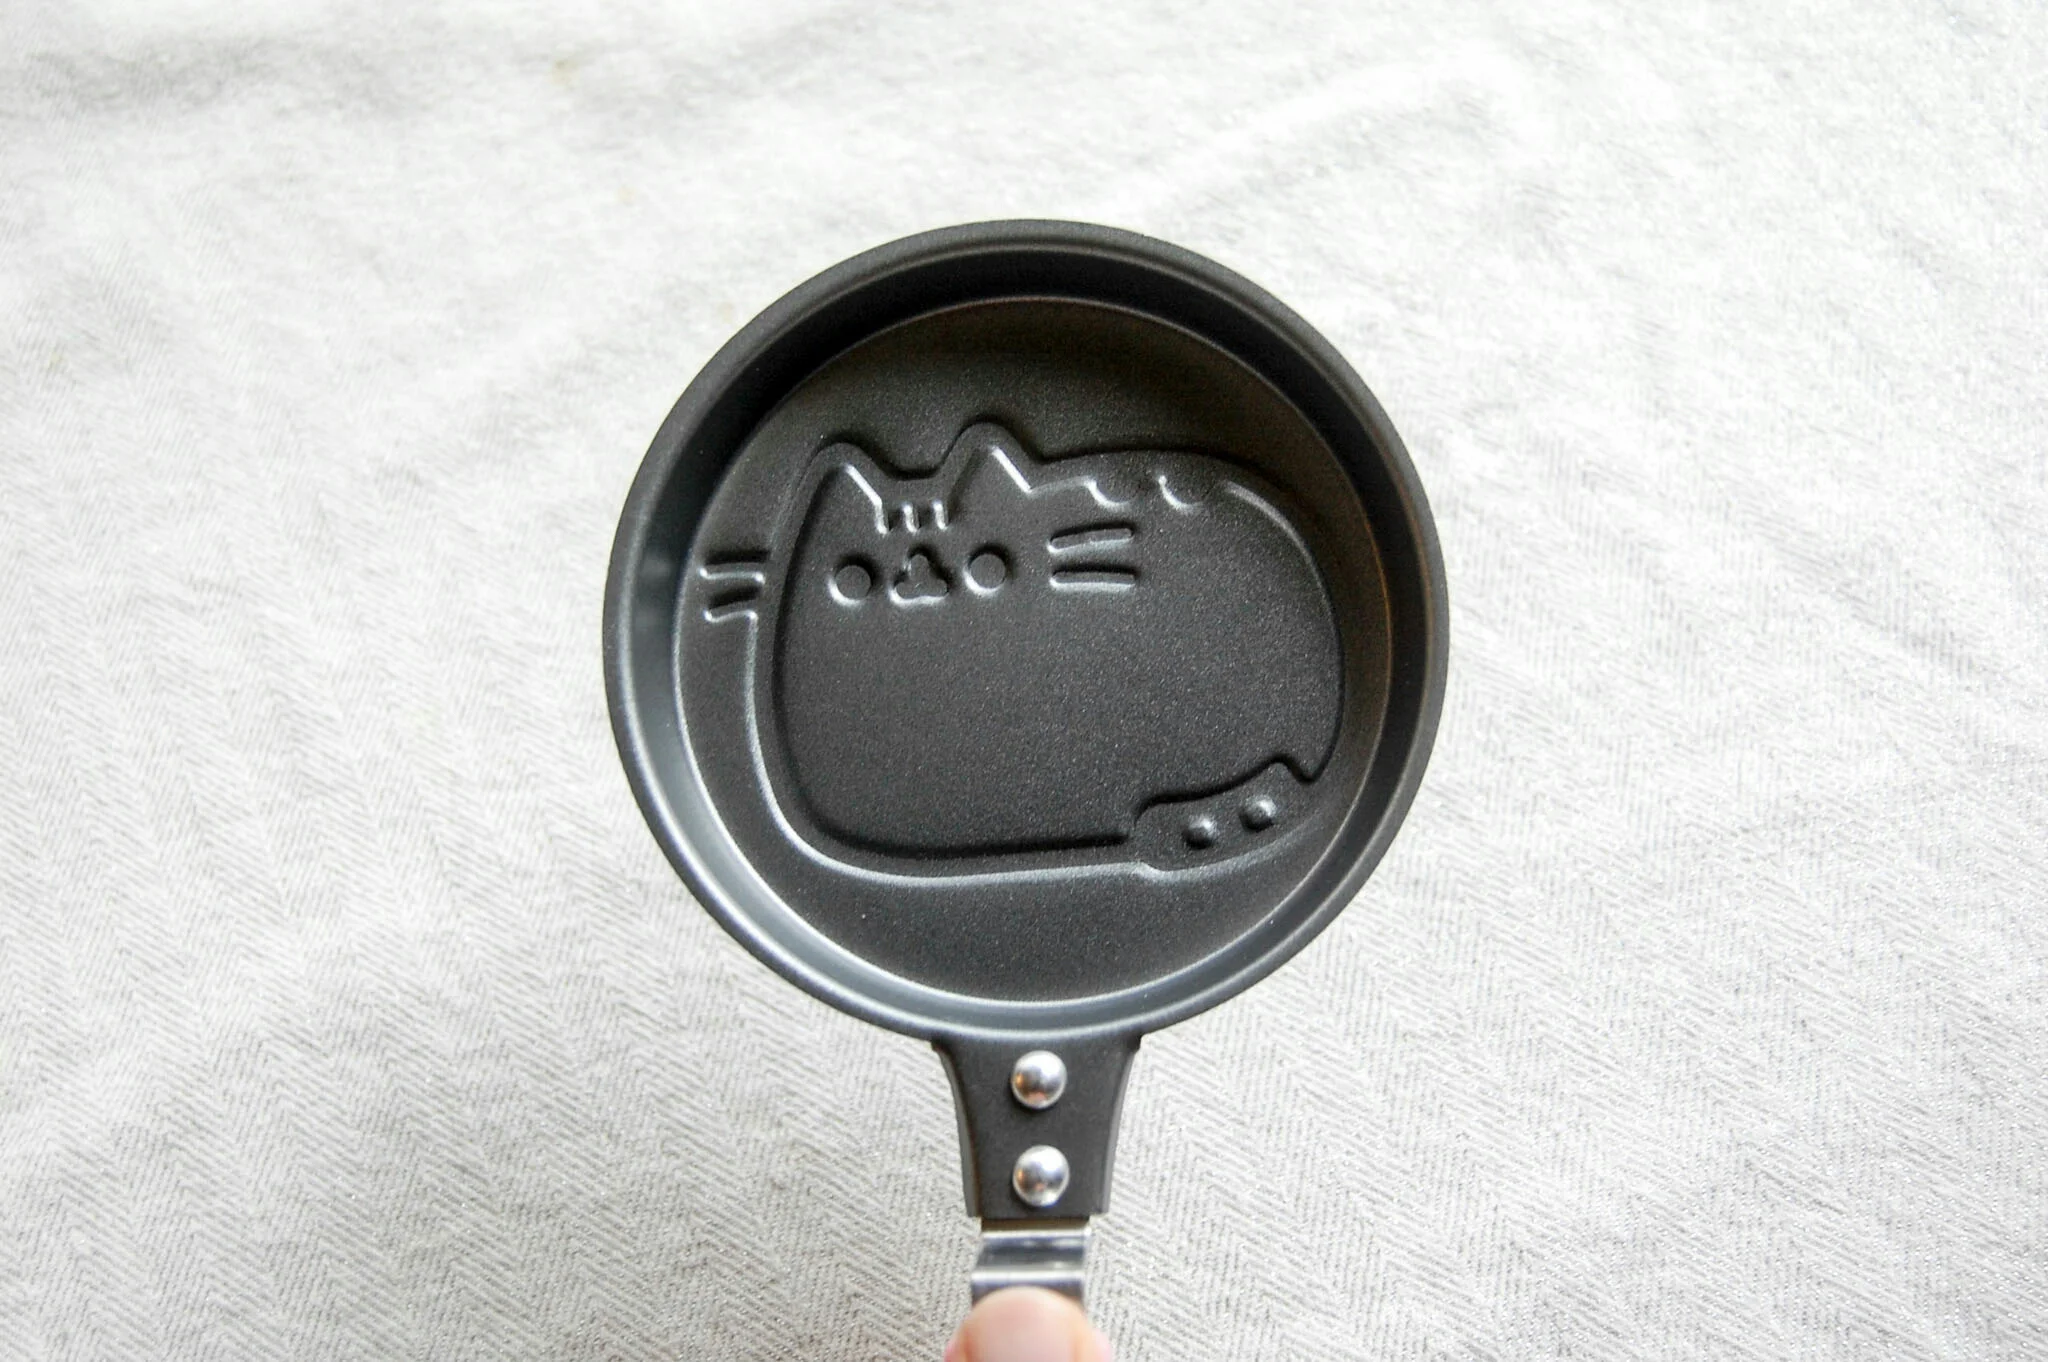
I got some "grandpa's puer" from White2tea in my sipsby box this month. I've recently gotten really into puer and most of them have a really rich flavor which is great for recipes! This tea is named after "grandpa style" which apparently means not really paying much mind to brewing times. A more relaxed way of drinking tea. I can totally relate to grandpa style especially because when it comes to certain teas I like to judge them by color or aroma.


This is a great recipe for a small batch of pancakes. The pusheen pan is pretty small so It made many pancakes but if you use a regular pan, the batter would probably make 1-3 pancakes!

You could optionally swap out the milk and use 3/4 cup of tea in the recipe but I think that without any milk the pancakes wont be as fluffy!

It was actually difficult to get a perfect mold of the pusheen pan but I did my best! I found it helpful to wipe out the pan after each pancake!

Look how cute this pancake is!

Topped with maple syrup, these tea infused pancakes are delicious!

These turned out nice and fluffy too! I also added in some cinnamon into the batter to give them an incredible aroma!


