
Mini Tea Bundt Cakes
I like little bundts.
Another installment of teas in my Sips by box! These were a special addition to my normal samples. I won't lie, I'm used to drinking and baking/cooking with loose leaf tea only. I'm sometimes a little snobby when it comes to loose leaf vs. tea bags BUT to each their own! I would normally use the milk or butter to infuse the loose leaf tea but since the tea in the bags is already ground I decided on a cake that I could thrown all of the tea into!

I recently found mini bundt pans at marshalls and thought that they would be the perfect way to make a cake but have it be special in it's own way.

I'm not a fan of licorice but the combination of these two flavors really have a wonderful fragrance which comes through wonderfully in the cake while it's baking and when it comes out of the oven.
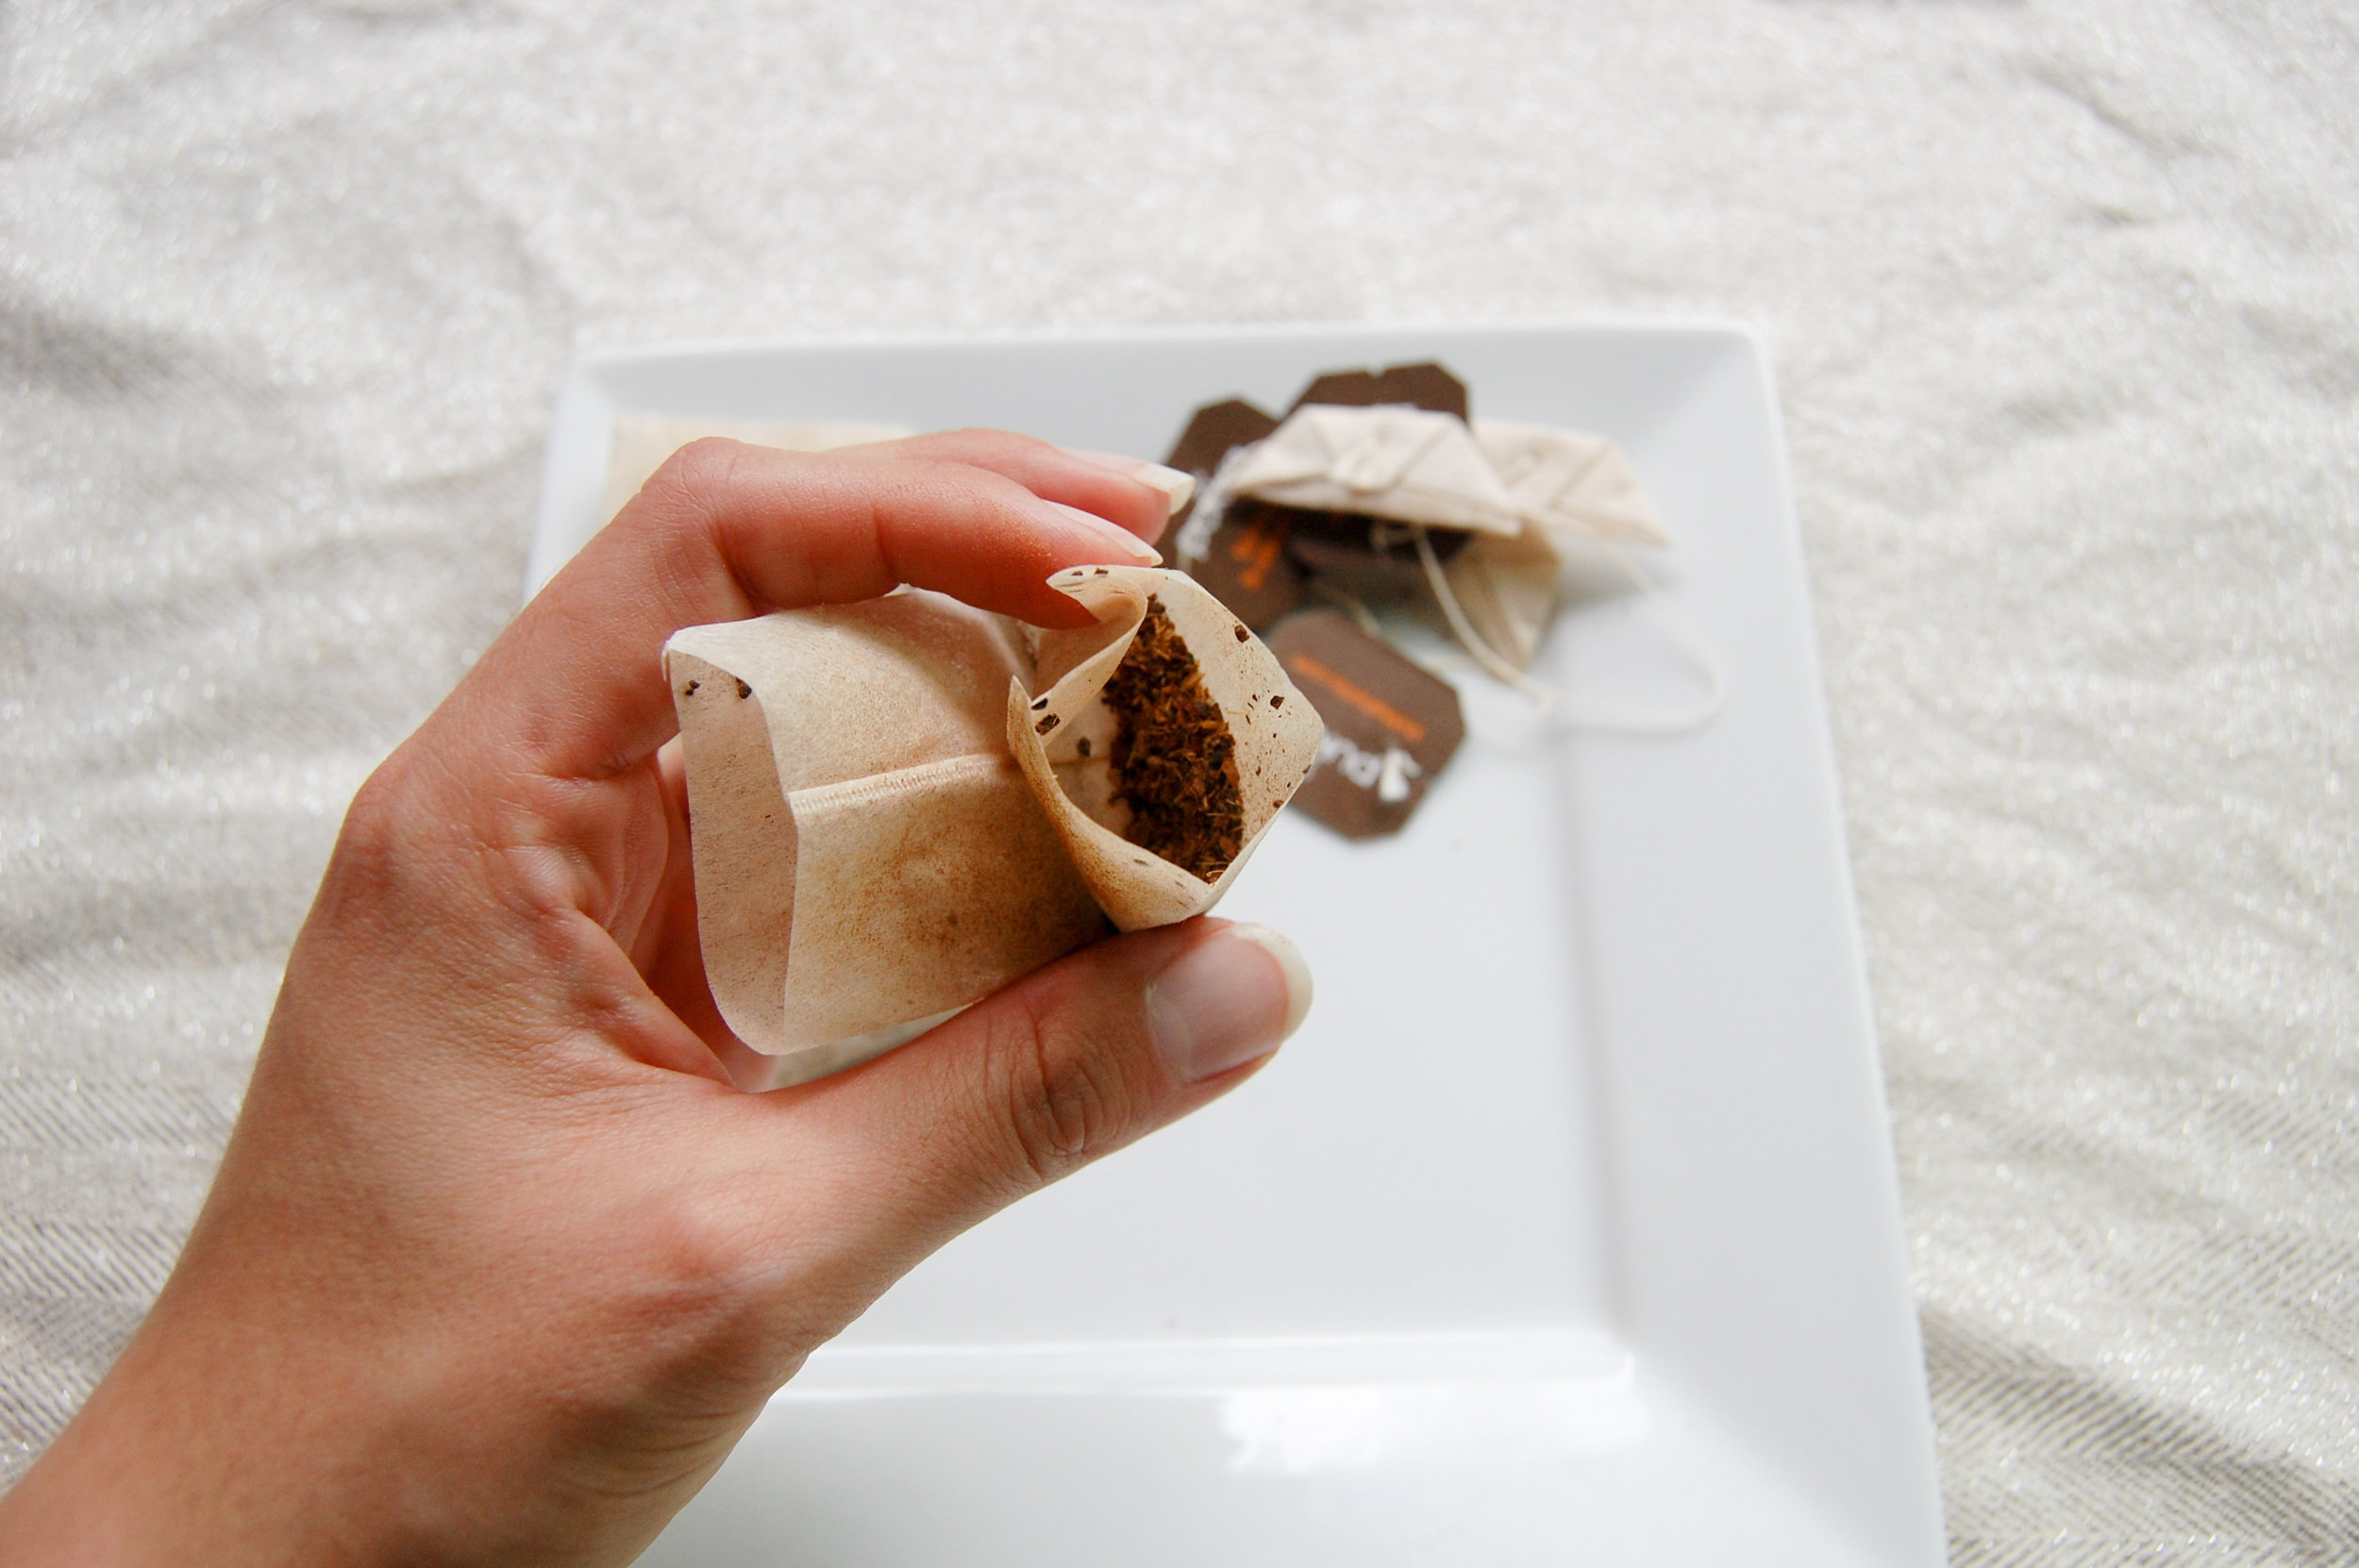
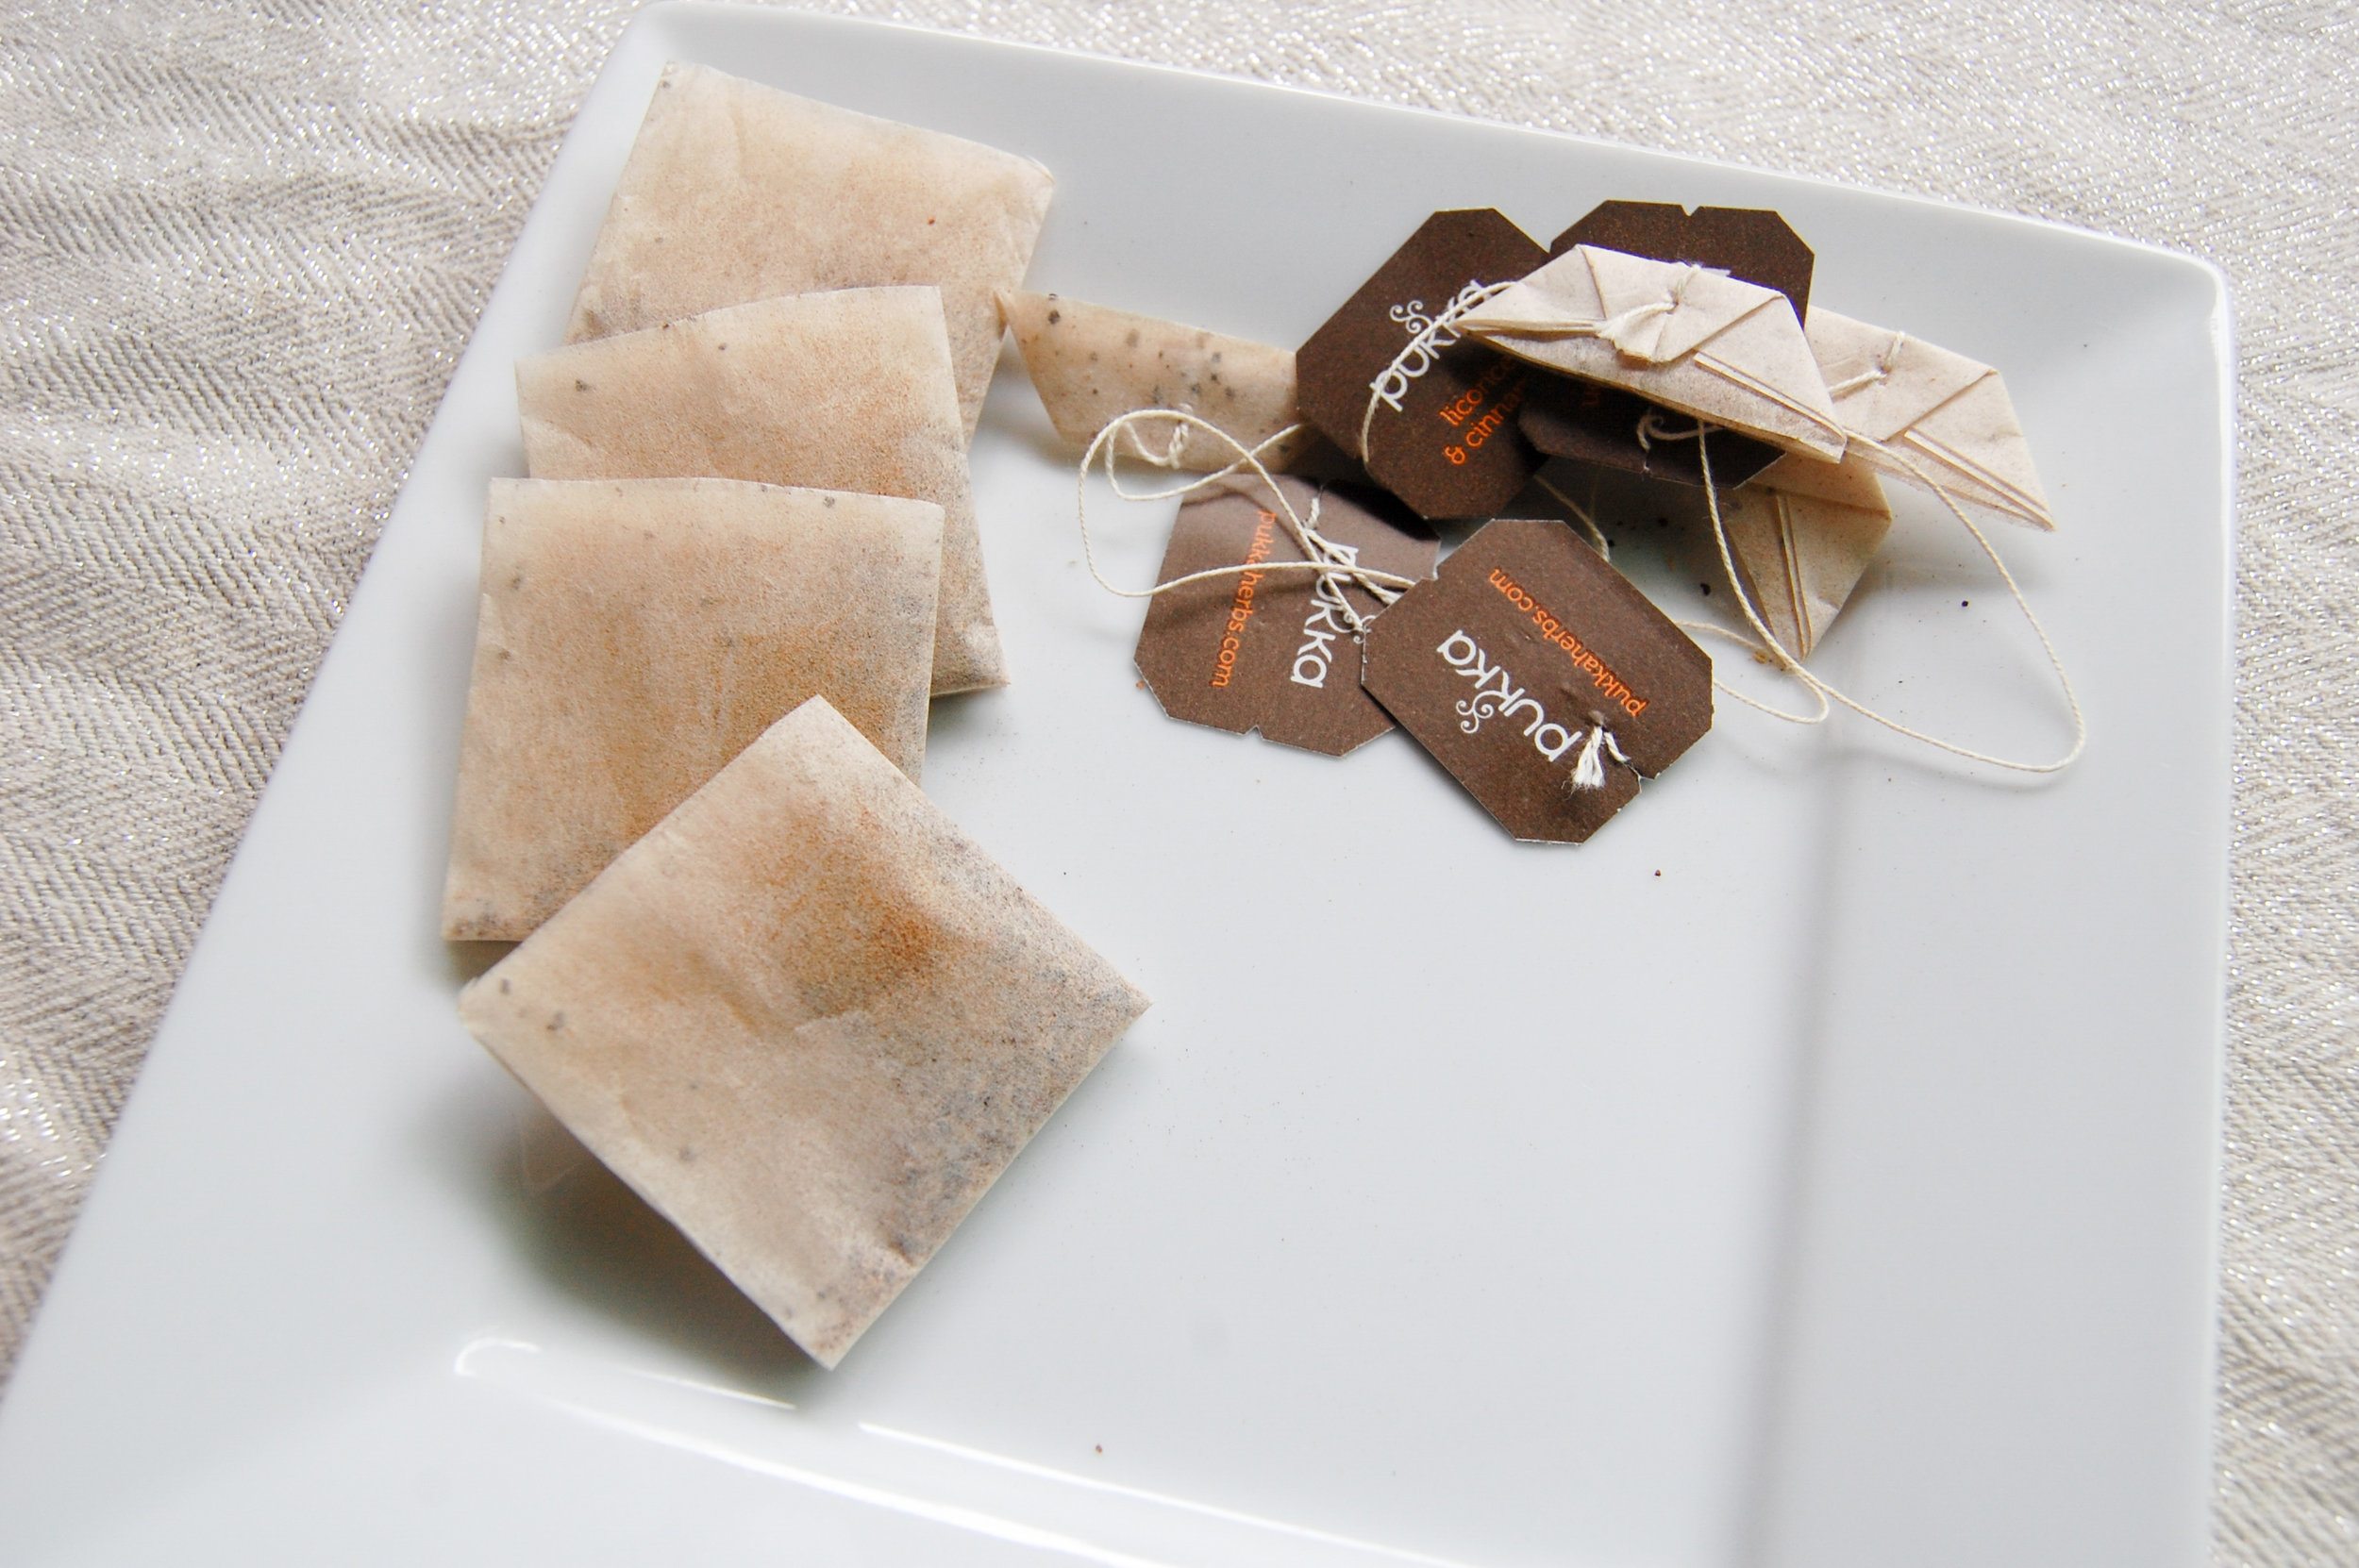
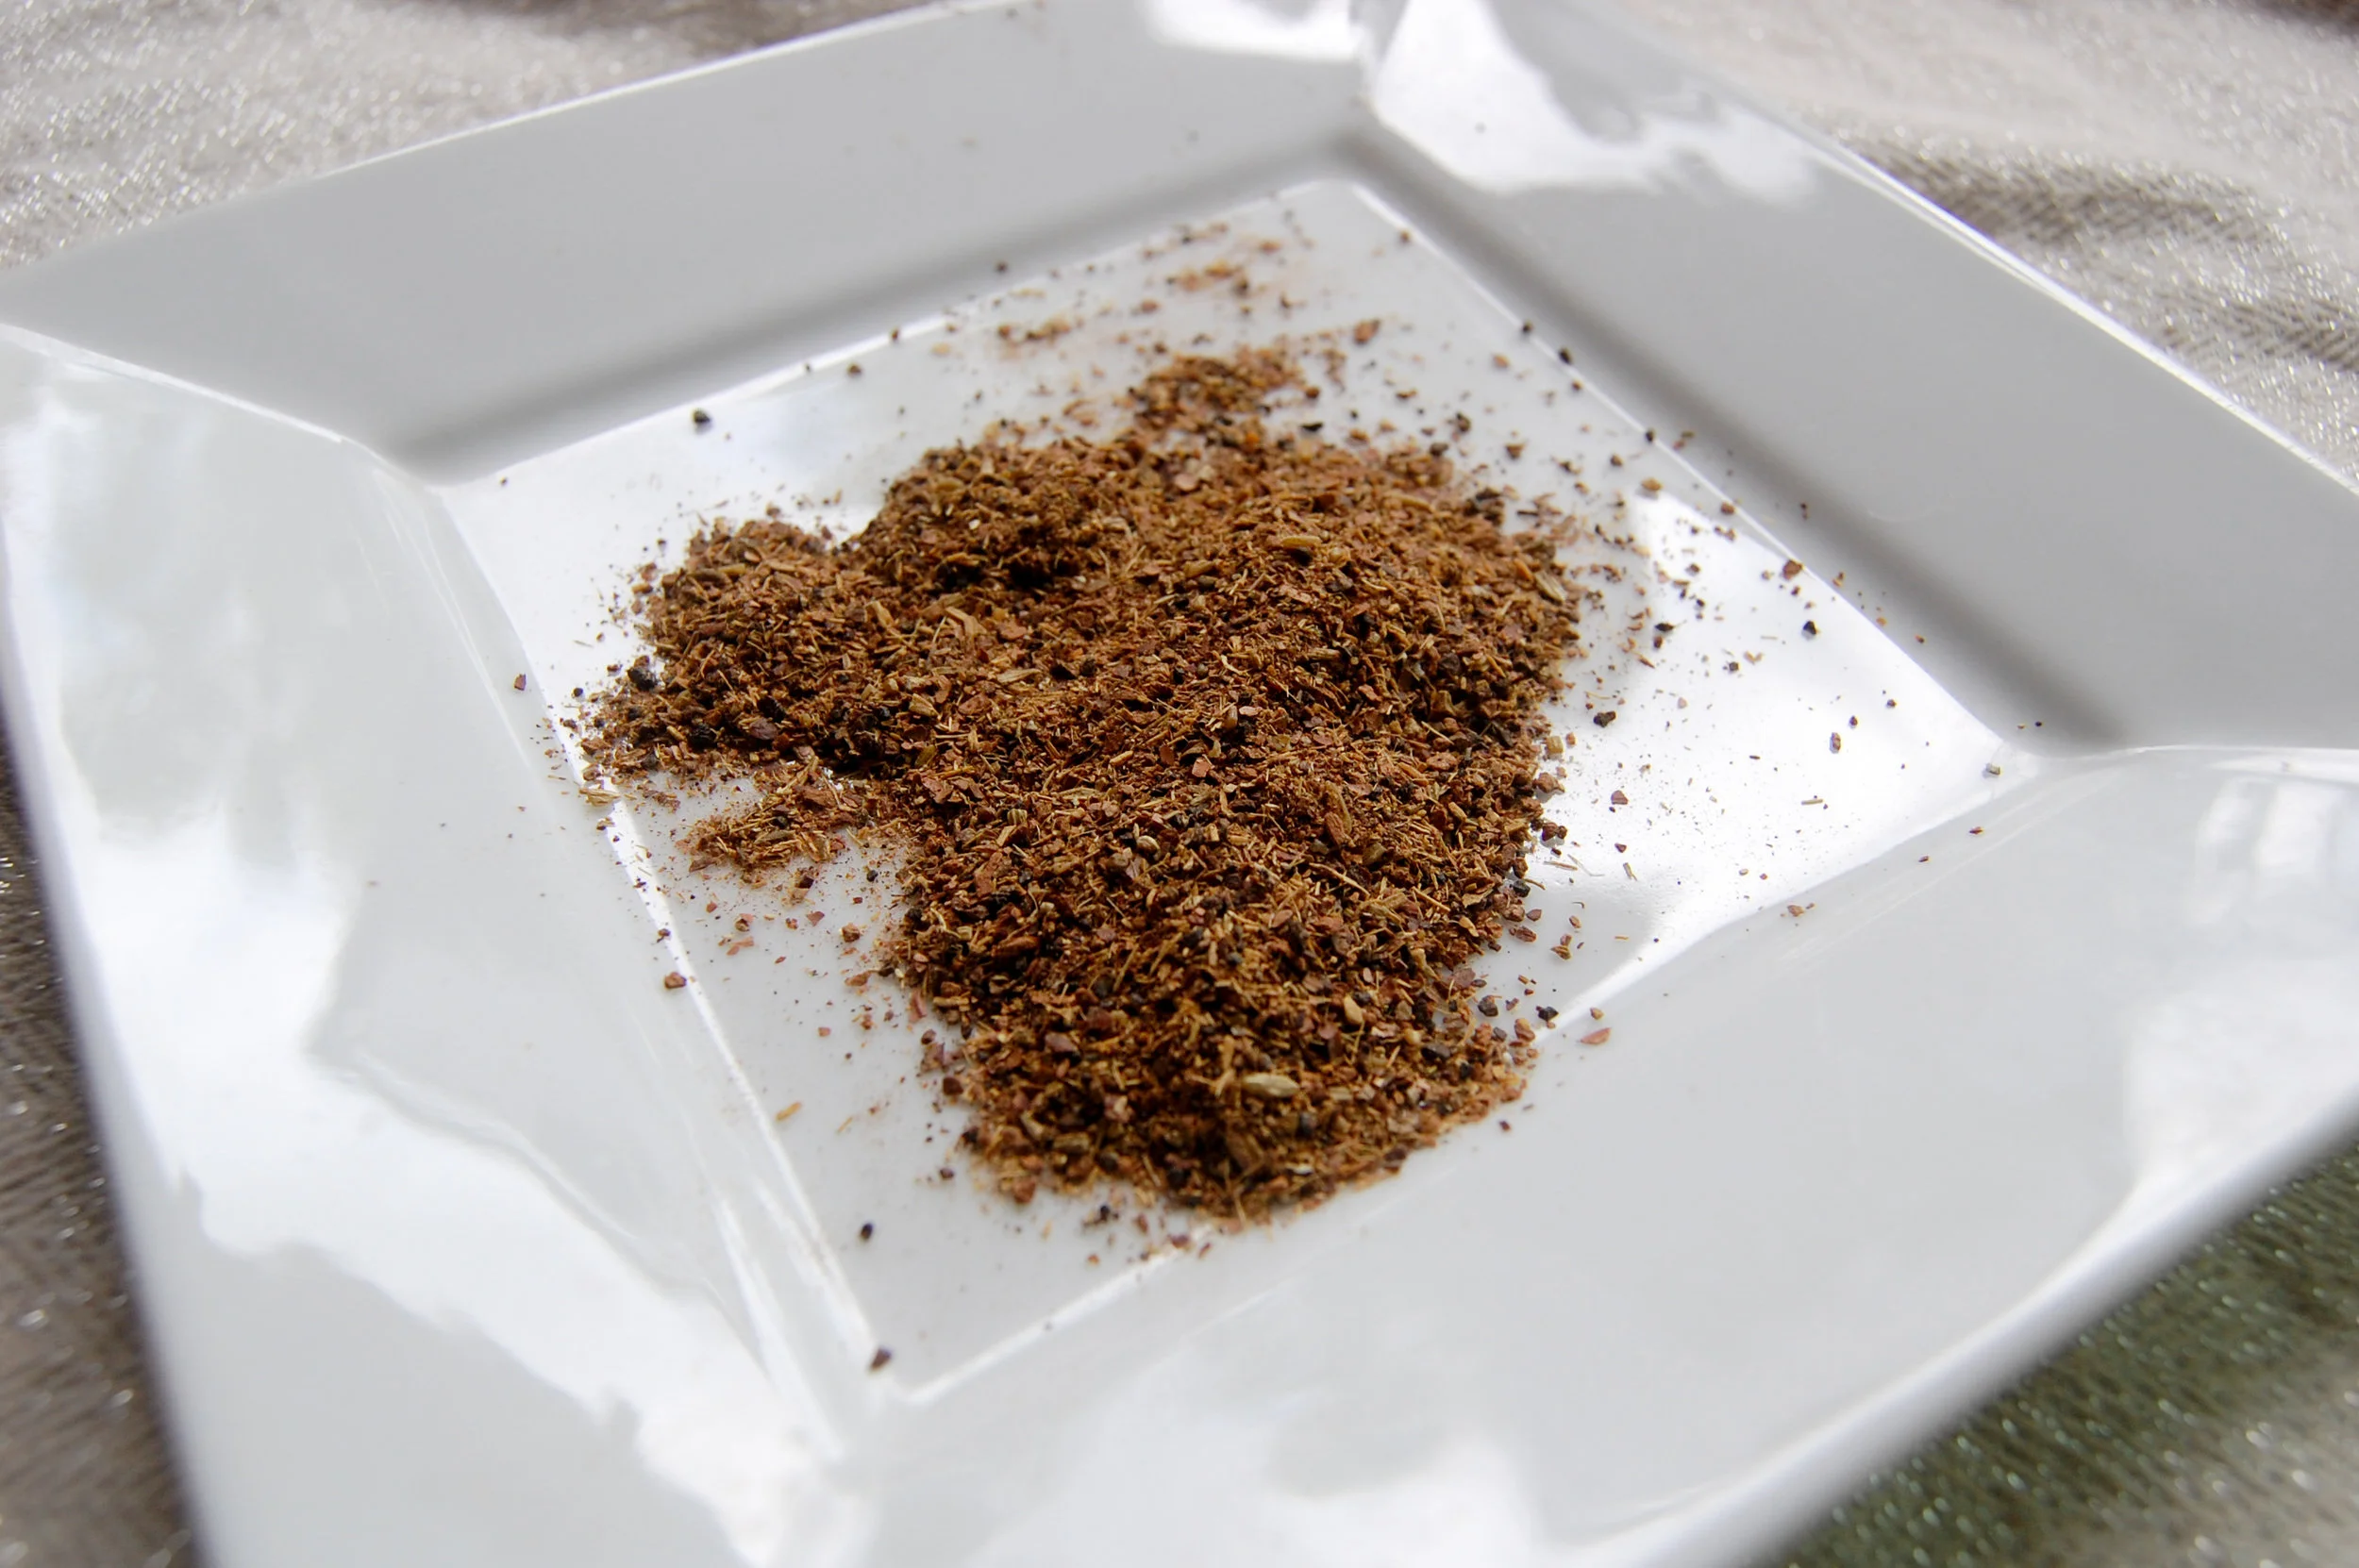
This tea was pretty well ground but if you open the tea bags and there are any large pieces make sure to crush them up so that you're not getting a lot of crunch factor in your cake. You want the tea to be there visually and for taste but not to physically chew it up.

An important note for using these pans, you have to do something with them or the batter will stick. I've seen people use parchment paper but I opted to use my misto to spray with olive oil and then flour them. Make sure to knock off excess flour because it will stick to the cake.


Most things I bake taste pretty good but they're not always "magazine ready." This is a perfect example lol. I filled my tins almost to the top because I wanted to get as much cake as I could. They turned out fin but they don't really have a flat bottom so if you care about that make sure you don't fill the tin too high.


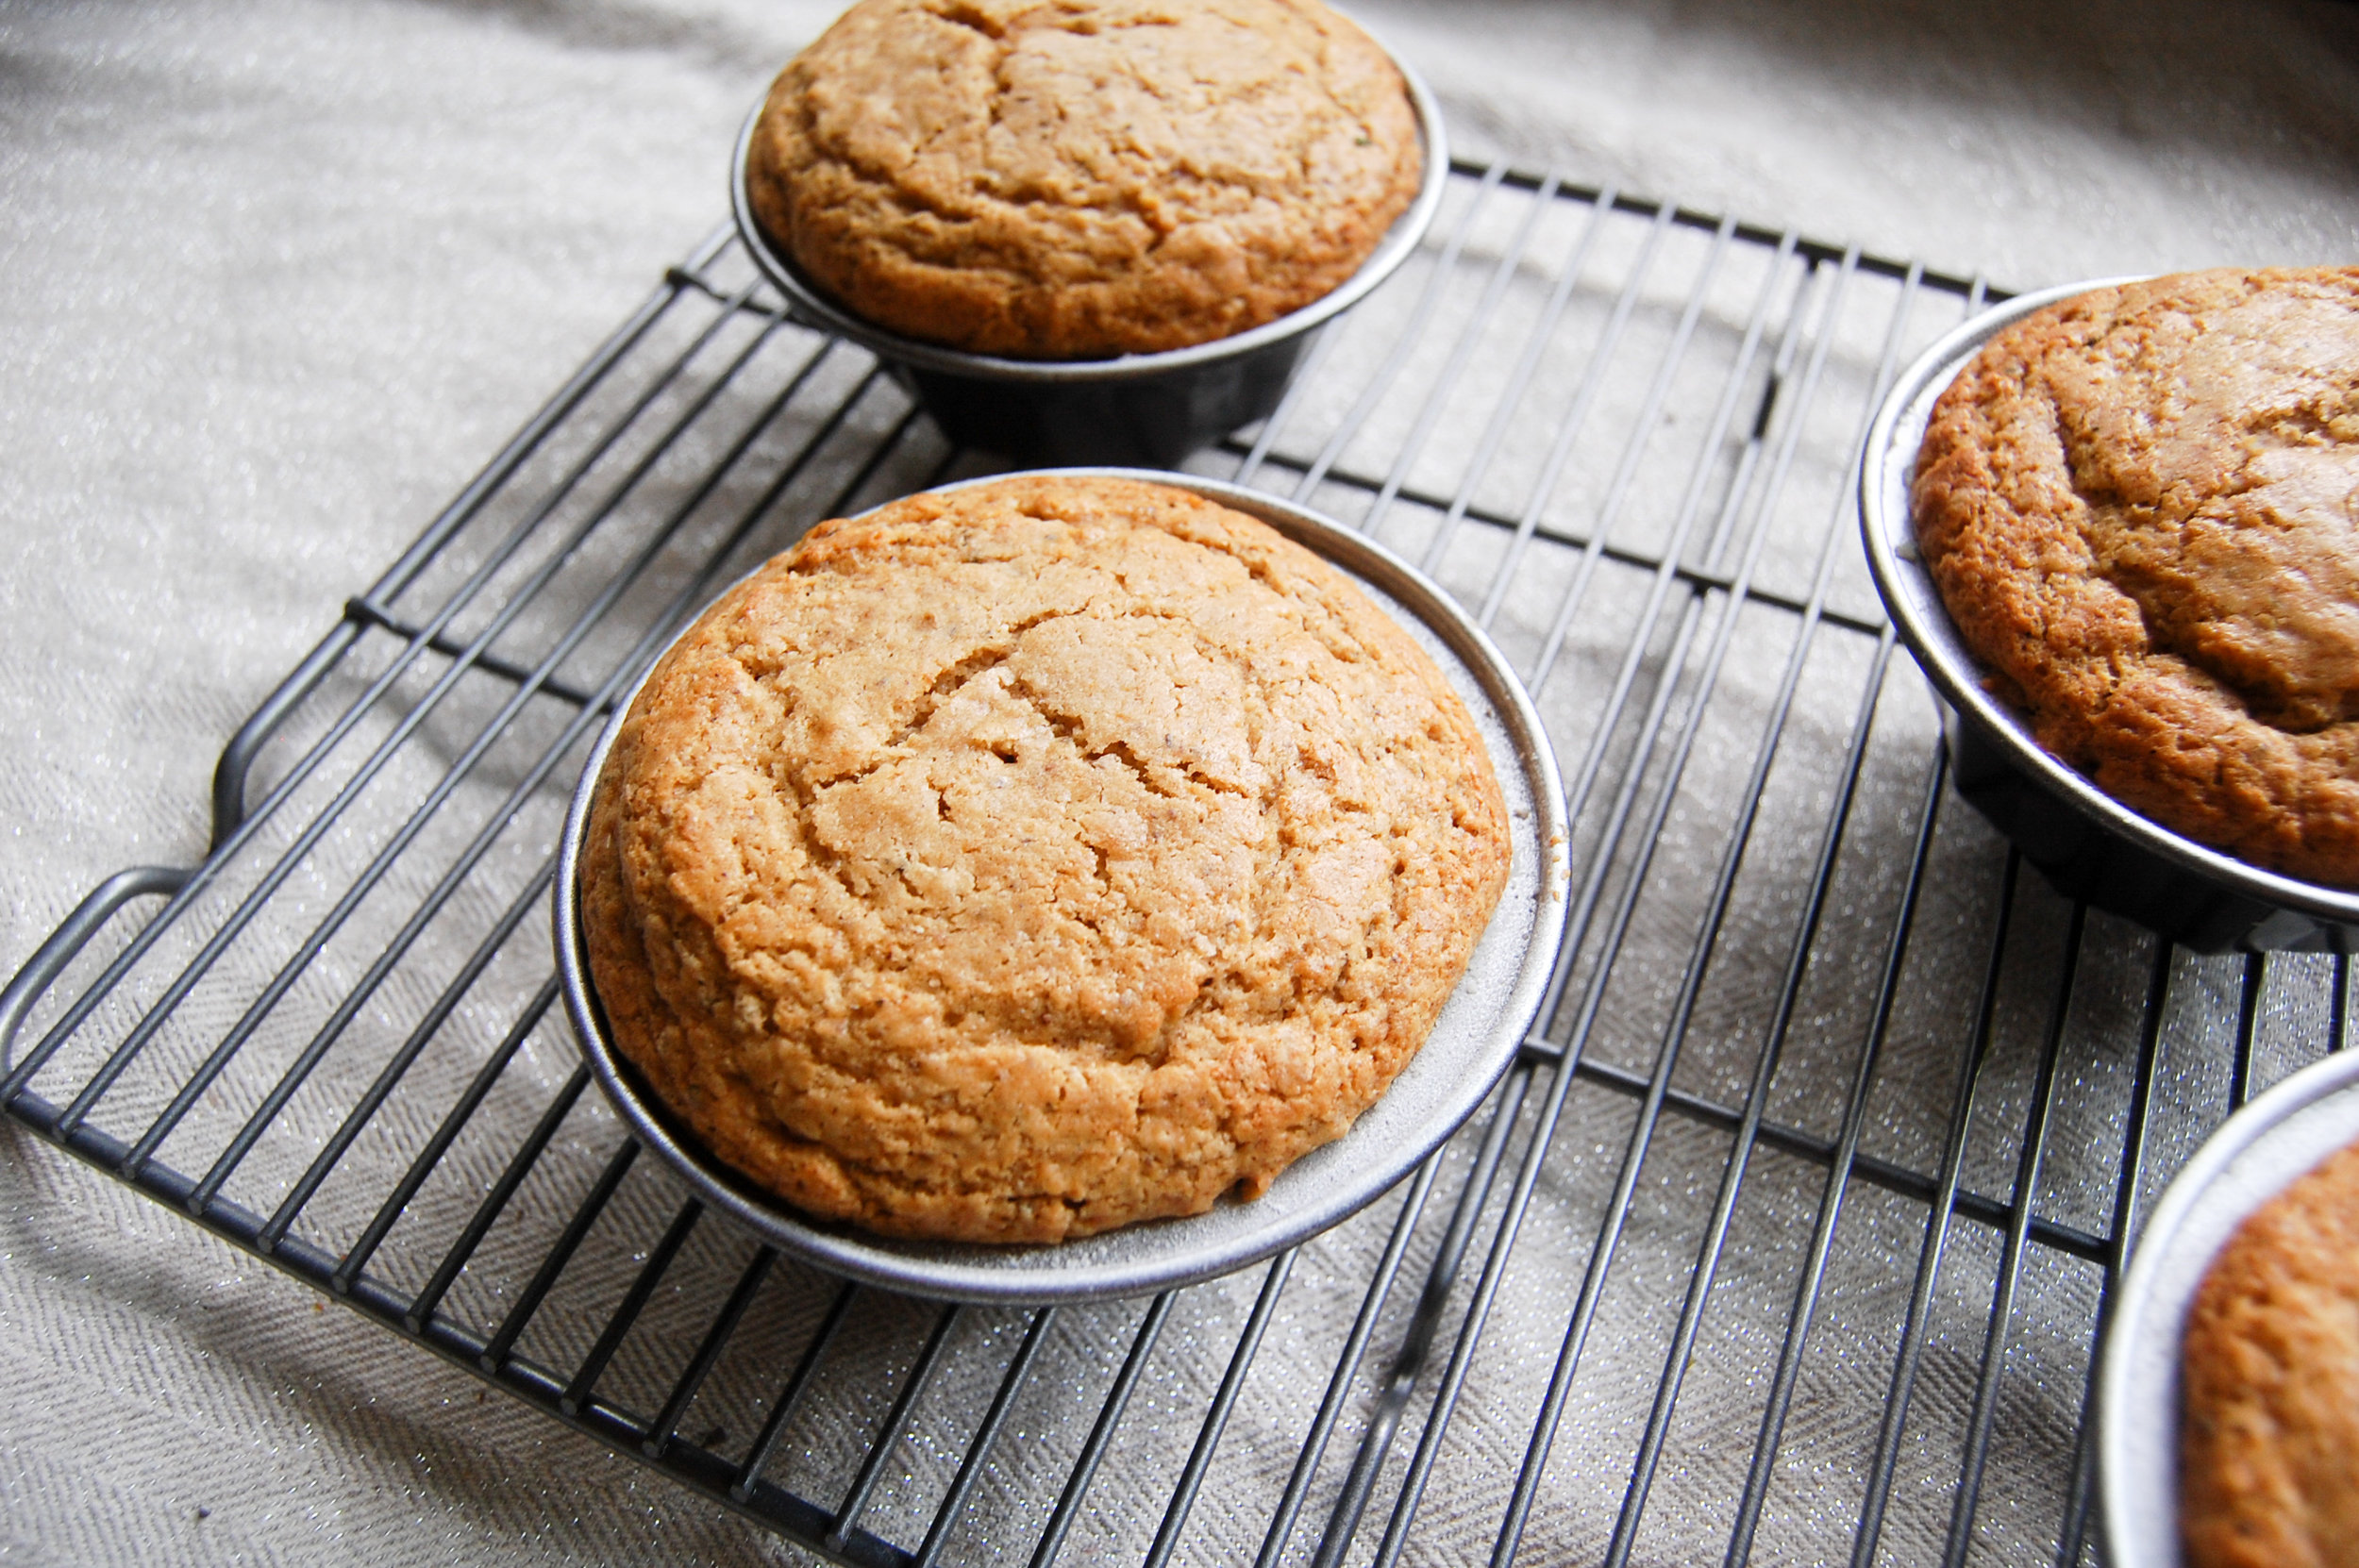

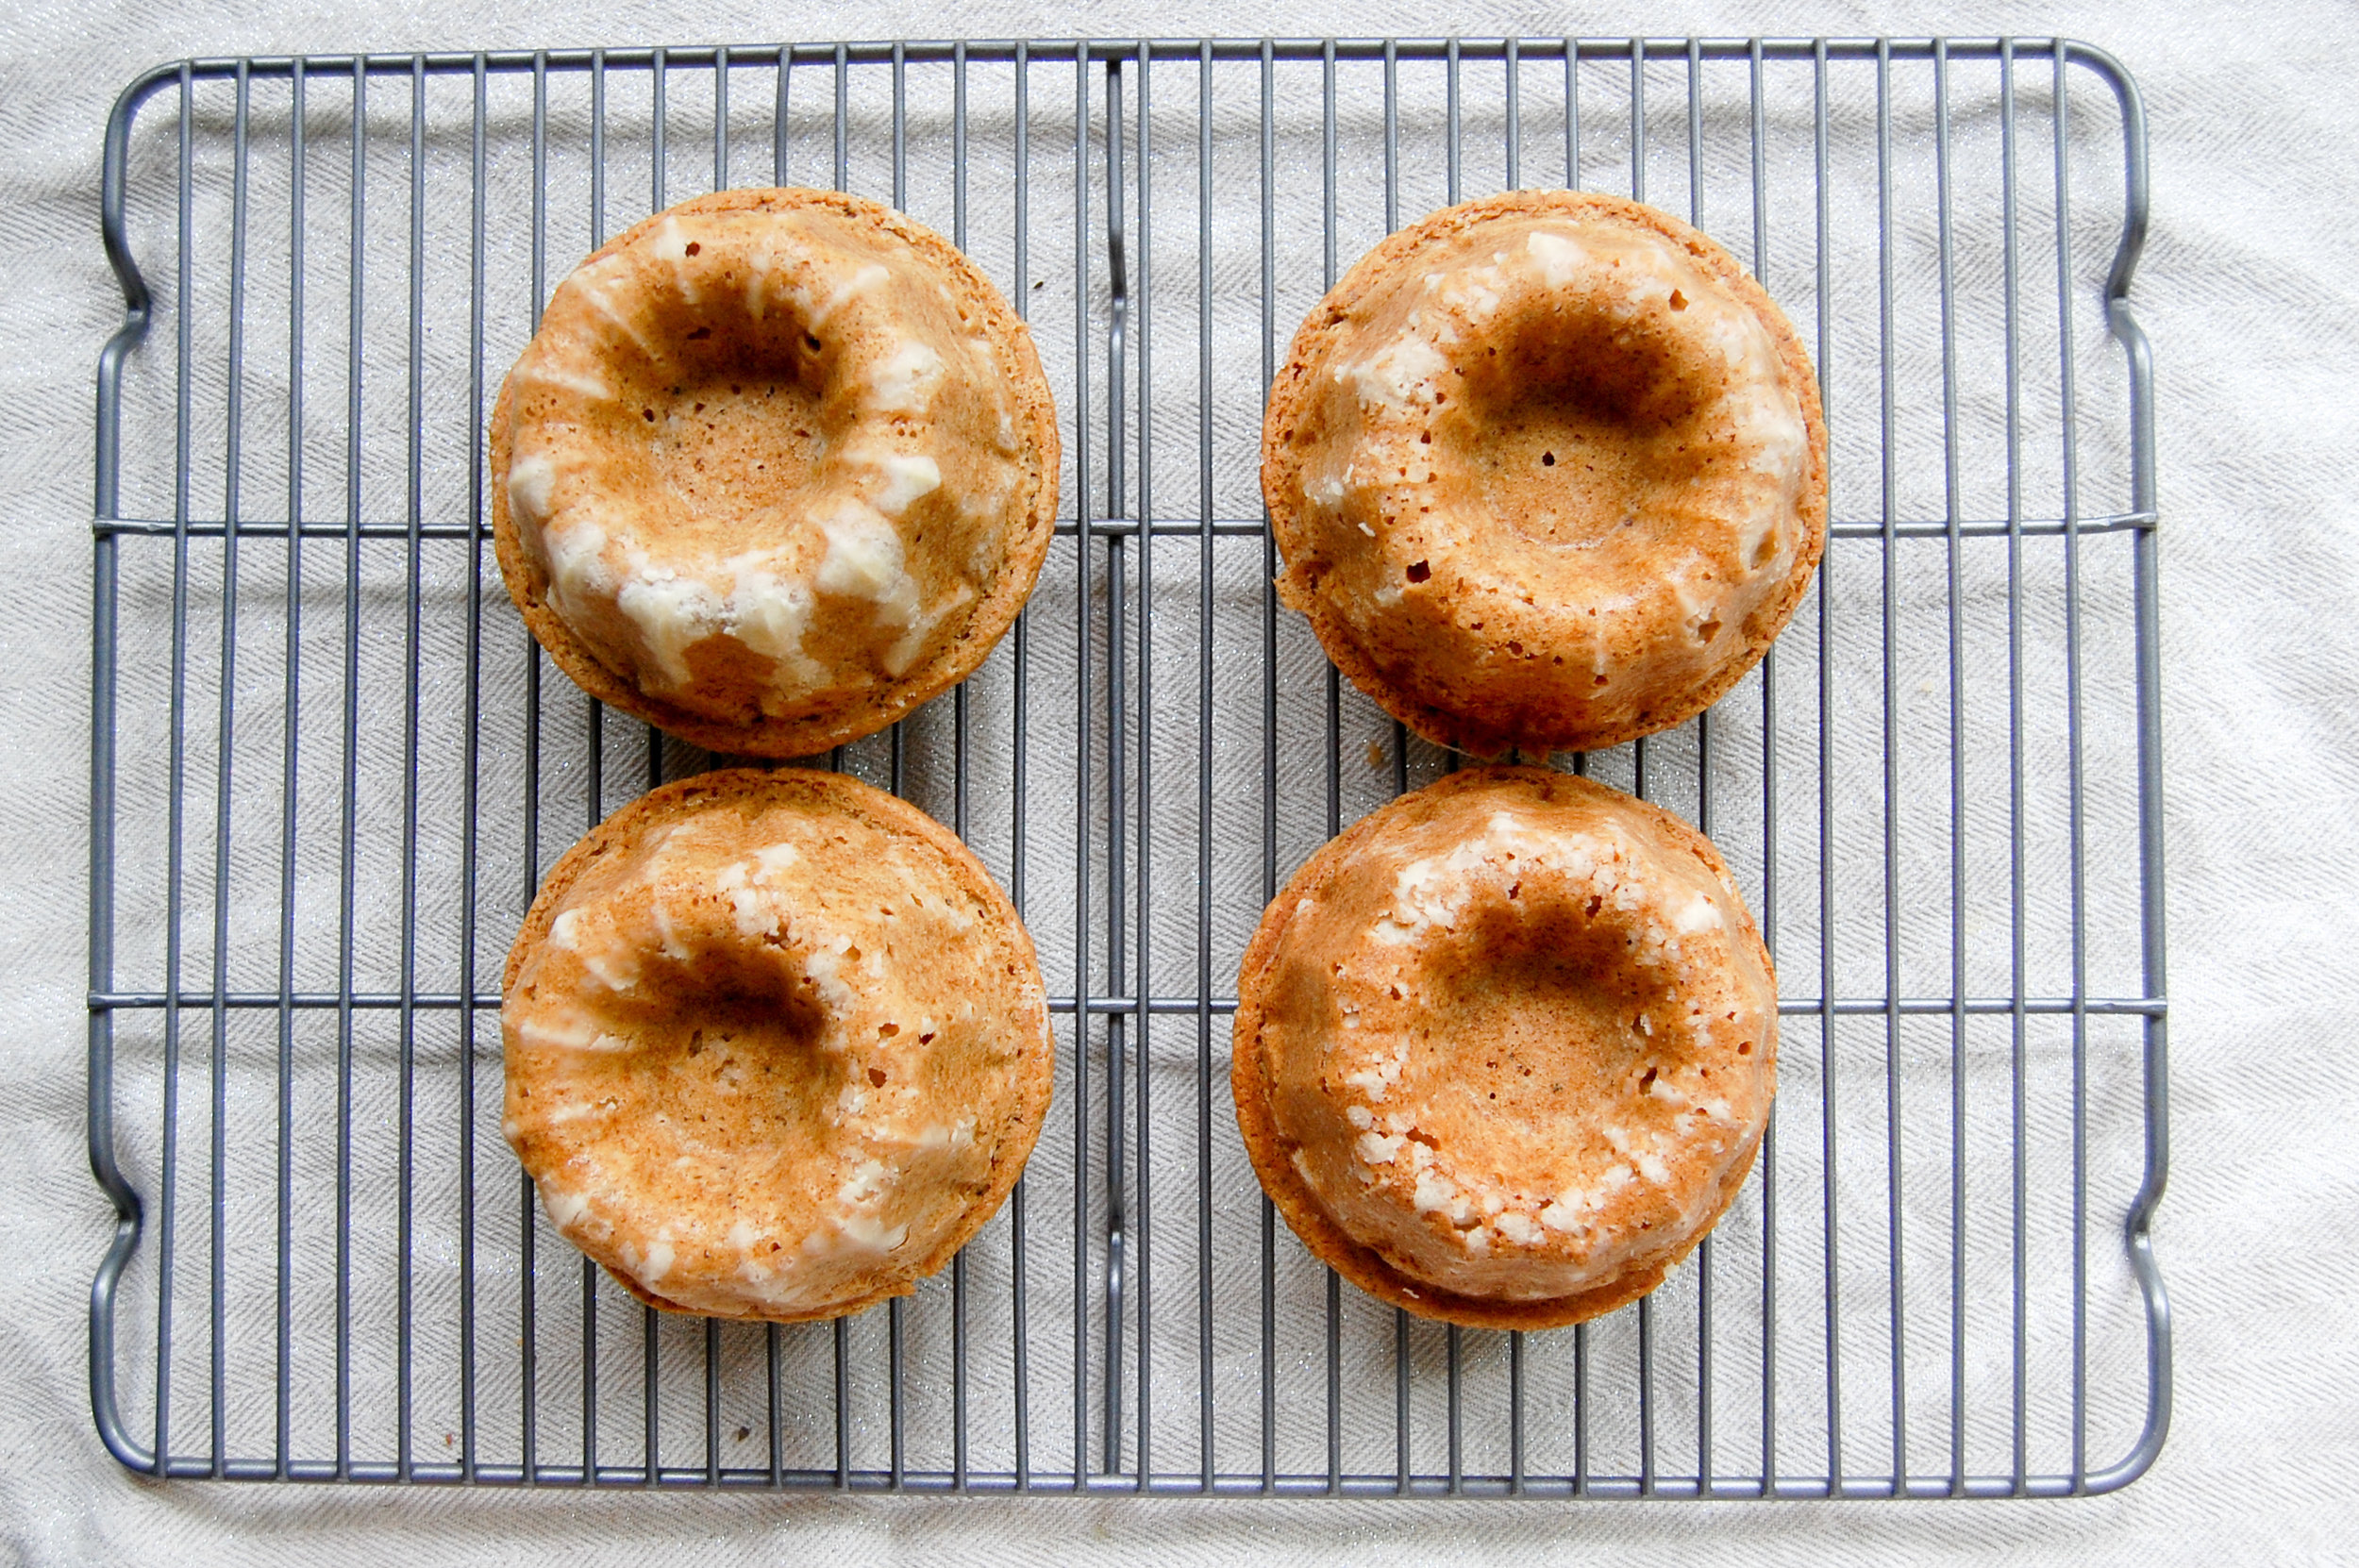
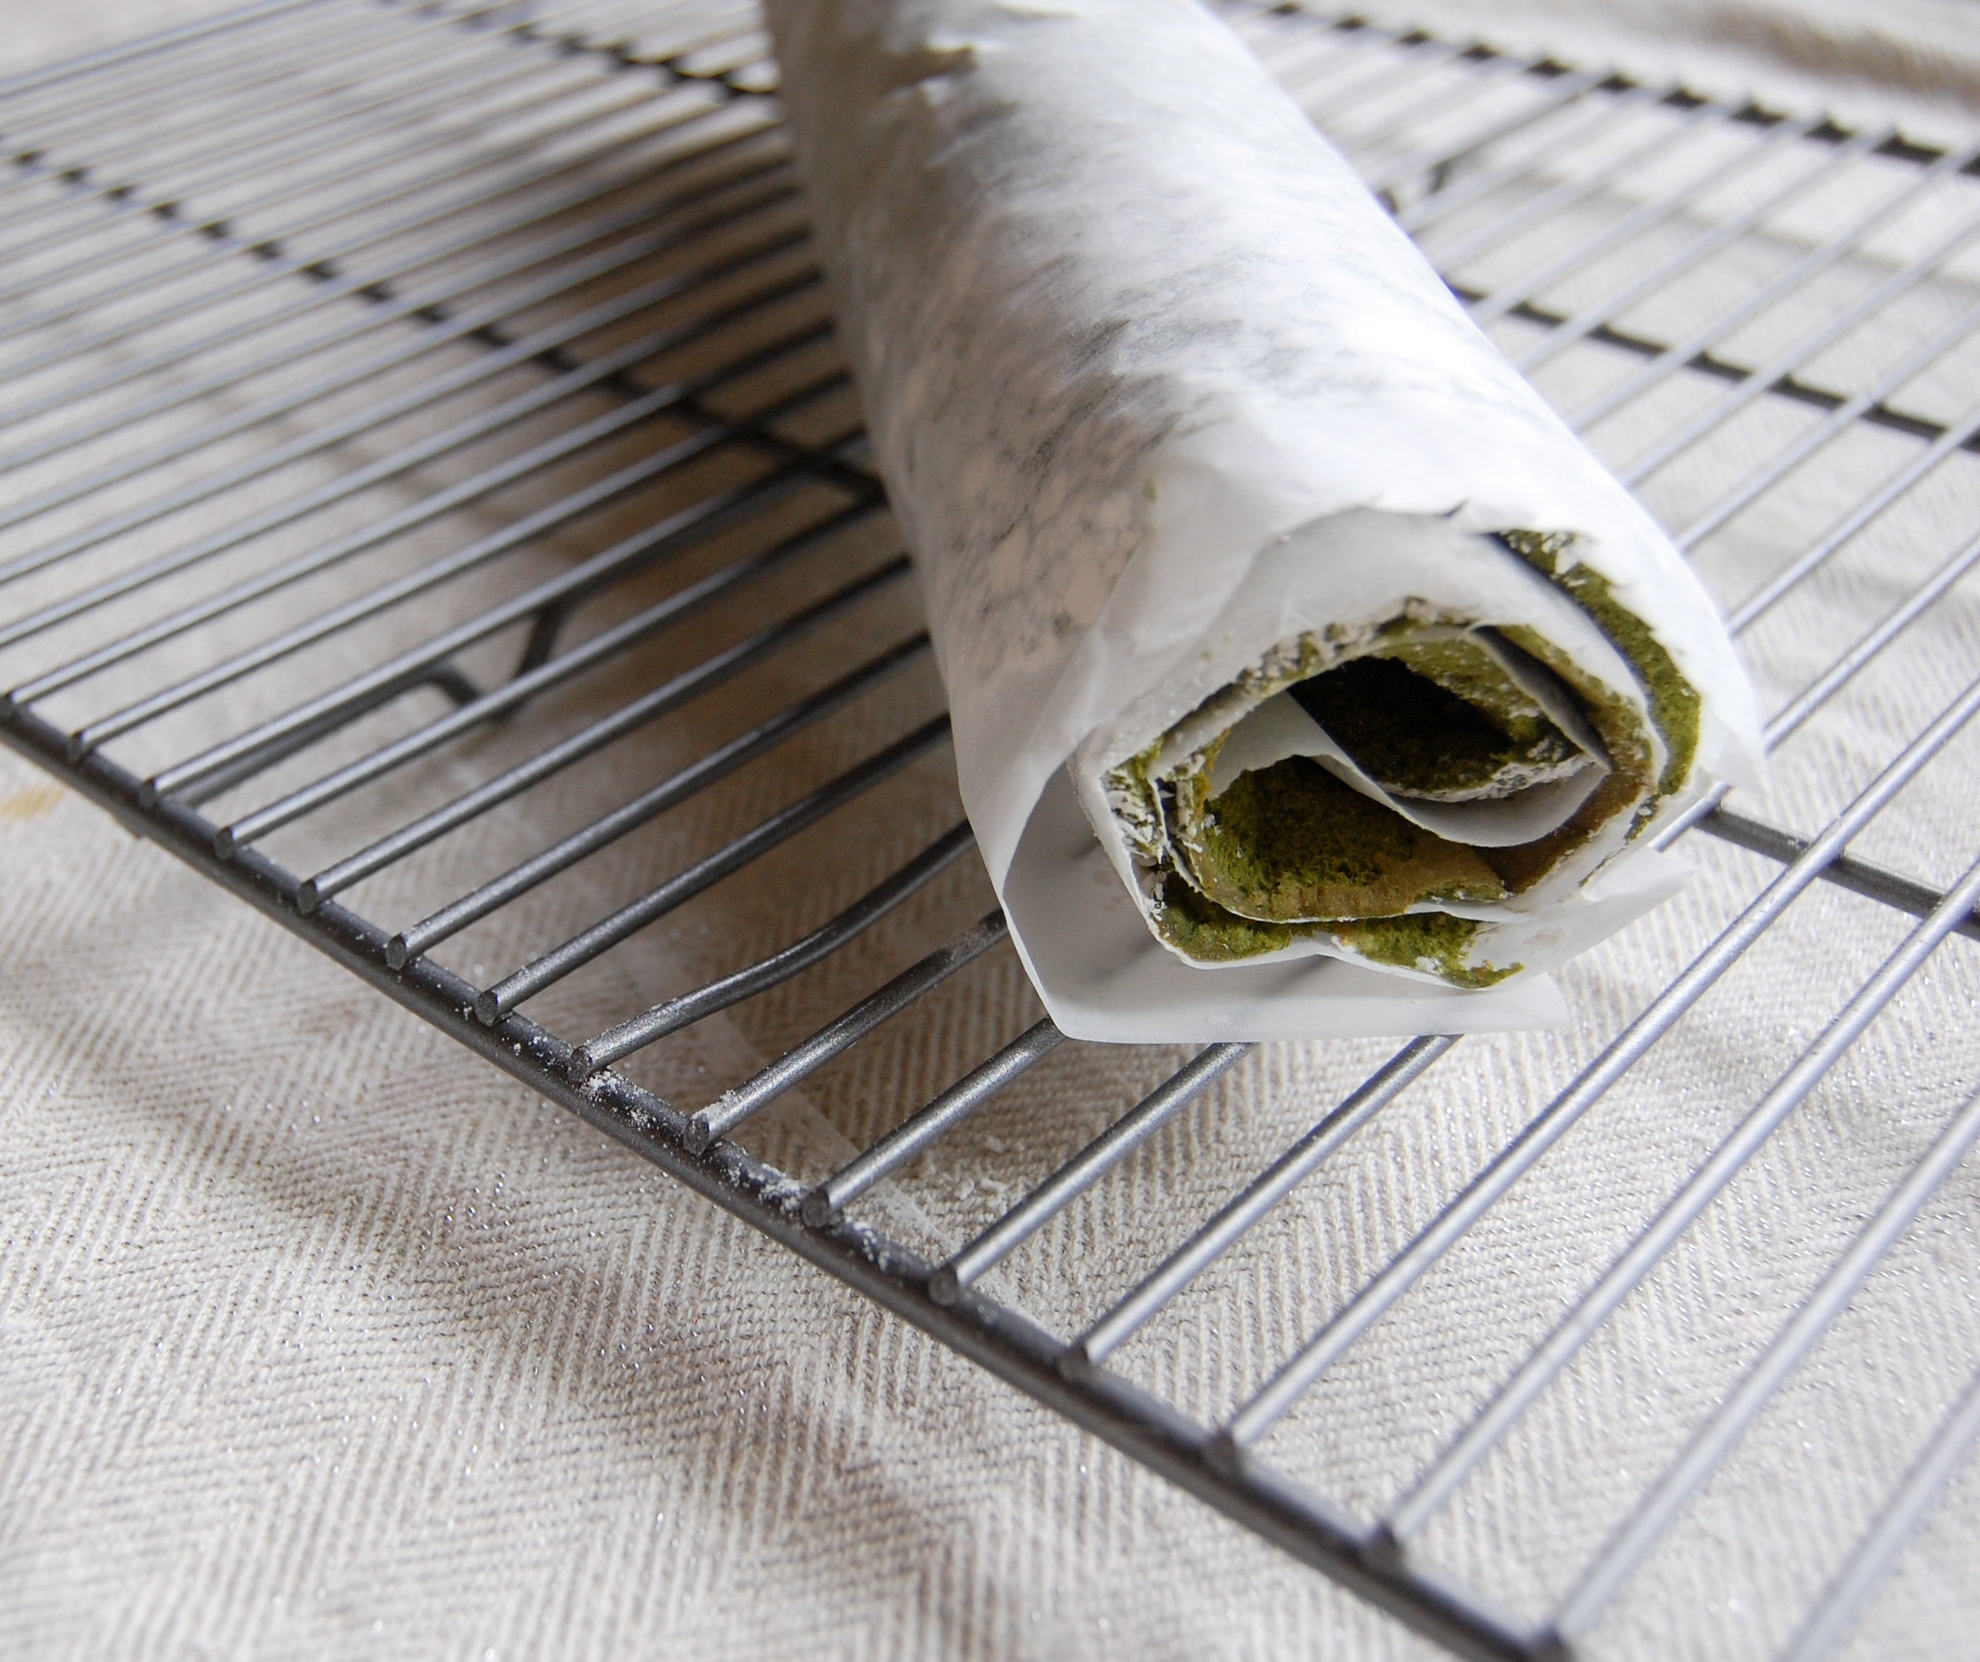
See the white on my cakes, that means I needed to knock off a little more flour. It didn't interfere with the flavor but here is a lesson! Especially if you're over concerned with how they look, make sure to have a thin layer of flour. You can however always cover it with glaze :)
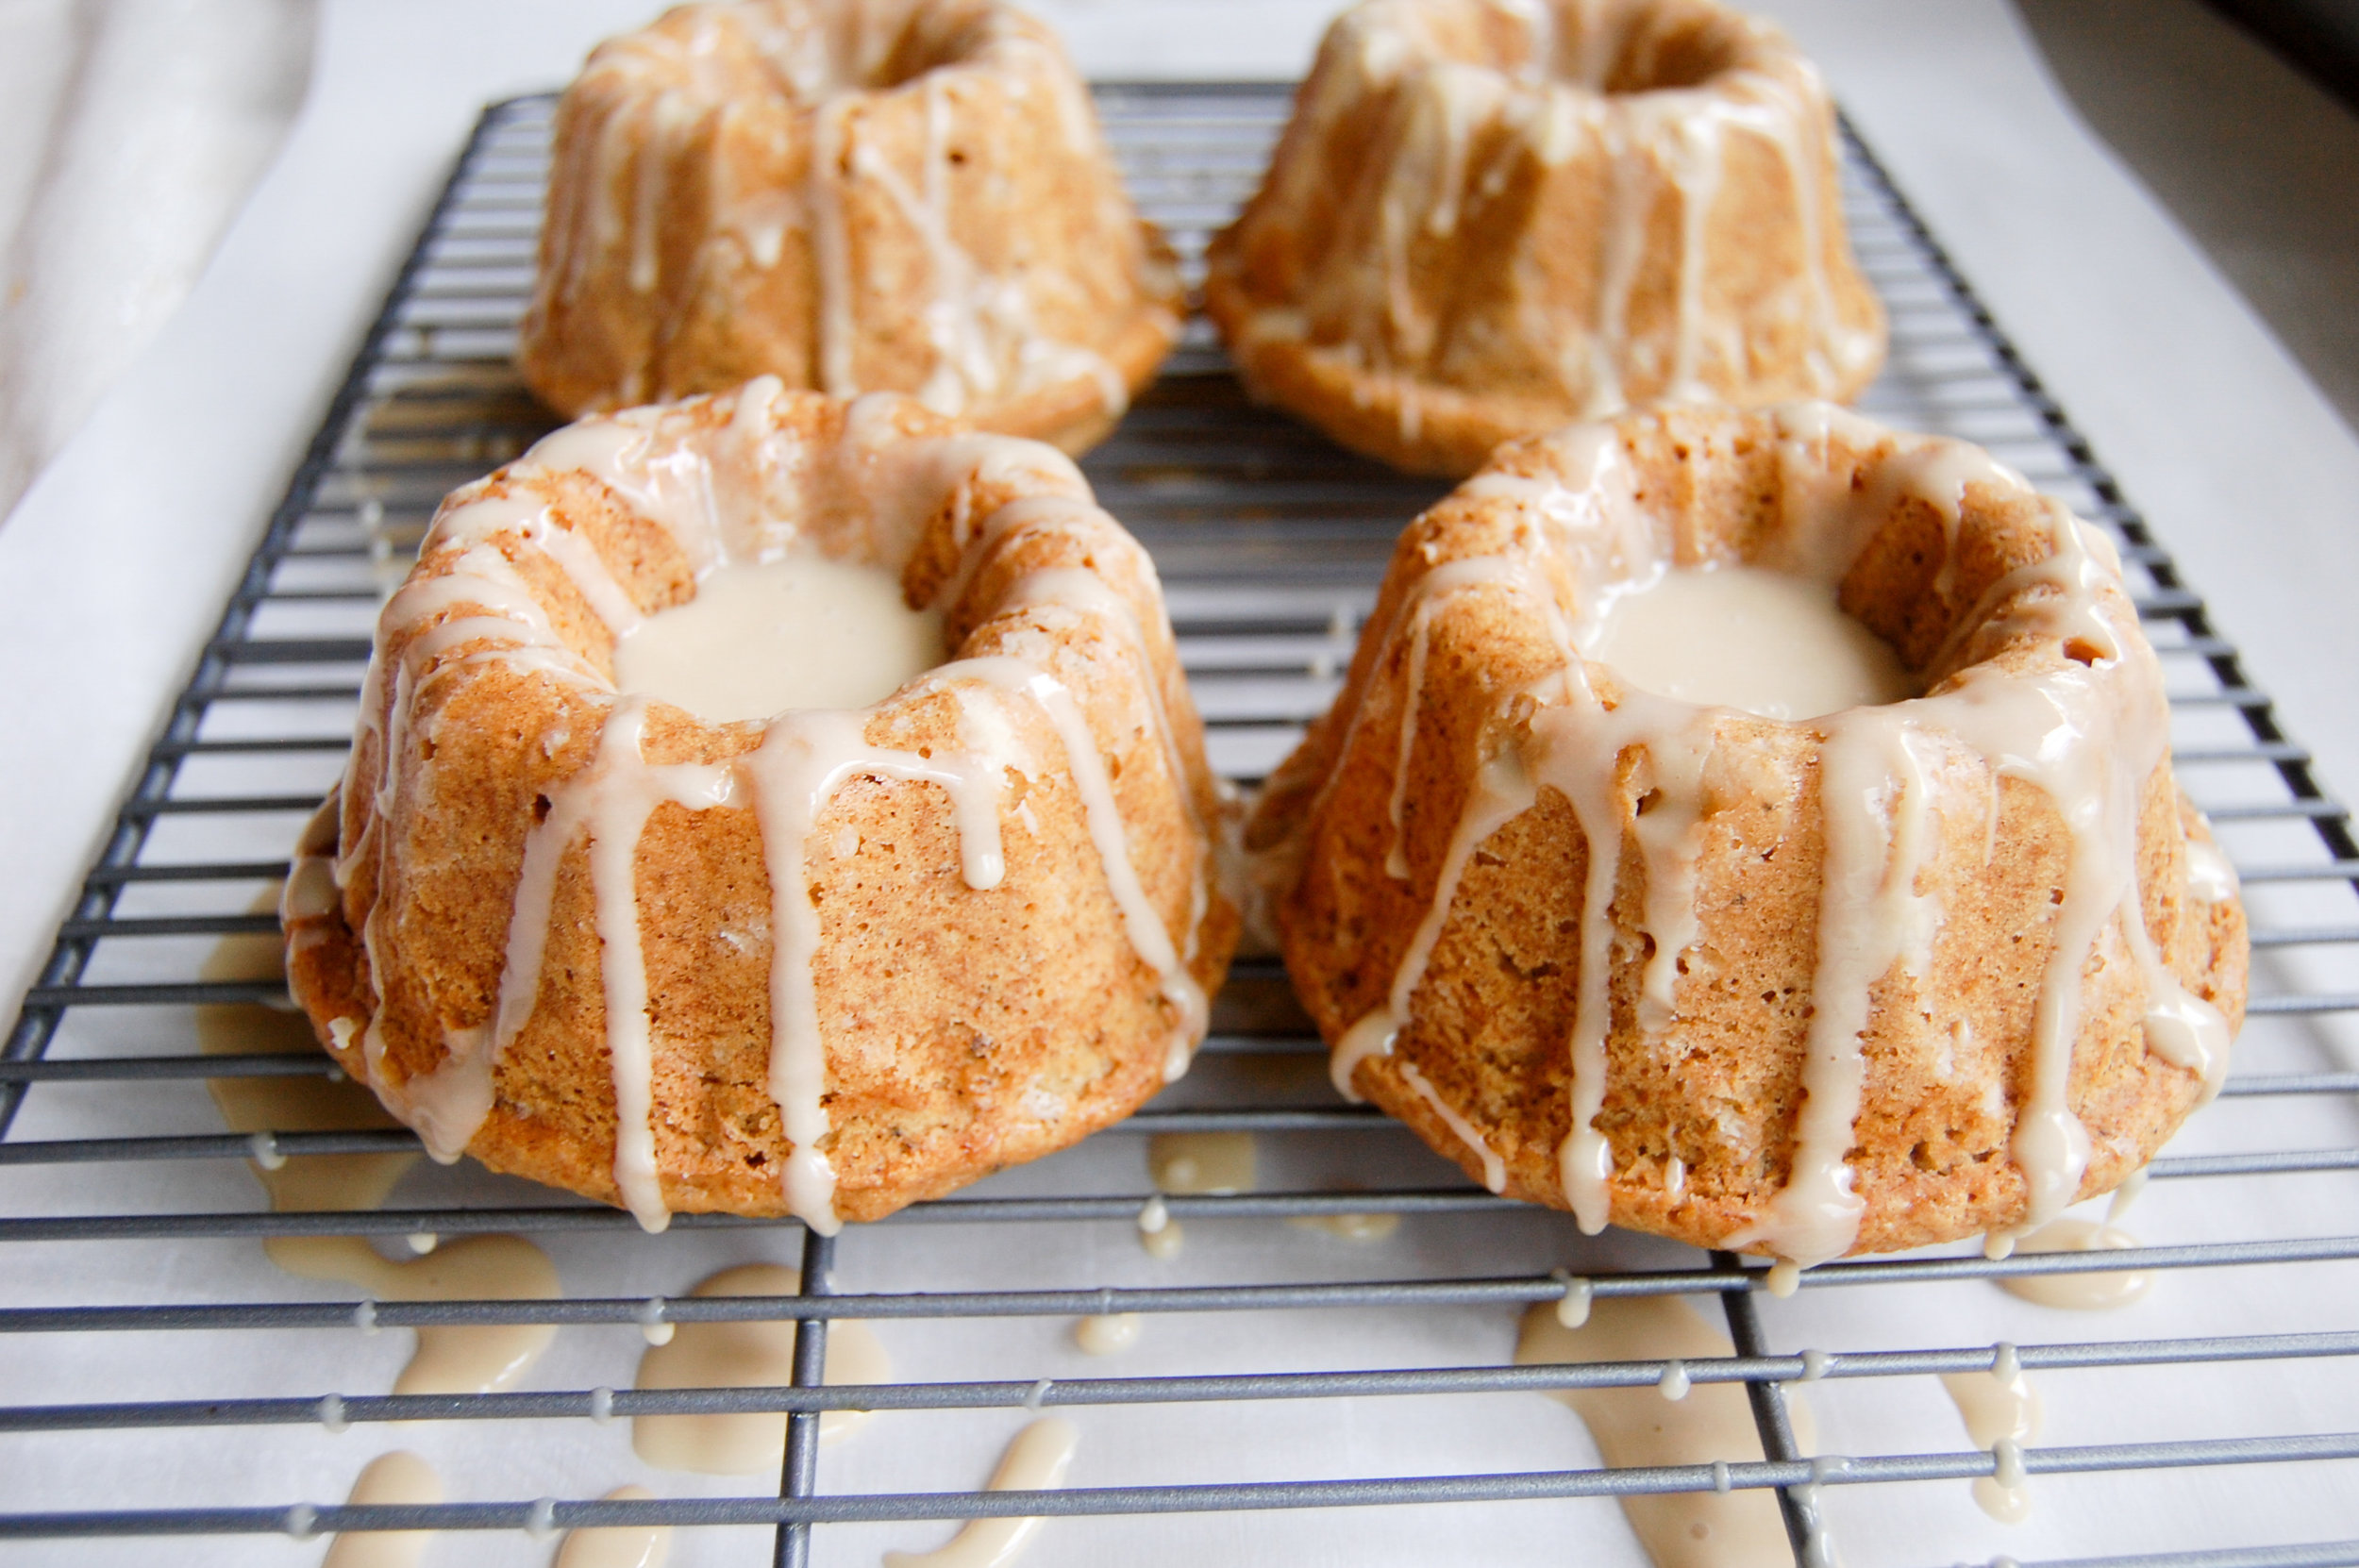
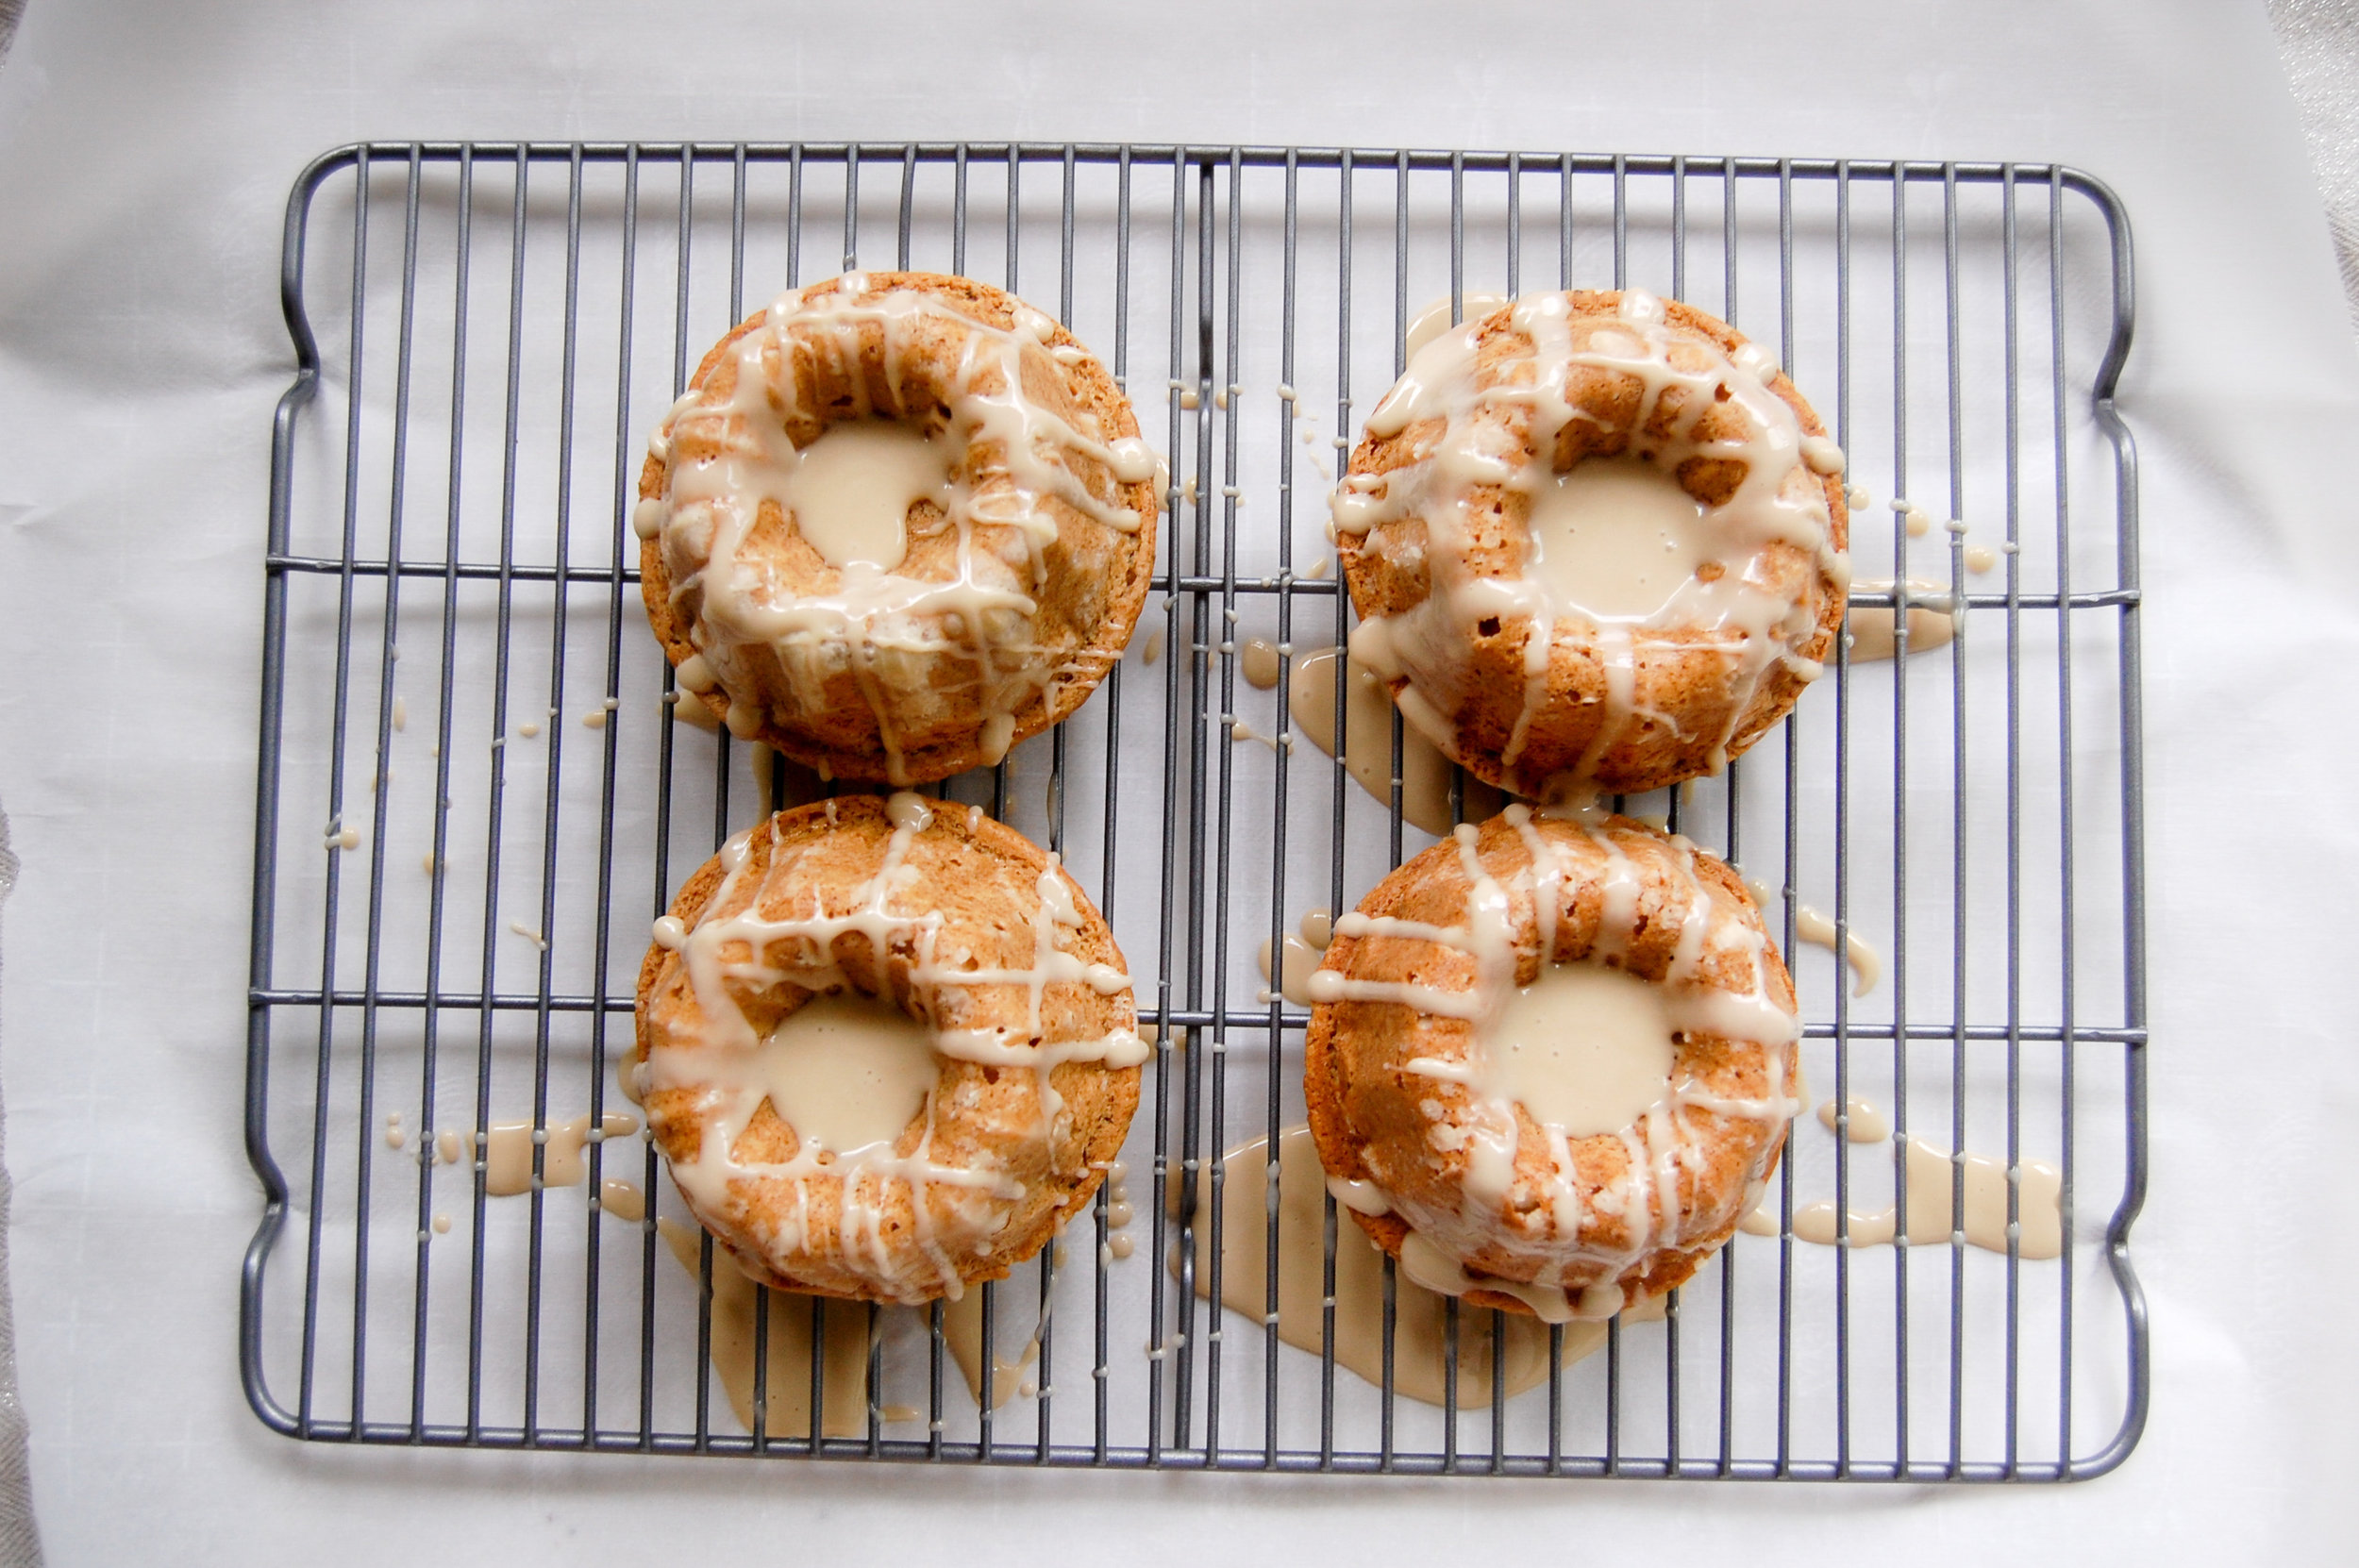
I made my glaze pretty thick but thin enough to drizzle. If it's too thin it won't solidify but this part is completely up to you. I put 2 cups of confectioner's sugar in my recipe but use as much as you want to get desired consistency. MAKE SURE YOUR BUNDTS ARE COOL BEFORE GLAZING!!! Or else it will melt into your cakes.


These tasted fine the next day but oh my gosh they tasted SO GOOD warm. The cake is thick but soft and the tartness of the glaze goes so well with the licorice and cinnamon in the cake.

I want to get all sorts of bundt pans and try these! Do you have a favorite bundt pan?!
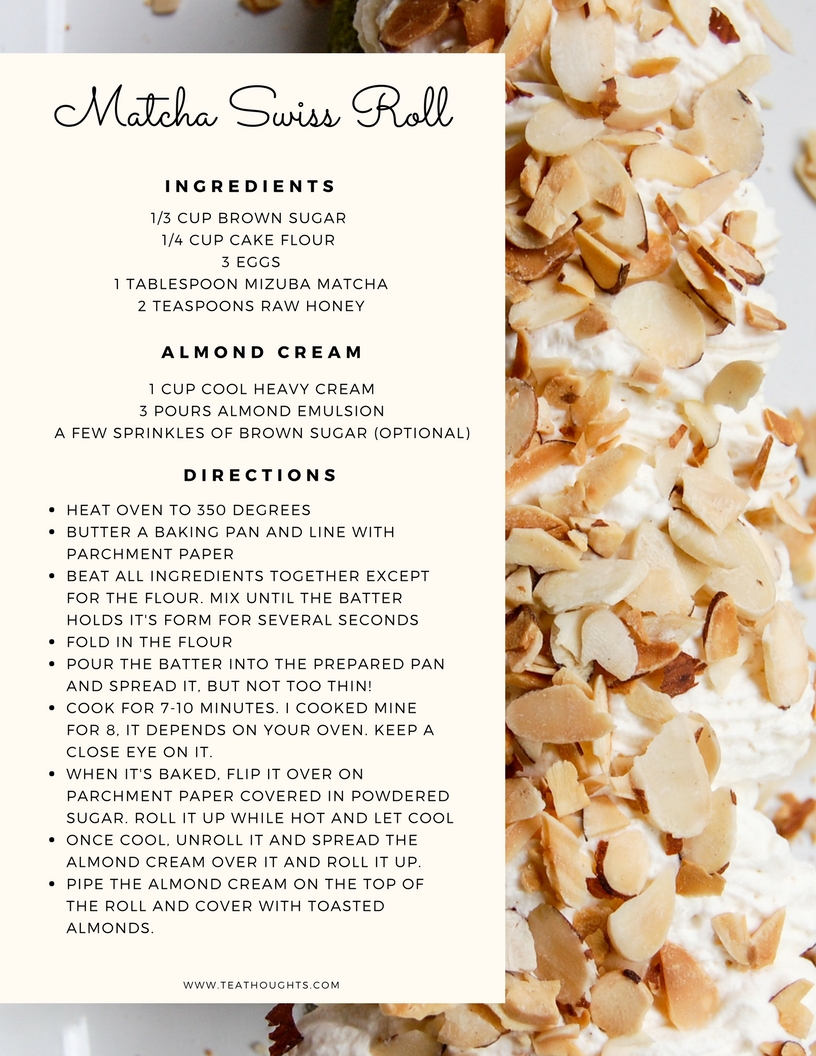
Matcha Swiss Roll With Almond Cream
Matcha Roll.
Another matcha recipe, are you surprised ?! So, I've been hooked on The Great British Baking Show recently and it's been giving me all sorts of recipe inspiration. One of the first episodes they made a "swiss roll" which is essentially a cake rolled around delicious cream! We get these all the time from the Iranian bakery near my house and I've always referred to them as roulette. These have so many styles but the essential idea is the same!

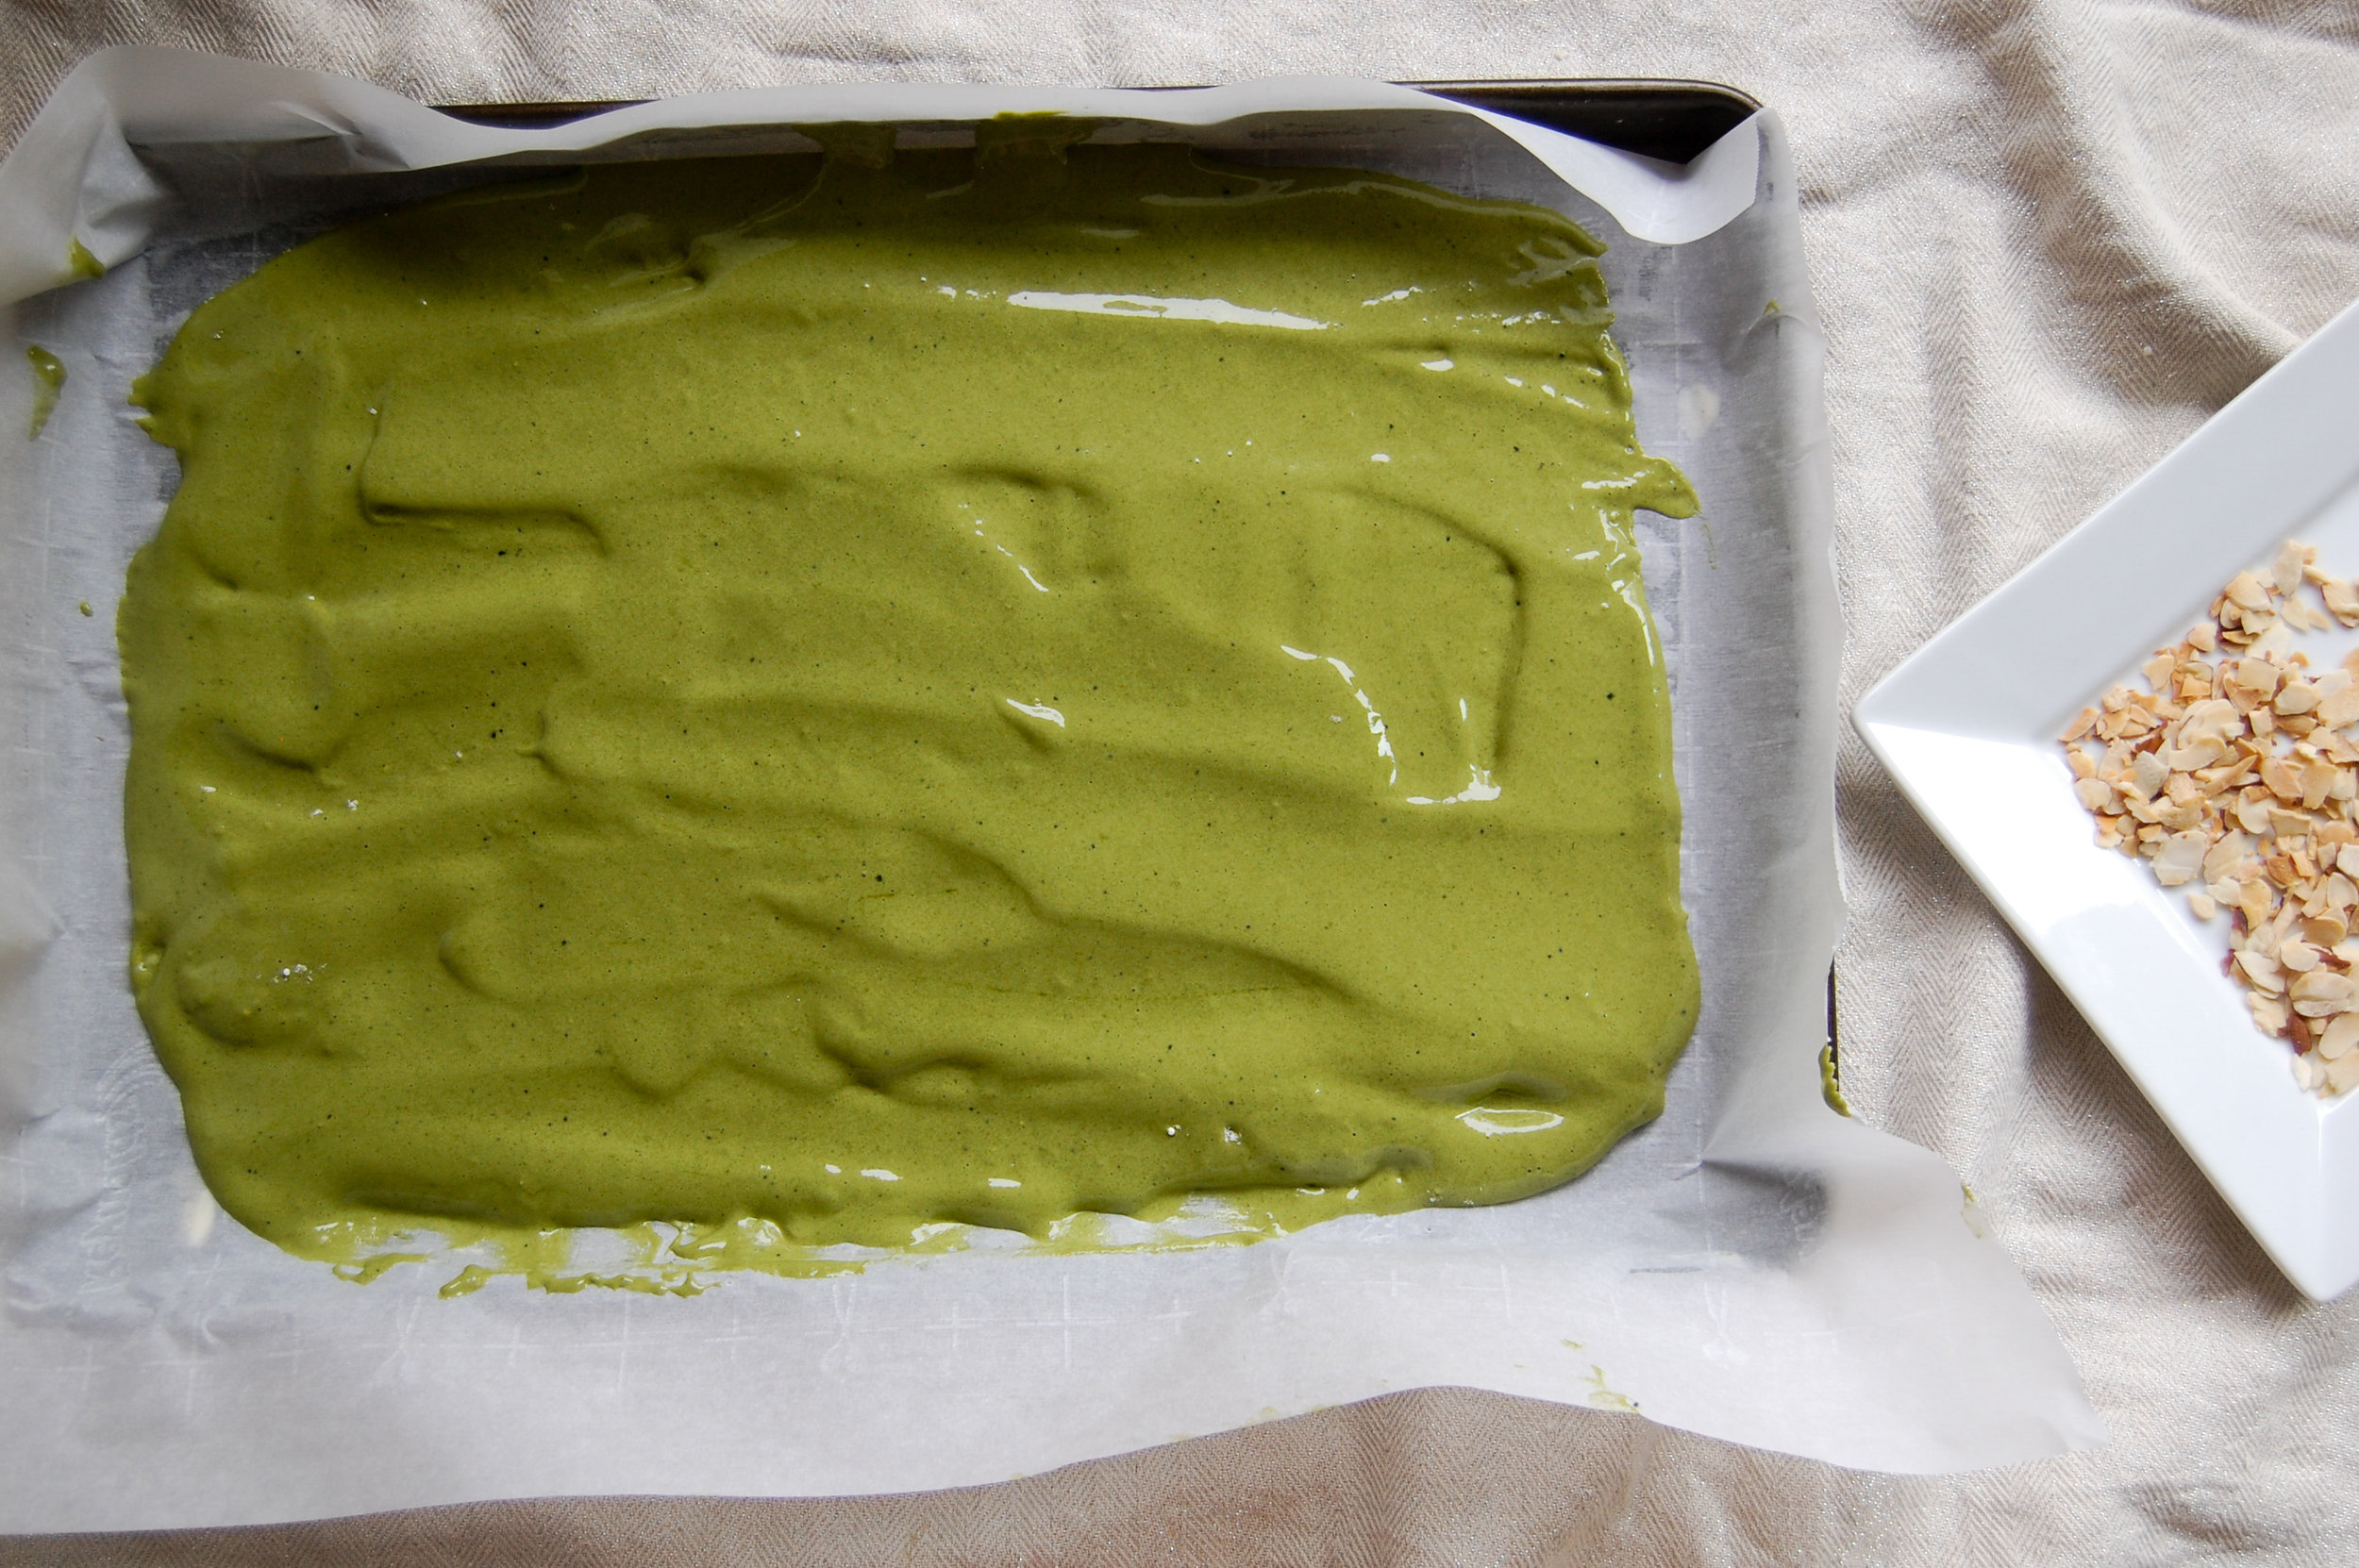
The trickiest part about this roll as I saw on the show and experienced when baking it, is getting it the right size, thickness and texture. On the show they referred to the roll as a "sponge." Well, I felt the pressure of the baking show when I made my first sponge because it was HORRIBLE! It didn't really rise and was not spongy at all.
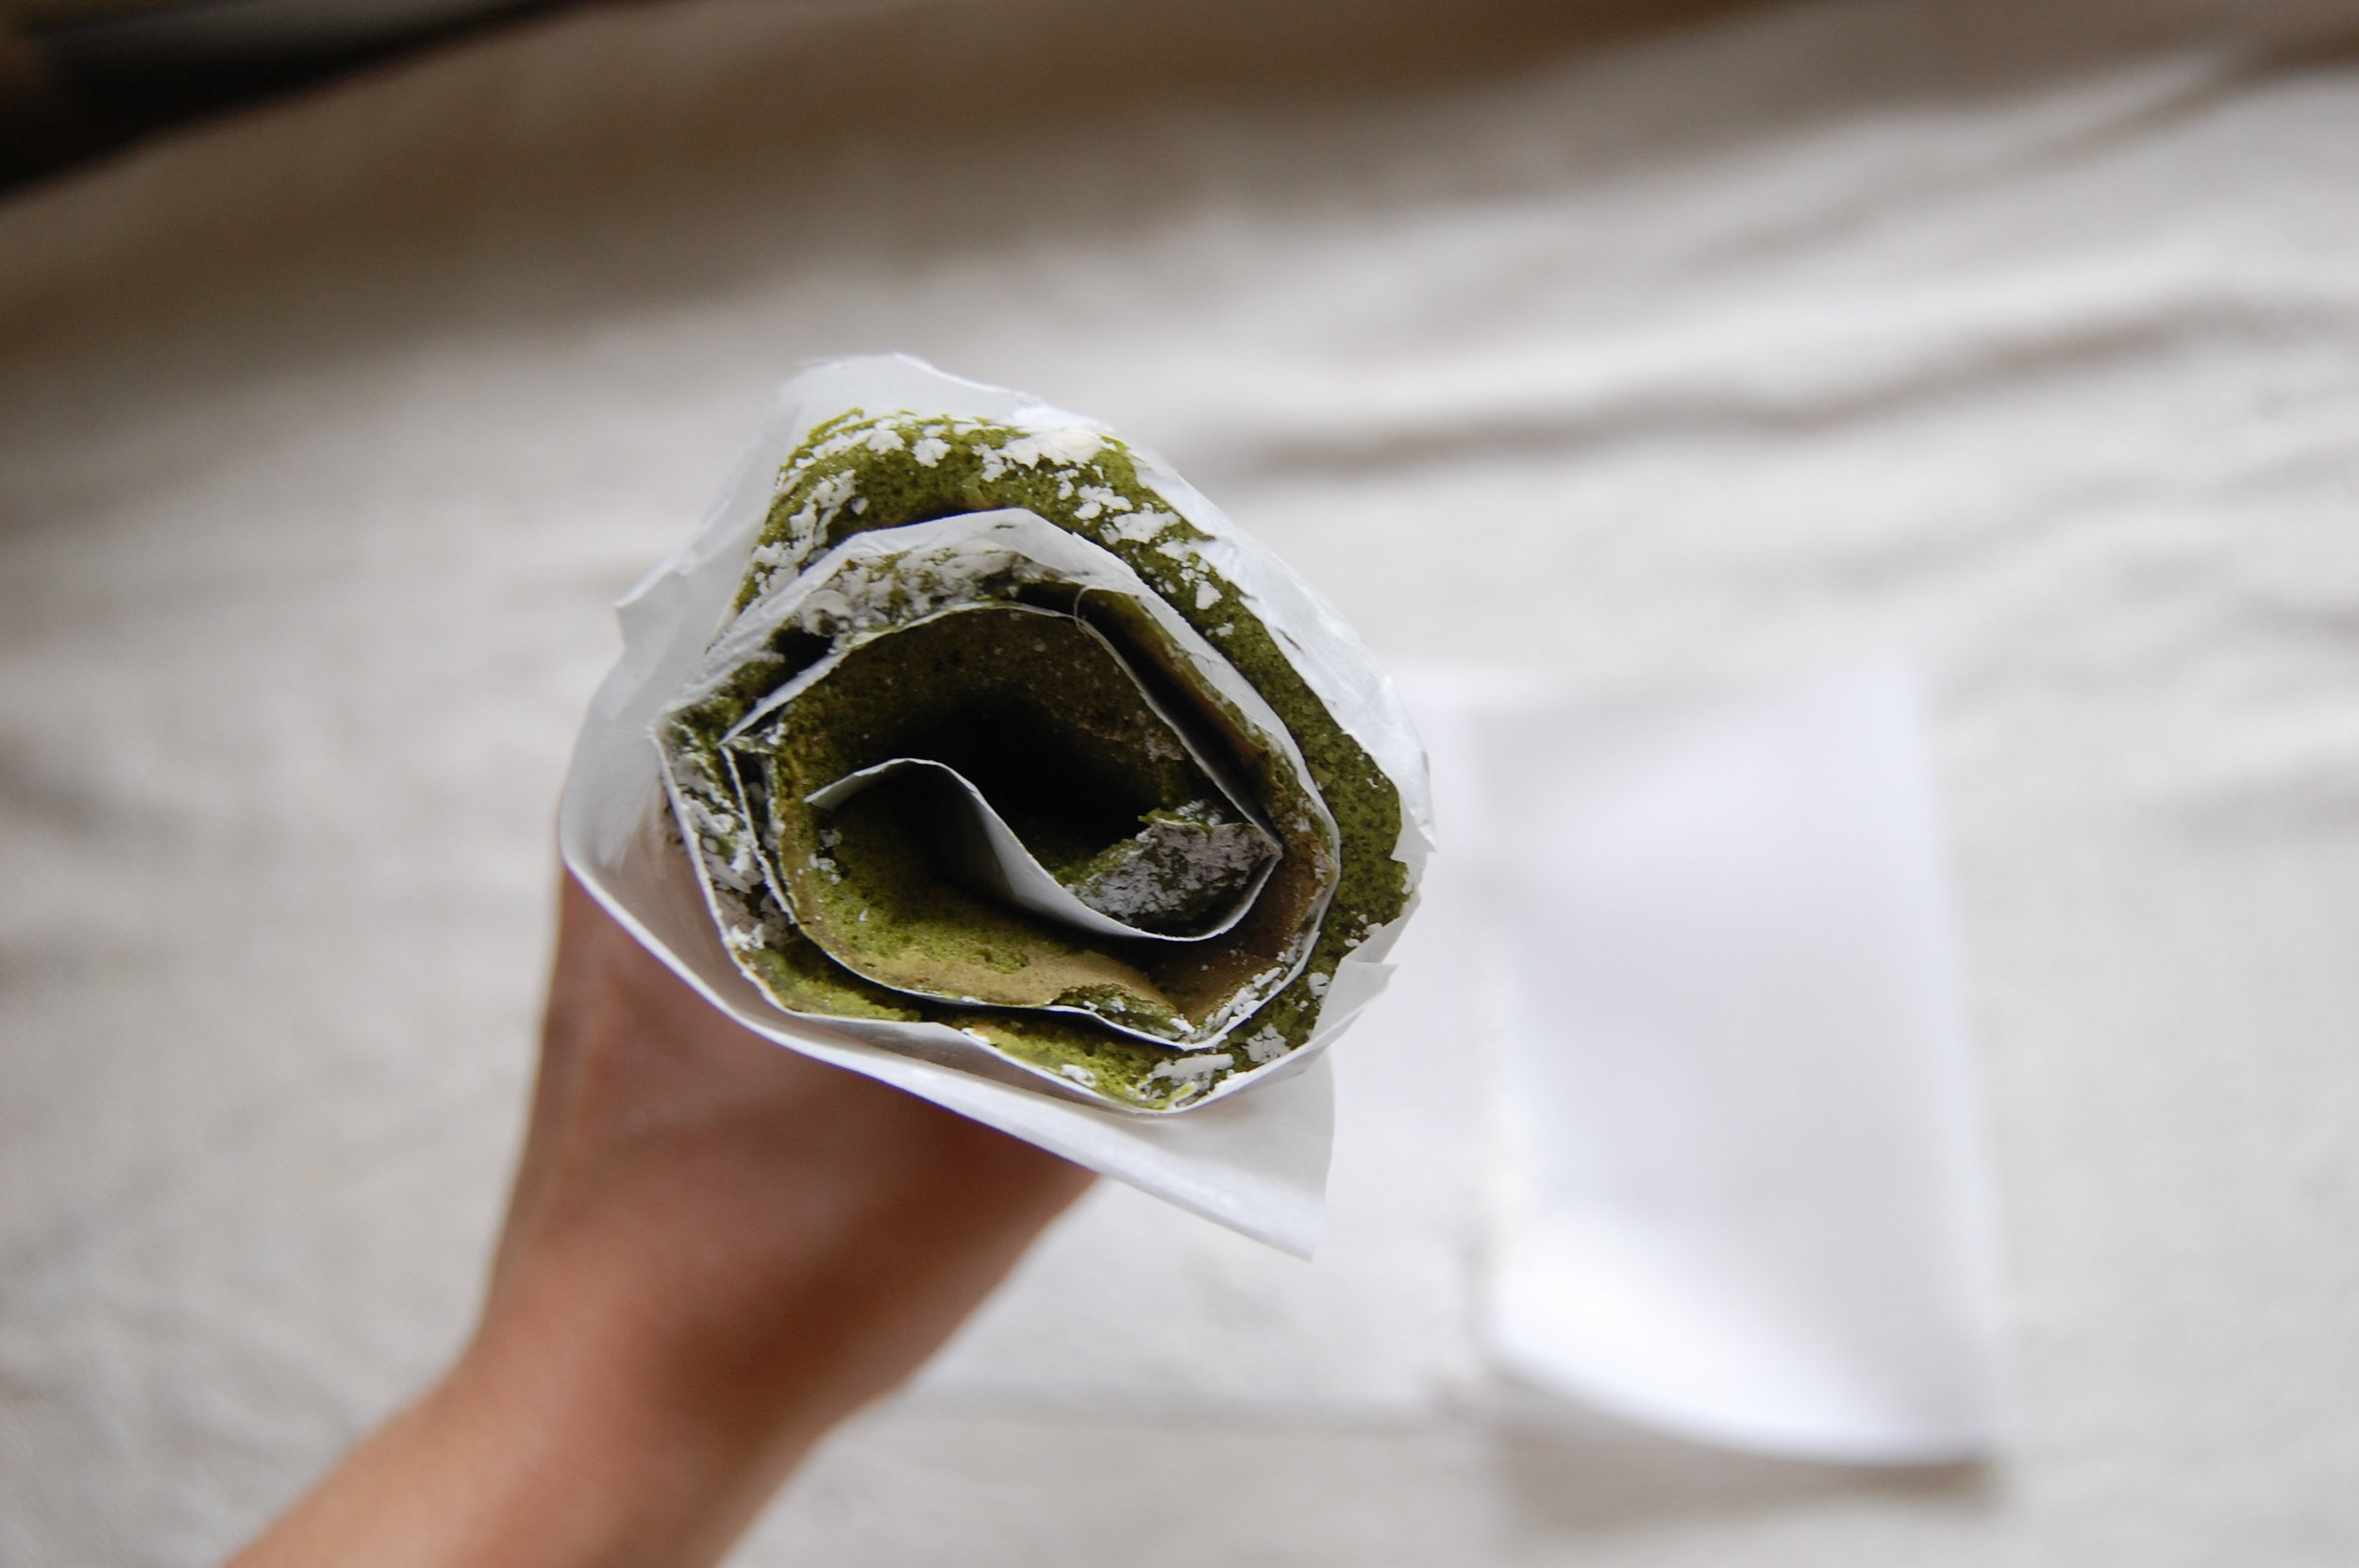
The second time I changed up my ingredients and added honey. I also used cake flour which I think helped a lot. I spread it a bit too thin but it was still soft and delicious! In my directions I note to spread it but not too thin so you can have a thicker roll :) It's really important to roll up the sponge while it's hot so it will roll easier when it's time to spread on the filling!
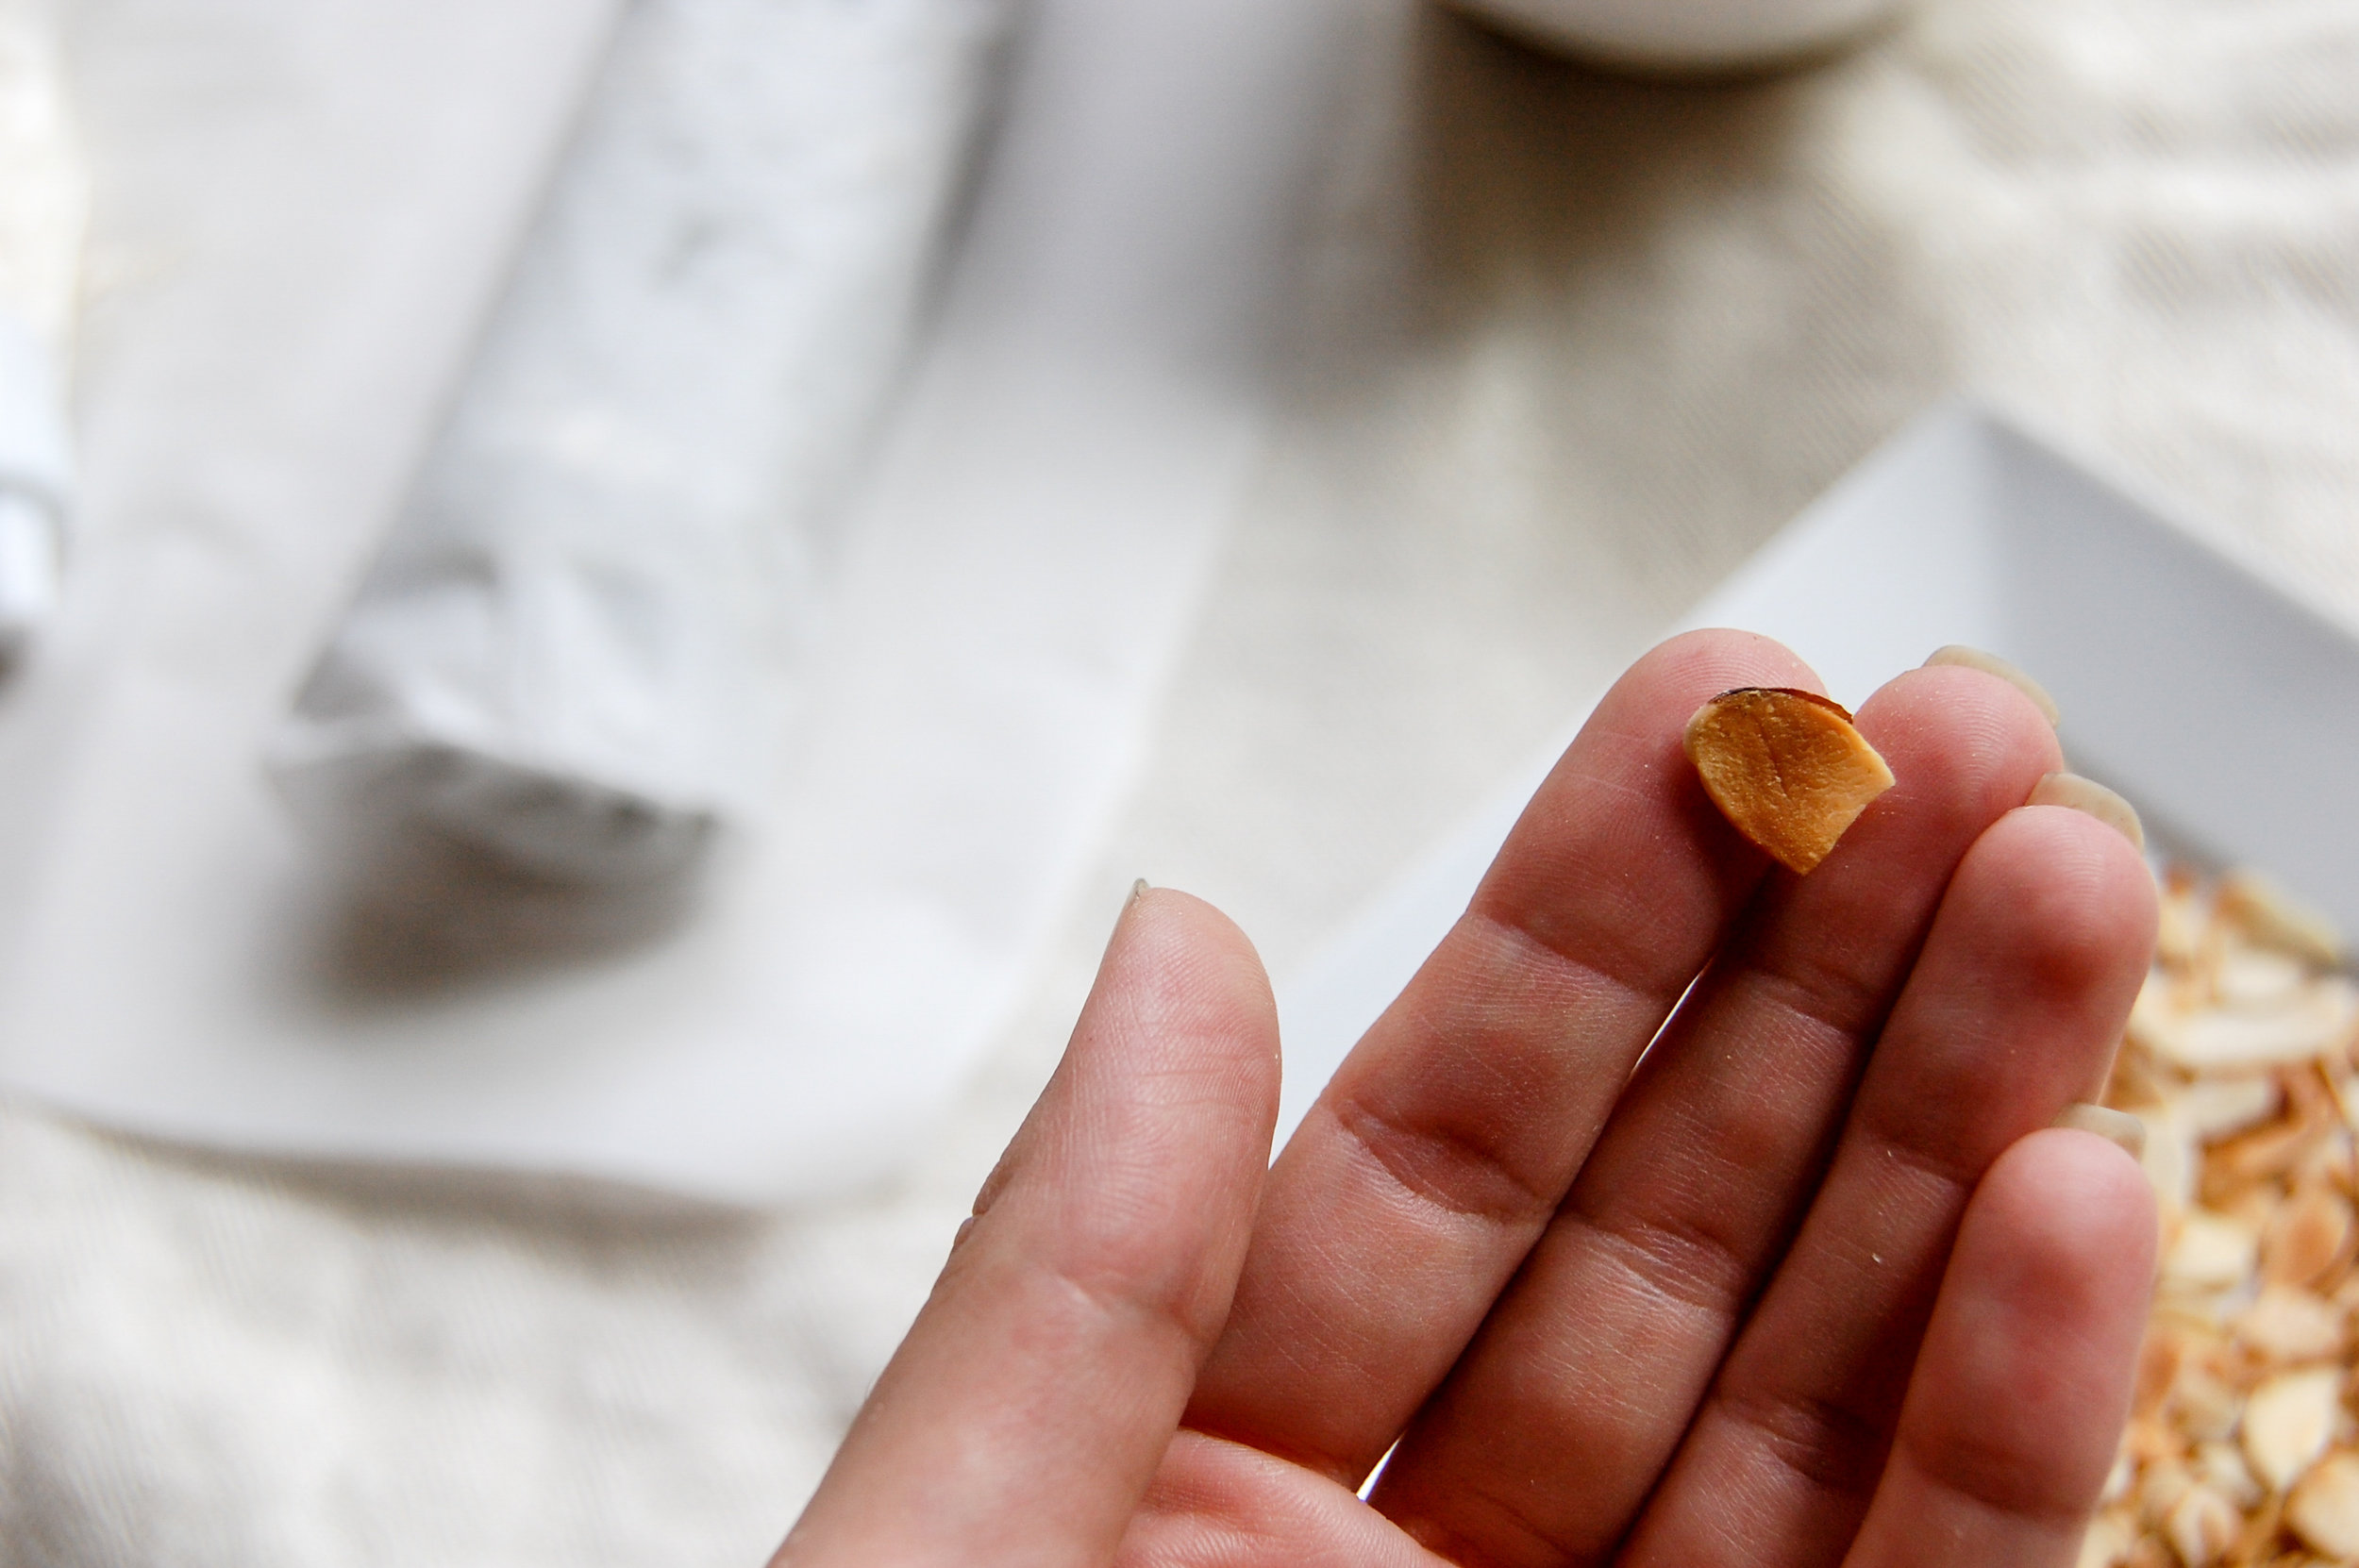
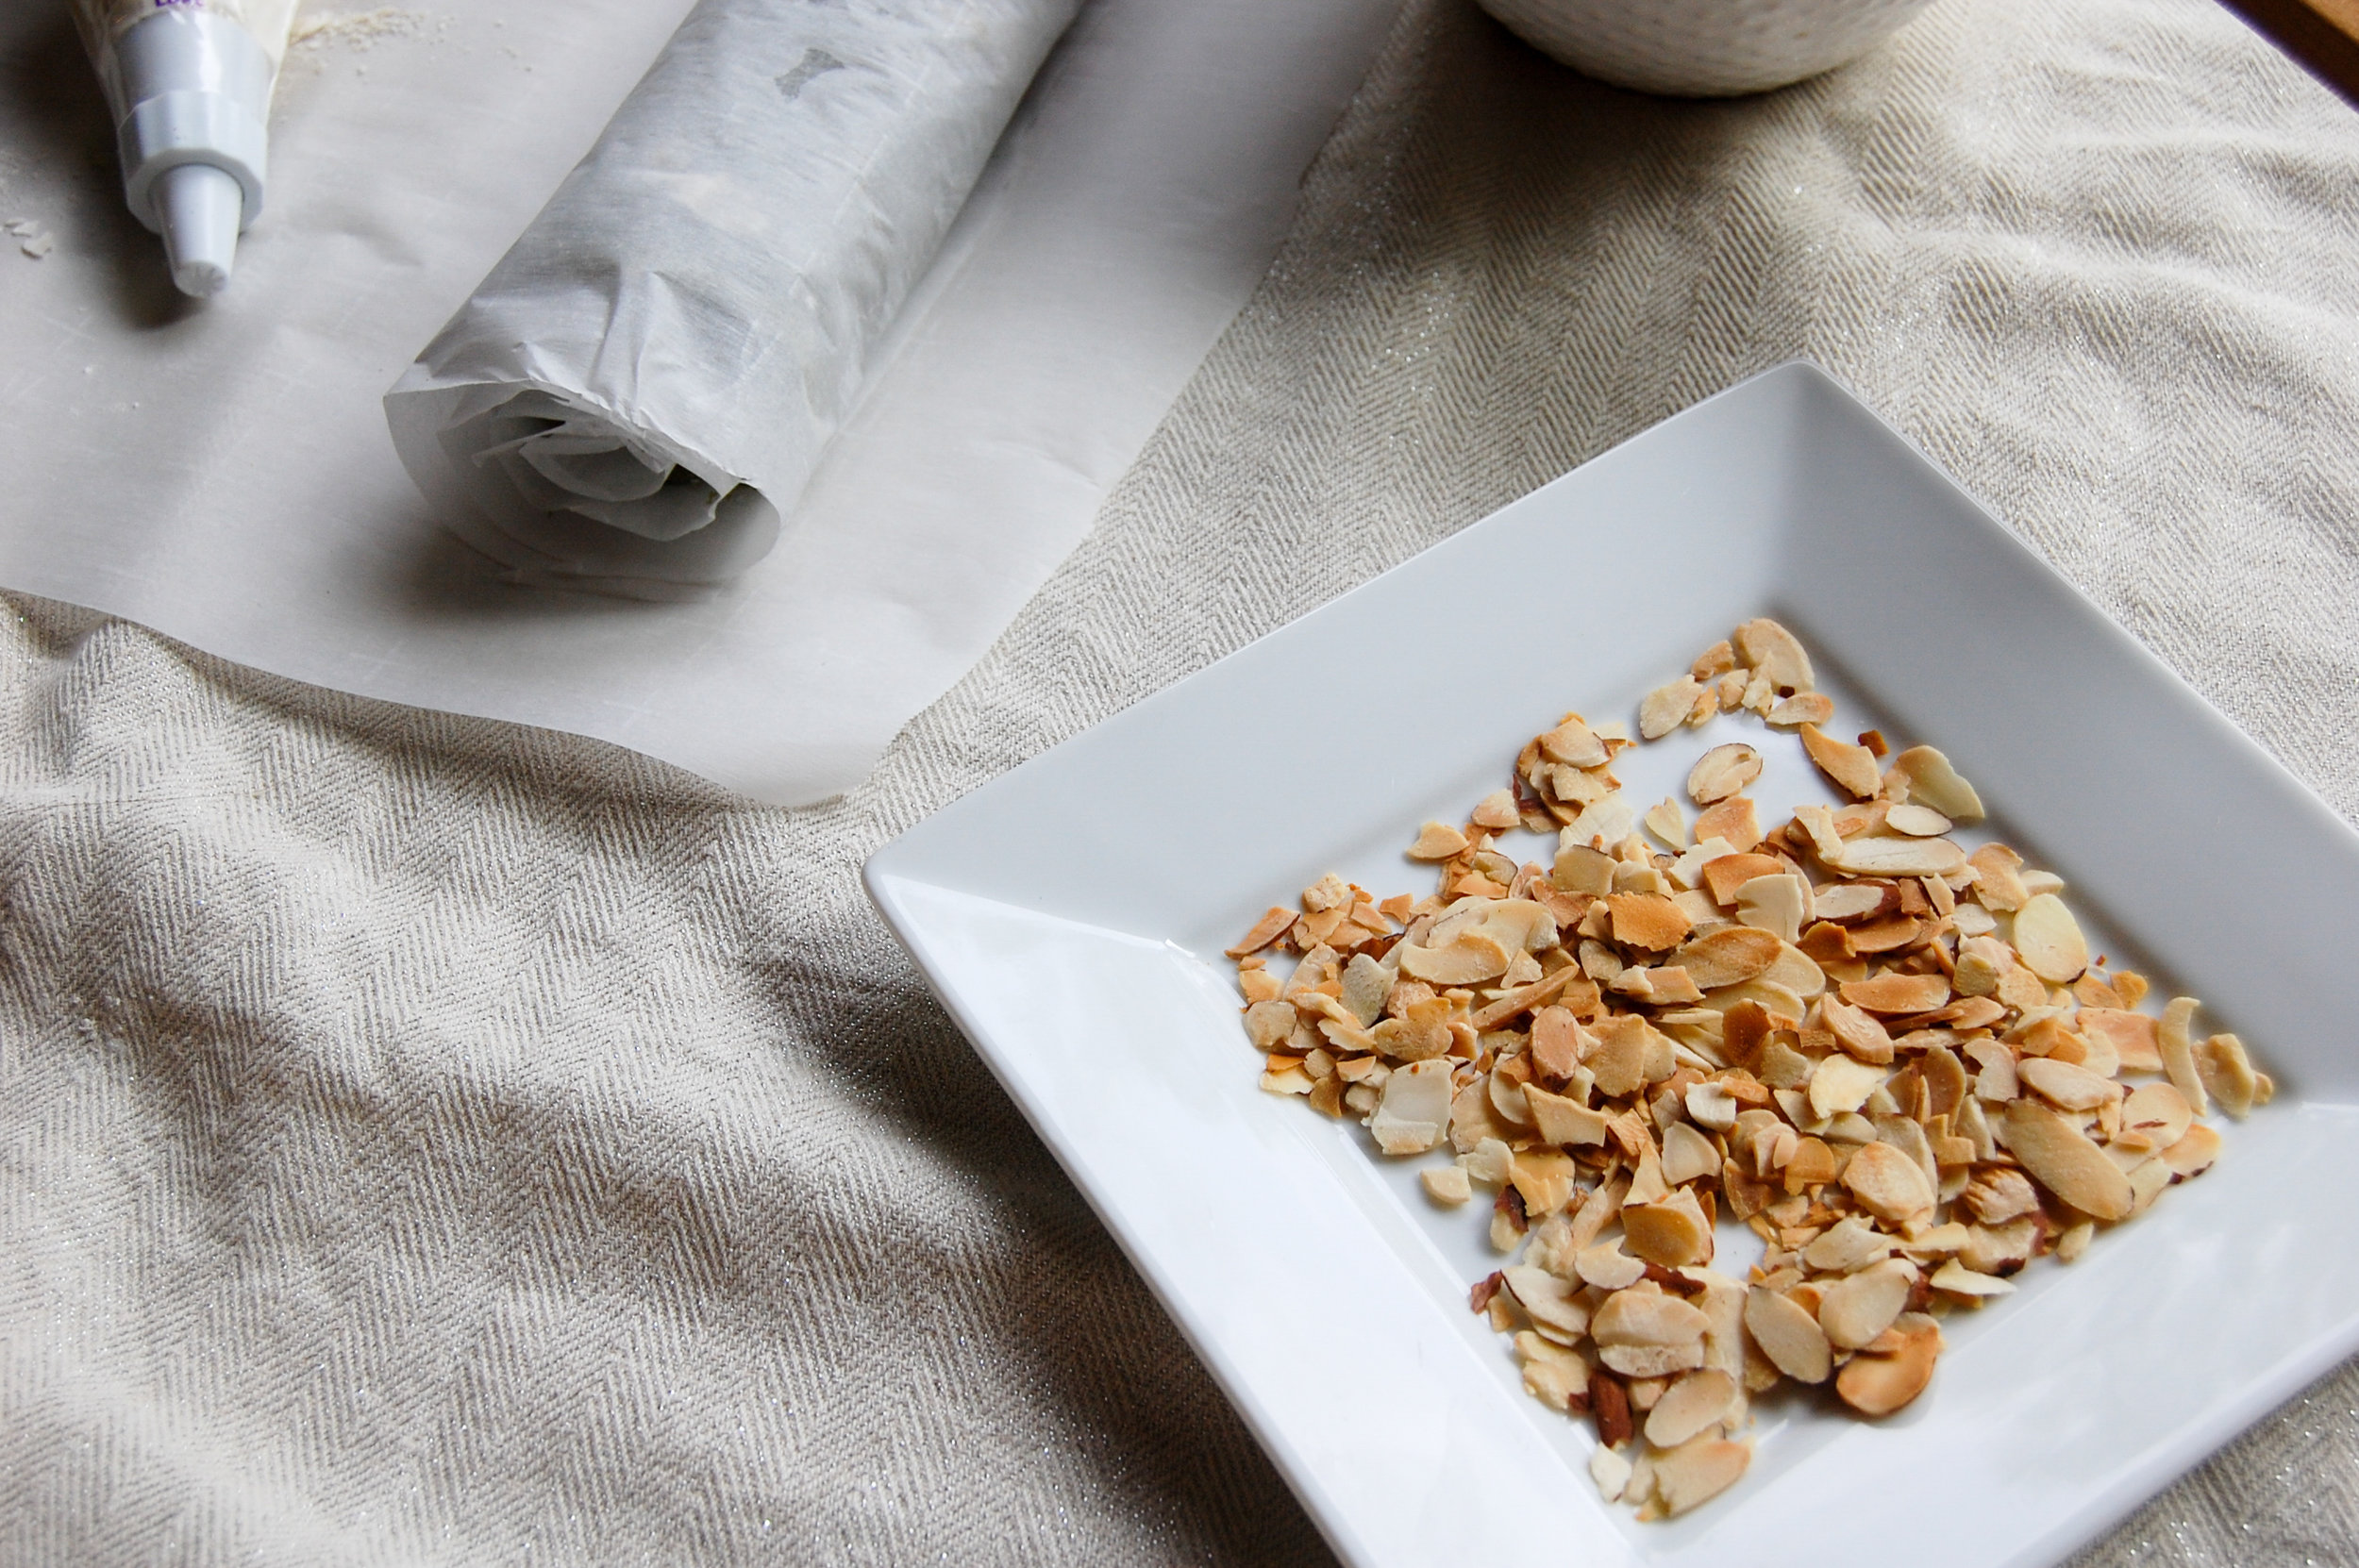
If you remember I made almond cupcakes with matcha frosting recently and I LOVED the flavor combo. I decided to recreate that flavor combination in a different way. Not only did I add almond emulsion in the heavy cream but I decided to toast some almonds for the top. This gives the soft sponge some crunch! The almonds can also help cover up a not so great piping job :)

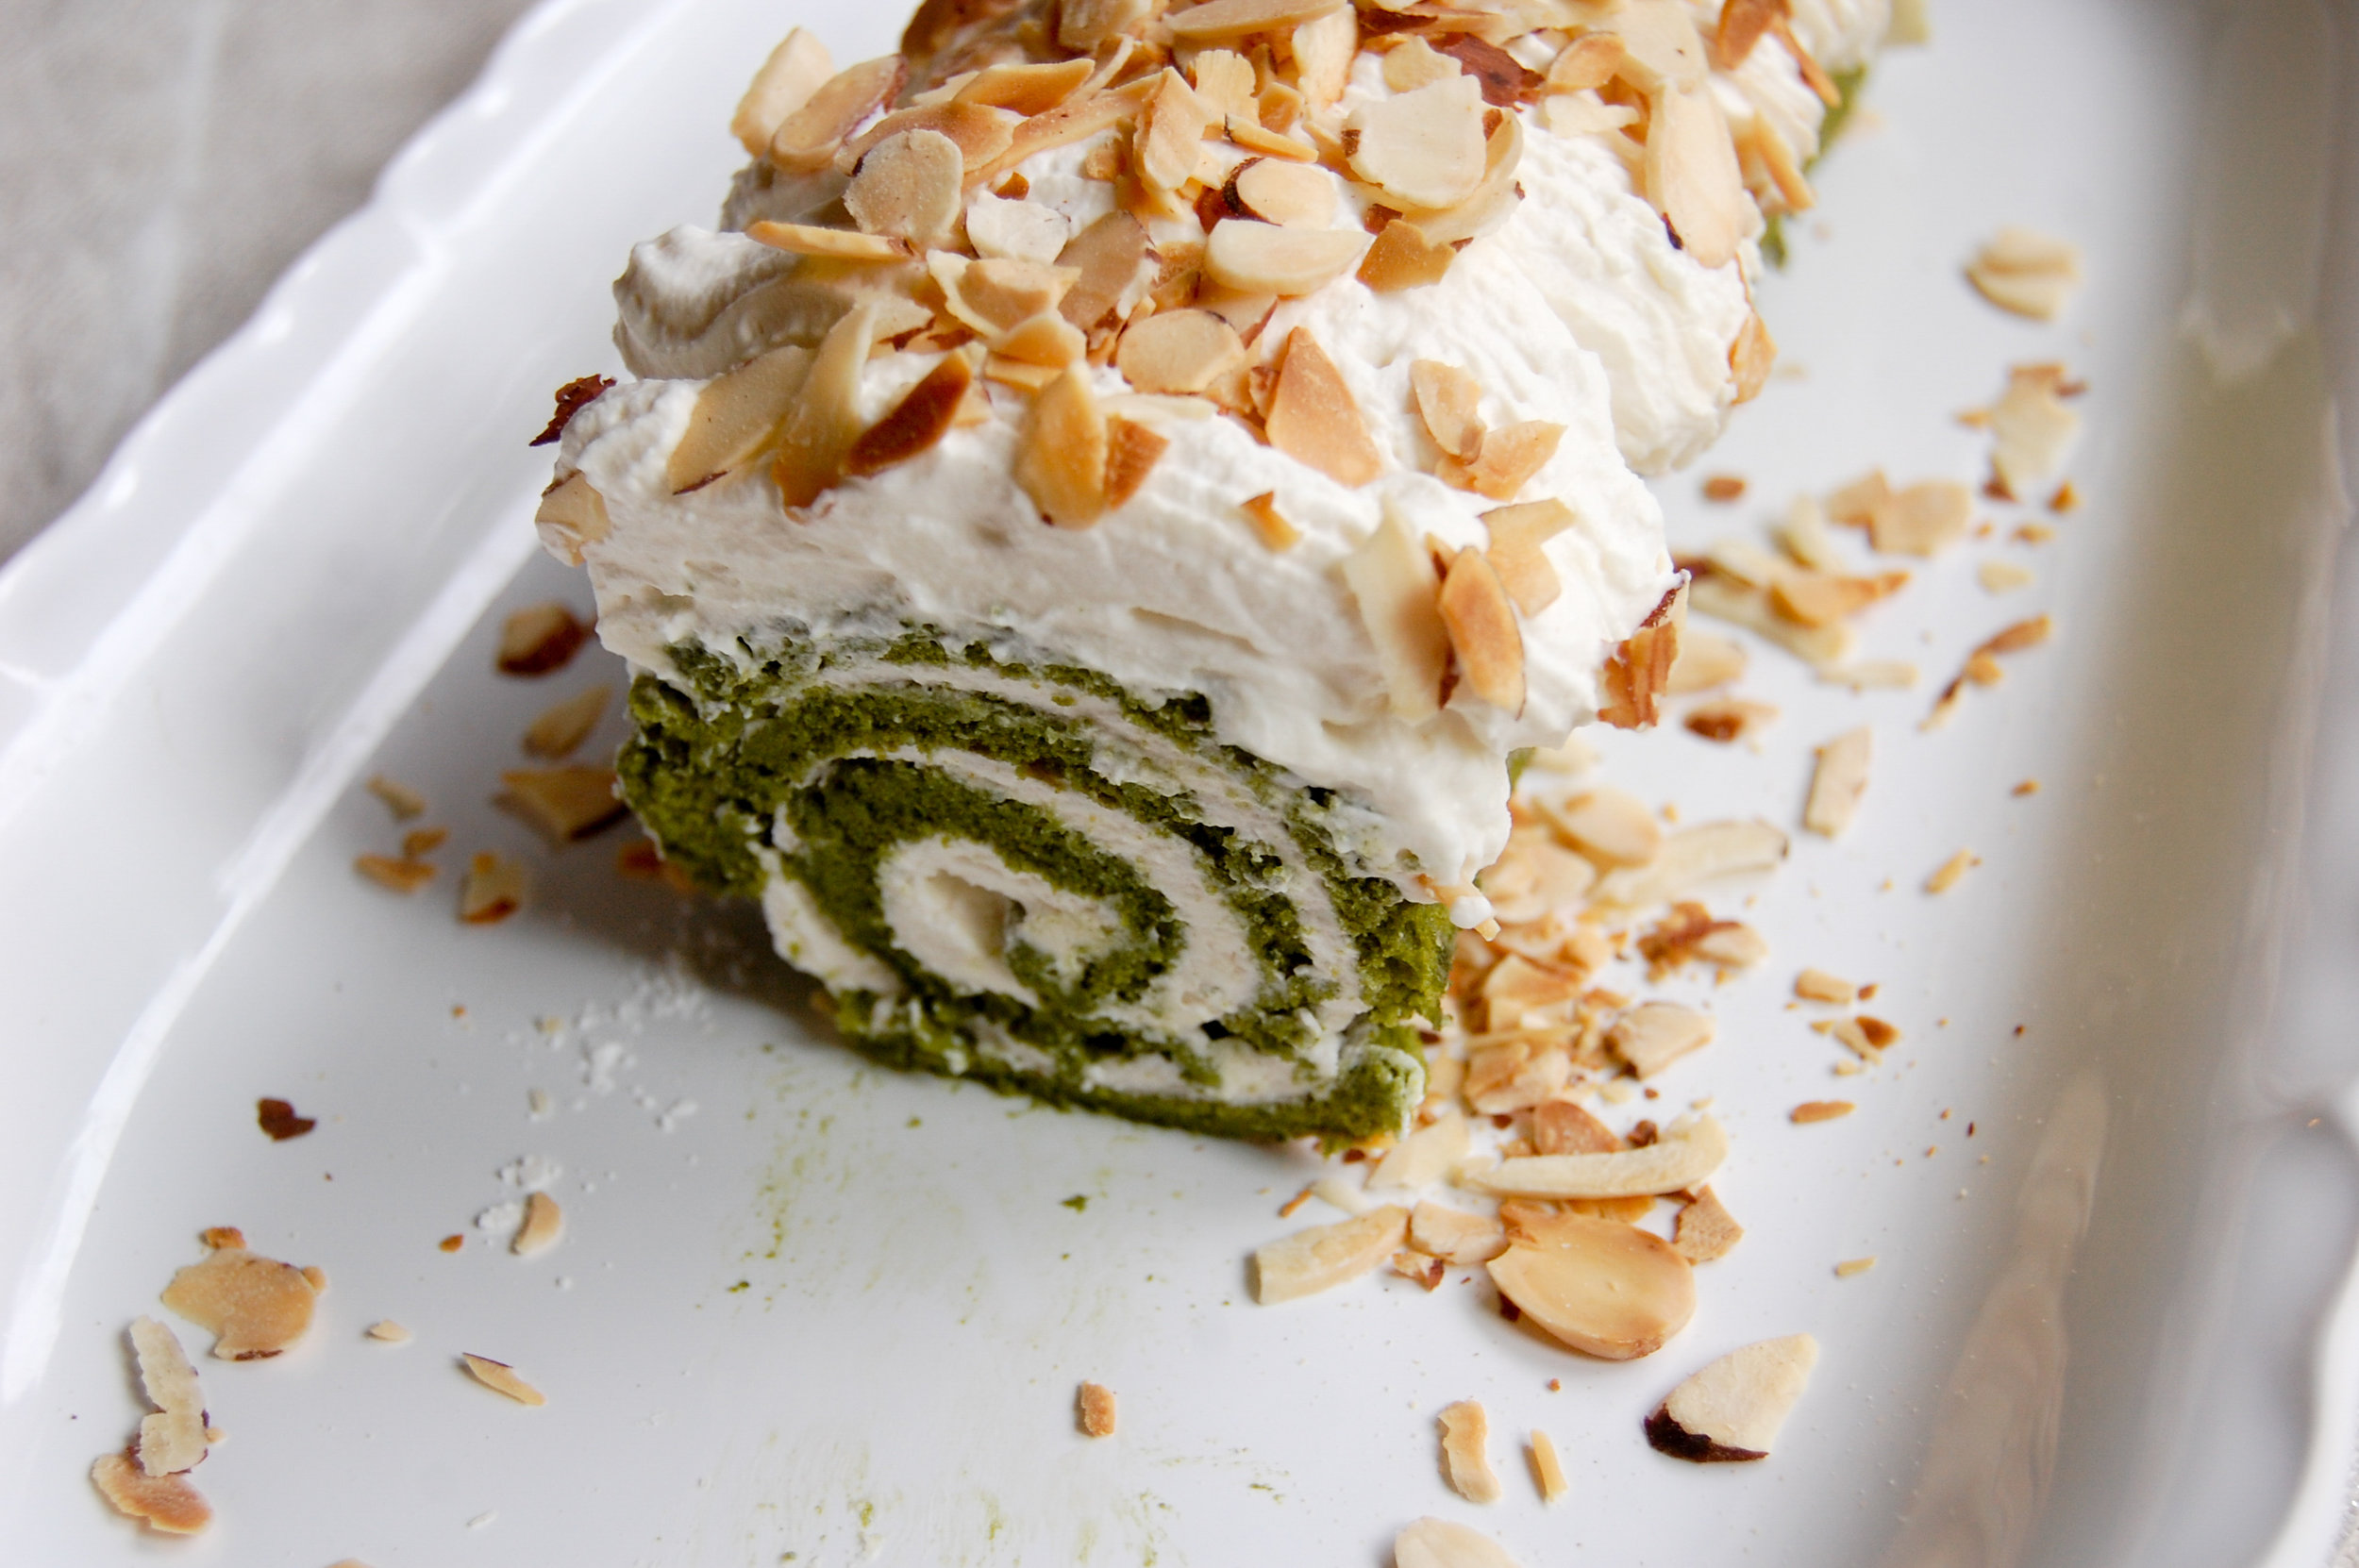
Even though I spread mine thinner than I wanted to, it was wonderfully tender. It also rolled really well!
My advice:
- Make sure your batter is well beaten and mixed before adding in the flour. The green color of the batter should get lighter.
- Make sure that you check your roll while it's in the oven. It will spring back slightly when it's ready. If you let it go too long it will be dry. This is especially important with a matcha flavored cake because the color isn't light so it's harder to tell when it's done.

I used some lovely culinary matcha from Mizuba Tea Co. for the roll and it was delicious! Keep your eye out for one more recipe with this matcha that I think you will love!

The best part about this combo is that the matcha flavor comes through really well. The cake and the heavy cream together are the perfect amount of sweetness.
Keep your heavy cream cool! It will make everything easier :)
Have you made matcha swiss roll? What is your favorite matcha flavored sweet?!
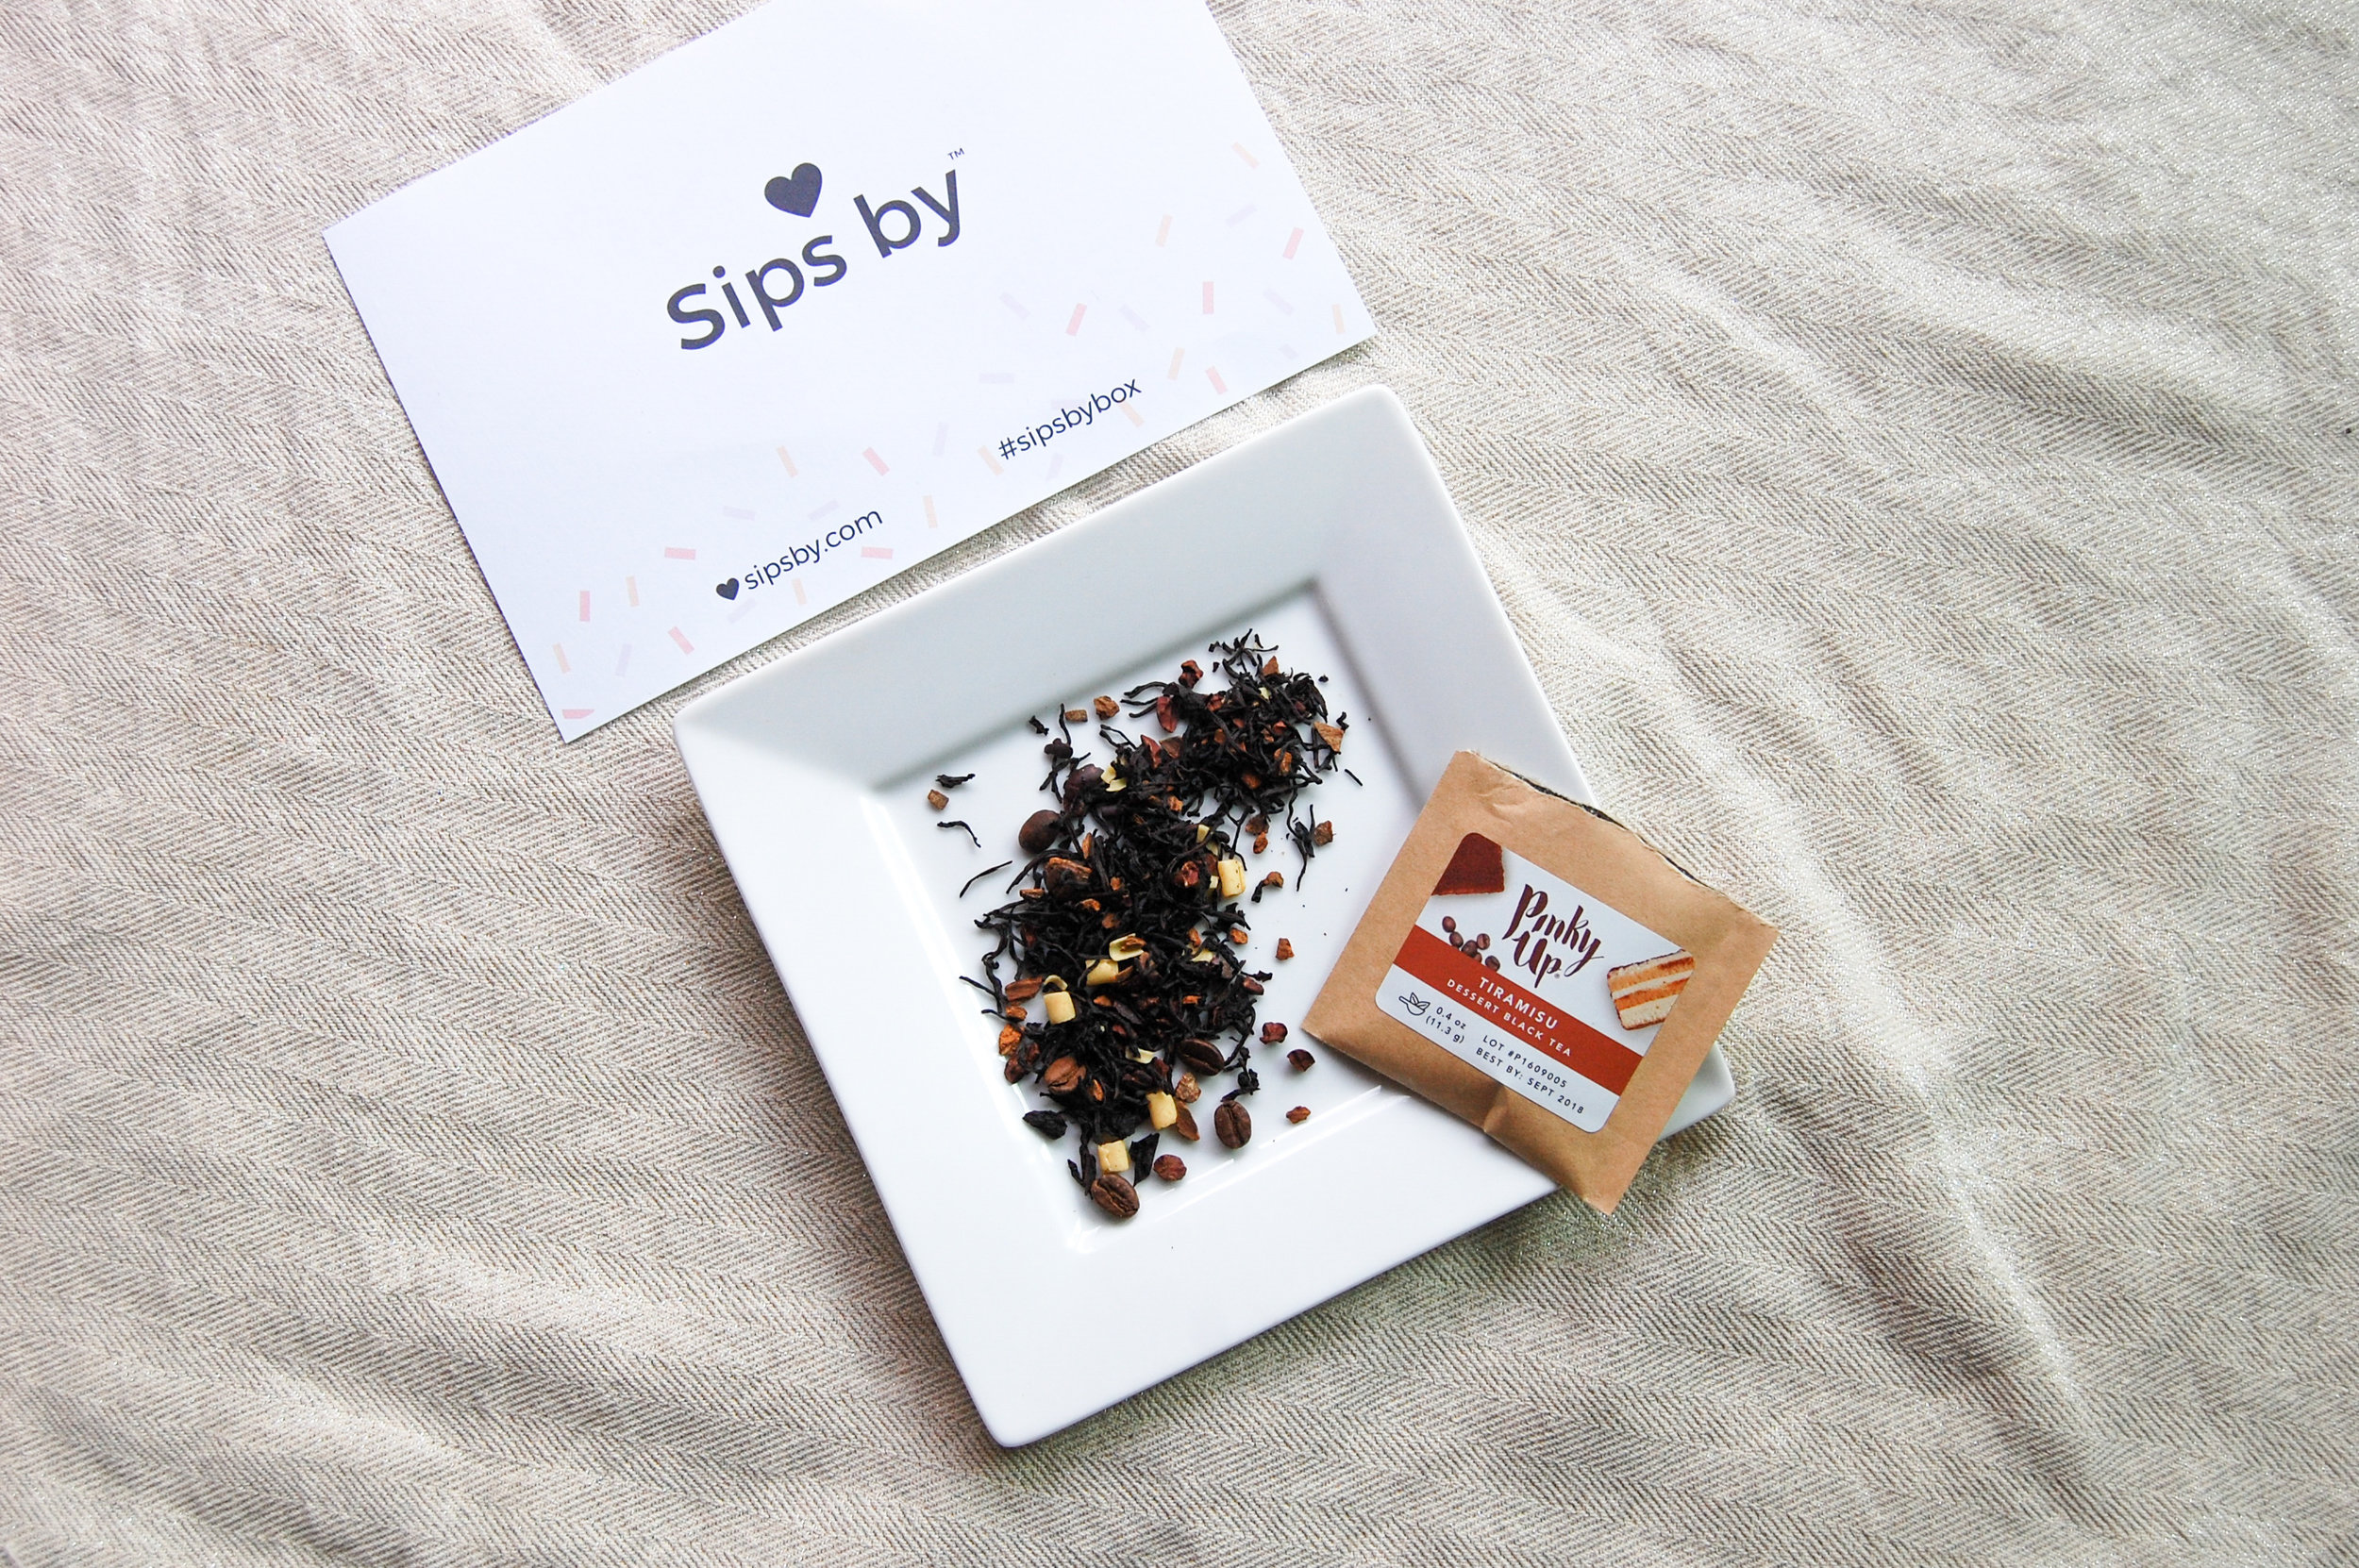
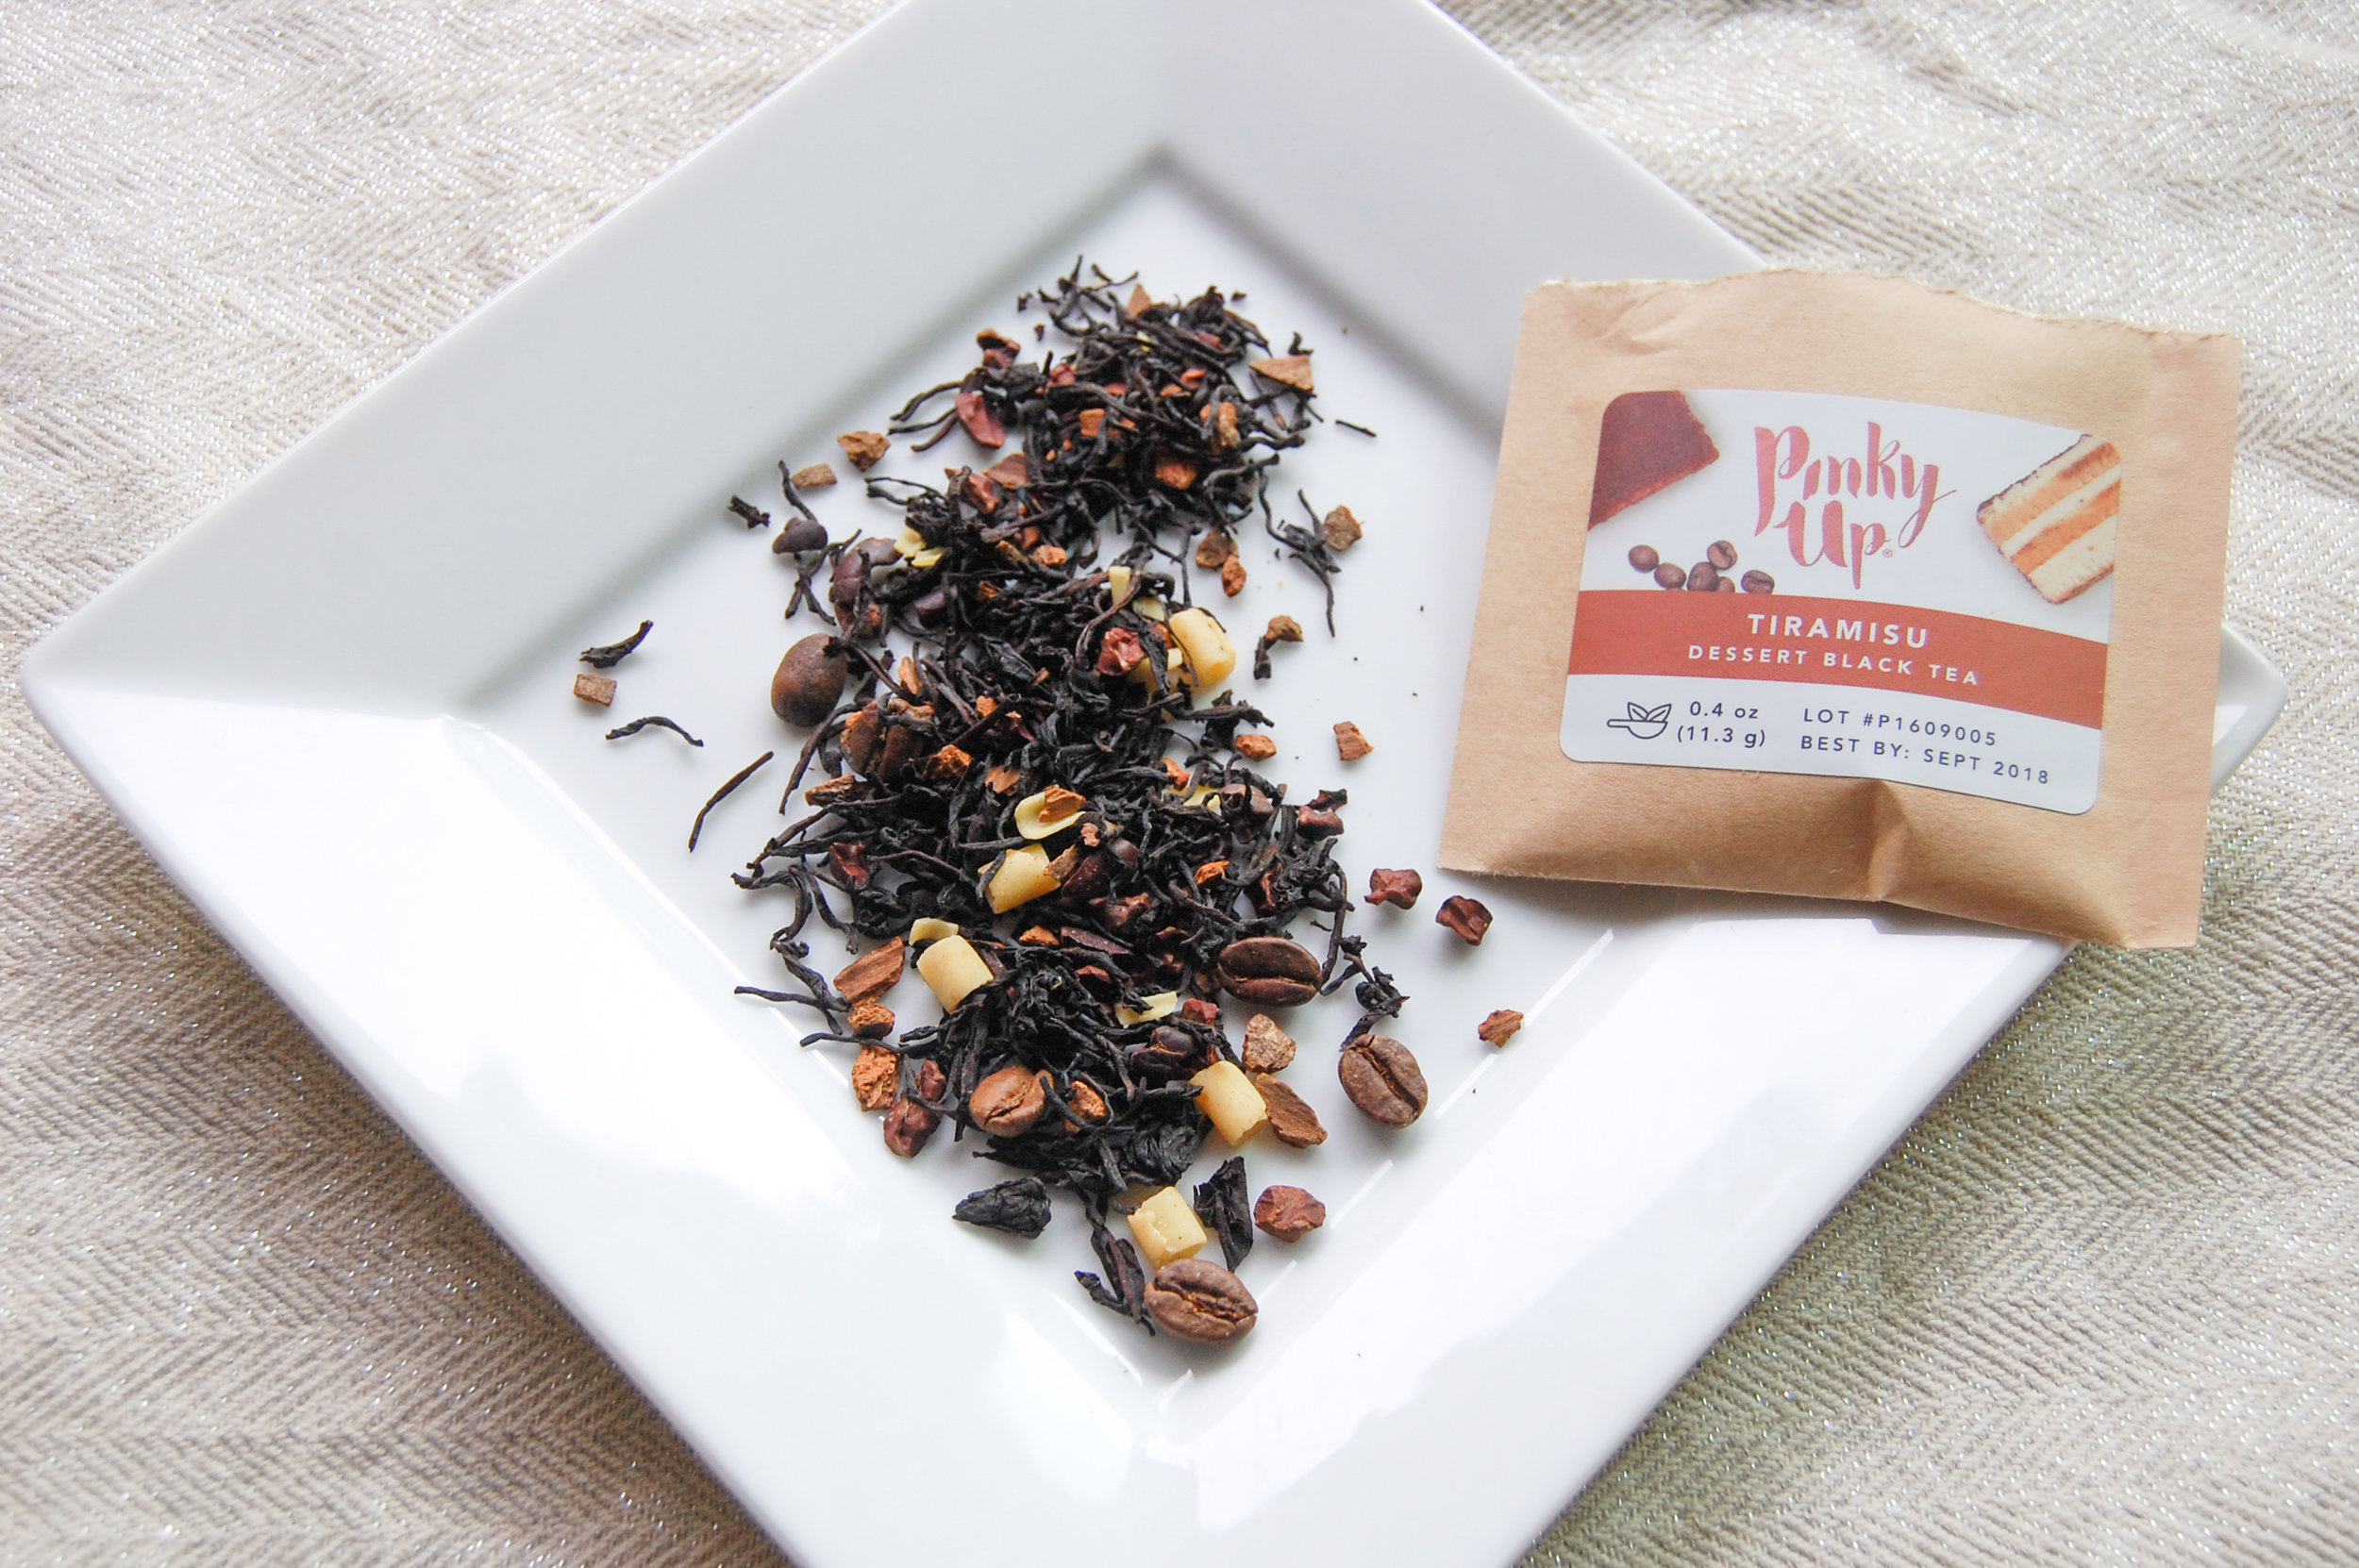
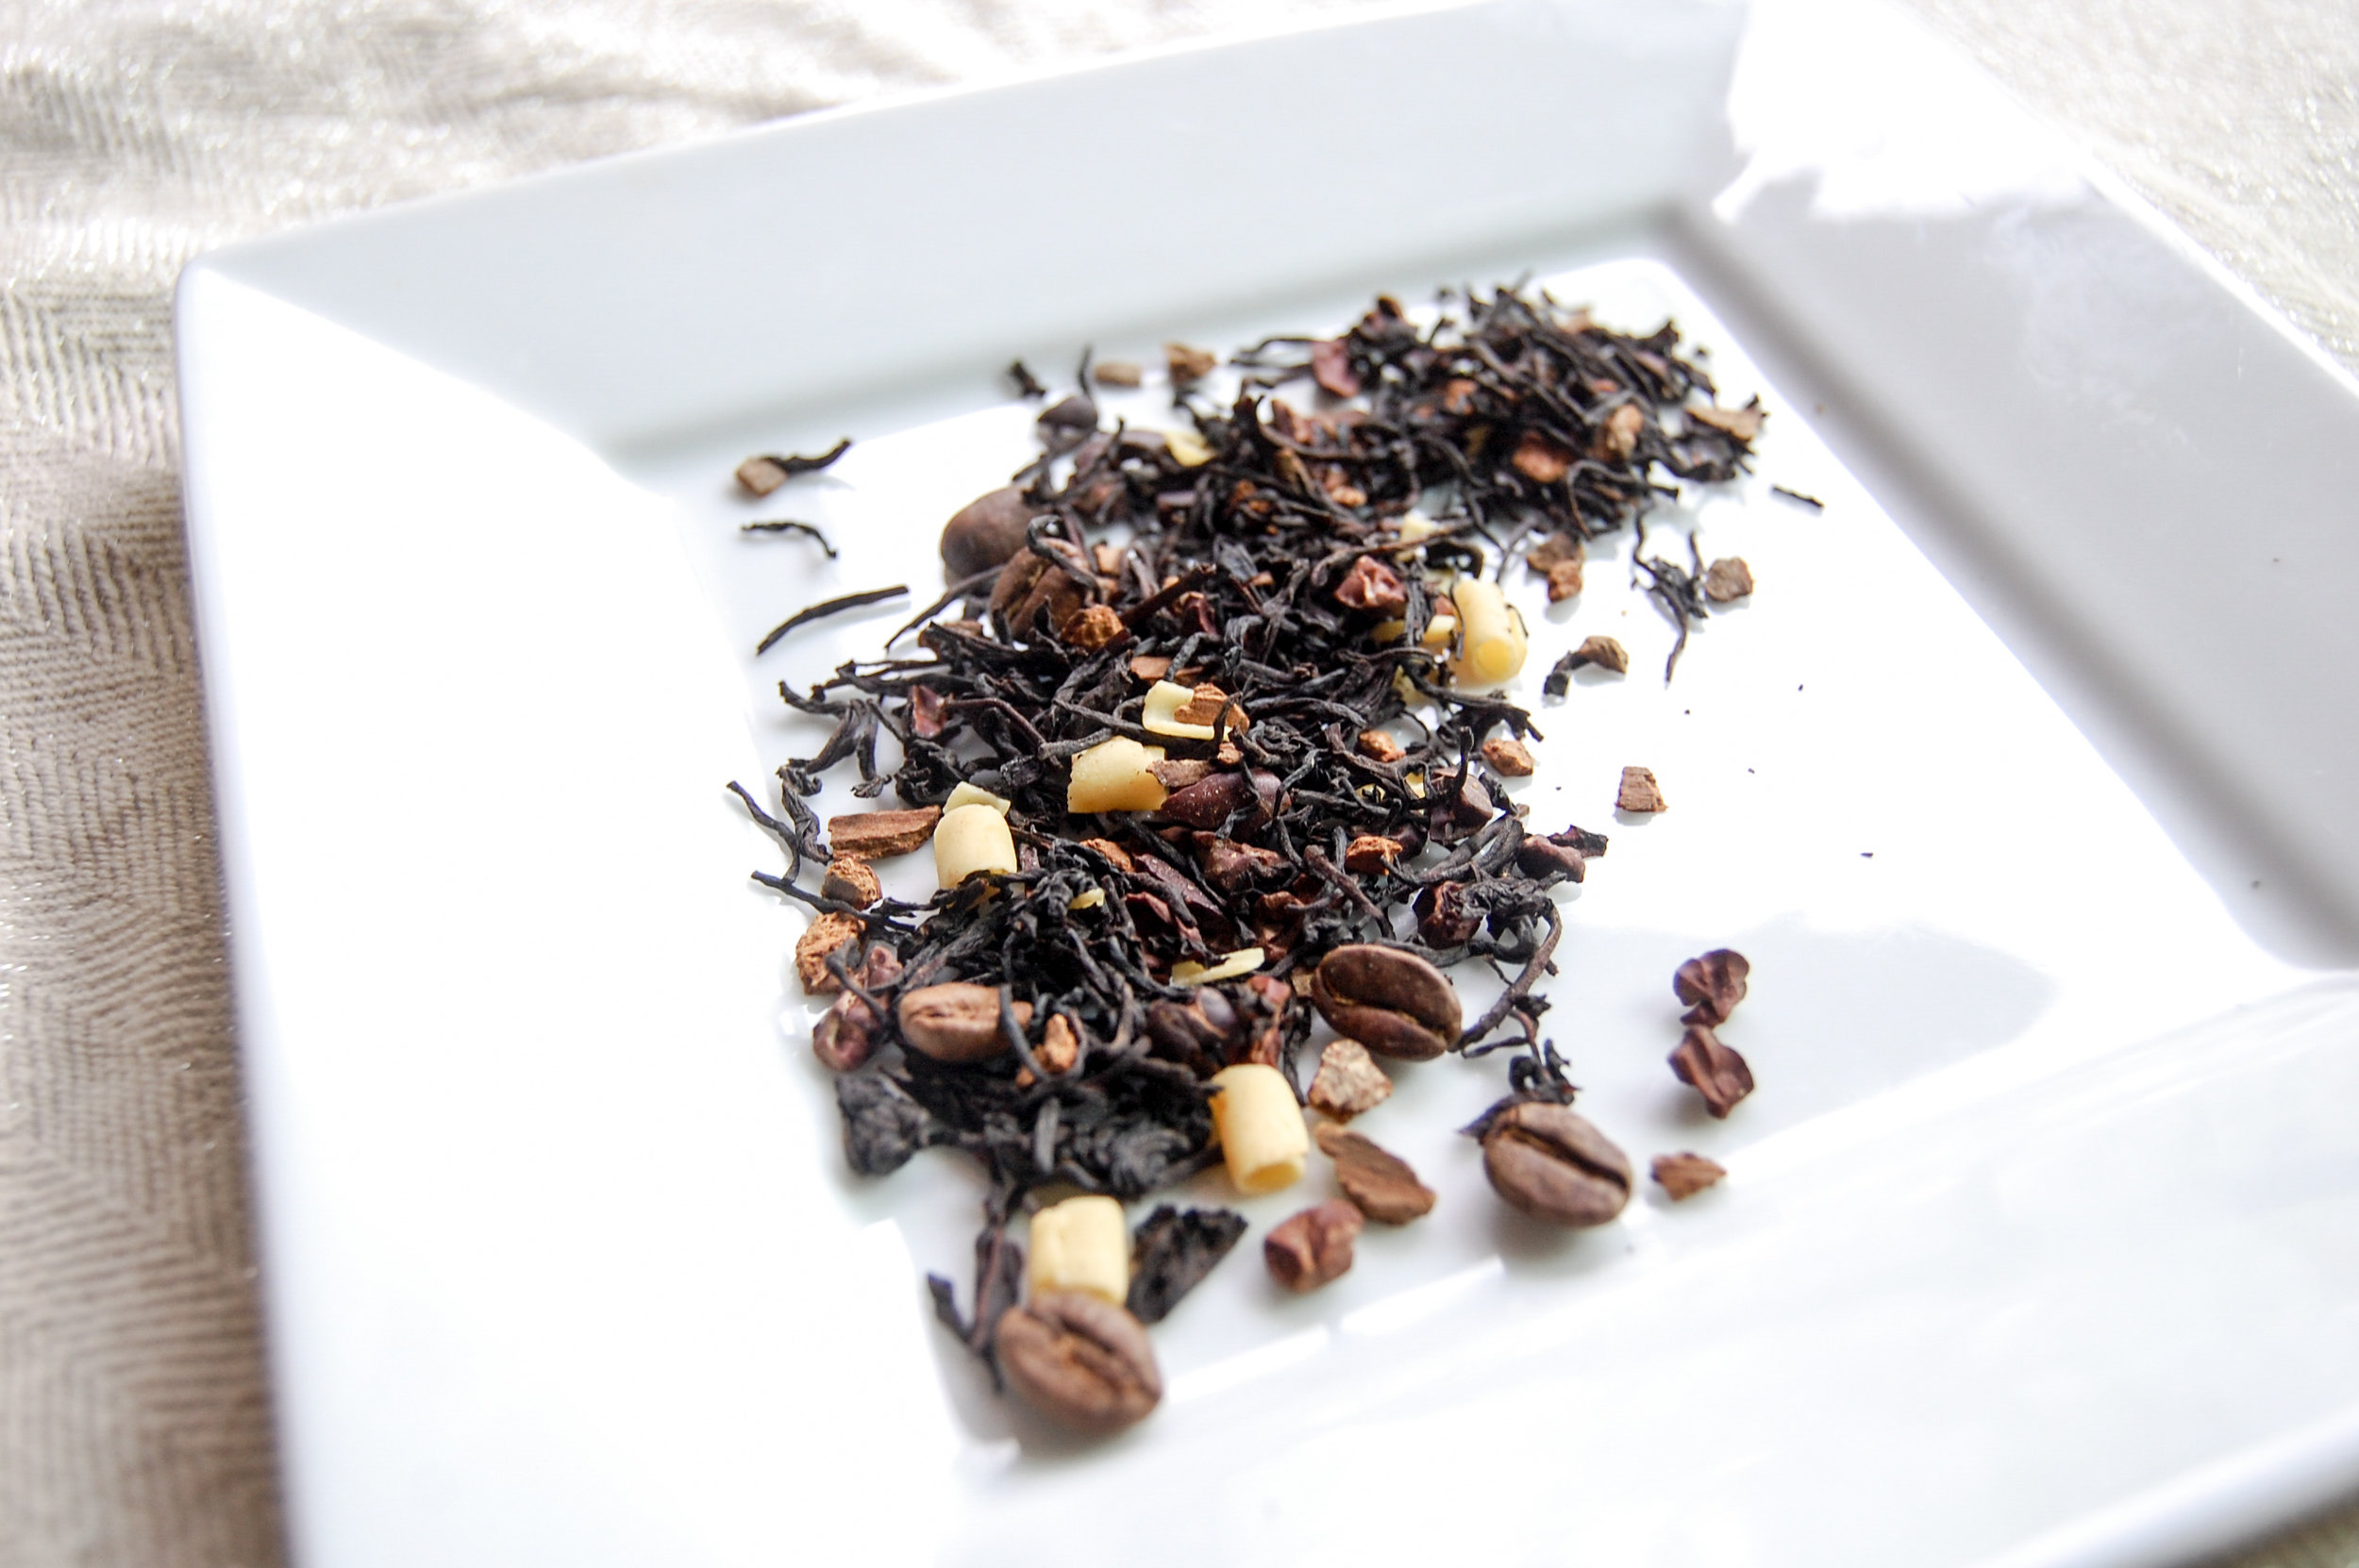
Tiramisu Truffles
Unicorn Truffles.
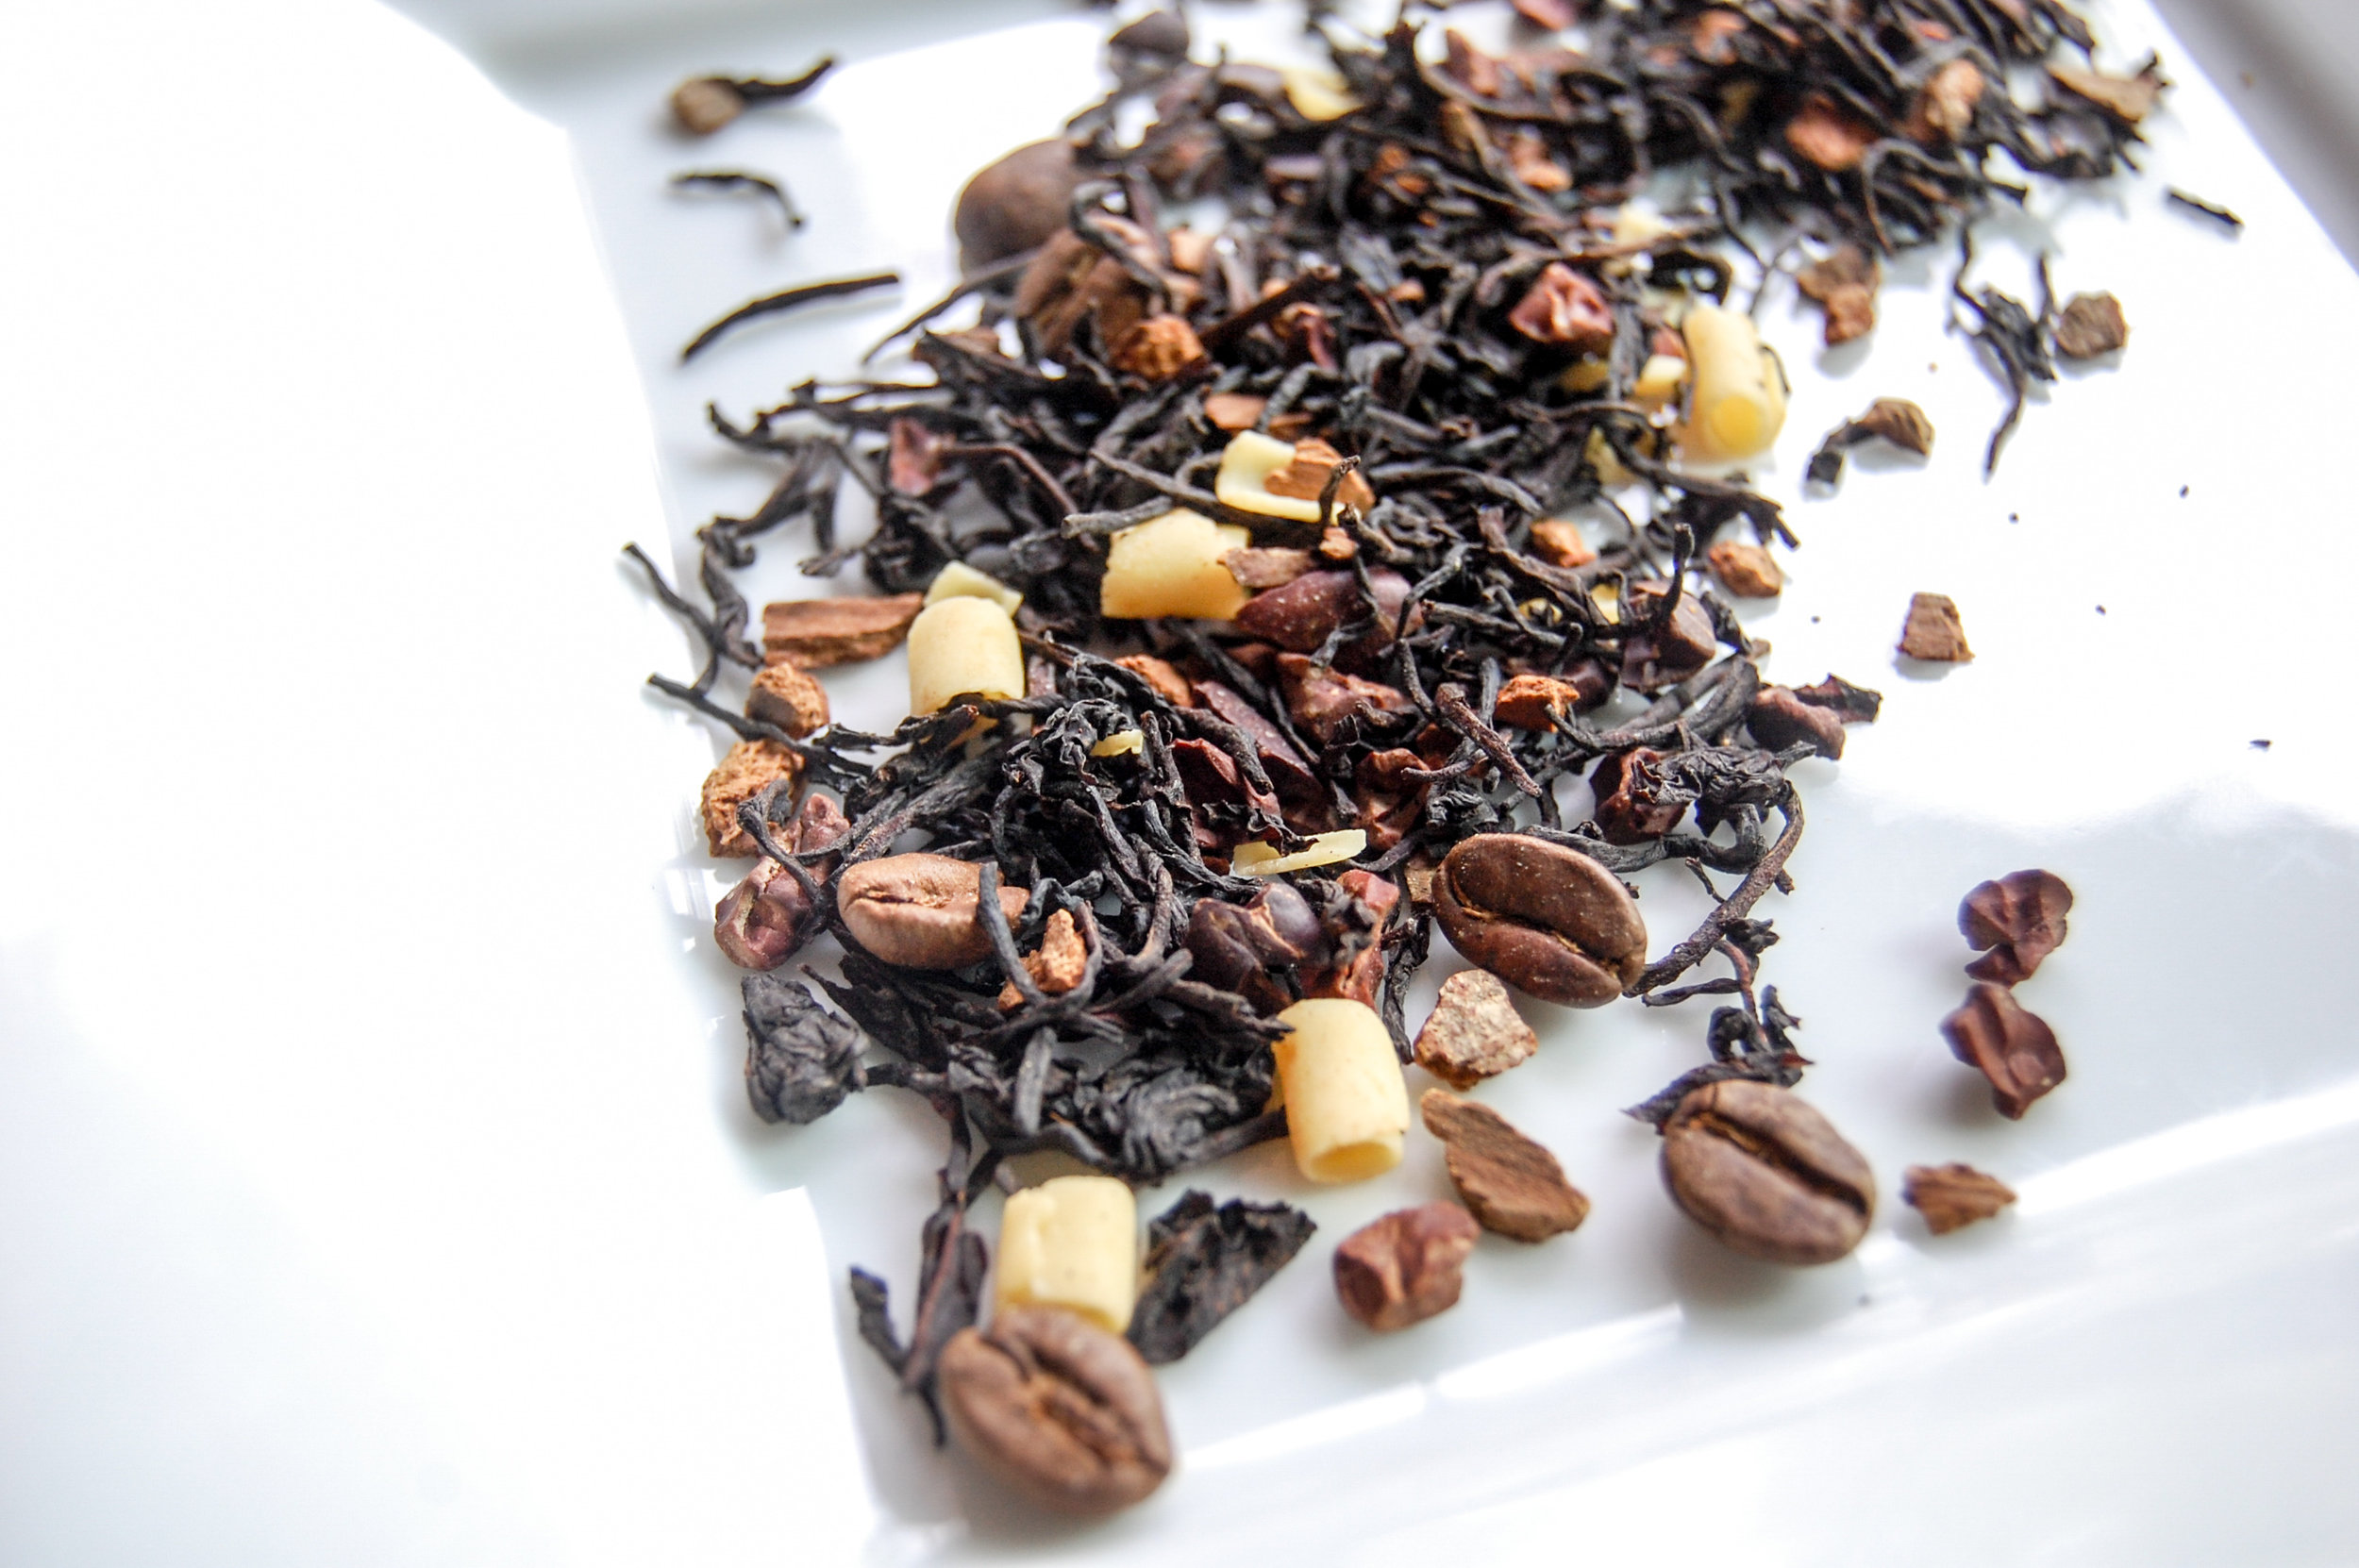
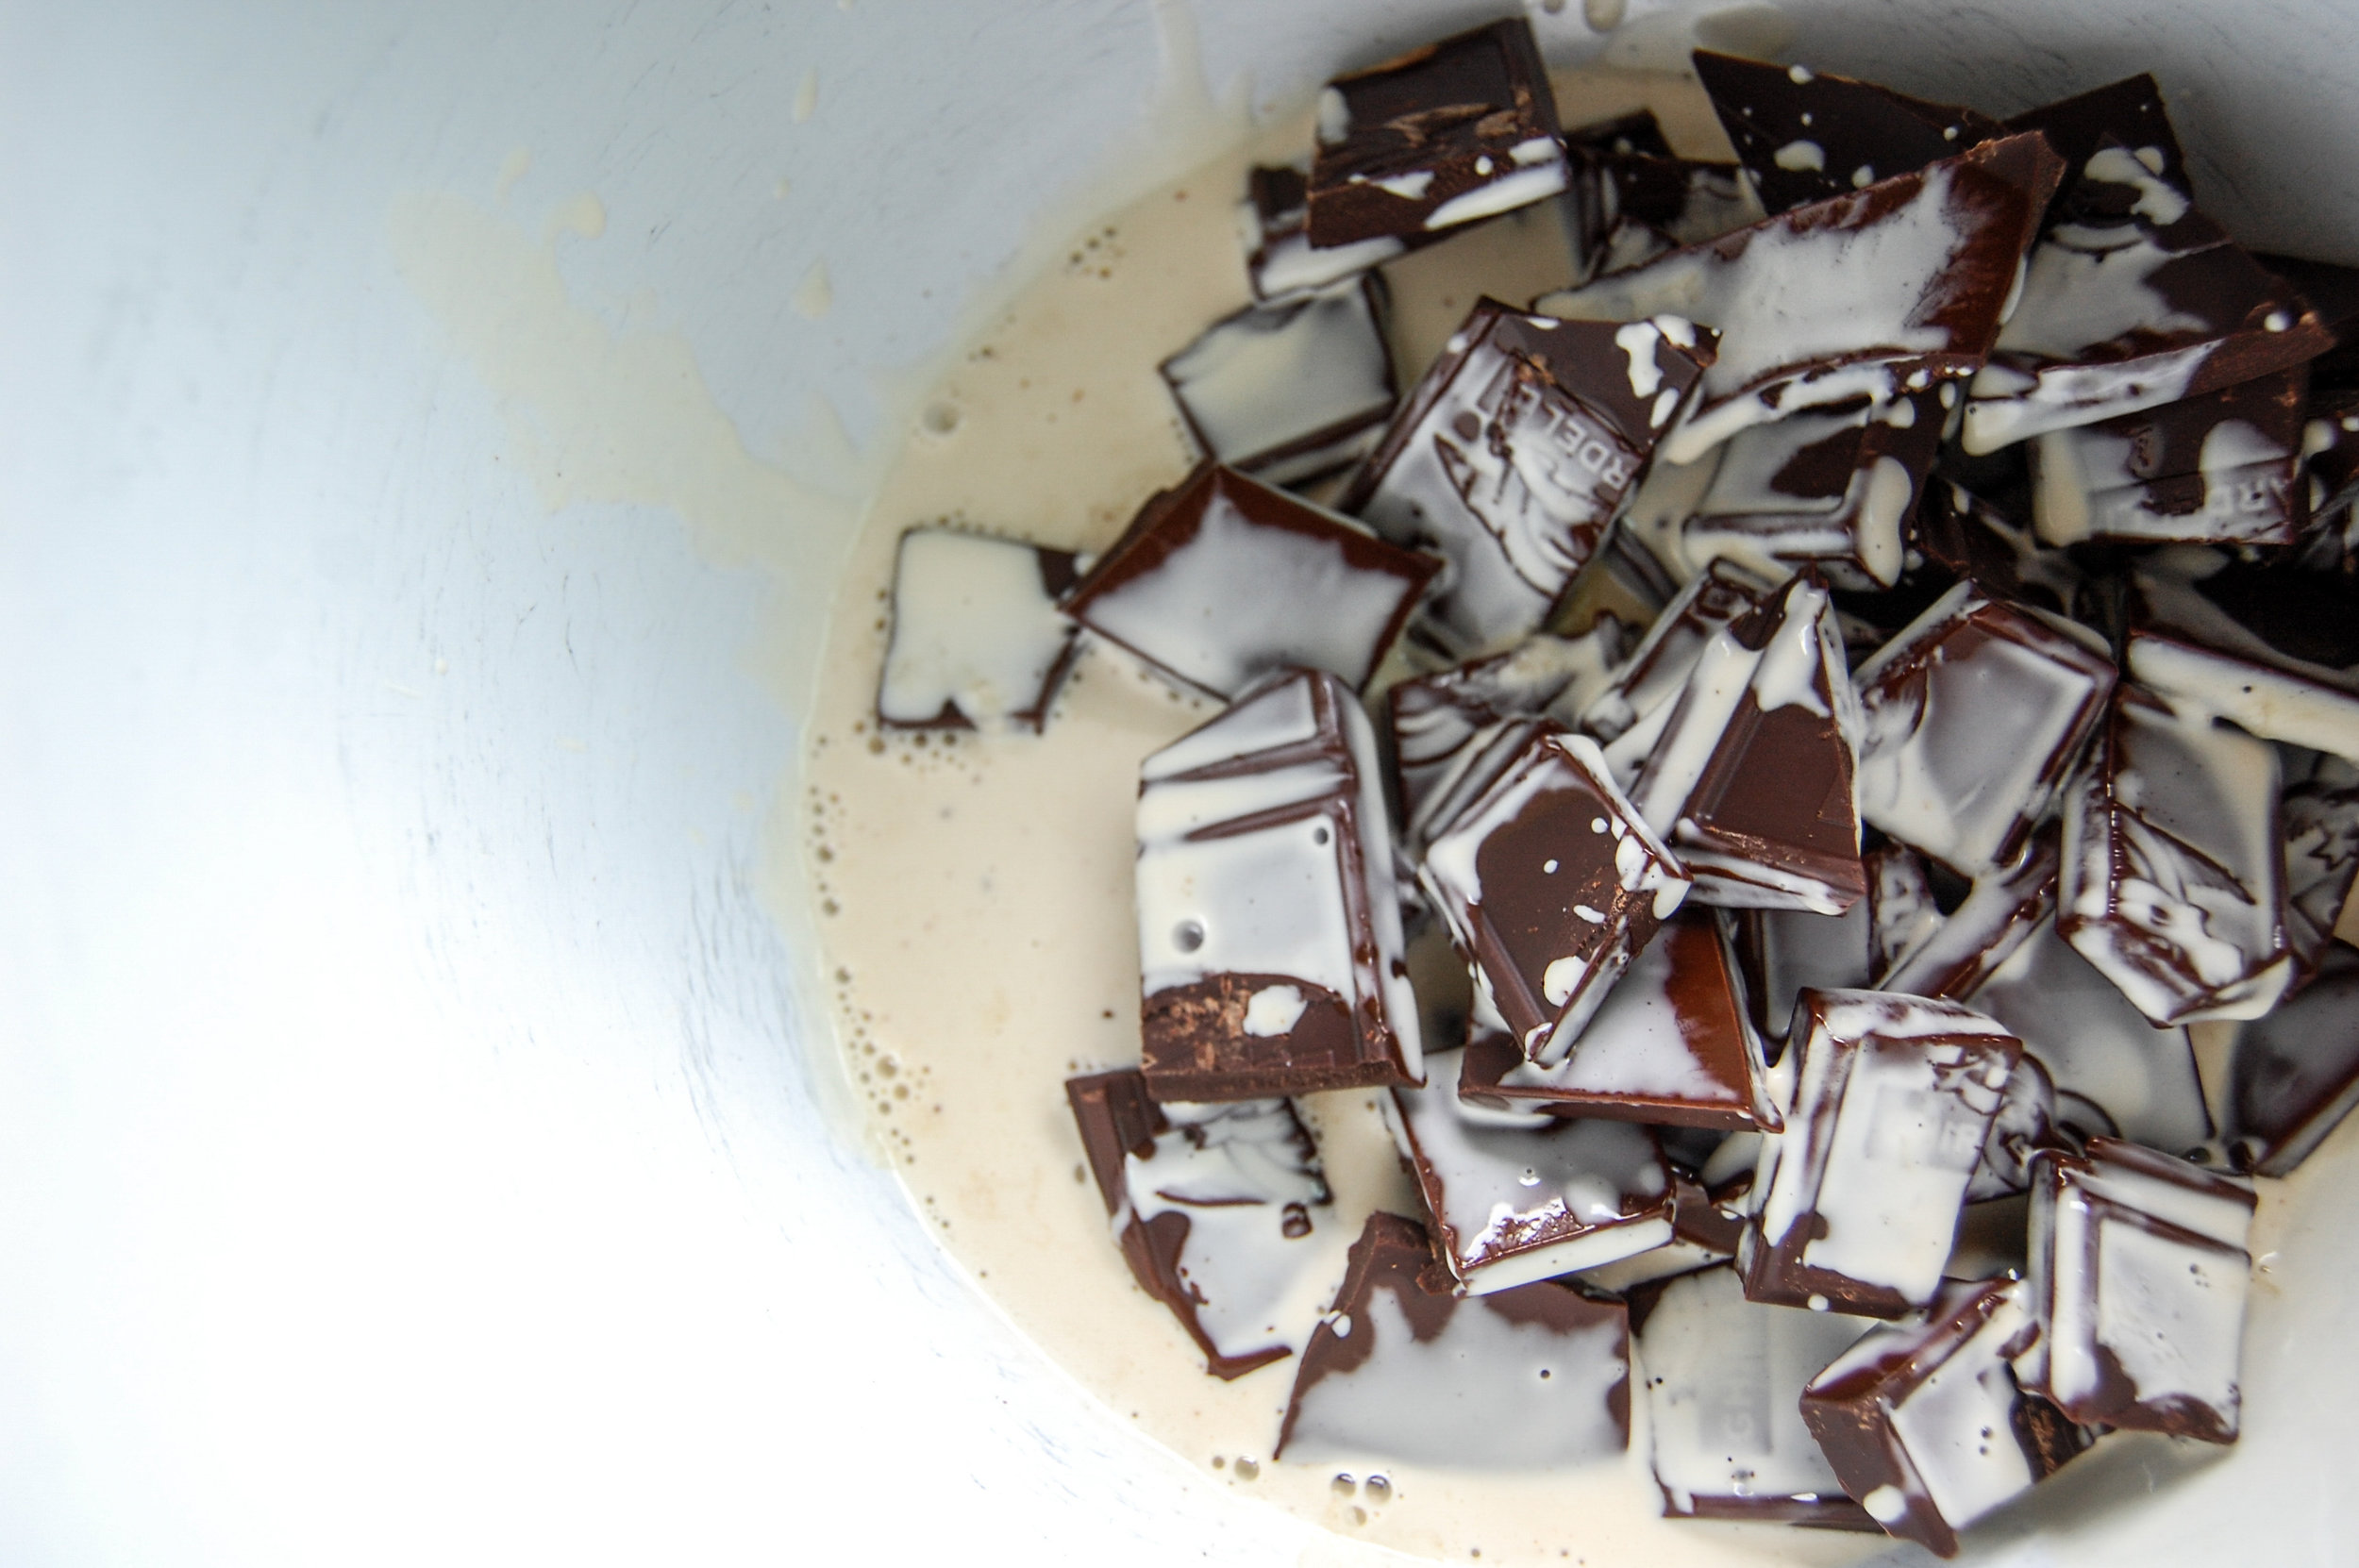
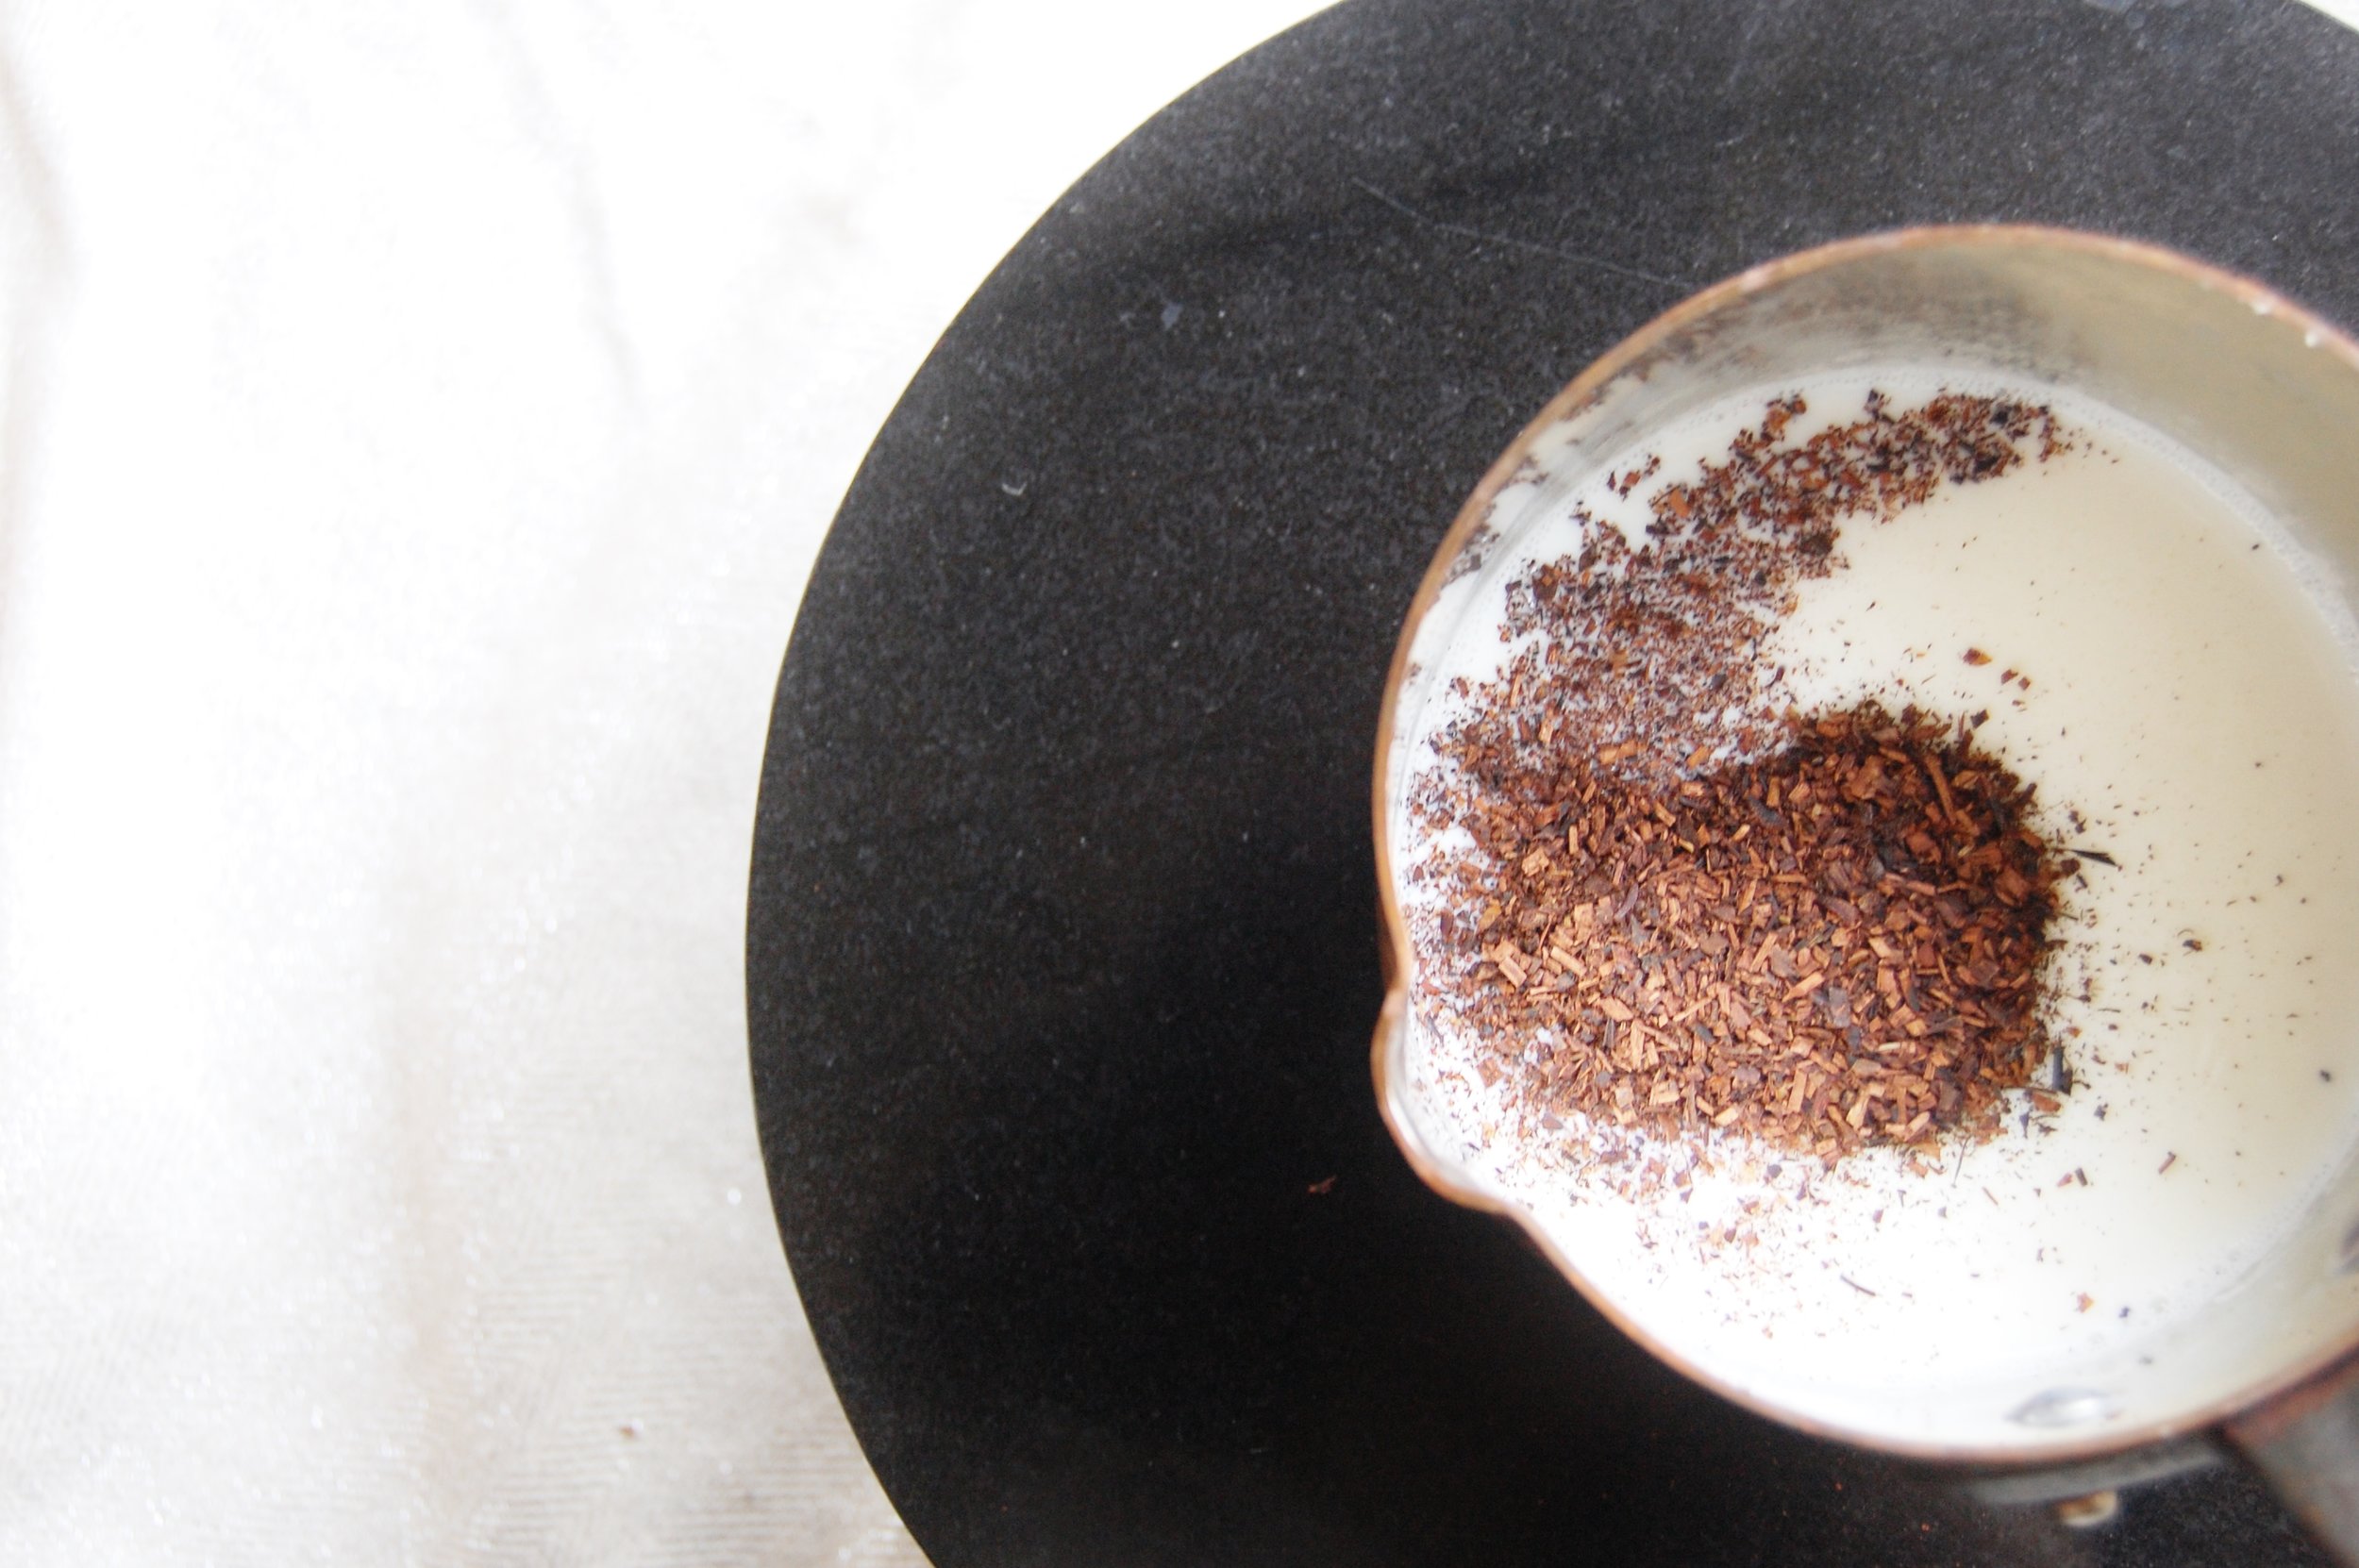
If you saw my post about the Sips by subscription box, know that I have a bunch of interesting teas to work with! Although truffles are pretty simple and classic, I couldn't resist using the Pinky Up Tiramisu blend to make truffles. With black tea, cocoa, white chocolate, cinnamon and a few coffee beans, how could I not make truffles?!
These take time to make due to refrigeration time but they are so so simple! What you end up with is a perfectly chocolate packed little ball. The tiramisu tea adds that black tea flavor and the cinnamon is an excellent addition to this classic dessert.
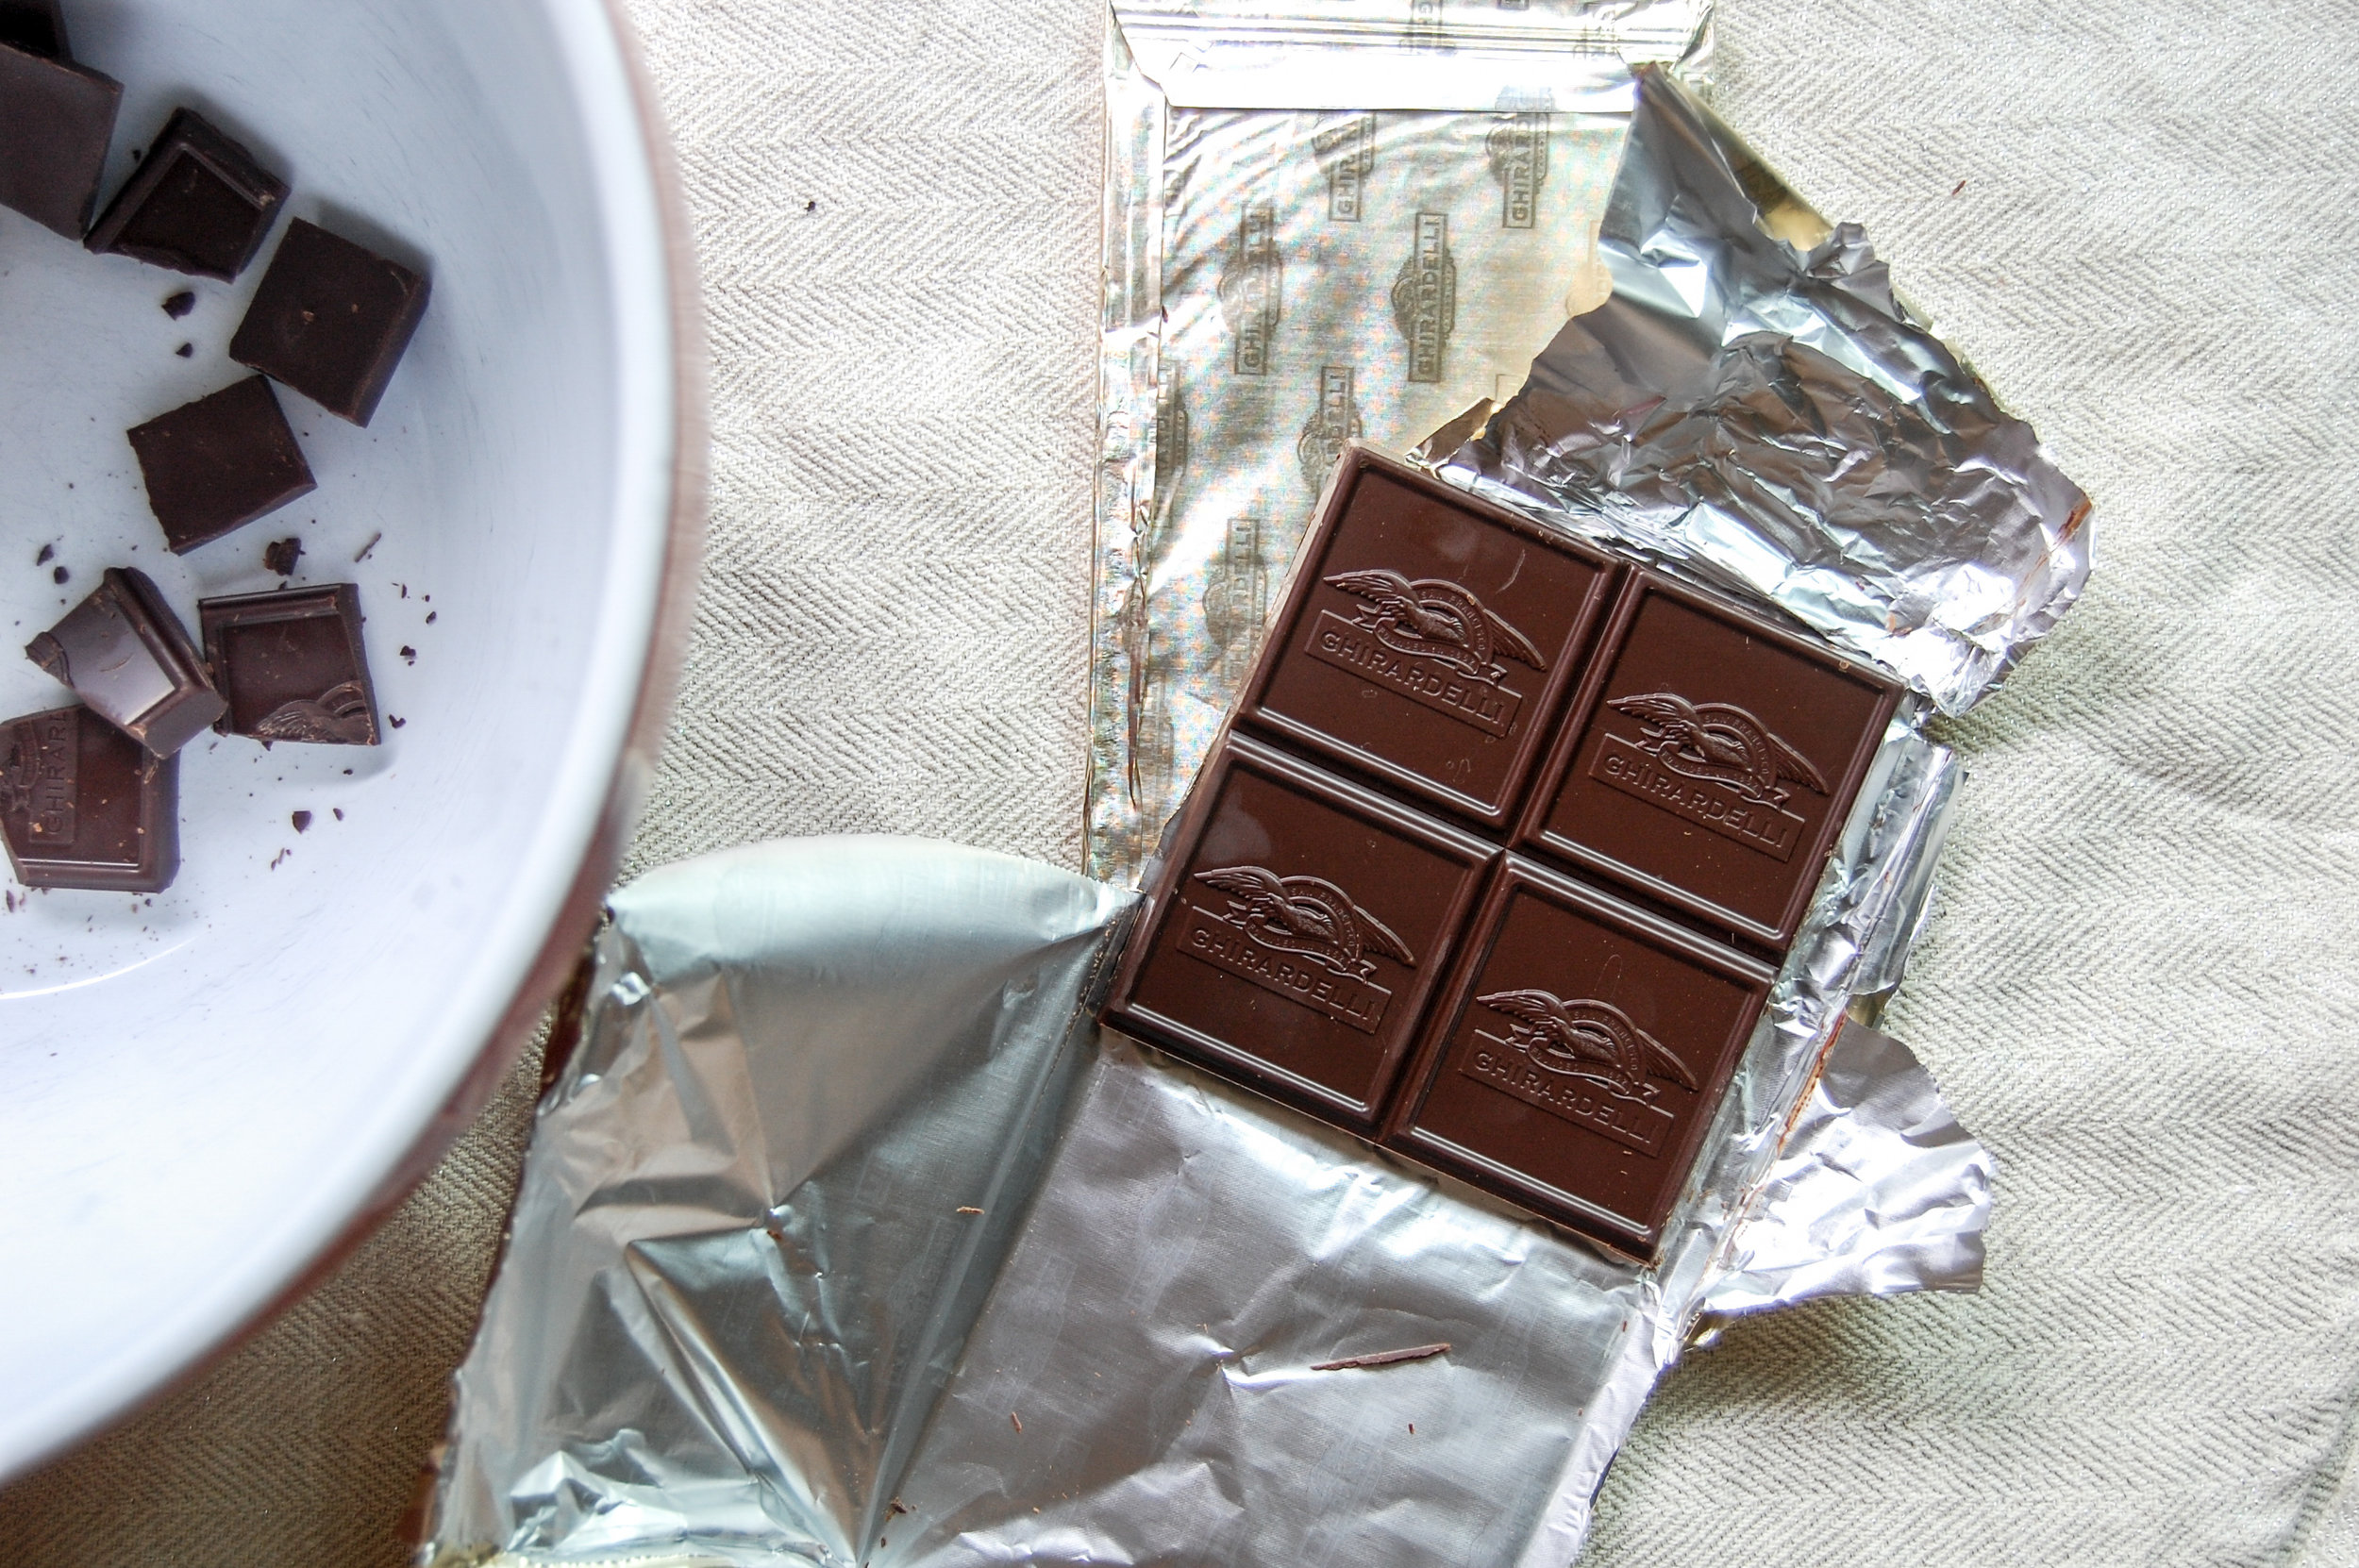
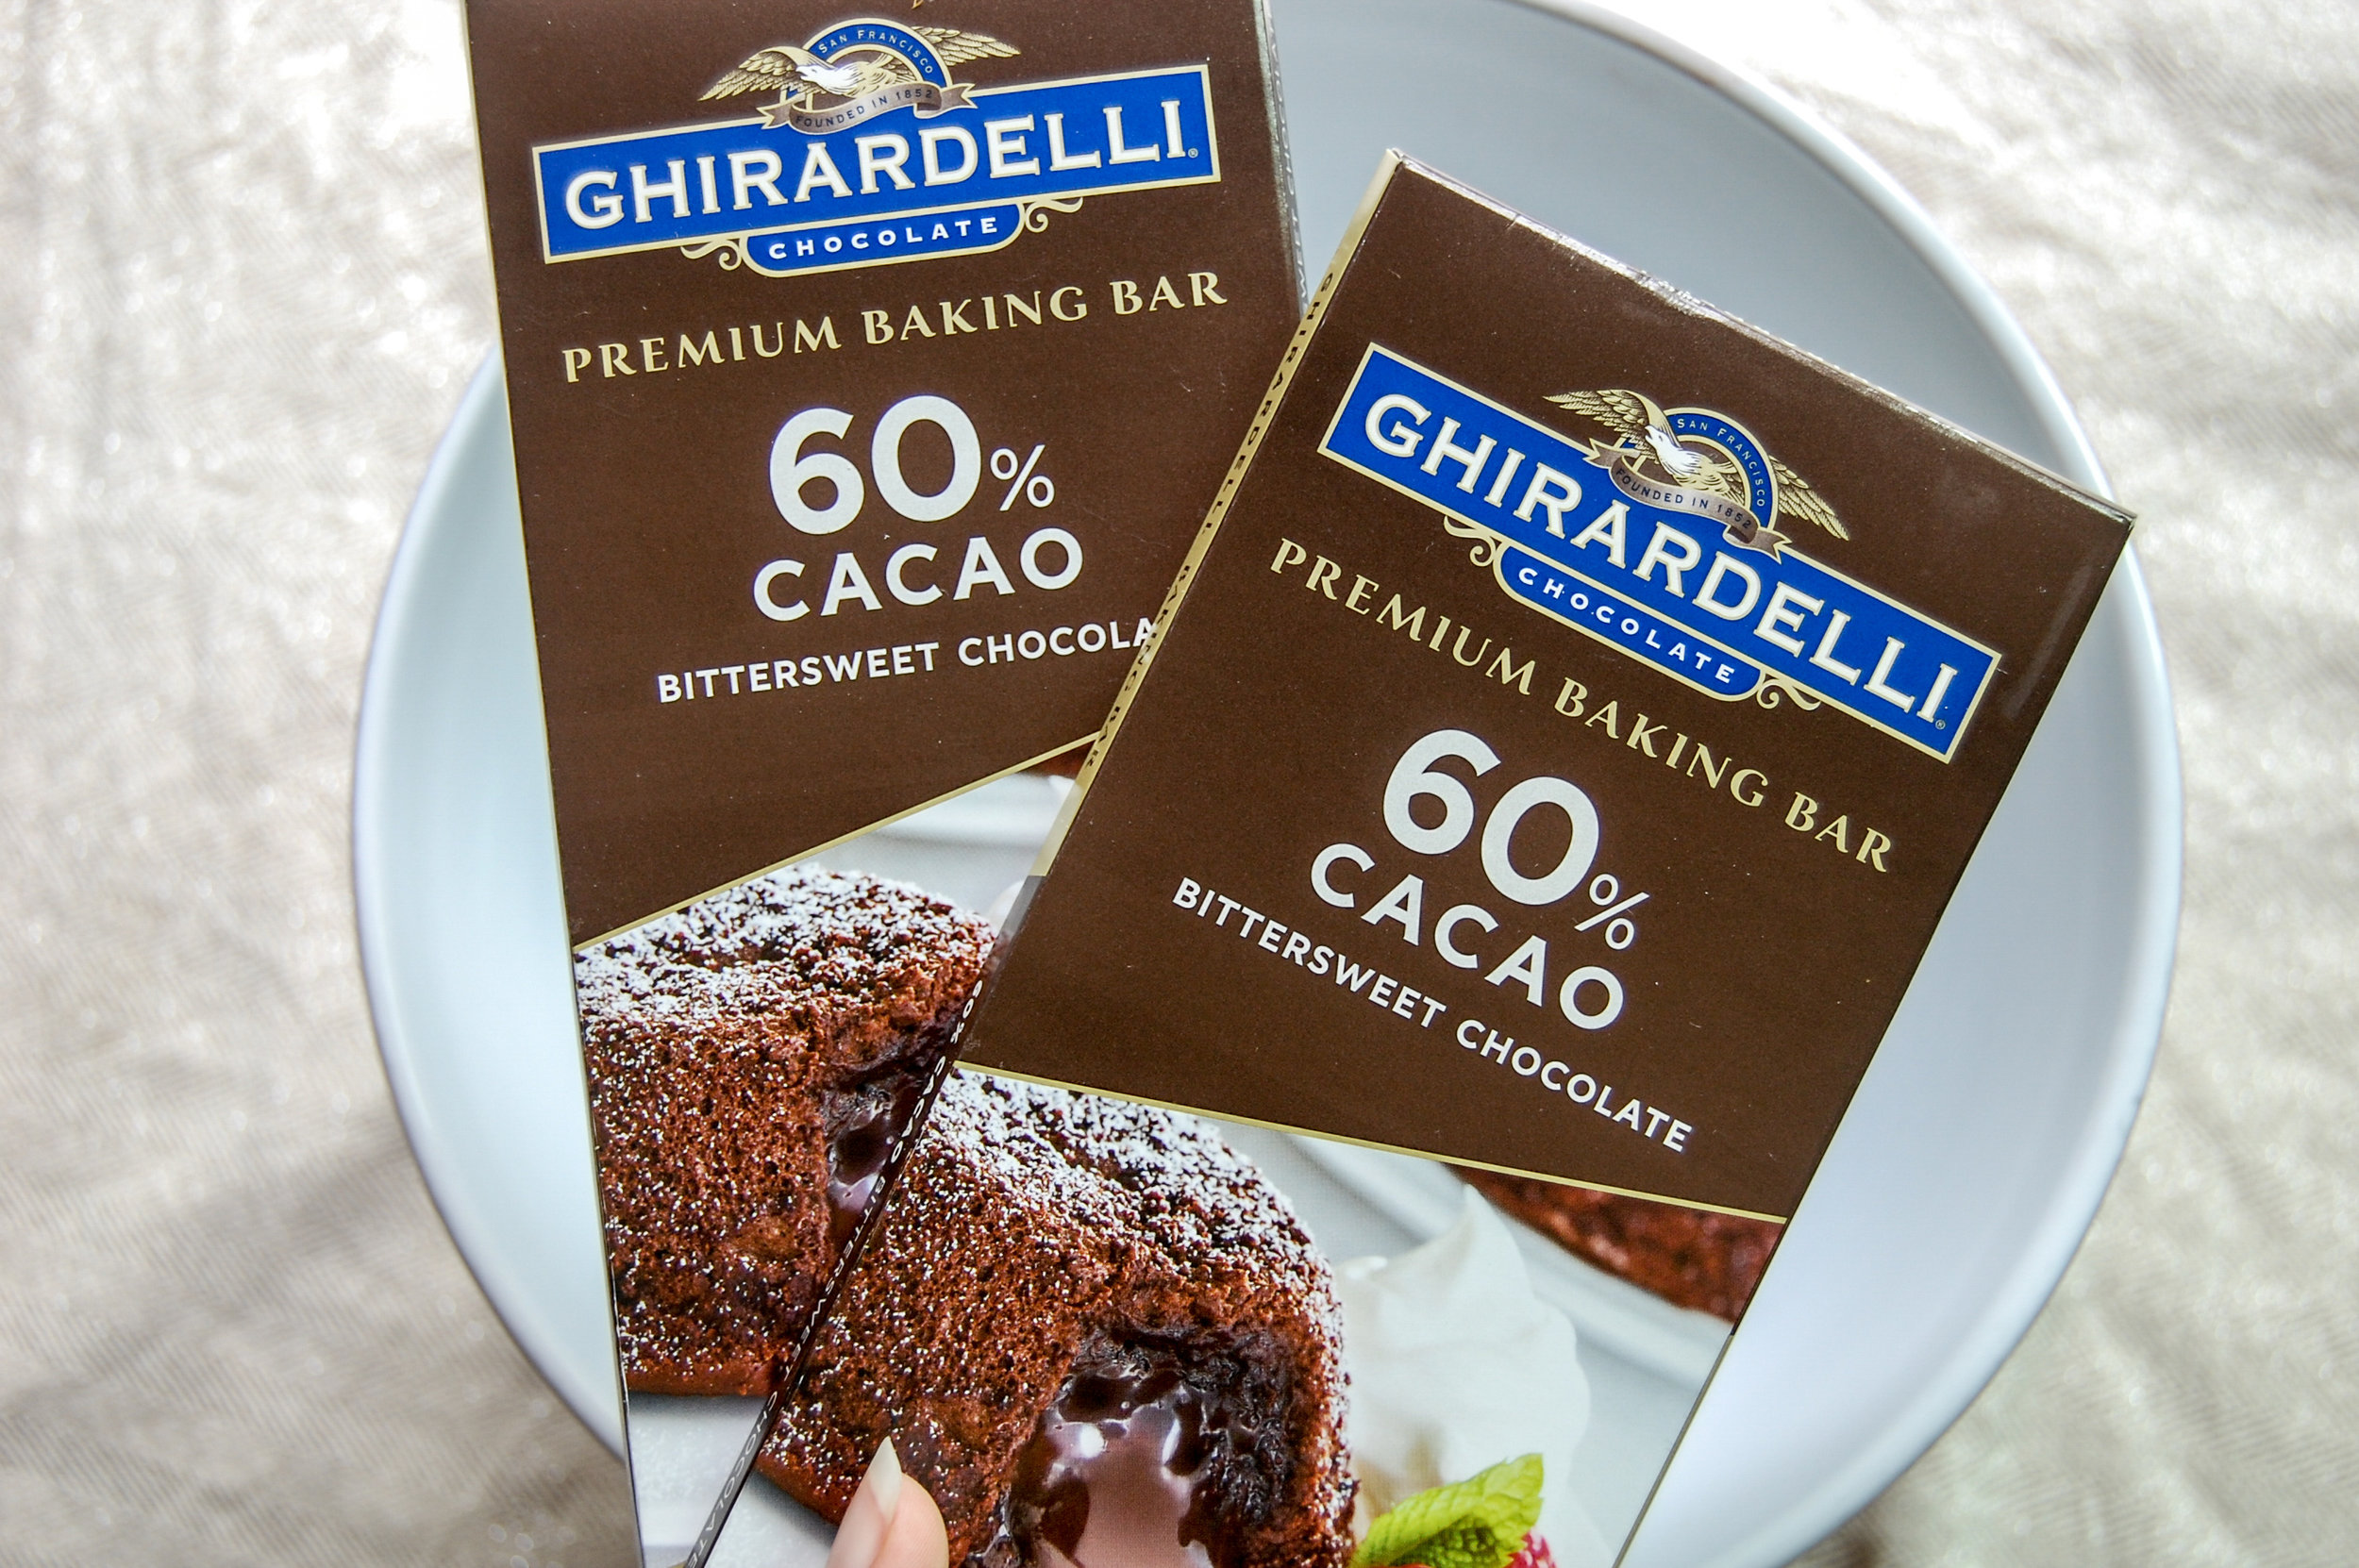

Lesson Learned: Chop, chop chop that chocolate up! I'm not sure what I was thinking leaving it that large. smaller pieces will melt a lot easier and your mixing arm will thank you!
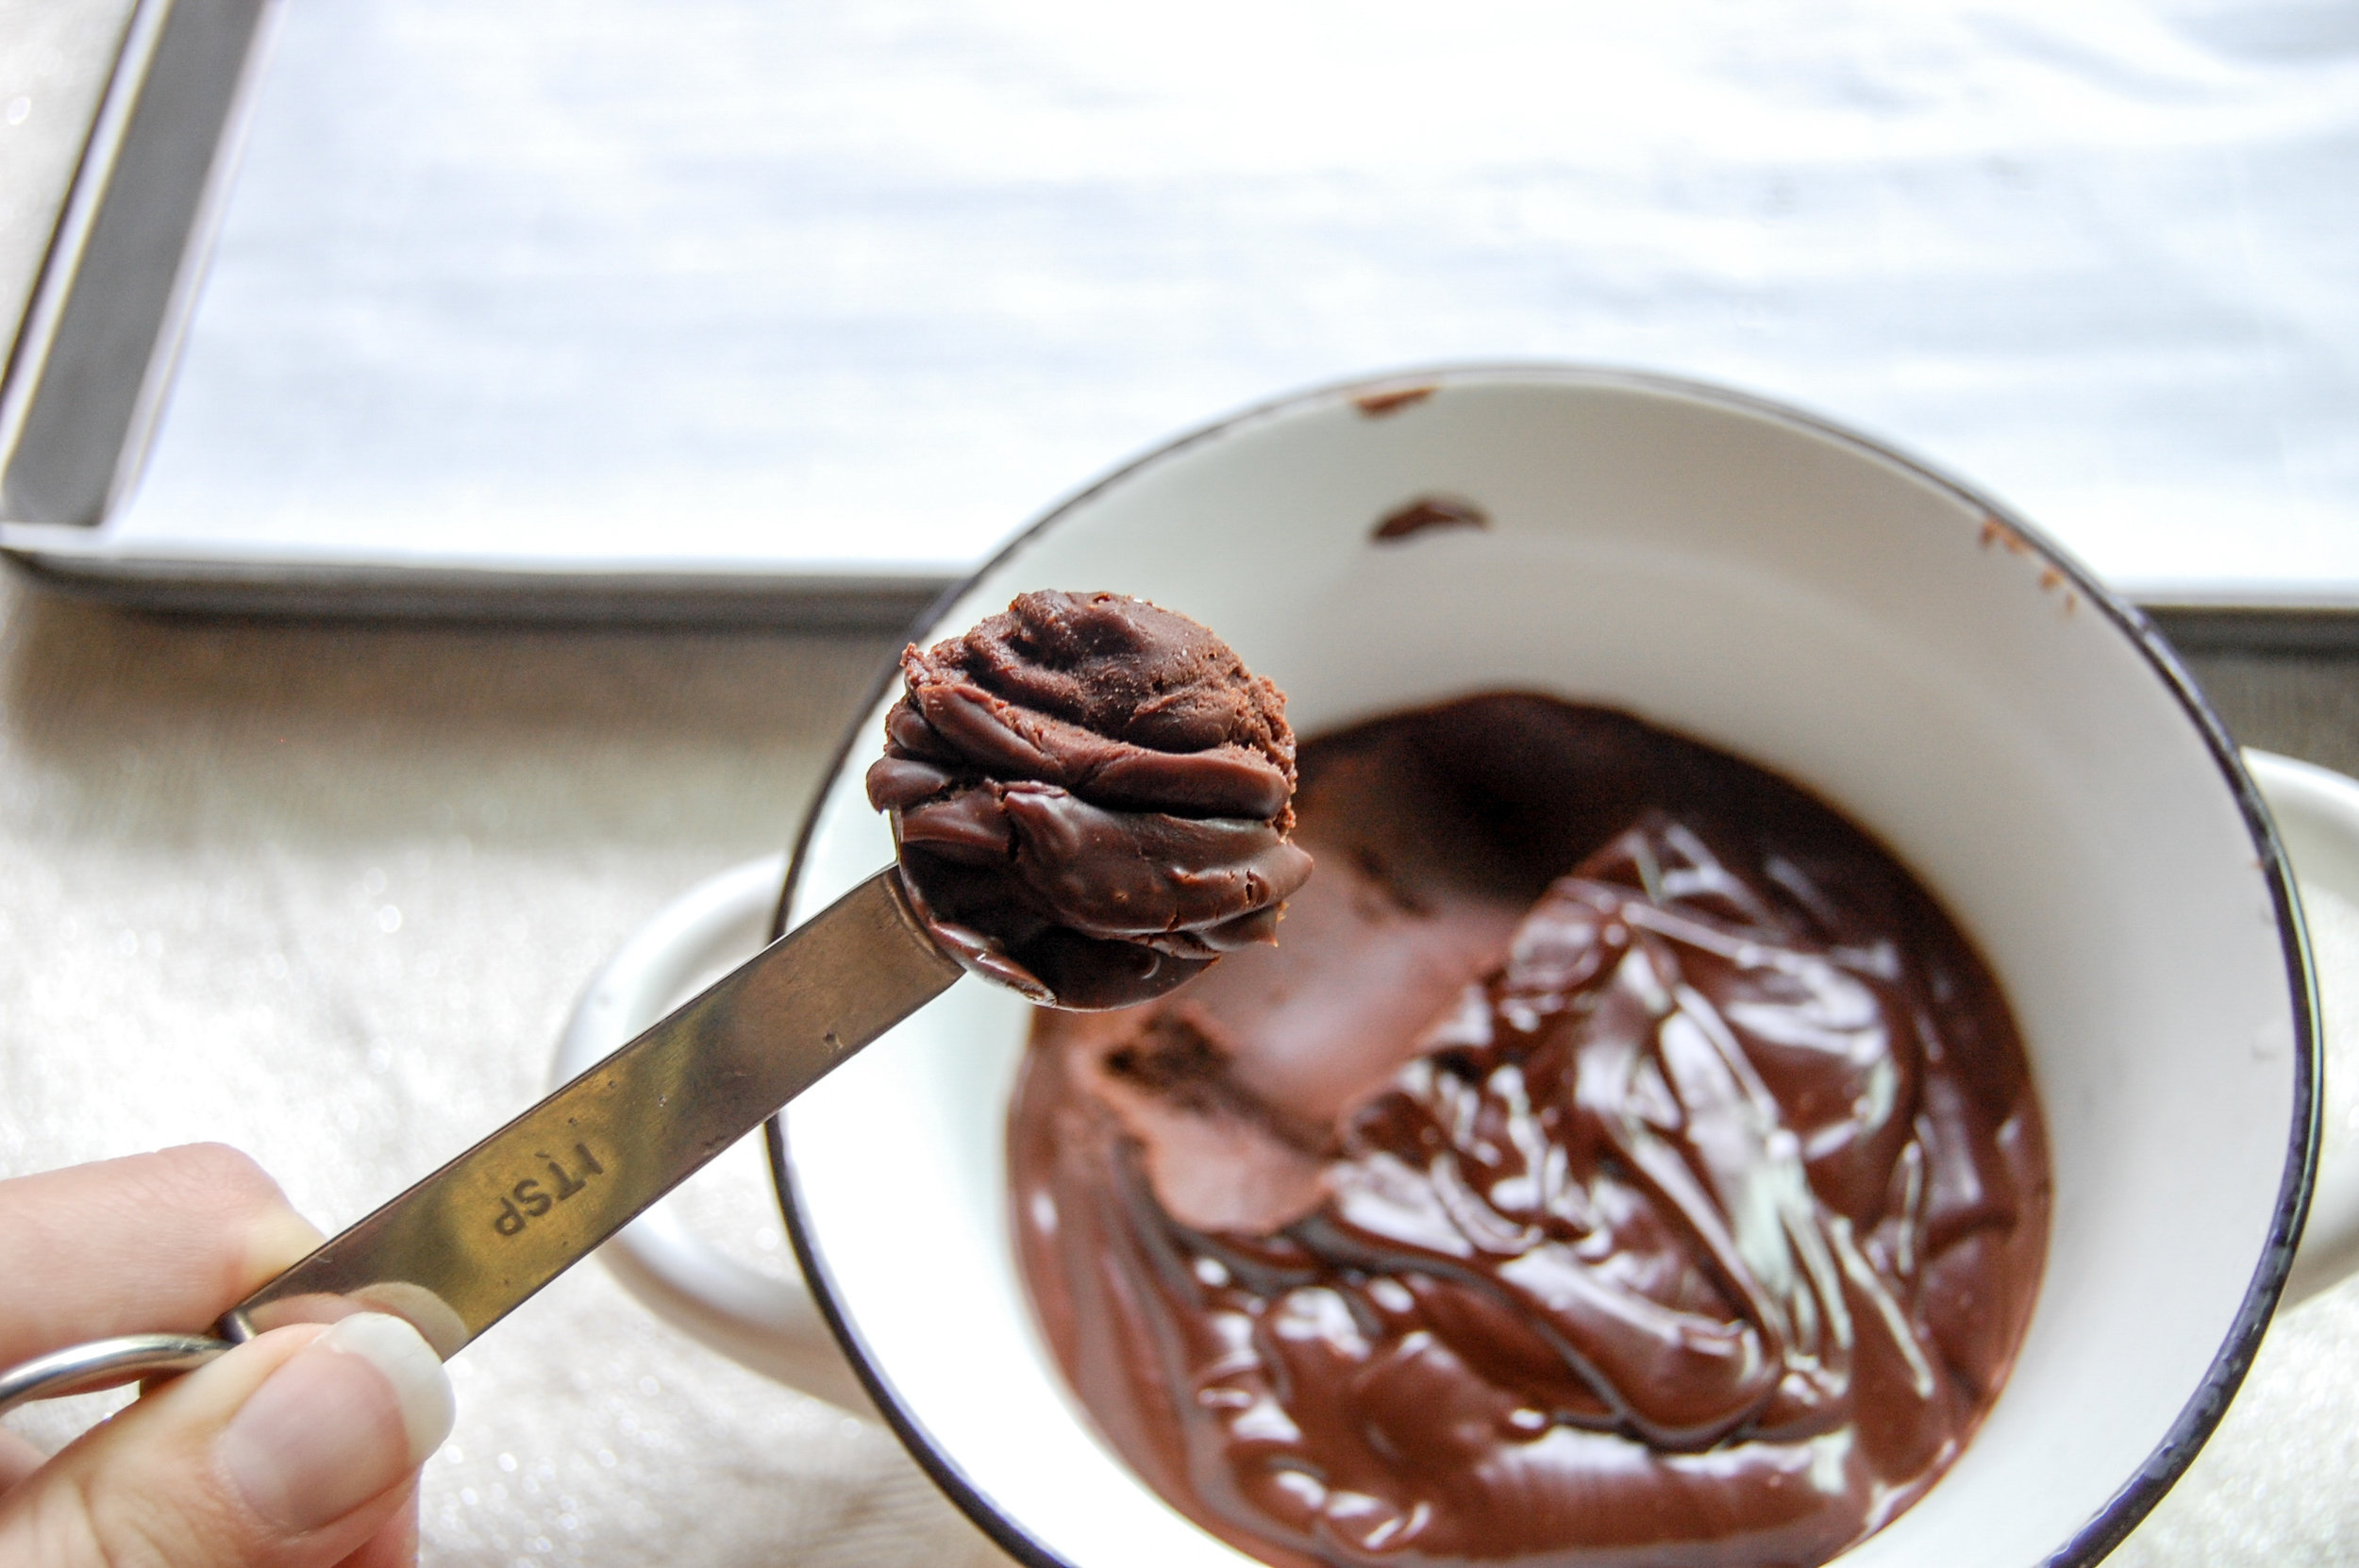
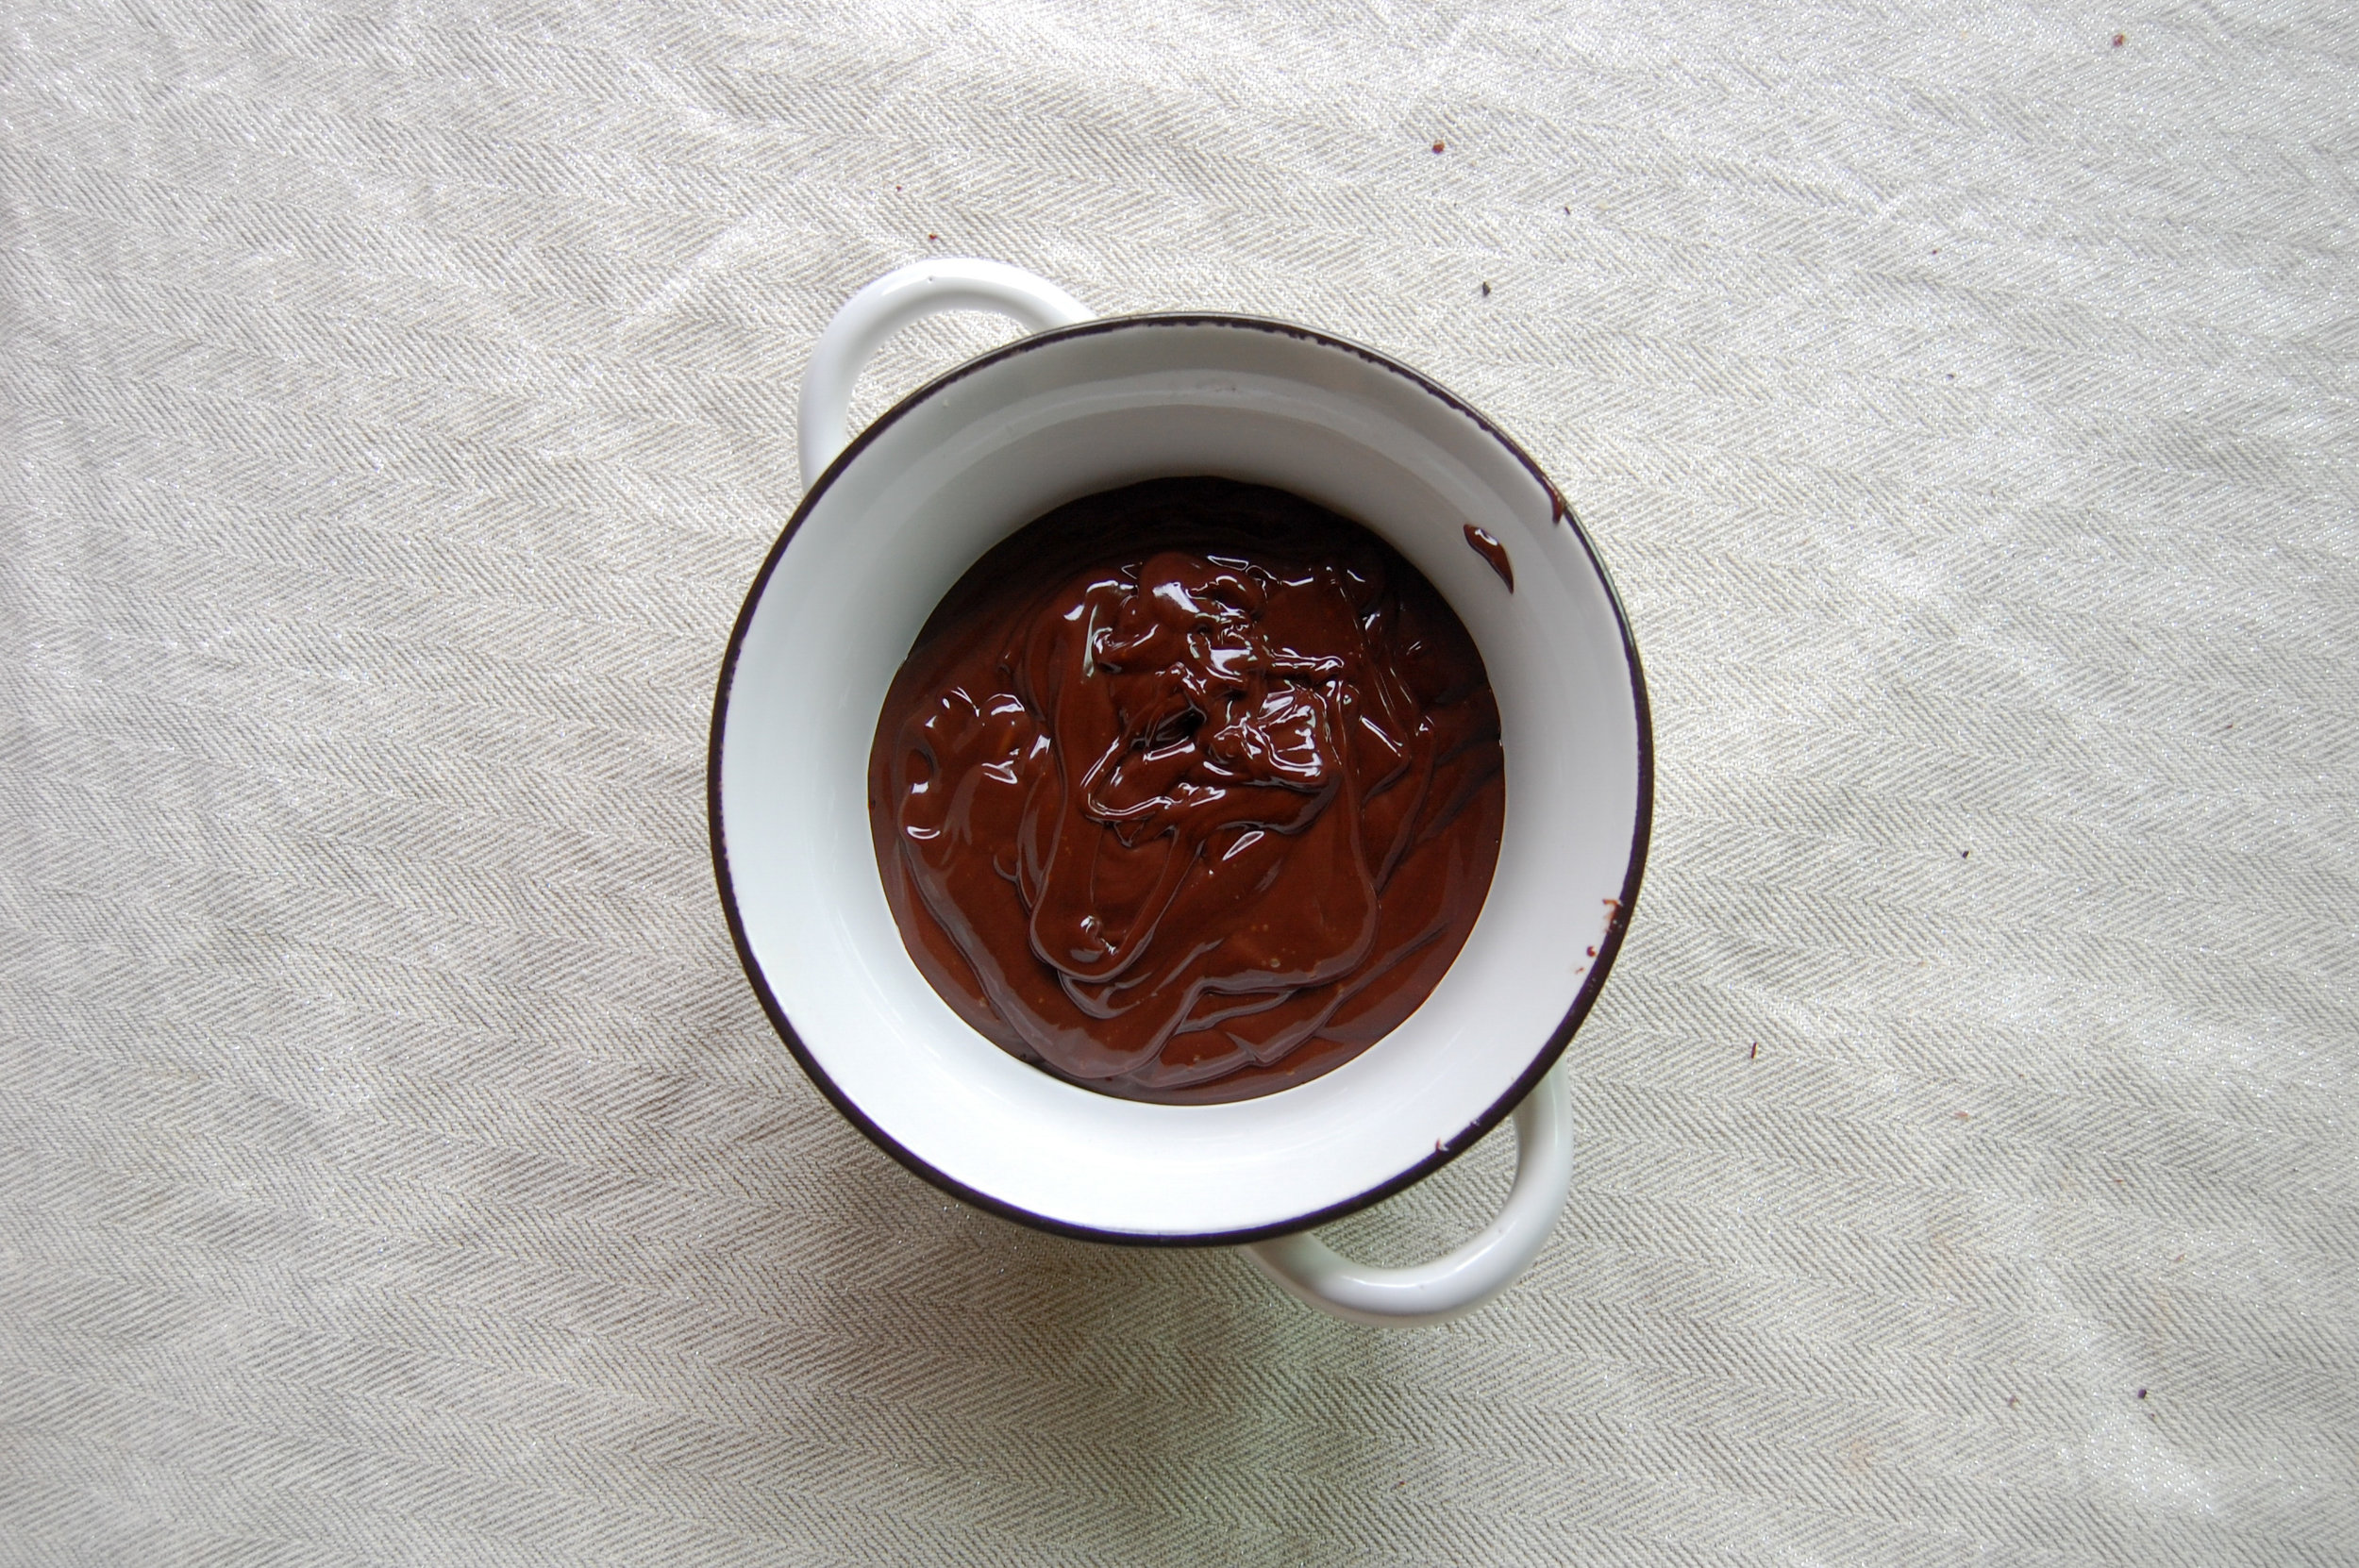
Rolling: Even though the truffle mixture had been in the refrigerator for hours and had solidified, it melted FAST! I would suggest cooling whatever instrument you use to scoop out the balls to help slow the melting a little bit.

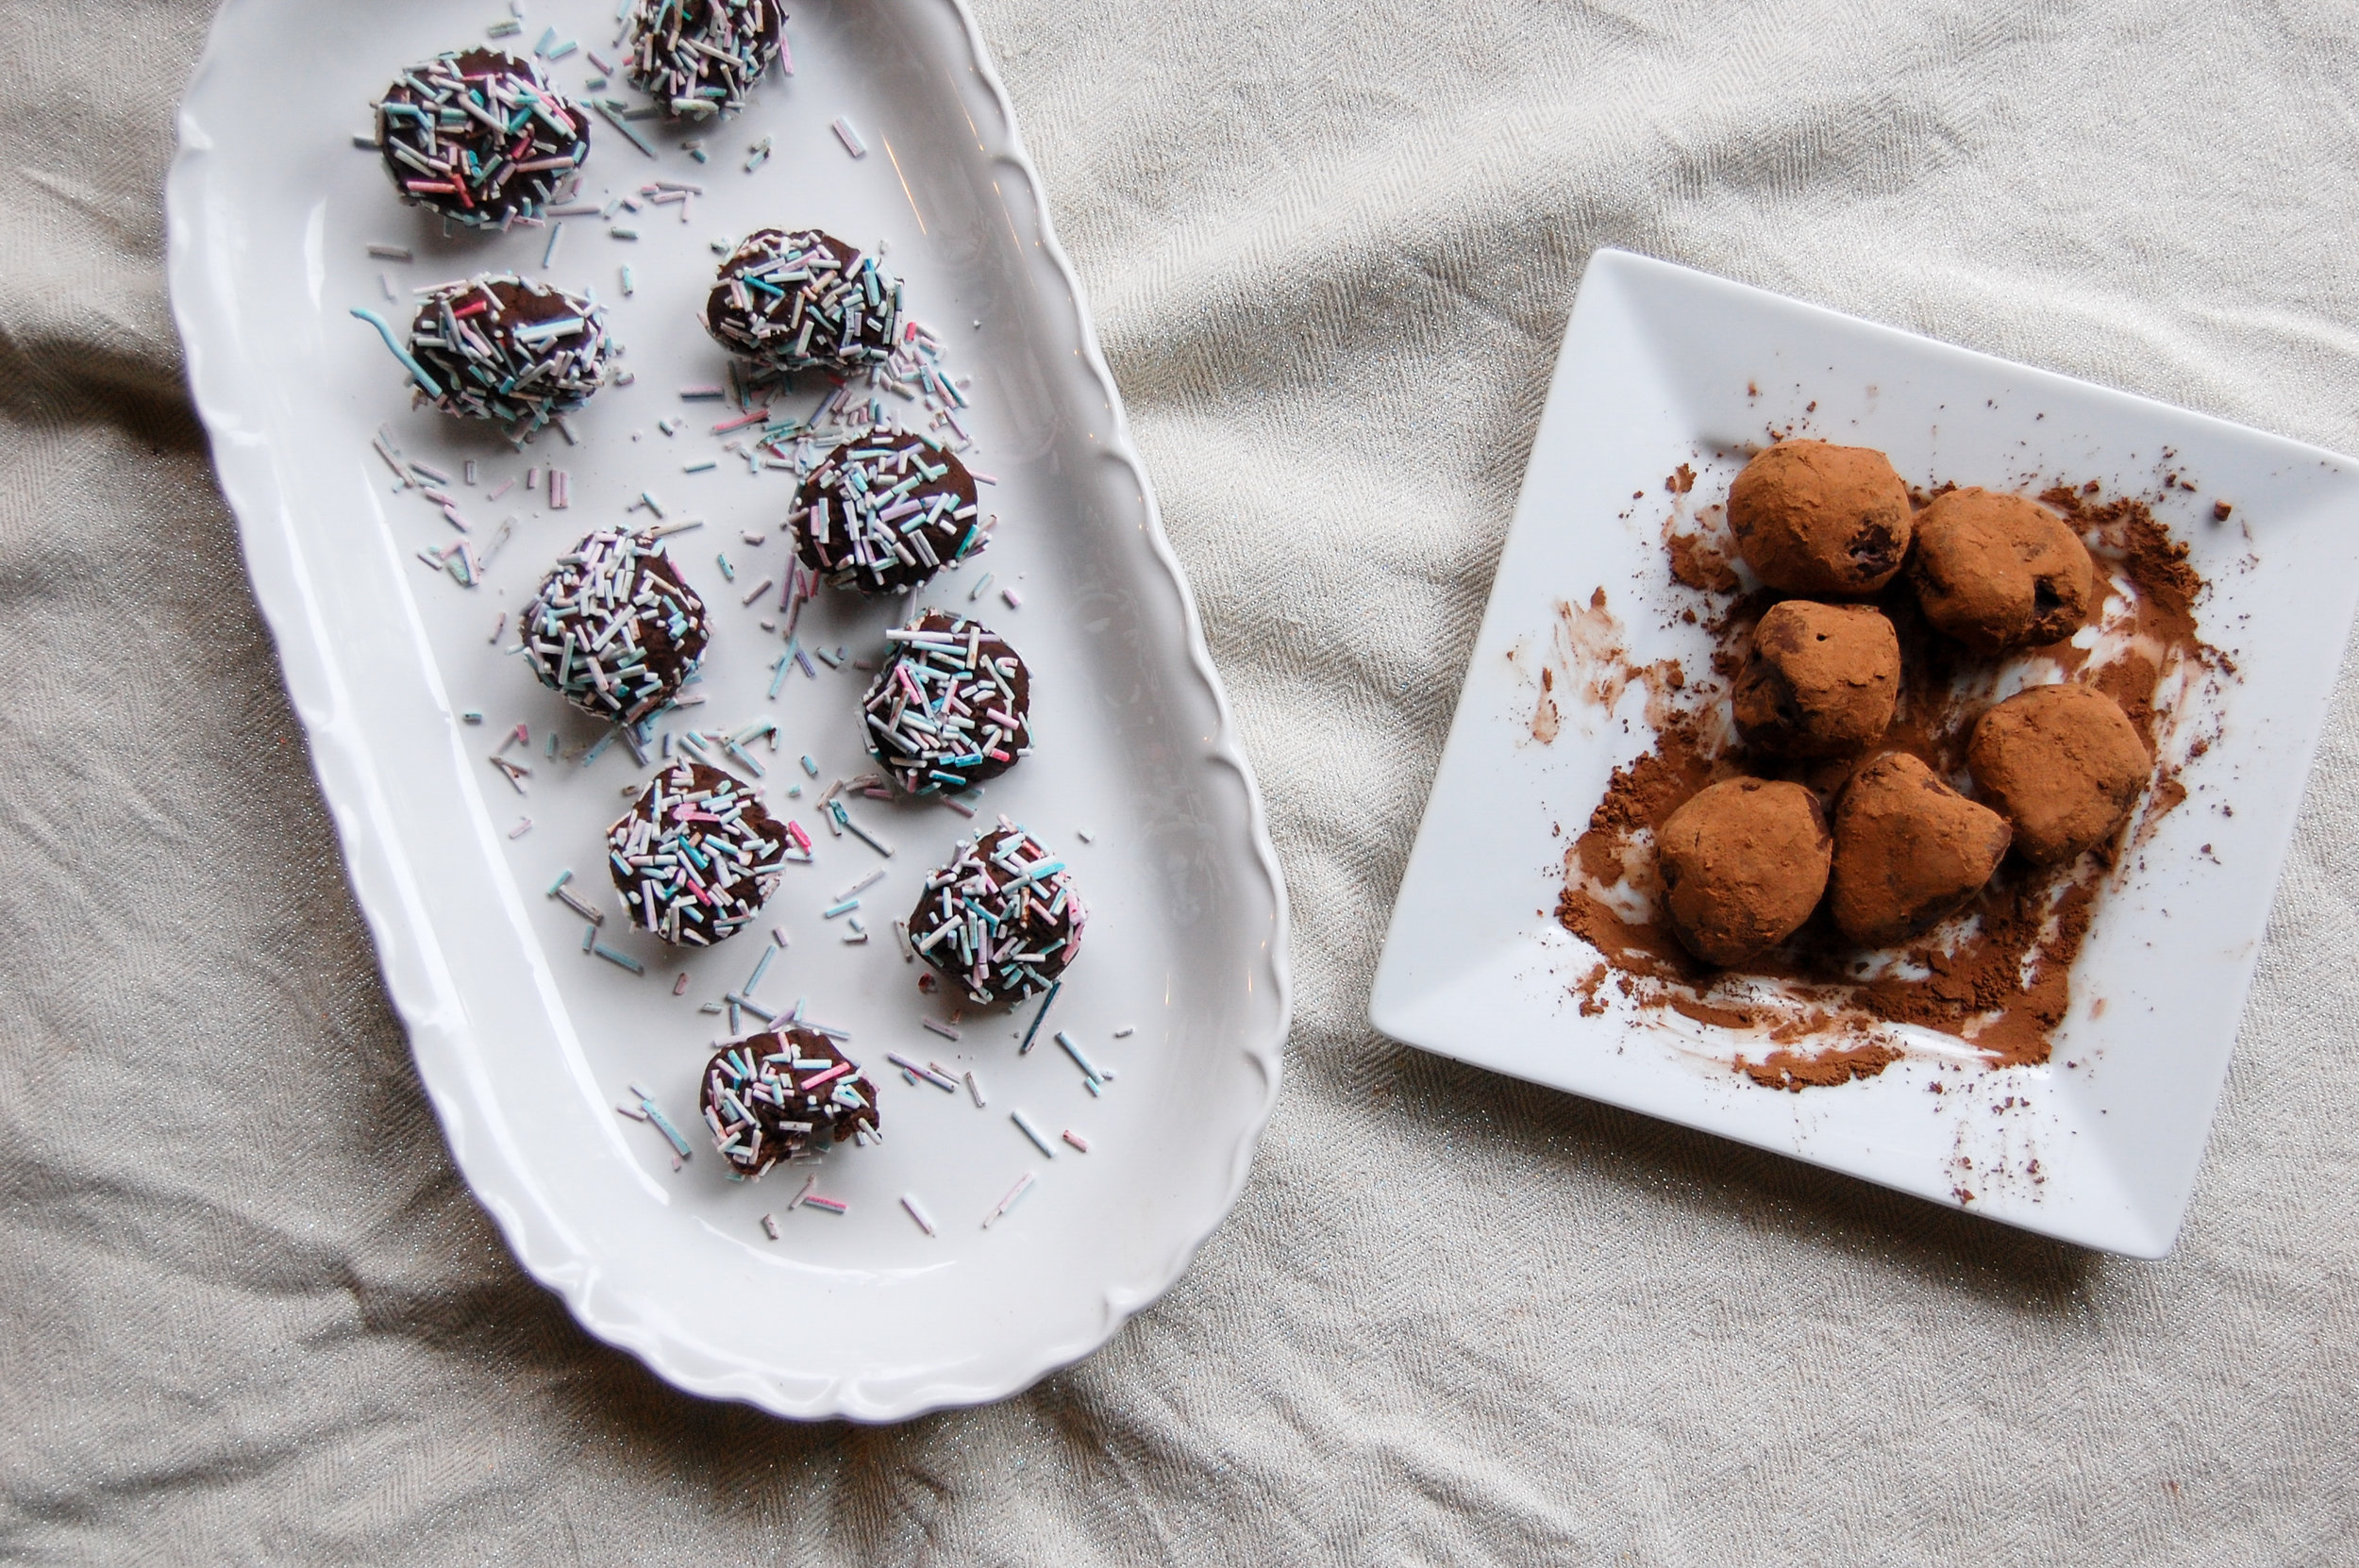
When choosing your rolling topping, I think you should be a little adventurous! Cocoa is a very common coating but these truffles are hardcore chocolate flavored. Adding in a different type of coating gives them more depth in the flavor department.


As you can see I used some fun sprinkles to roll the majority of my truffles. These are of course from my favorite sprinkle shop, Tiny Kitchen Treats! She not only makes fun names for all of her sprinkles but they actually TASTE good. They taste real. A lot of sprinkles I've bought from the store have a strange flavor to them.


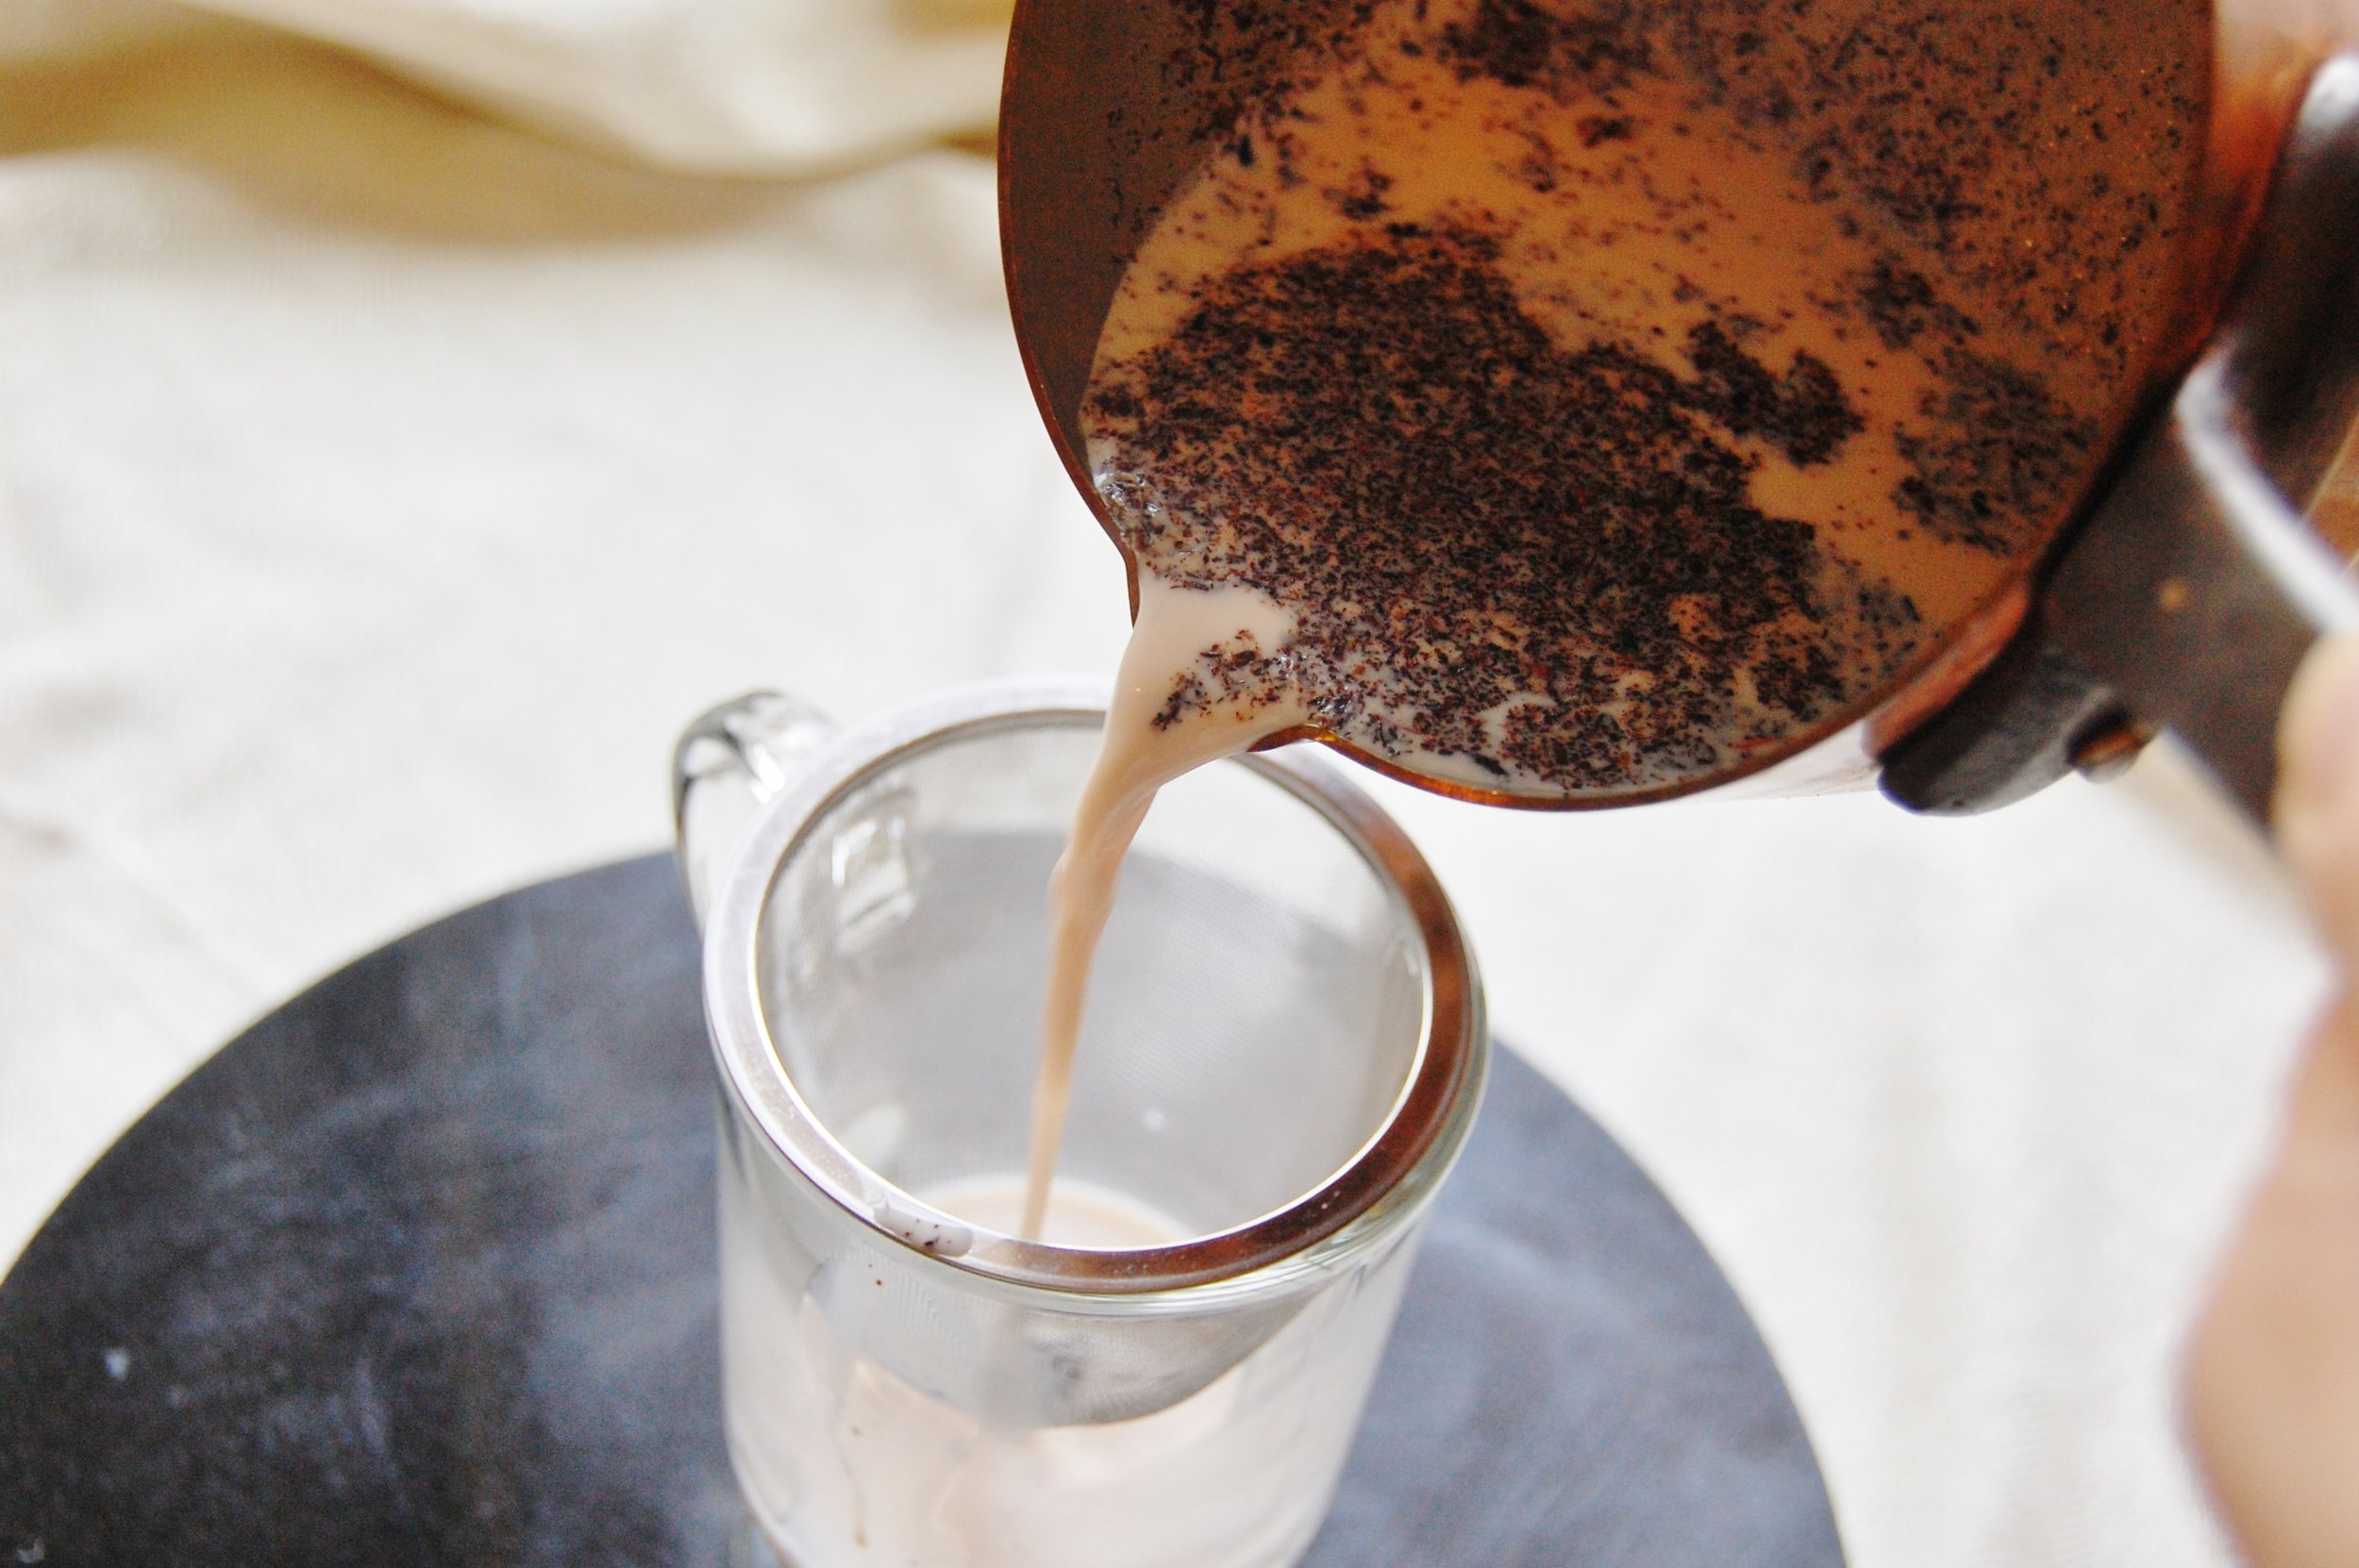
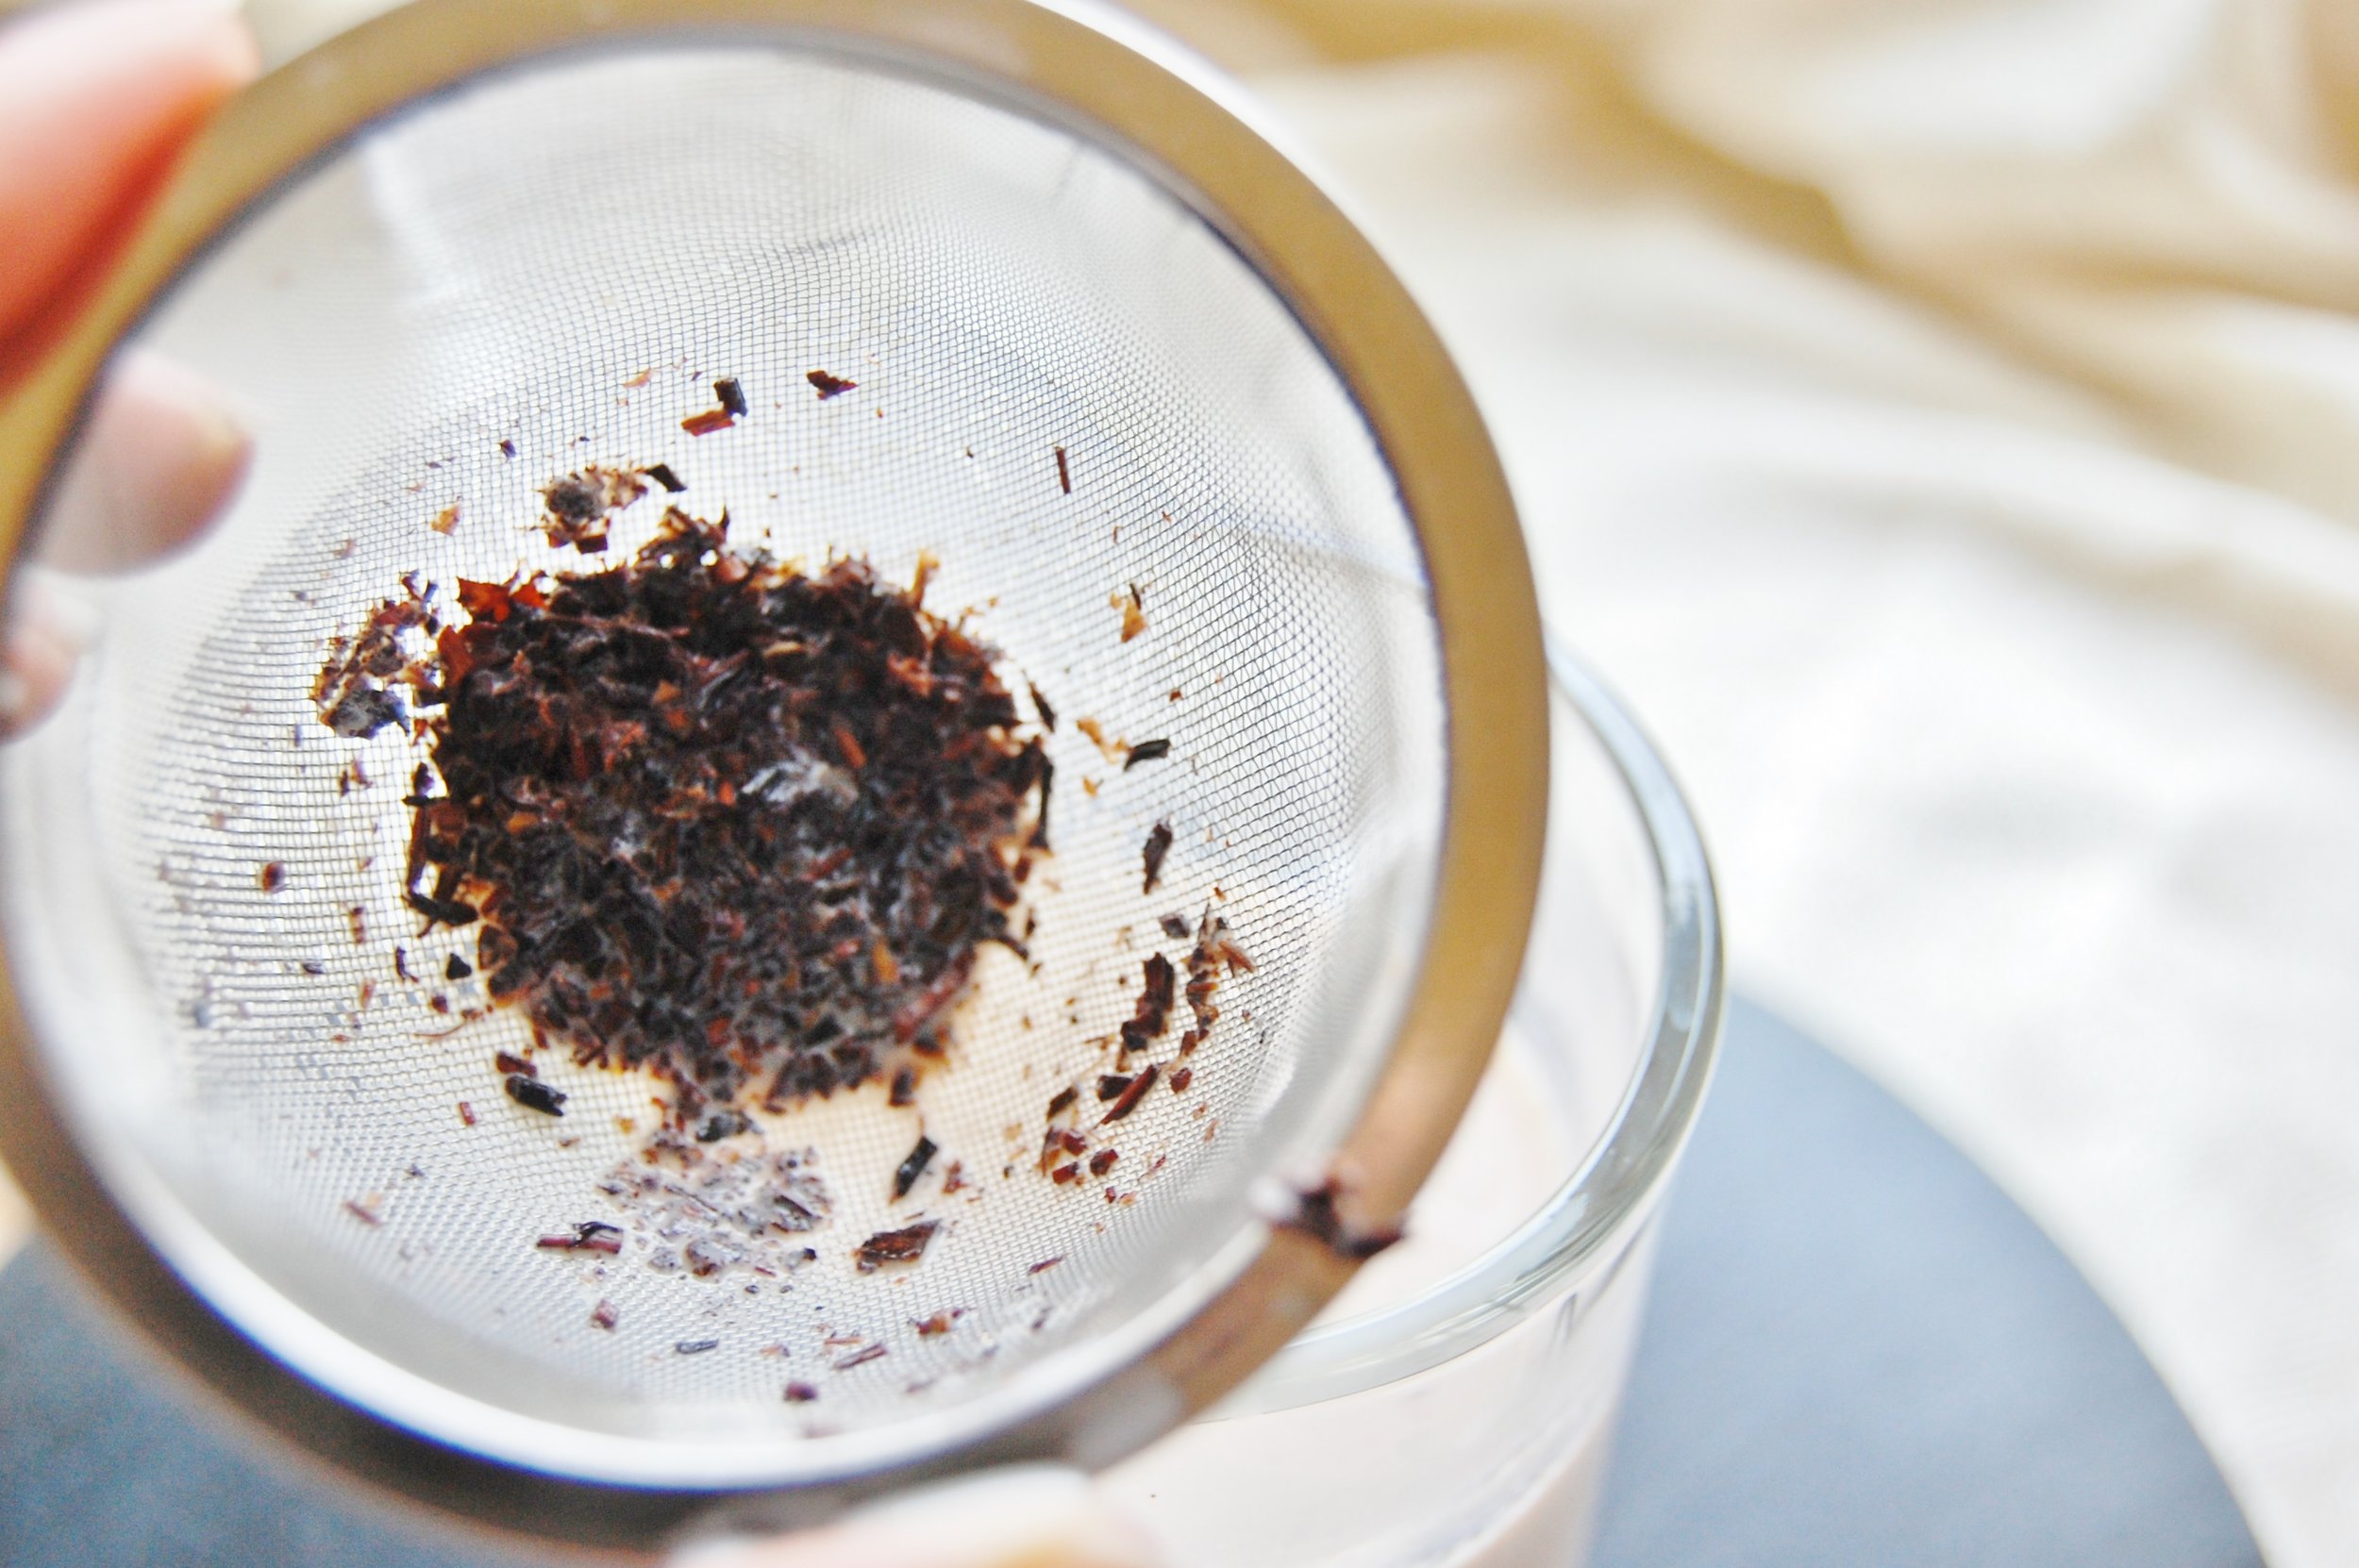
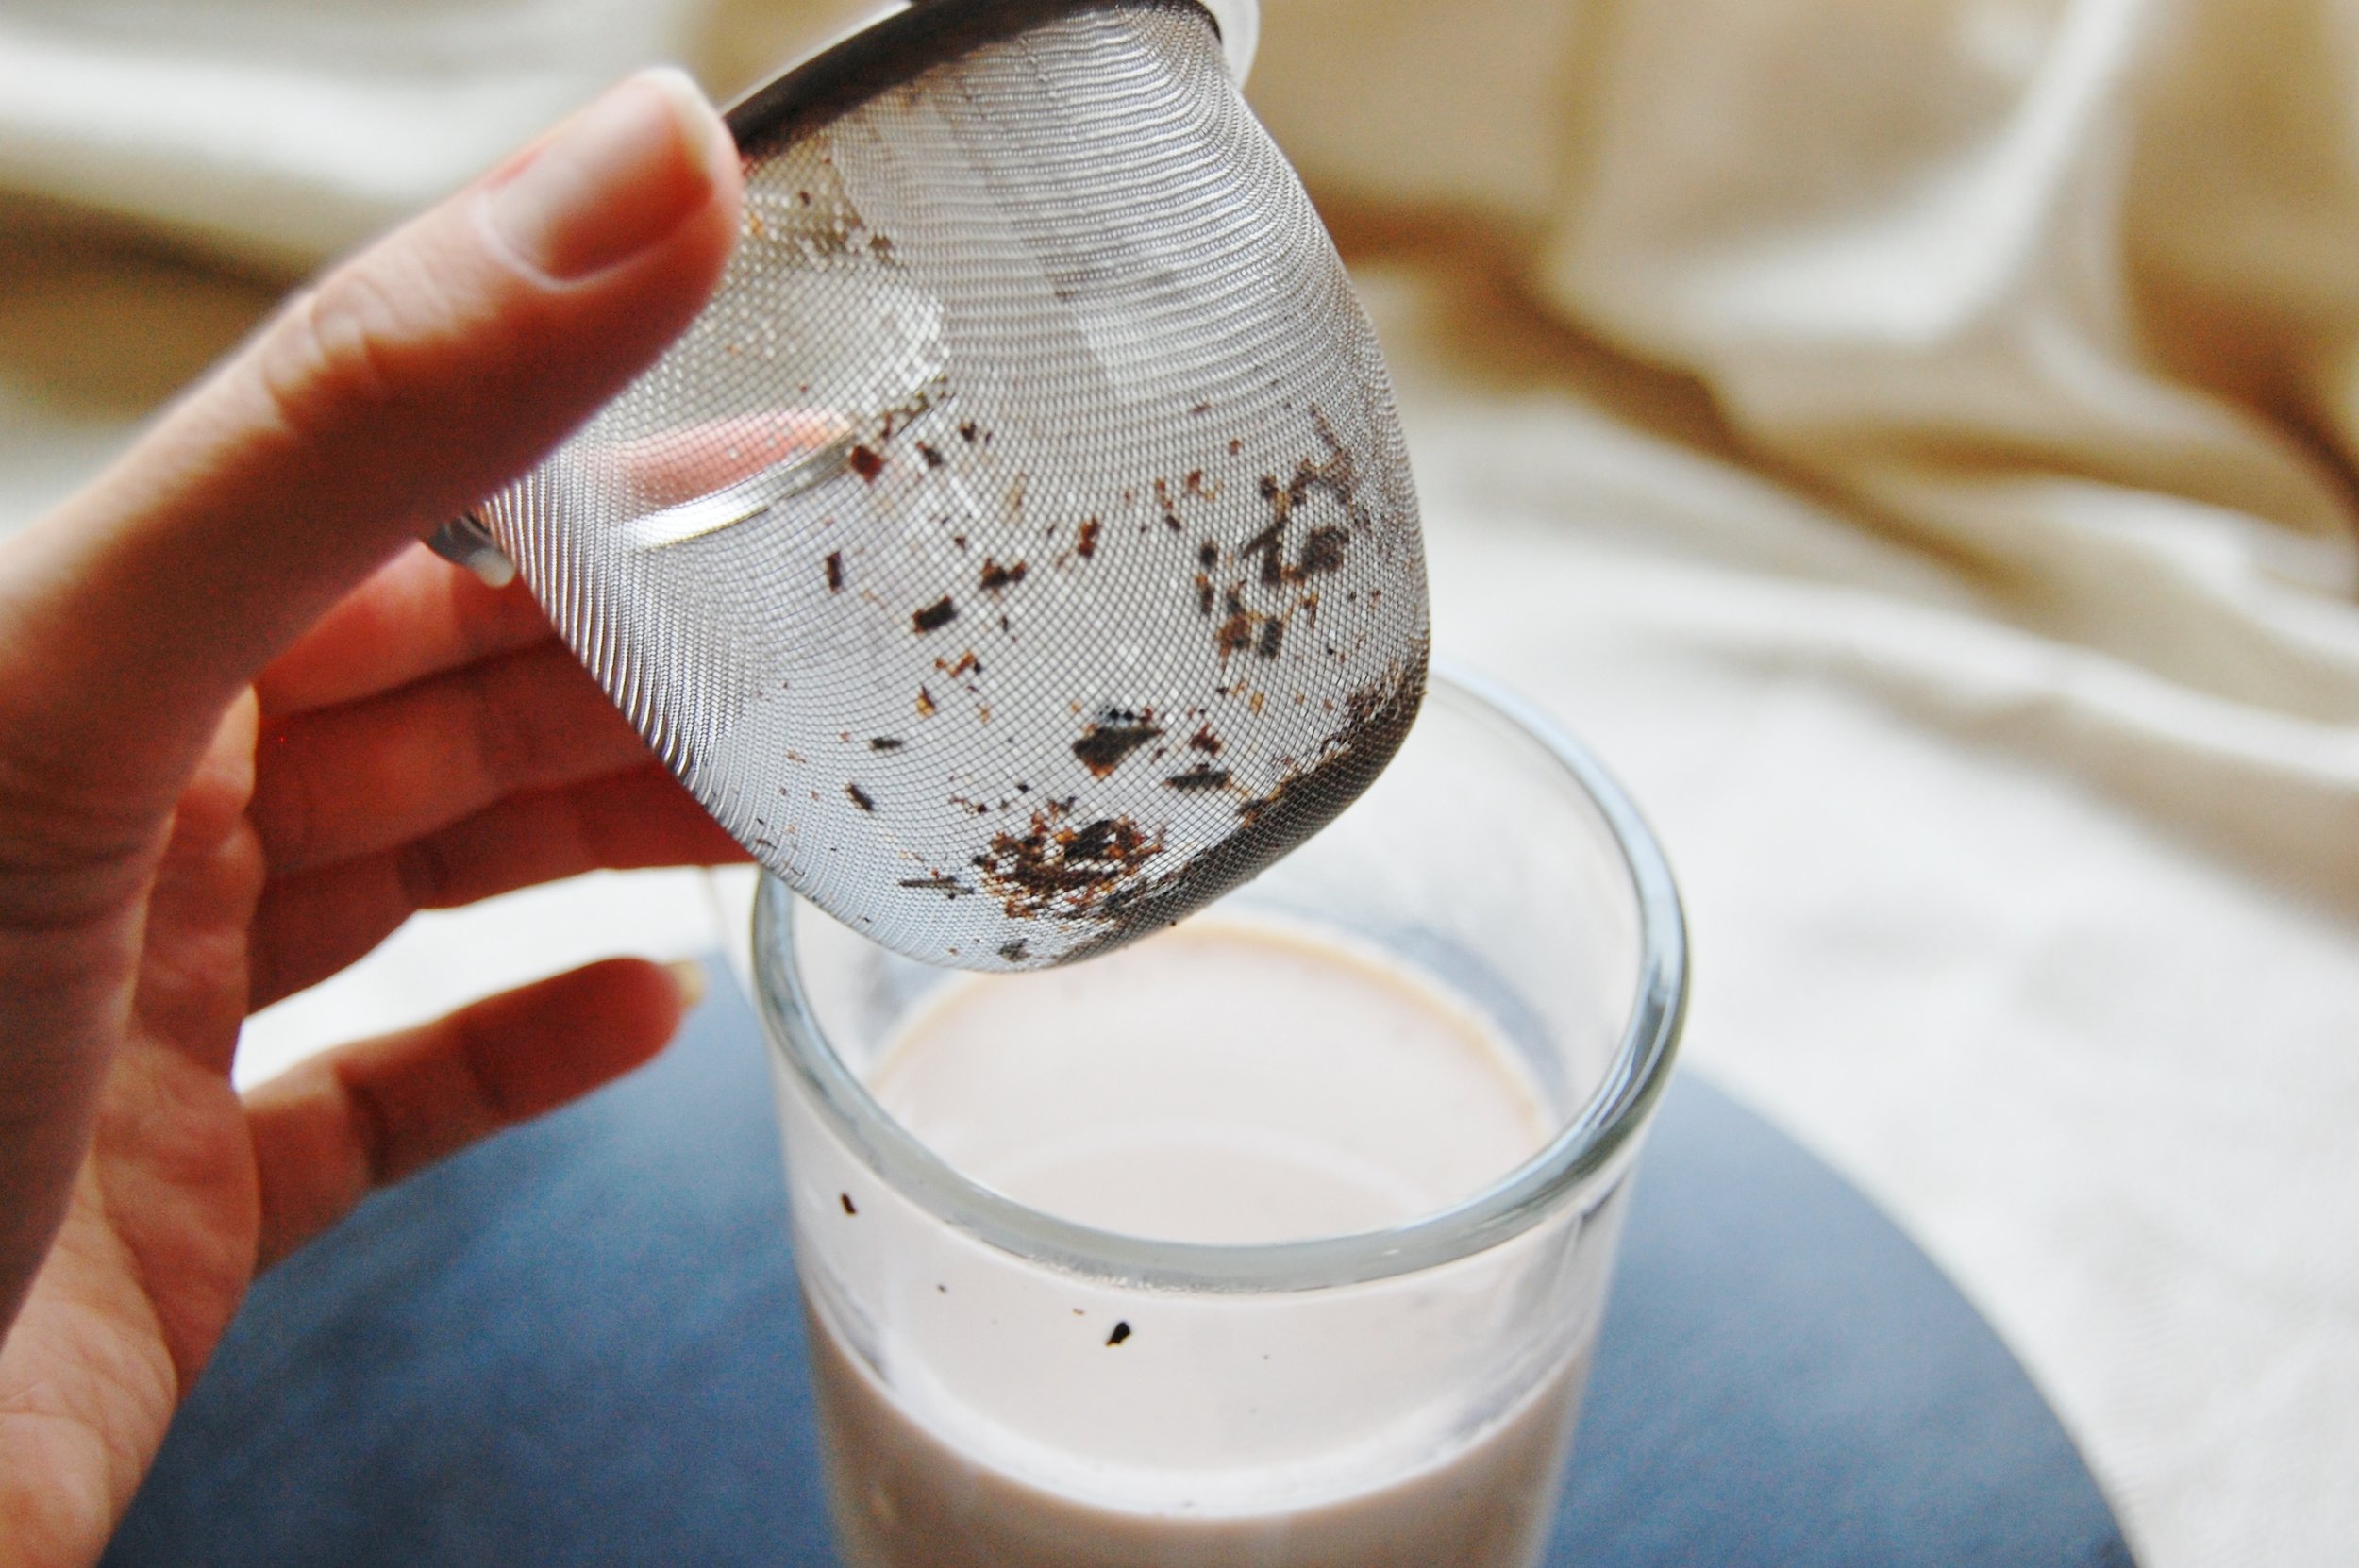
The tiramisu tea was excellent in these truffles, it was almost like biting into a piece of tiramisu. Flavors were more dominated by chocolate but the notes of coffee were there. This blend has both black tea and coffee so it smells AMAZING and your truffles will hold that aroma as well. Make sure that when you're heating the cream with the tea that you let it get hot enough that the cream is actually brewing the tea or the entire addition of the tea is pointless.

If you could roll your truffles in whatever flavor you wanted, what would it be?!
Matcha Mint Chocolate Chip Ice cream
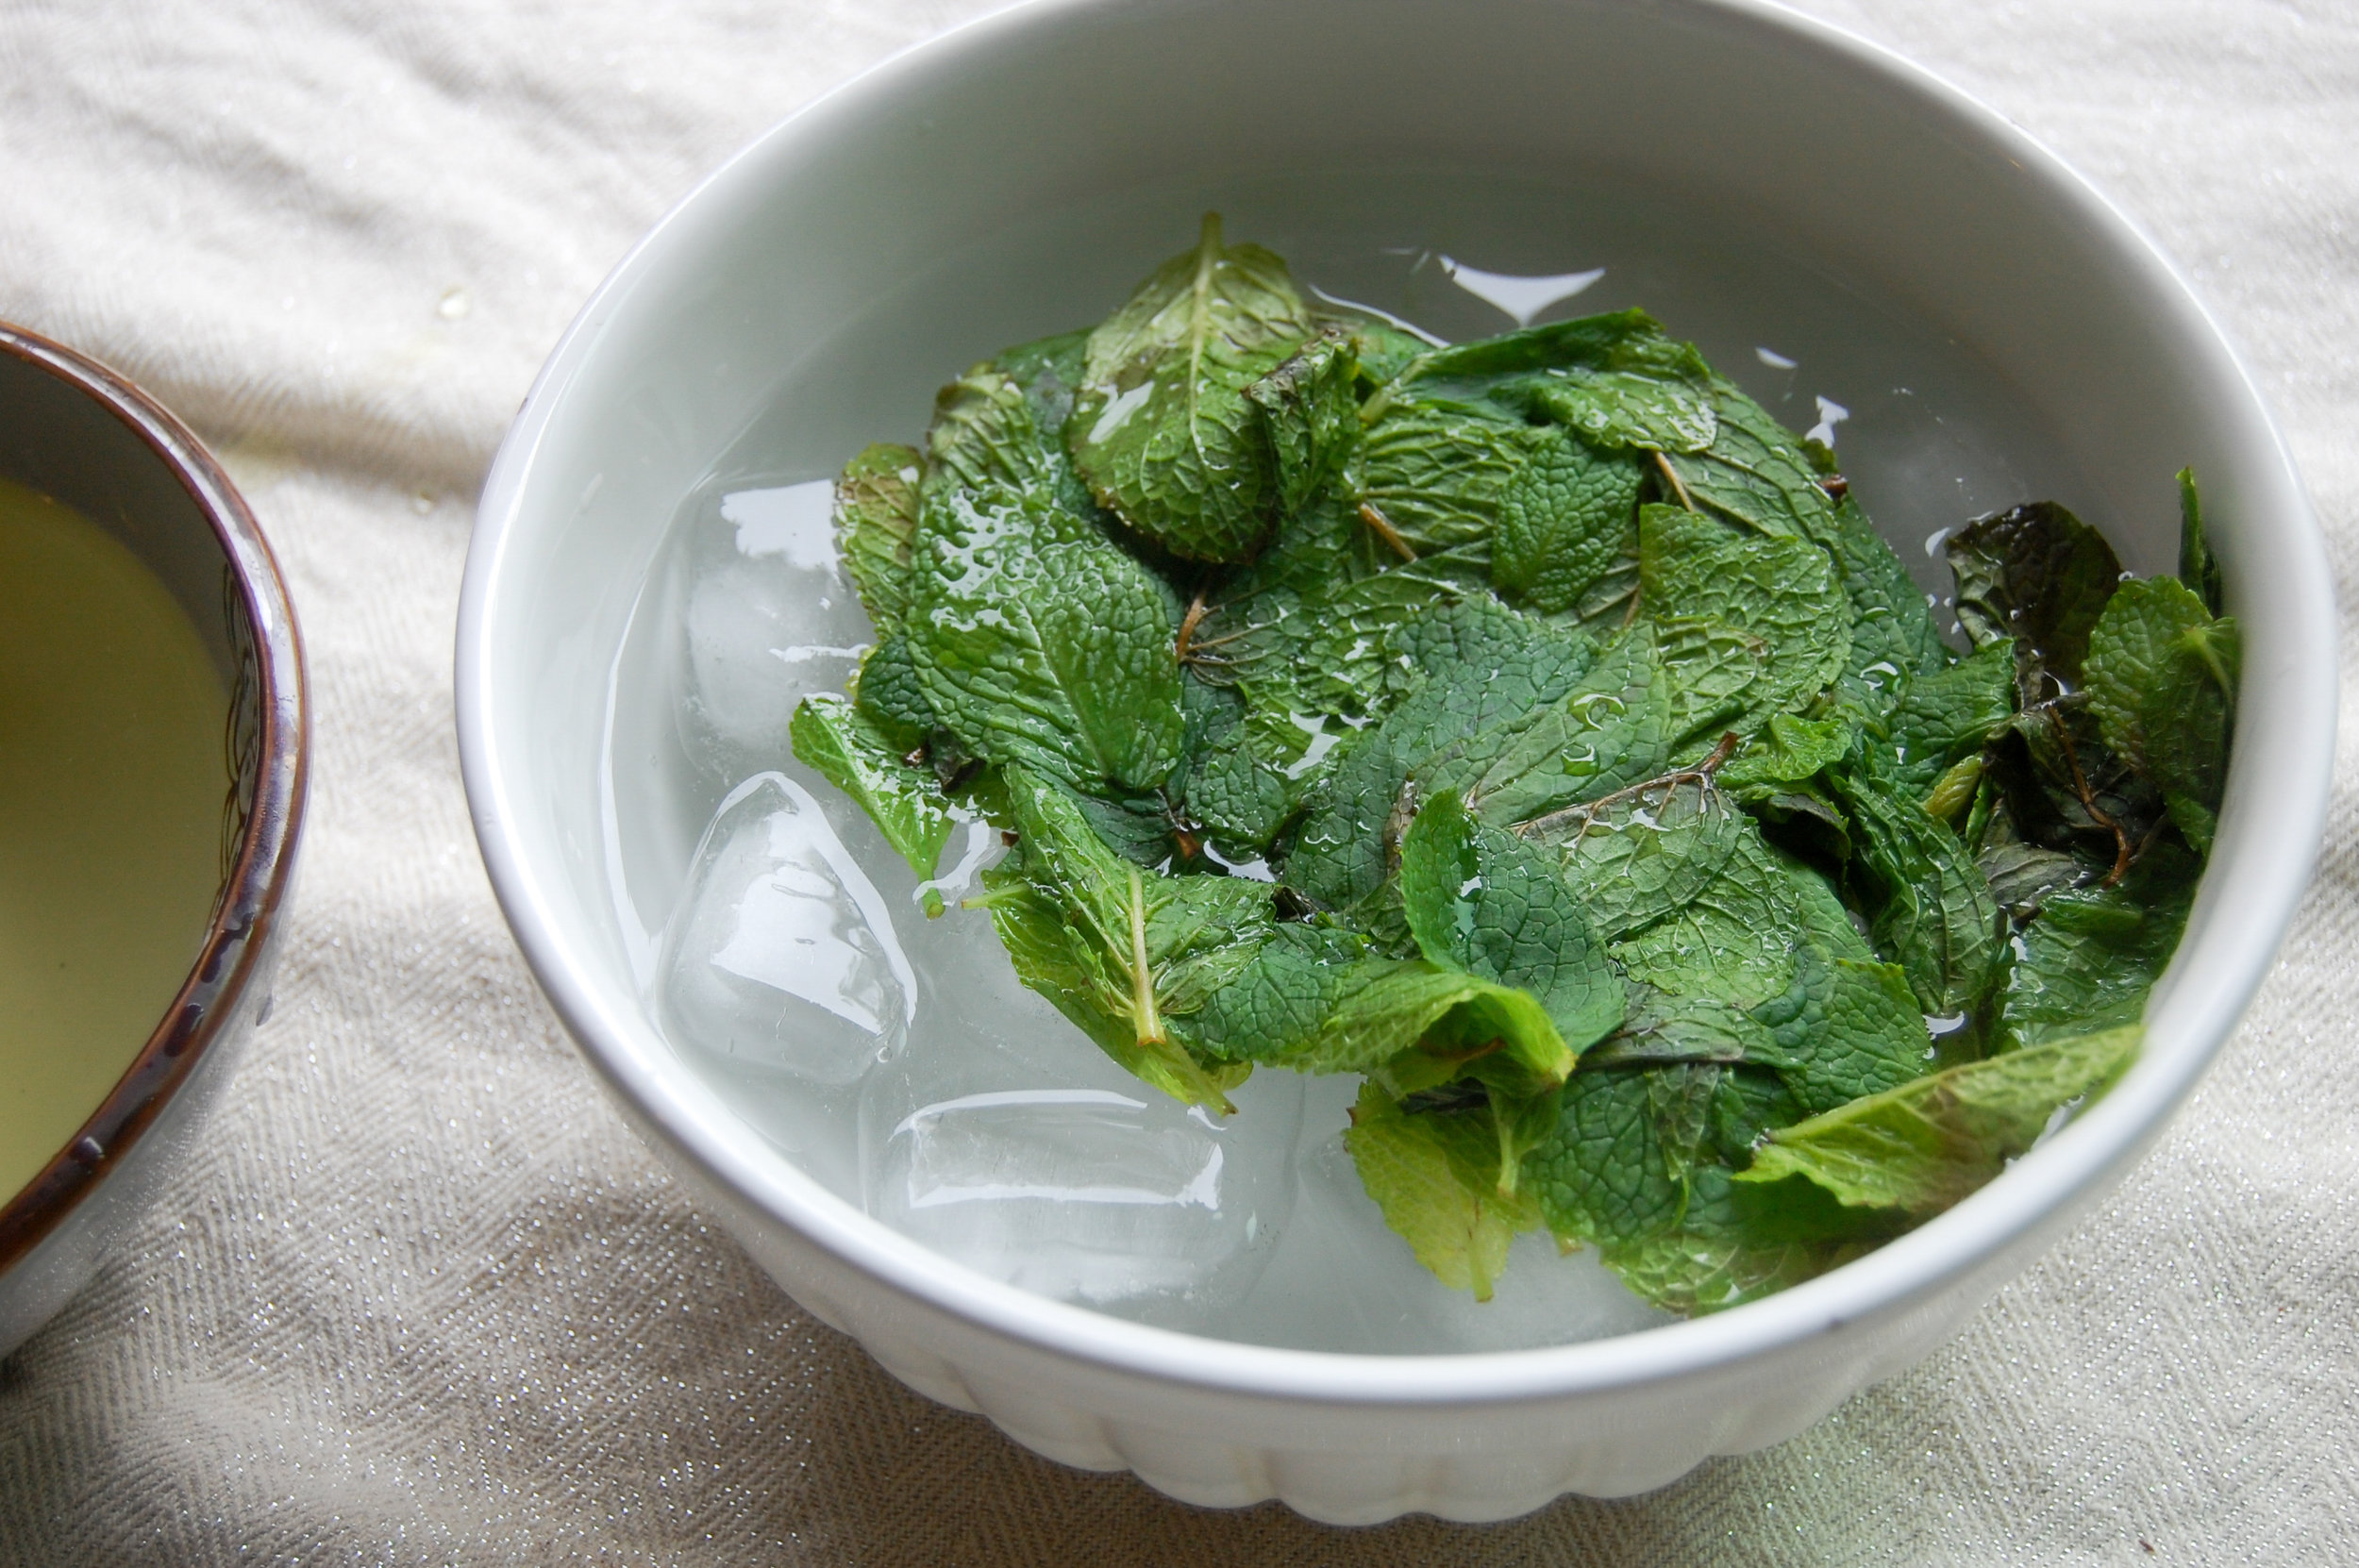
Matcha Mint.
Y'all. Let me tell you about the dangerous thing I just made at home for the first time. MATCHA MINT CHOCOLATE CHIP ICE CREAM !! I'm not sure if I've shared this with you but mint chocolate chip is my favorite ice cream of all time. One time, in my teens I read that Orlando Bloom also loves mint chocolate chip ice cream so basically, it's the best ice cream flavor.

I found a recipe for it and made some tweaks based on what I love. For example I put in almost double the matcha, I didn't use an ice cream maker, brown instead of white sugar and I used more mint that what was called for.
There are a lot of steps but nothing too complicated. A devilishly easy ice cream recipe that can easily be molded to have different flavors? I'm in big trouble!

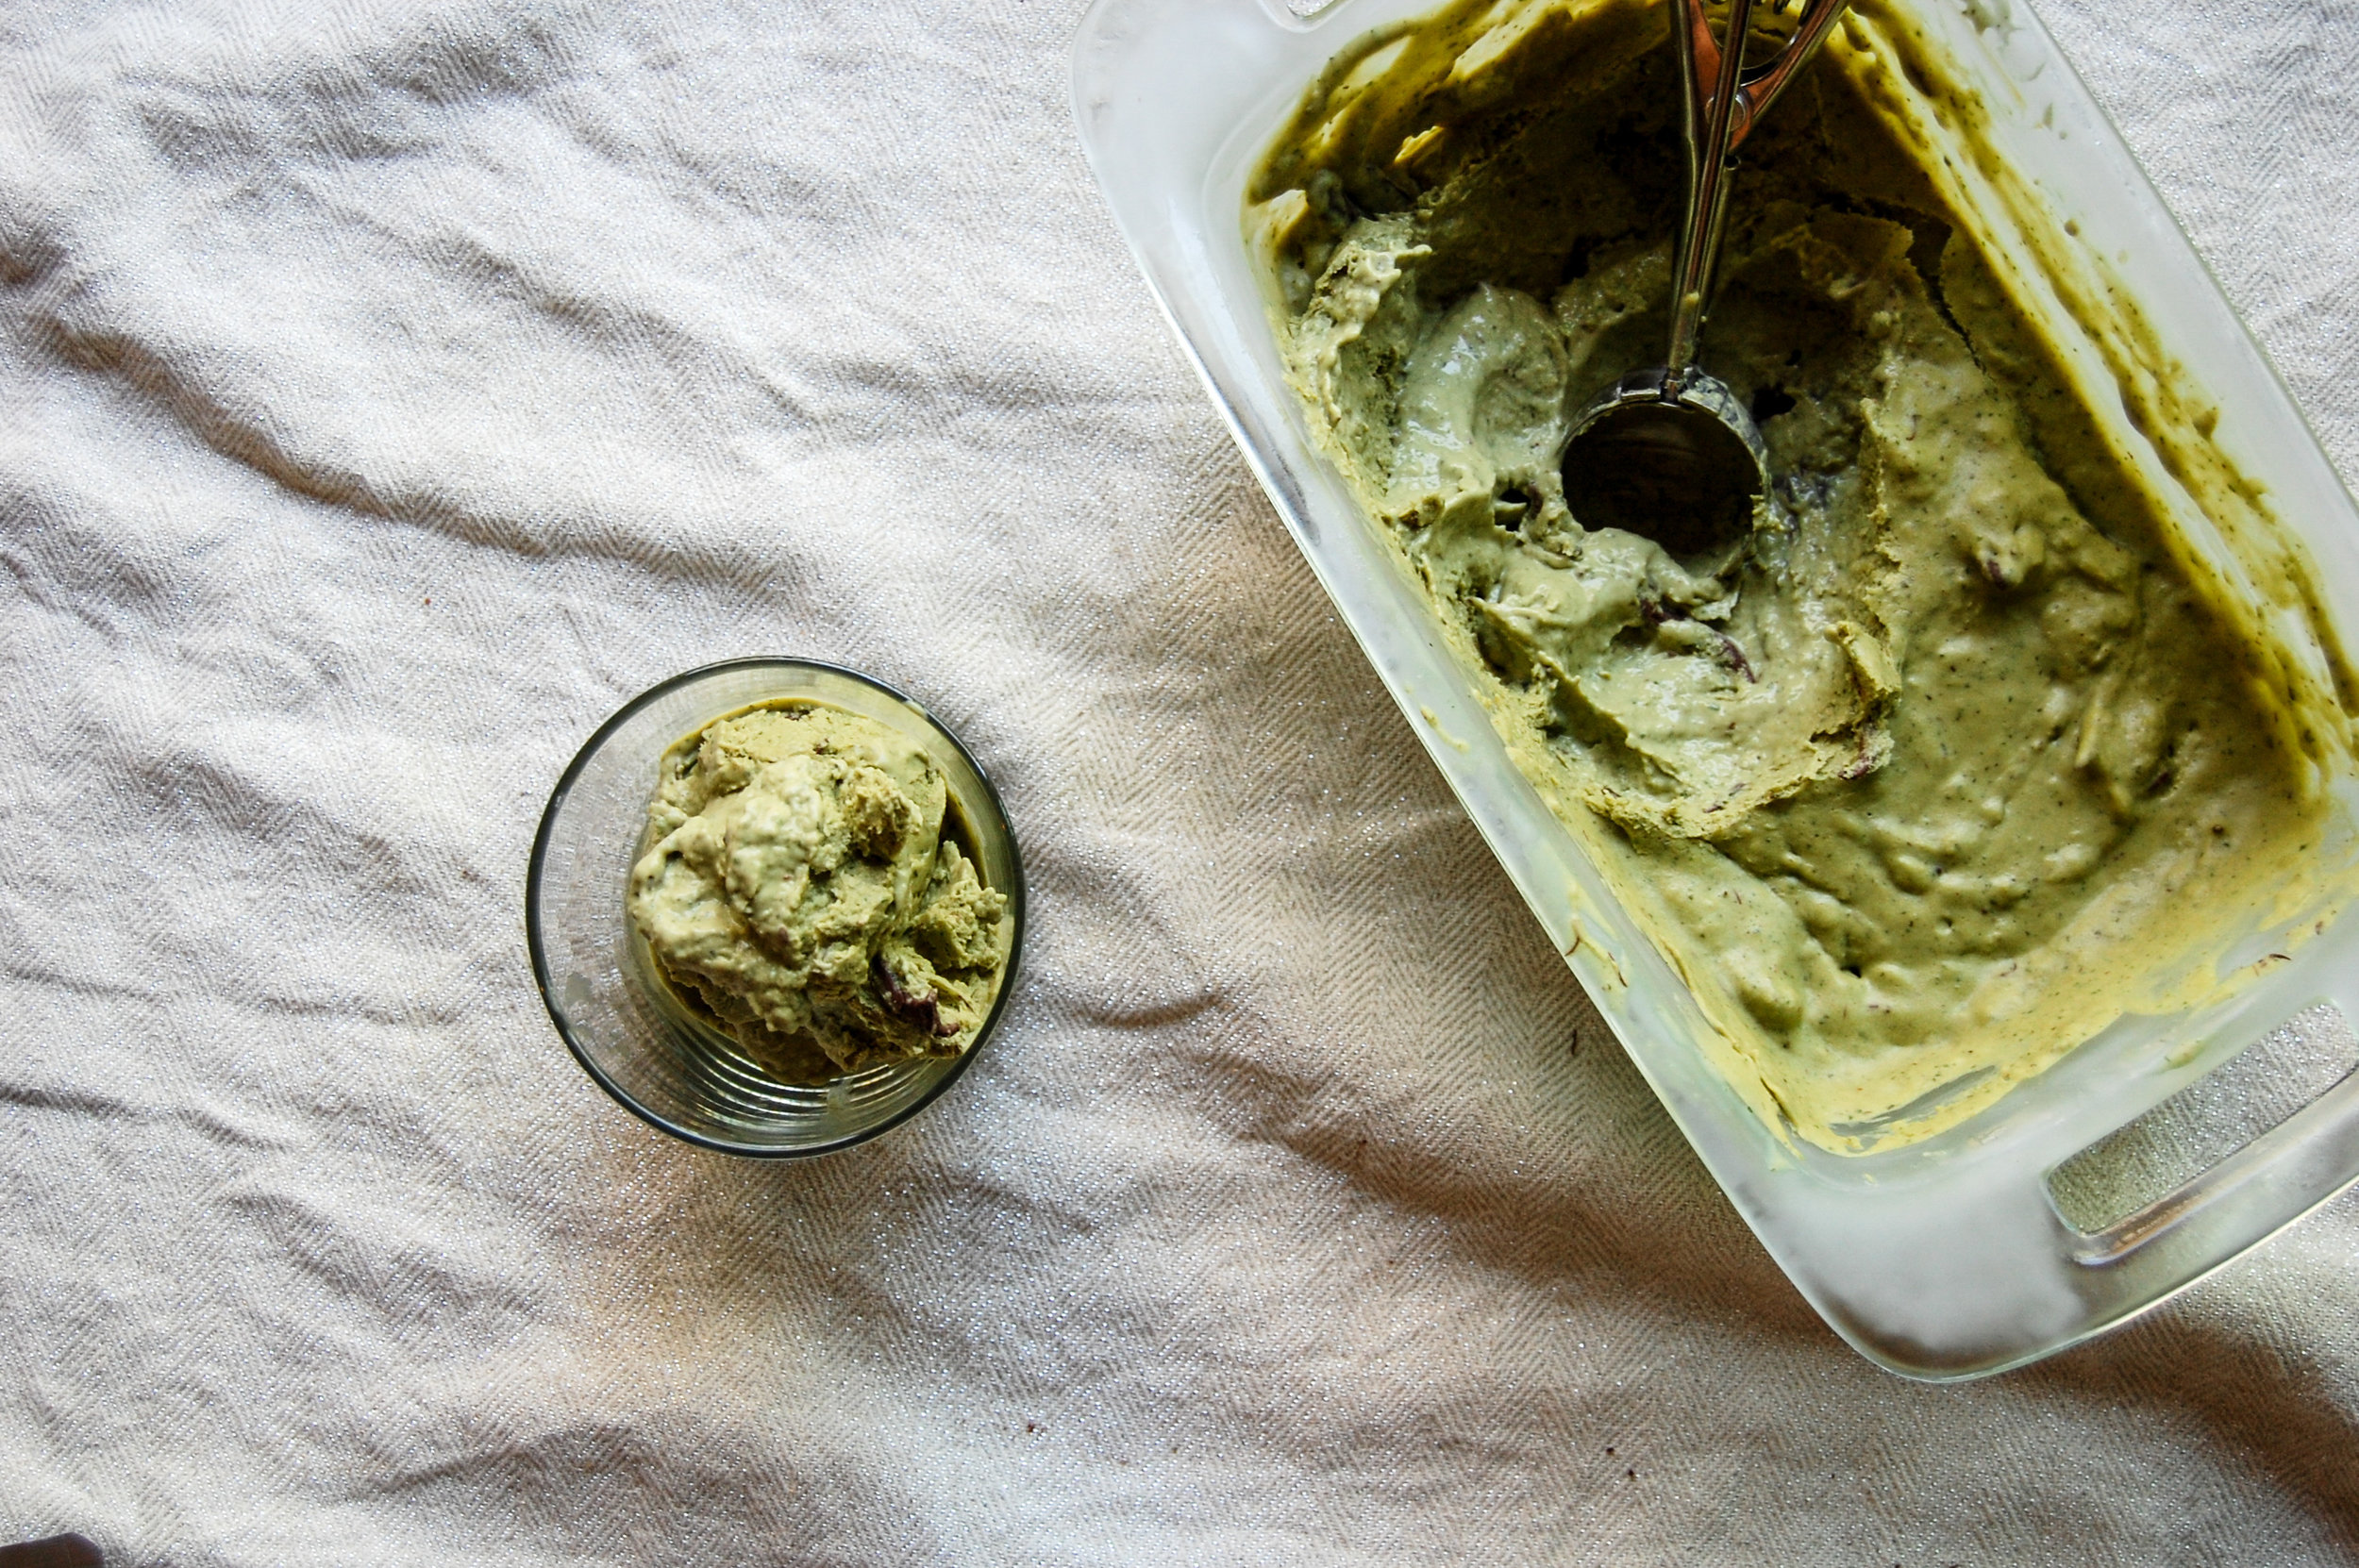
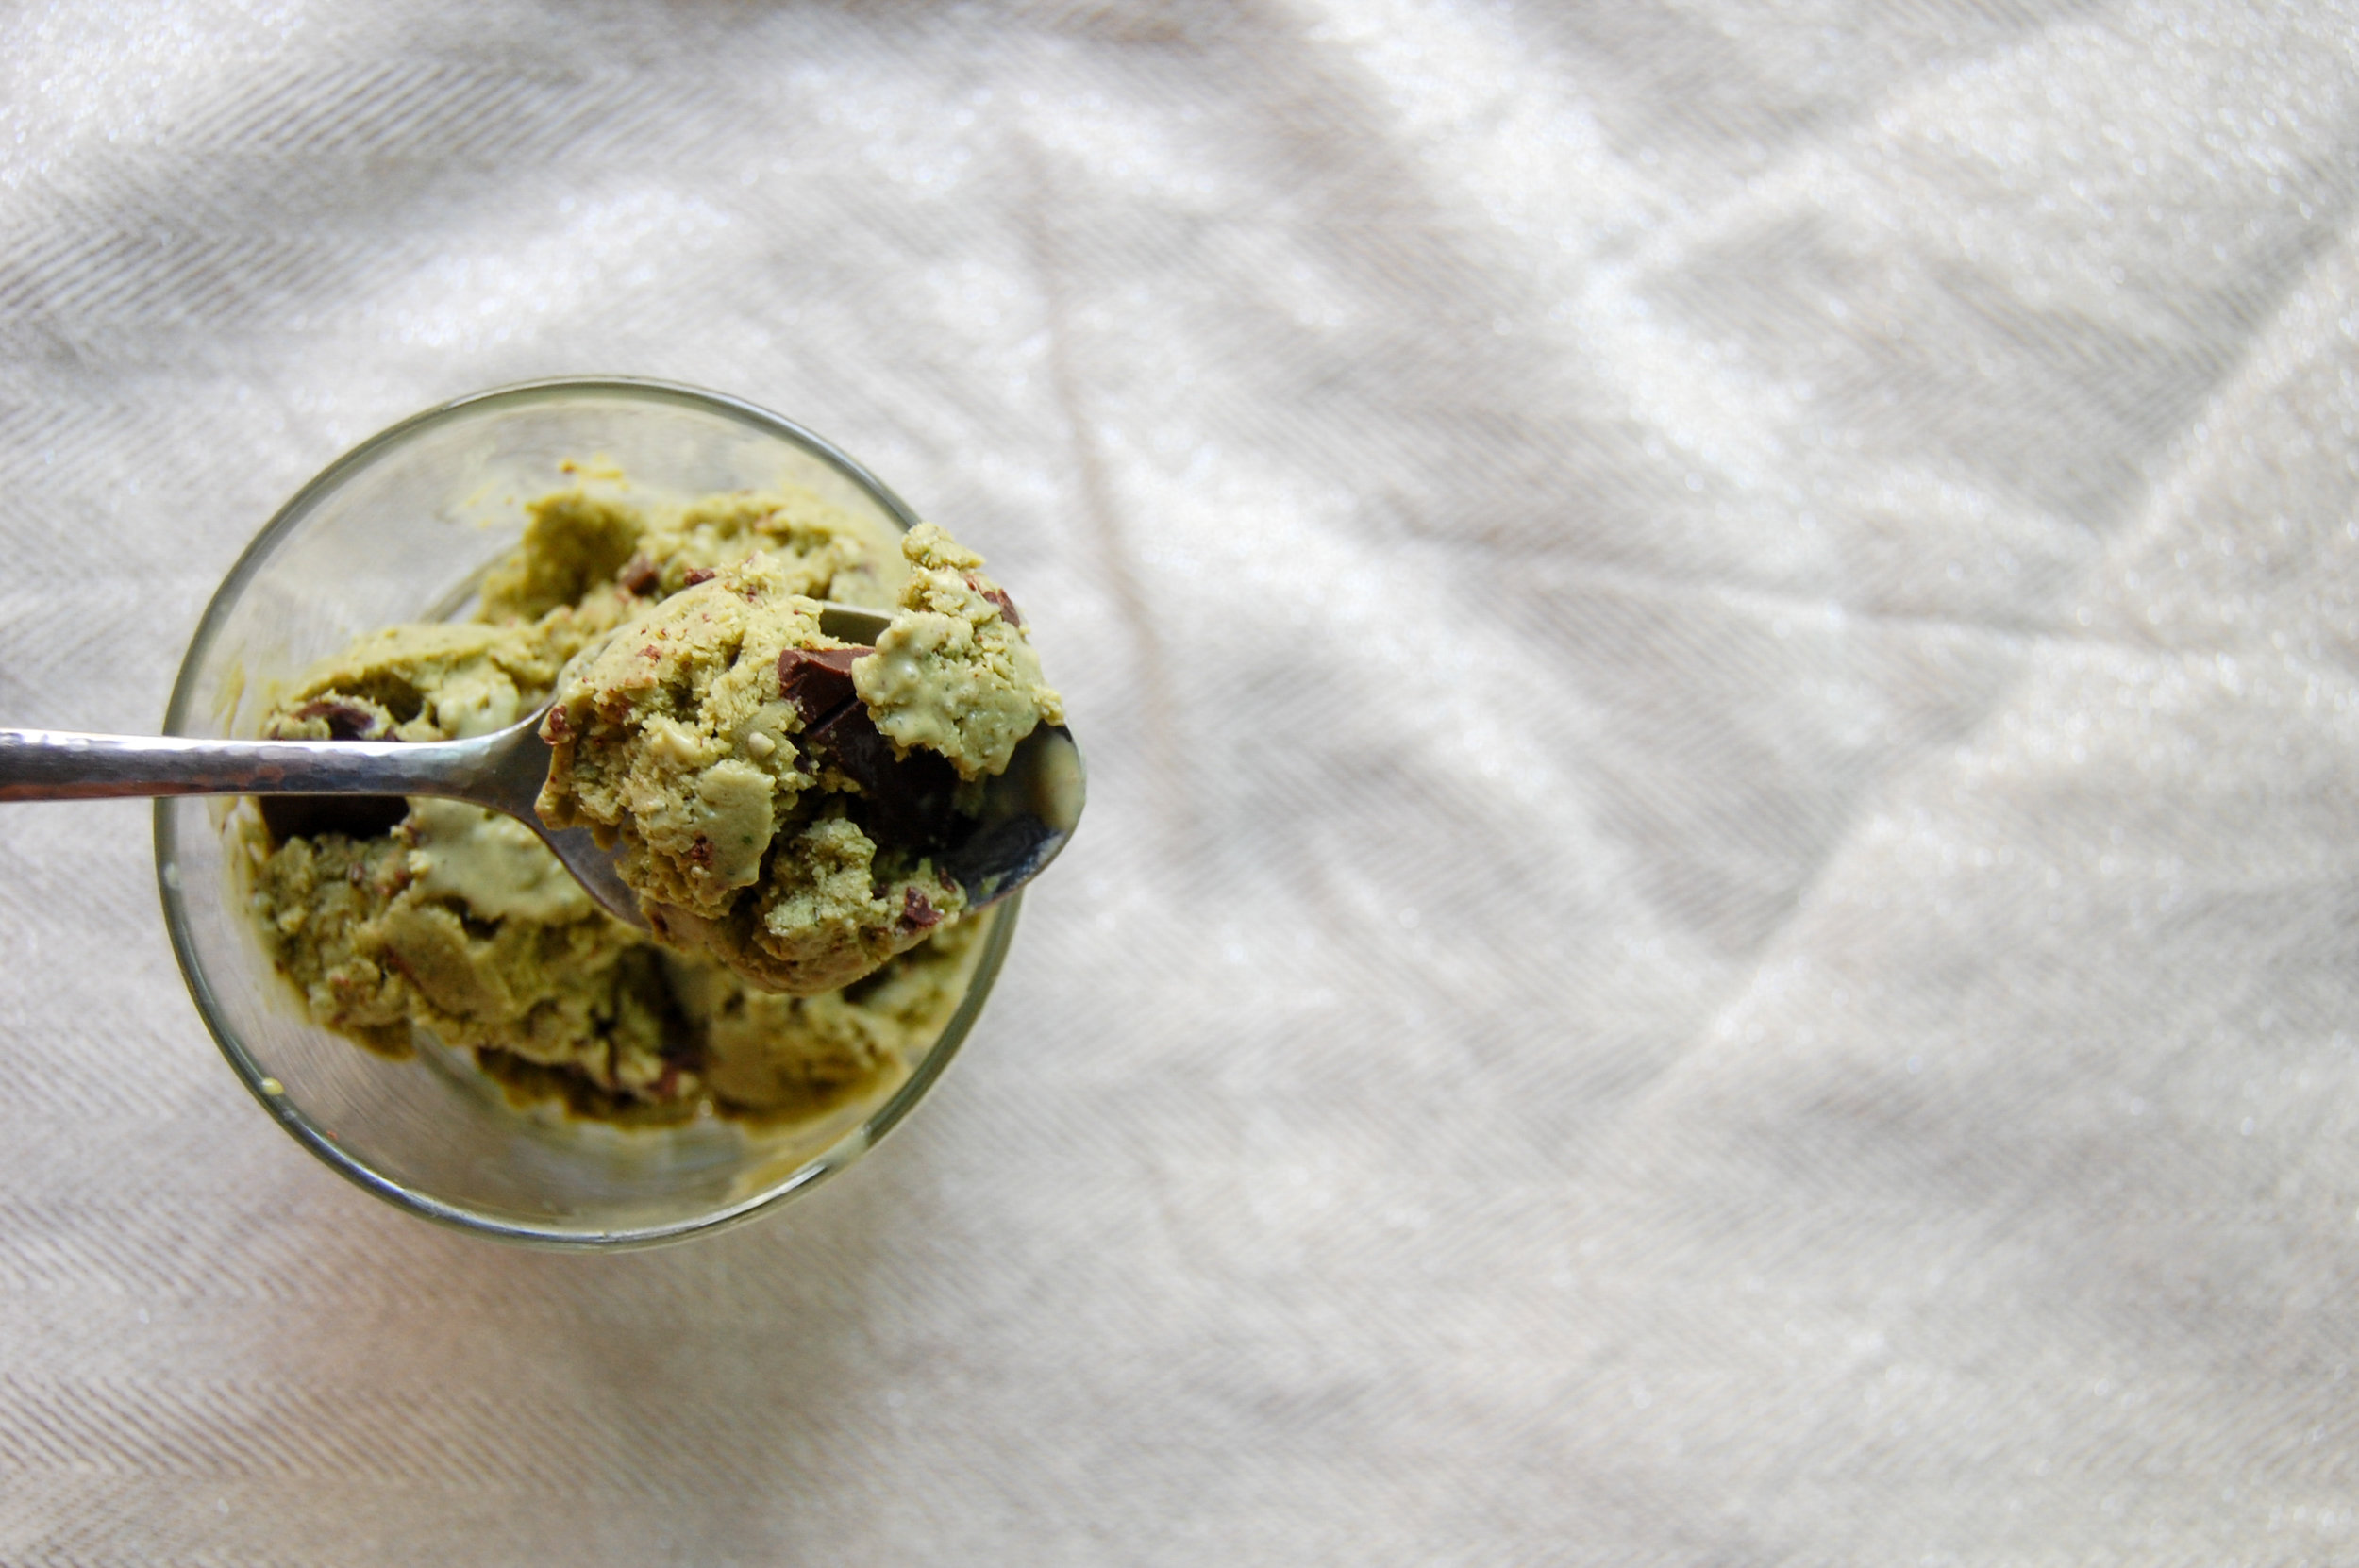
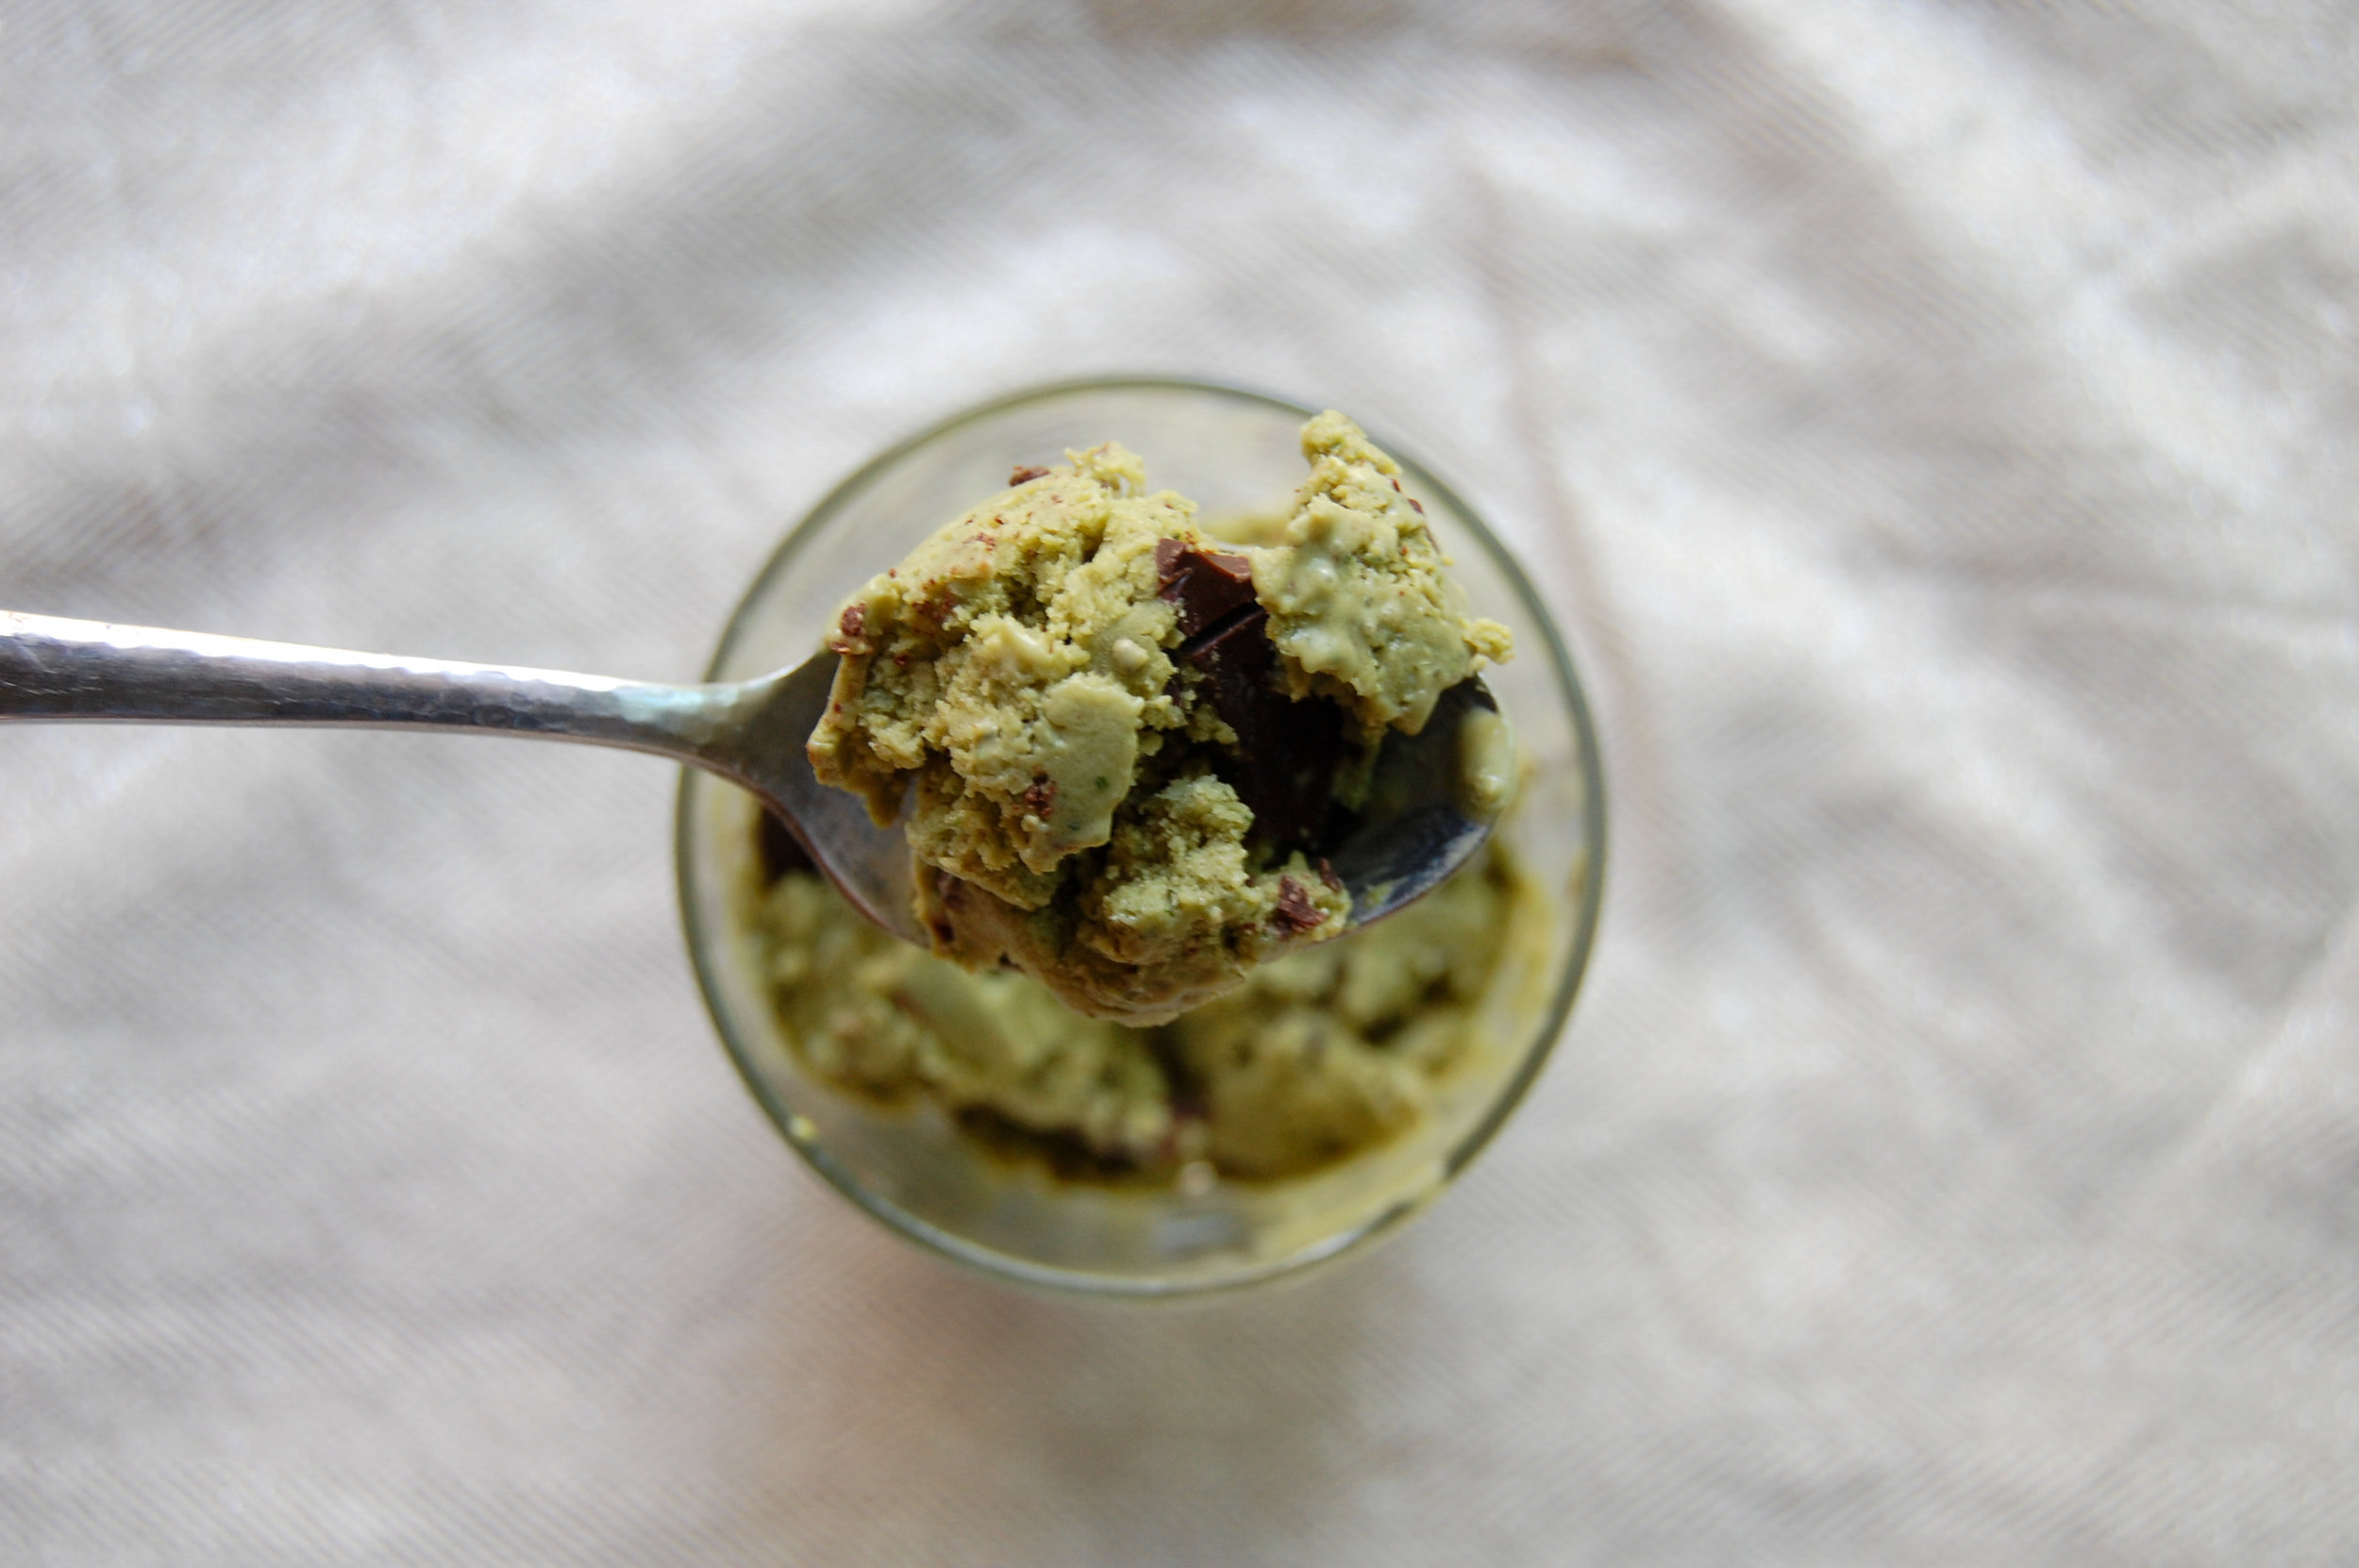
My favorite part is that instead of using chocolate chips, I melted chocolate and covered the pan so as I churned they broke up into smaller chunks/shavings.

So excited to finally use this ice cream scoop!
The flavor of the matcha is there but there are still all the lovely charactistics of the mint chocolate chip. The fresh mint has such a wonderful flavor that makes it taste very fresh!
One thing to note, I used a glass loaf pan to store my ice cream and it worked well but it didn't have a lid. After day 2 or 3 in the freezer, even with some foil over top it froze a little too much. I would suggest getting some kind of container with a lid! I think the ice cream tasted best on day one, why not make a batch and finish it that day?! :)


What are you favorite ice cream flavors??!
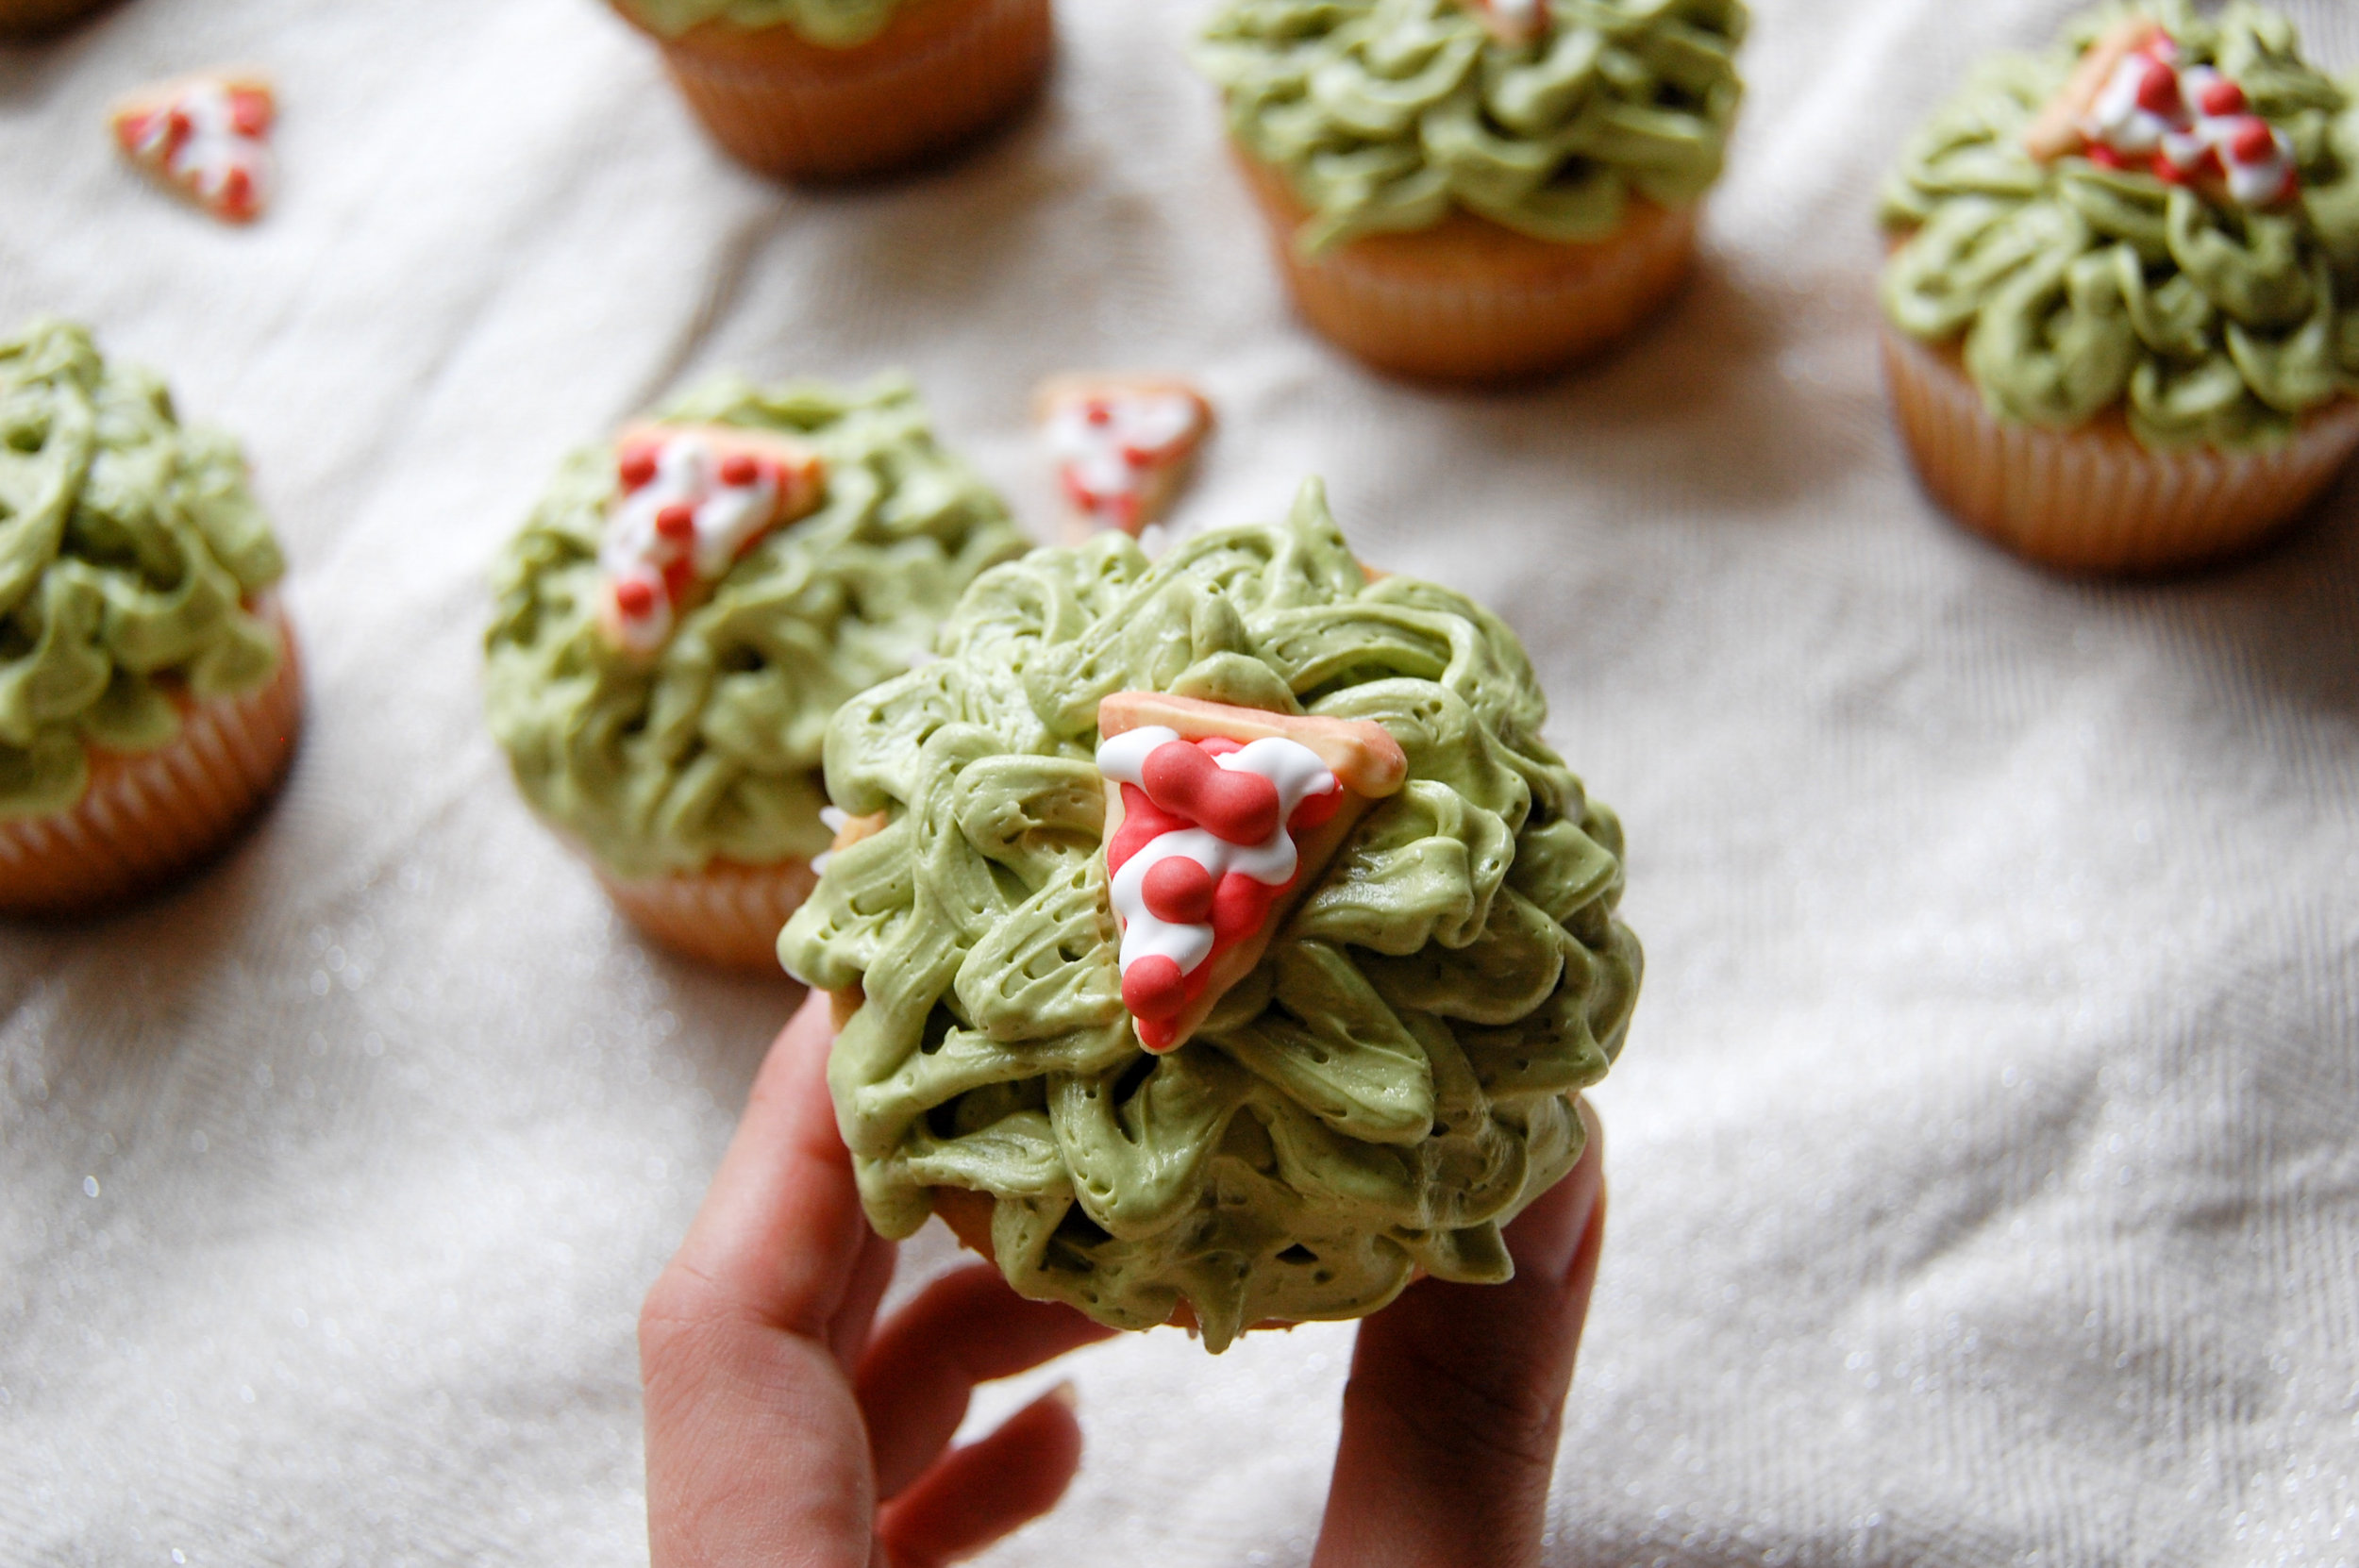
Almond Cupcakes with Matcha Buttercream
Buttery Matcha.
You all know how much I love matcha and It's so fun to bake with. I've been drooling over matcha pictures on instagram everyday and decided it was time to make matcha frosting. I know some people don't like frosting but it's my favorite part of any cake or cupcake!

I'll be honest, I don't have every baking tool in the book so sometimes things get a little messy. I finally upgraded with a simple ice cream scoop to help eliminate mess! I originally got it to make cookie dough placement easier (and future ice cream making?!) but found it to be very useful for this batter as well. I filled each liner up with about two scoops. Some liners were a little over 3/4 way full and those are the cupcakes that had a bit of a top. I don't mind this, it actually means more area for frosting! BUT if you're the type of person who likes to have very neat, not overflowing cupcakes I would suggest using a scoop and a half or one heaping scoop! After I had the desired amount in the liner I took a chopstick into the center of the batter and swirled it in circles. This helped the batter settle.

Ah, matcha buttery frosting. YUM! I decided to use almond and matcha as a combination of flavors because I kept seeing this combo EVERYWHERE. Thinking about the heavy, full flavor of matcha and the fragrance of almond I wasn't sure if they would be good together but I as wrong! The almond flavor in this cupcake is very light and airy which goes so well with the heavy butter and matcha frosting. In my recipe, I talk about "pours" for the almond emulsion. My emulsion is very thick and comes out slowly so when I say pours I mean it literally. Each time I tipped the bottle over my bowl a drop came slowly out. I did it 3 times. You are welcome to do more or less based on how much you enjoy the fragrance and taste of almond!
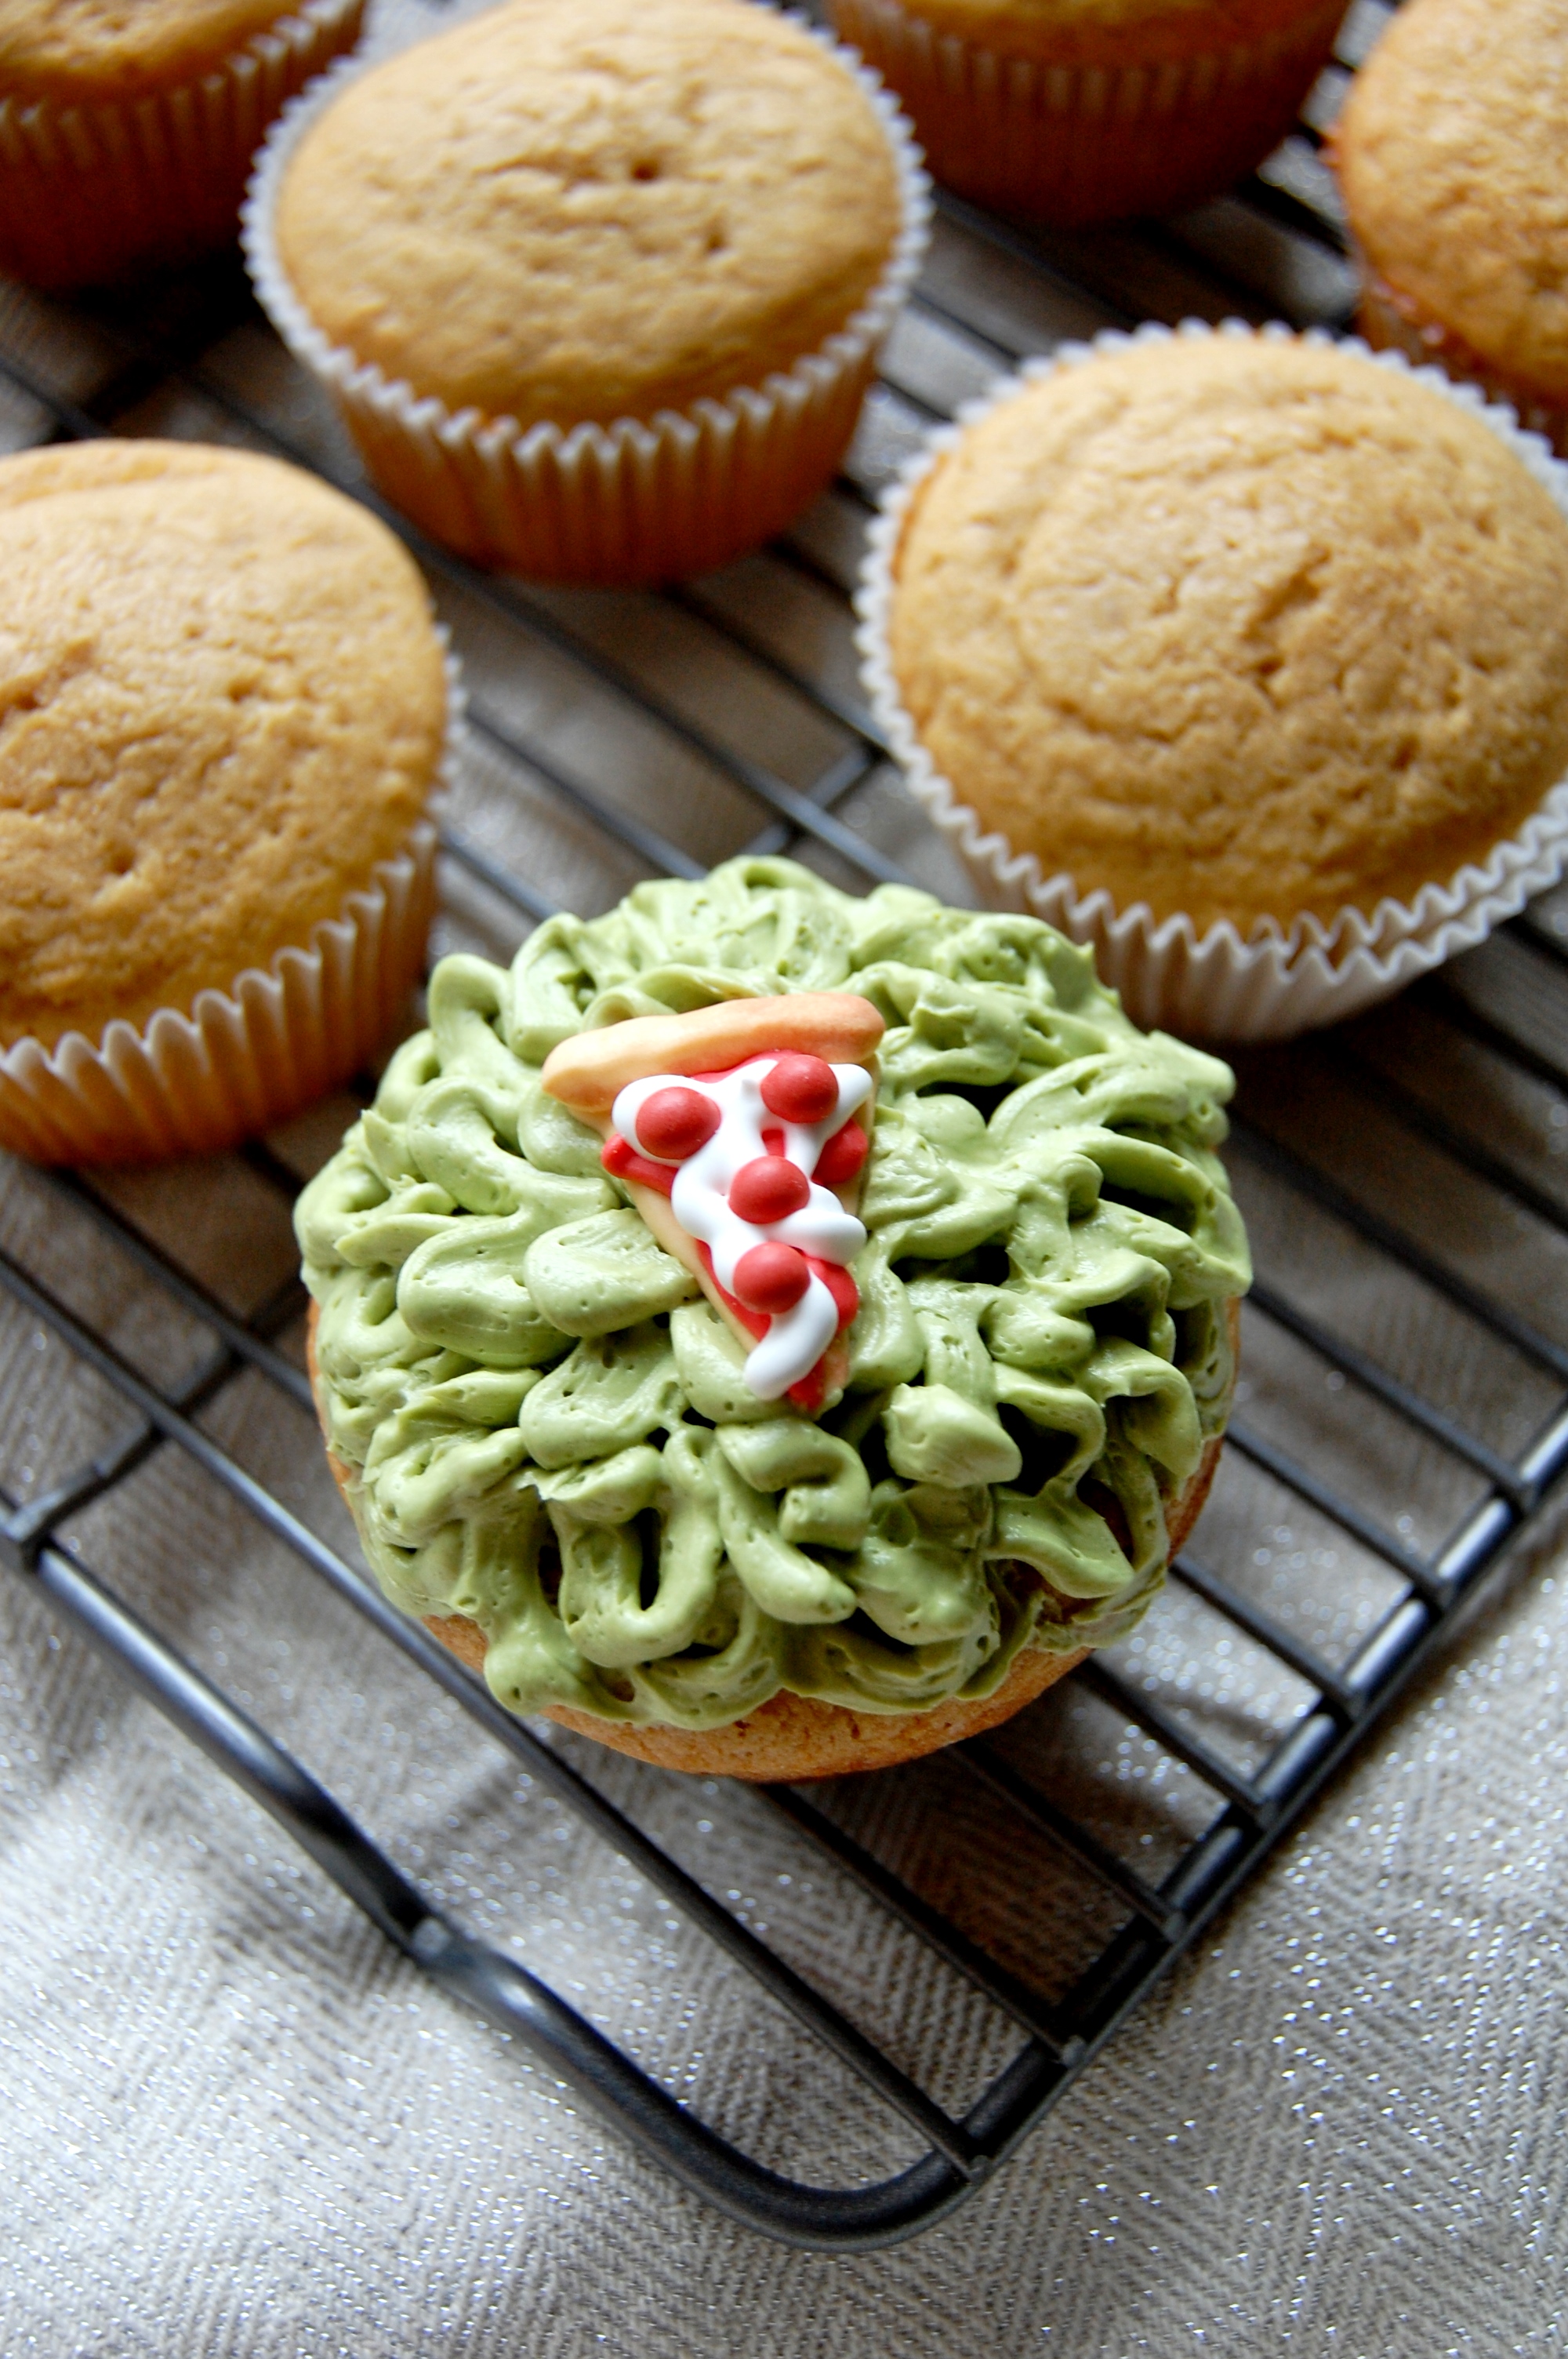
Ok, so I originally wanted to do a frosting rose on top of the cupcakes. As you can see that didn't happen. I love watching cupcake and cookie decorating videos and I've been wanting to try this one method of making the rose. I thought I had the right tip but when I started piping got this short thin piece of frosting and decided to improvise. One small note, as I started piping I put too much frosting in the bag so my hands were gradually warming up the frosting. You can see in the photo below thinner and thicker lines. I put mine back in the fridge to cool it off before I continued.

You're probably wondering about these pizza slices. My original plan was to create matcha frosting because the pastel green was perfect for spring. I then put one of these pizza sprinkles, yes they're sprinkles from Tiny Kitchen Treats, on top and I LOVED how it looked! Does an almond cupcake with matcha buttercream and a pizza sprinkle make sense? Who knows, but it sure looks cute!
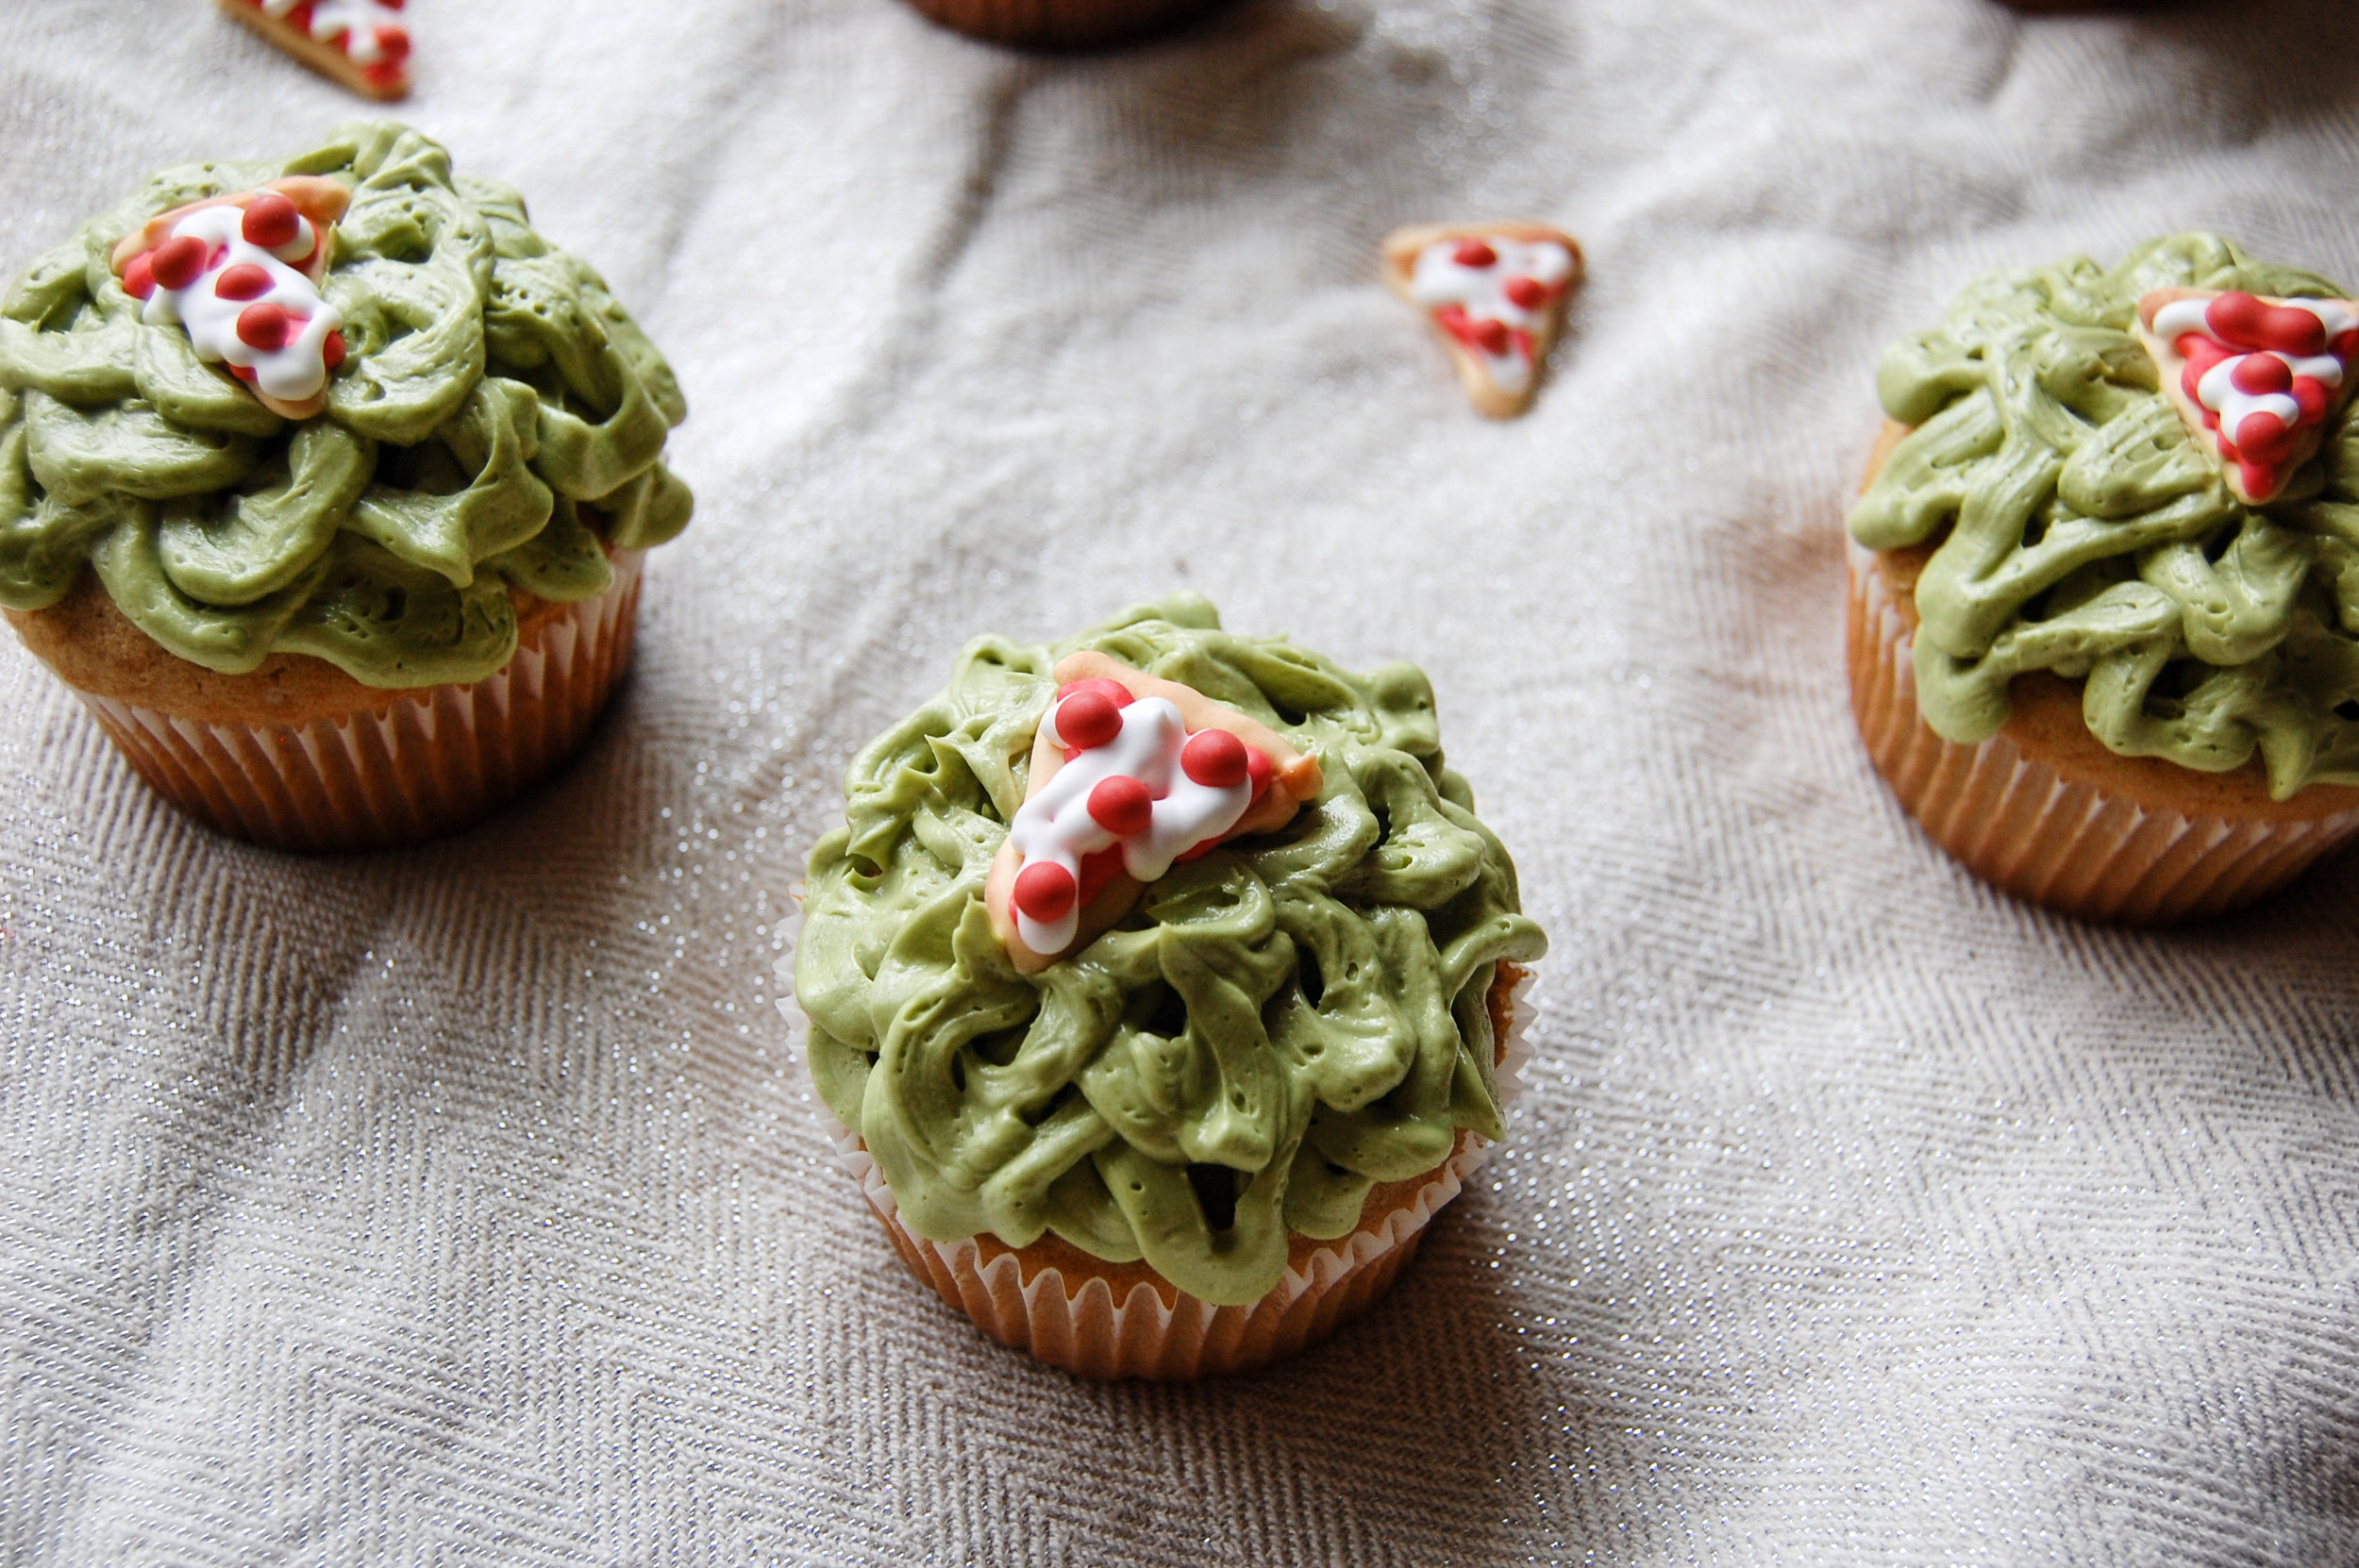
So what's the verdict? Matcha donuts are good. Matcha scones are better. Matcha buttercream is queen!
As many of you may know, matcha is in powder form because it consists of the ground up leaves. This is said to increase the health benefits because you're ingesting the actual leaf instead of brewing it and throwing it away. In powder form, it is also much easier to incorporate into your cooking and baking! So these cupcakes a kinda healthy, right ? ;)
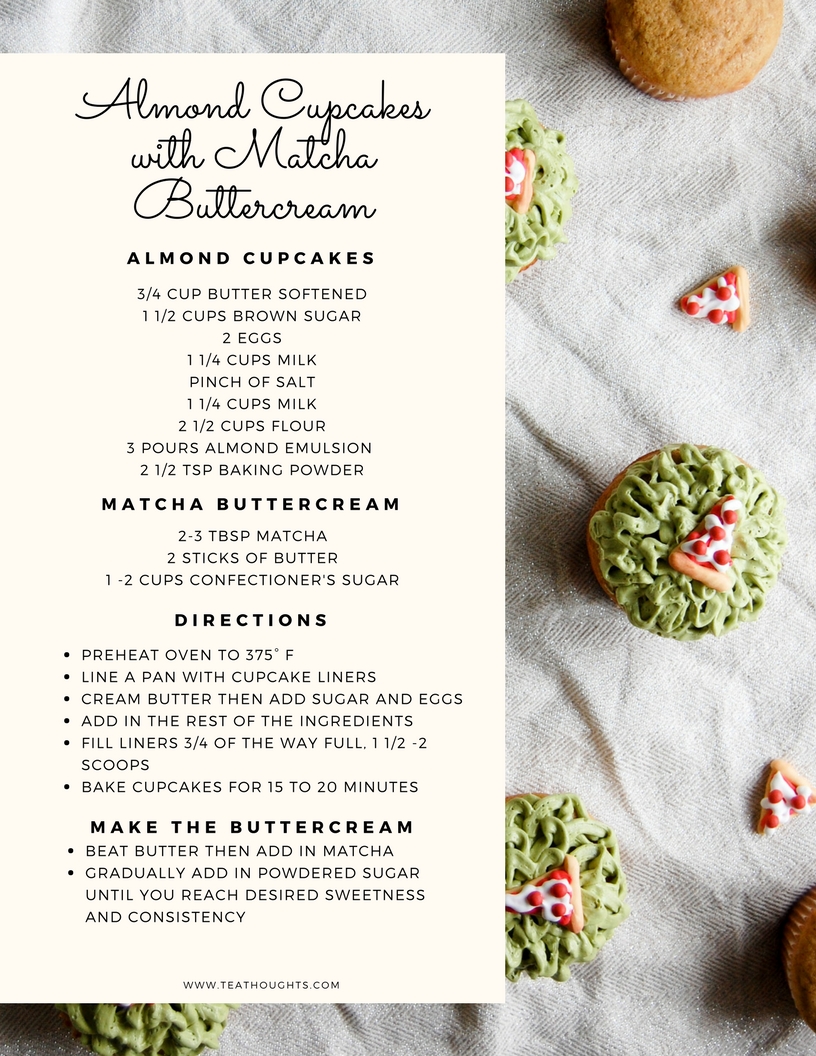
The almond cupcake recipe was adapted from this one
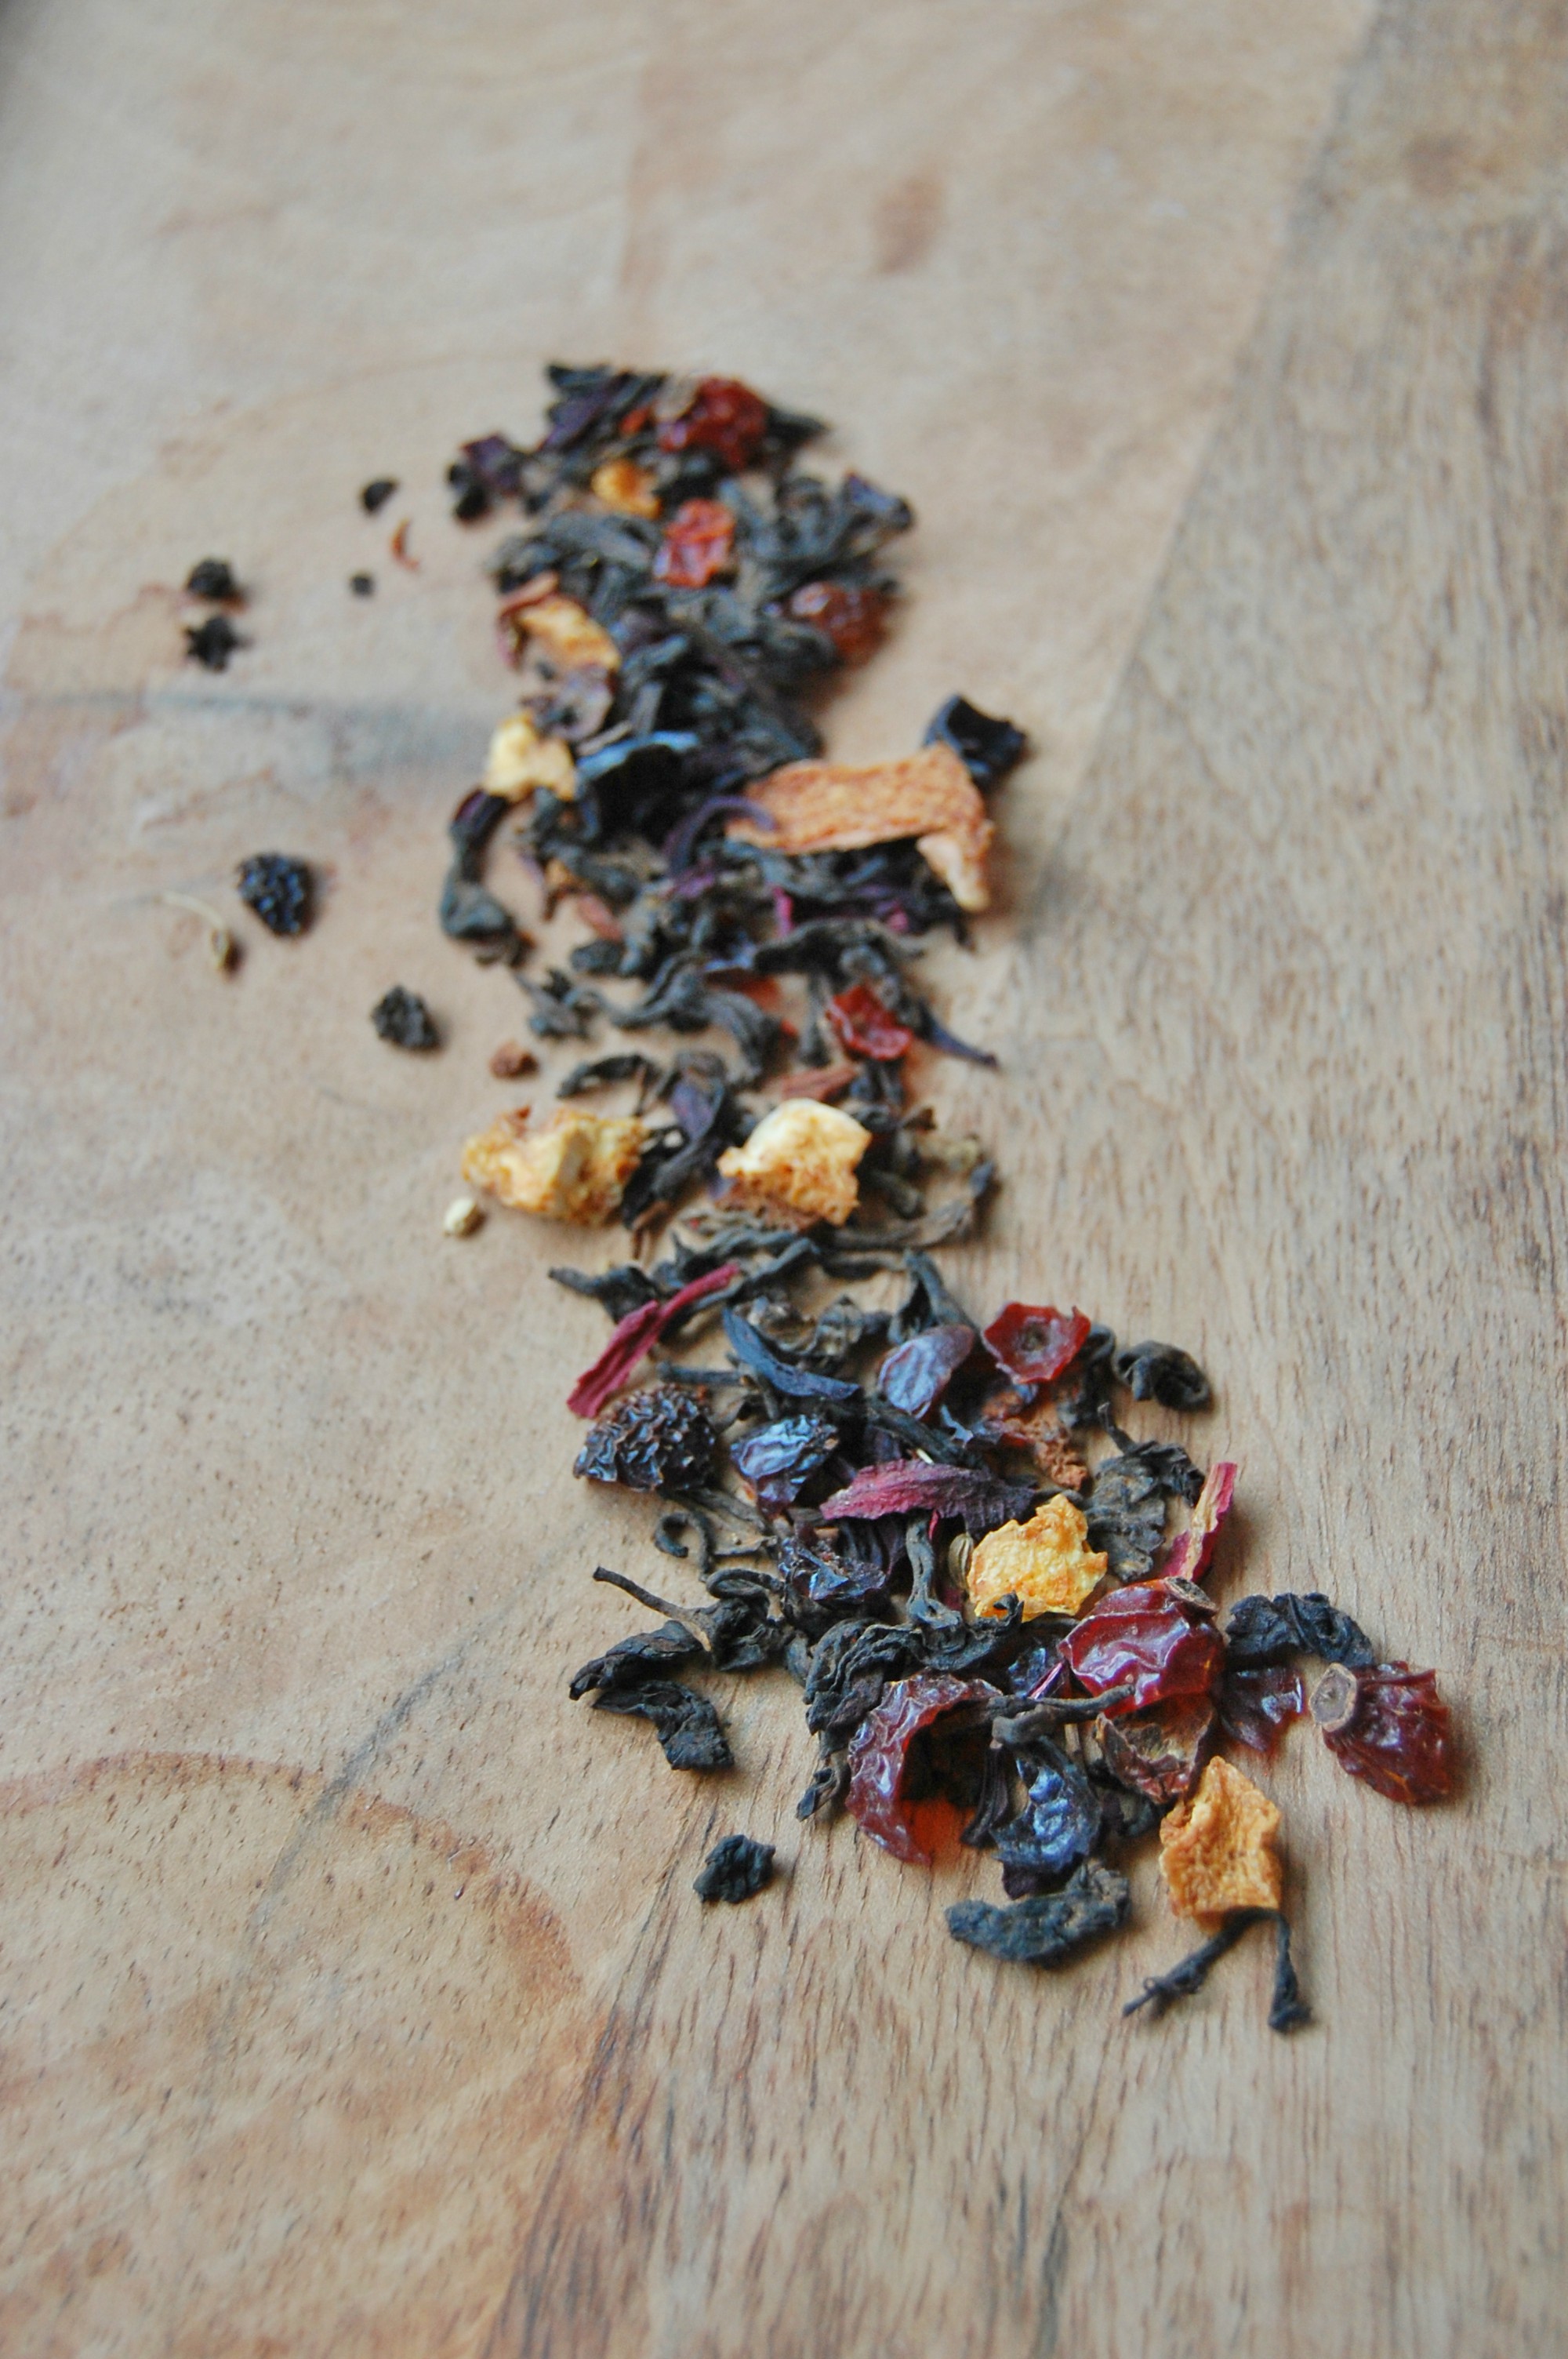
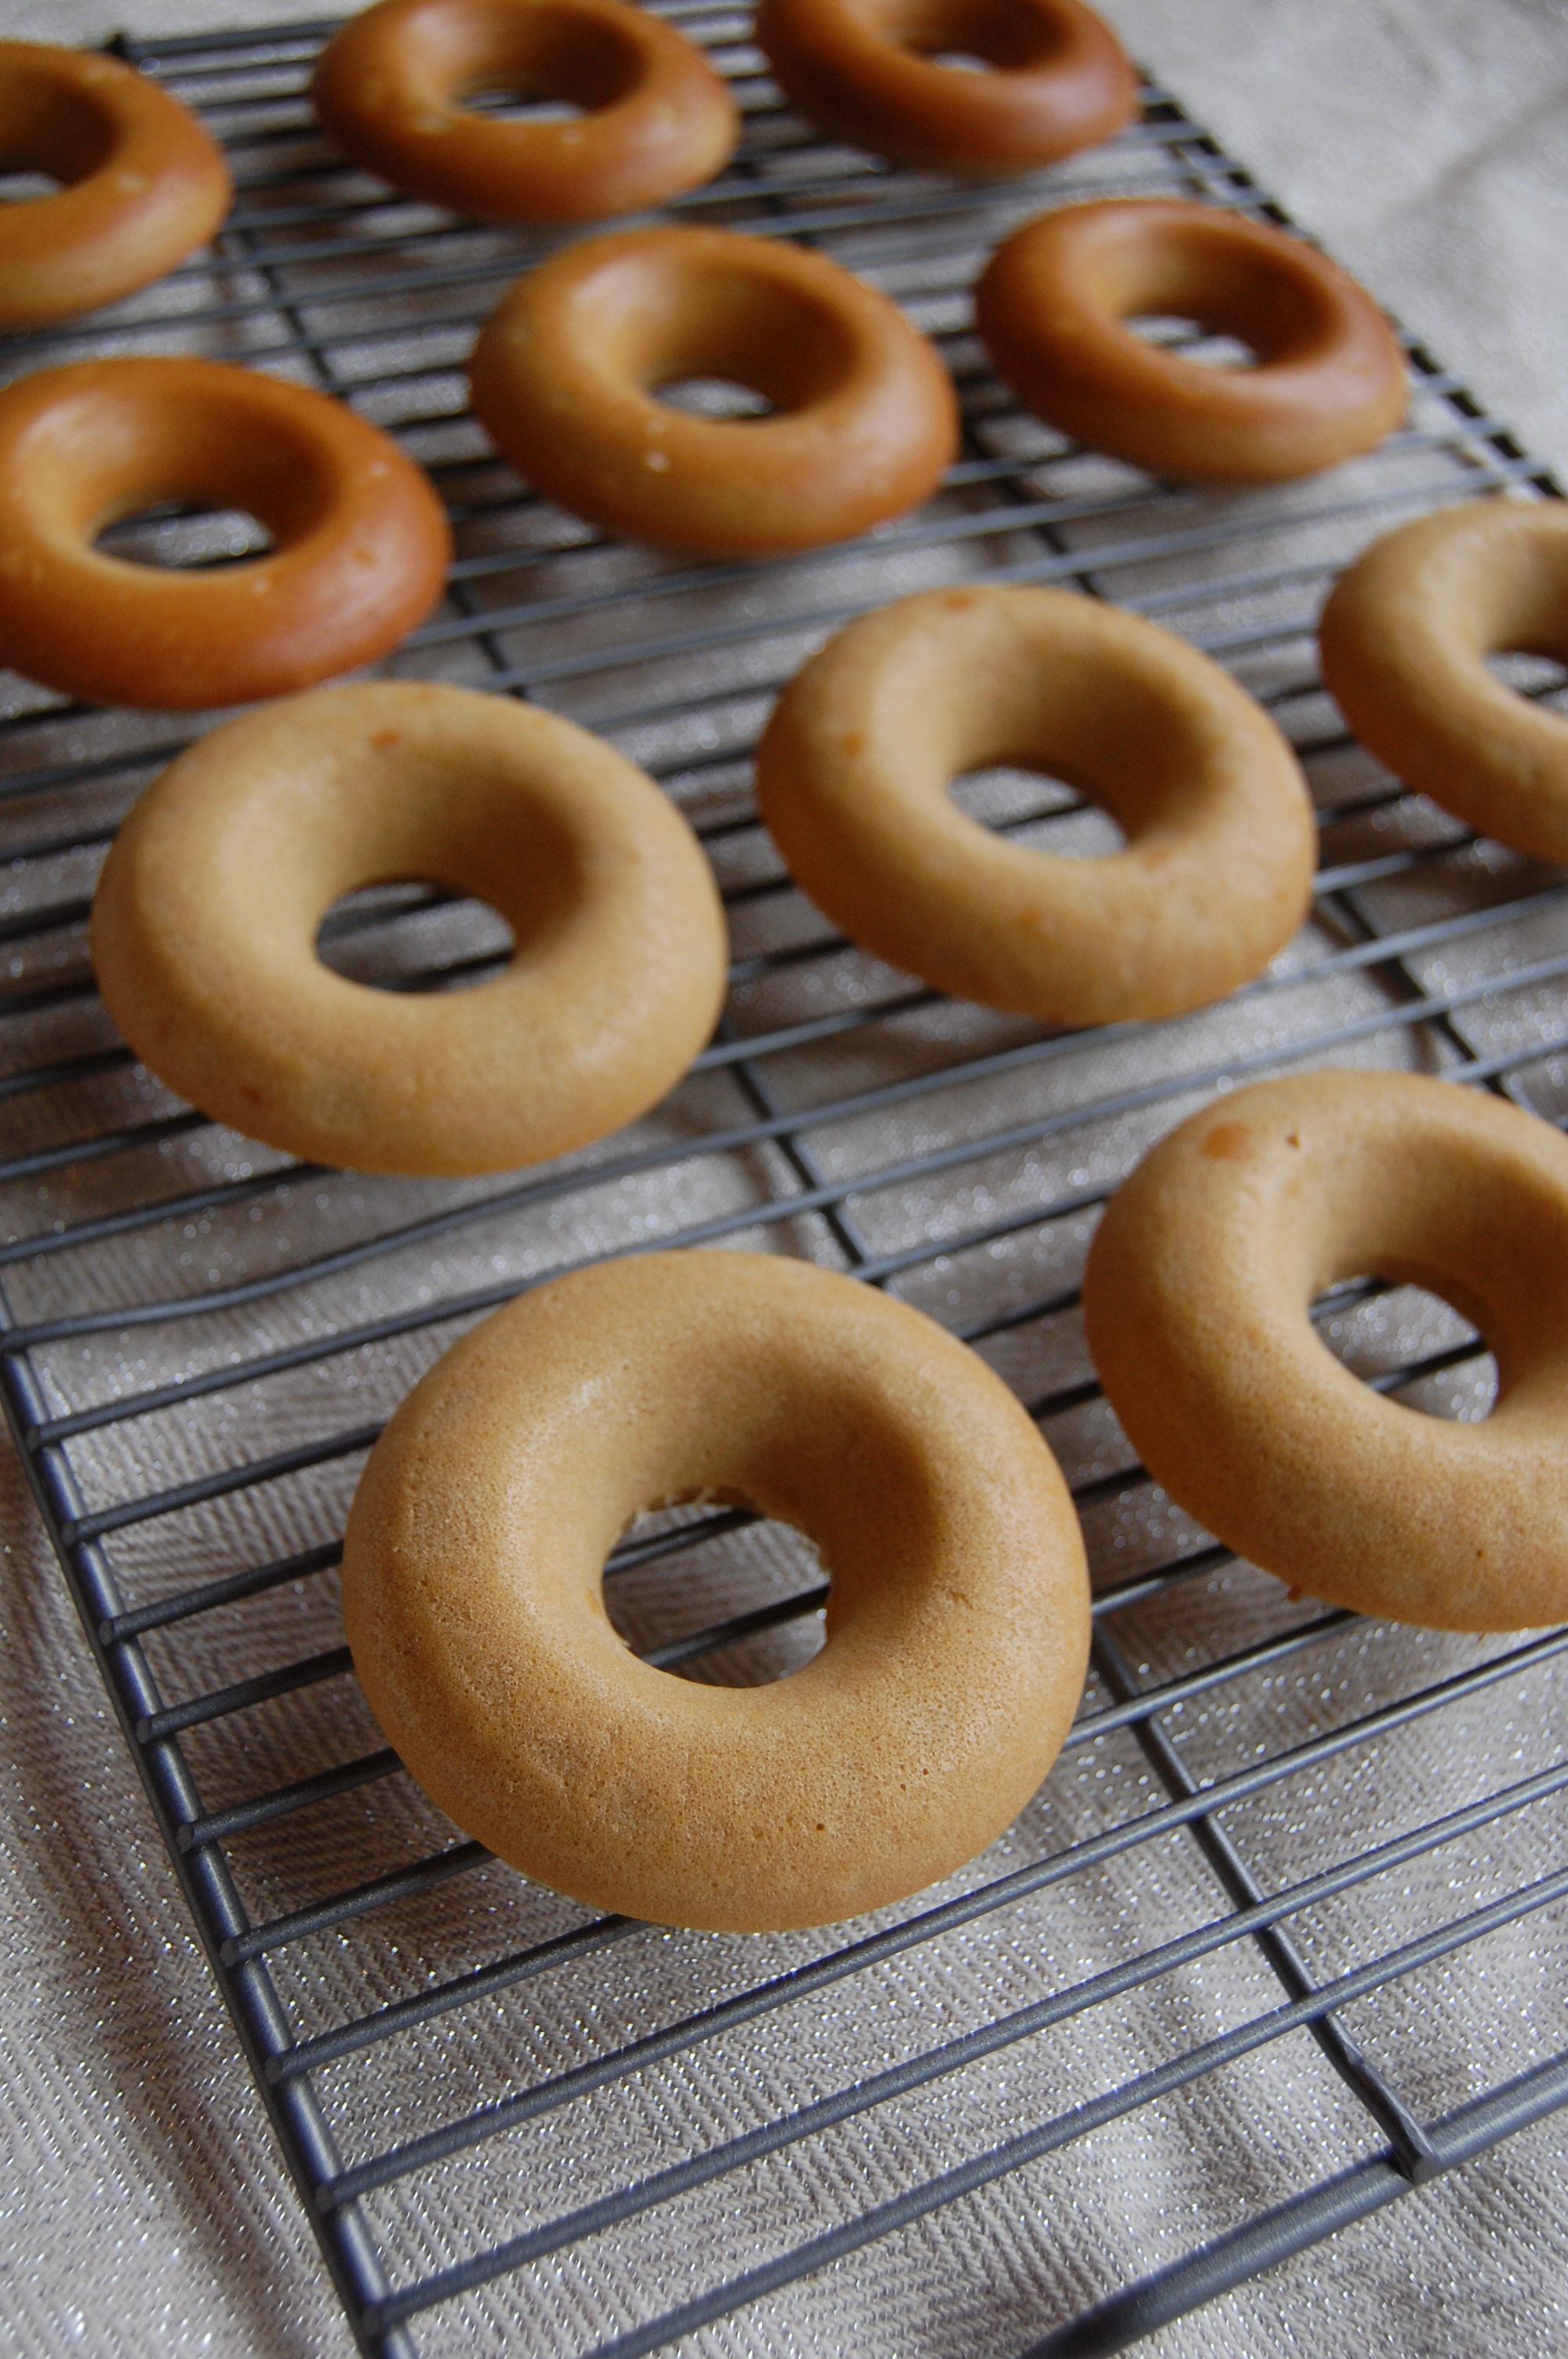
Puerh Donuts with Orange Glaze
Glazed Donuts.
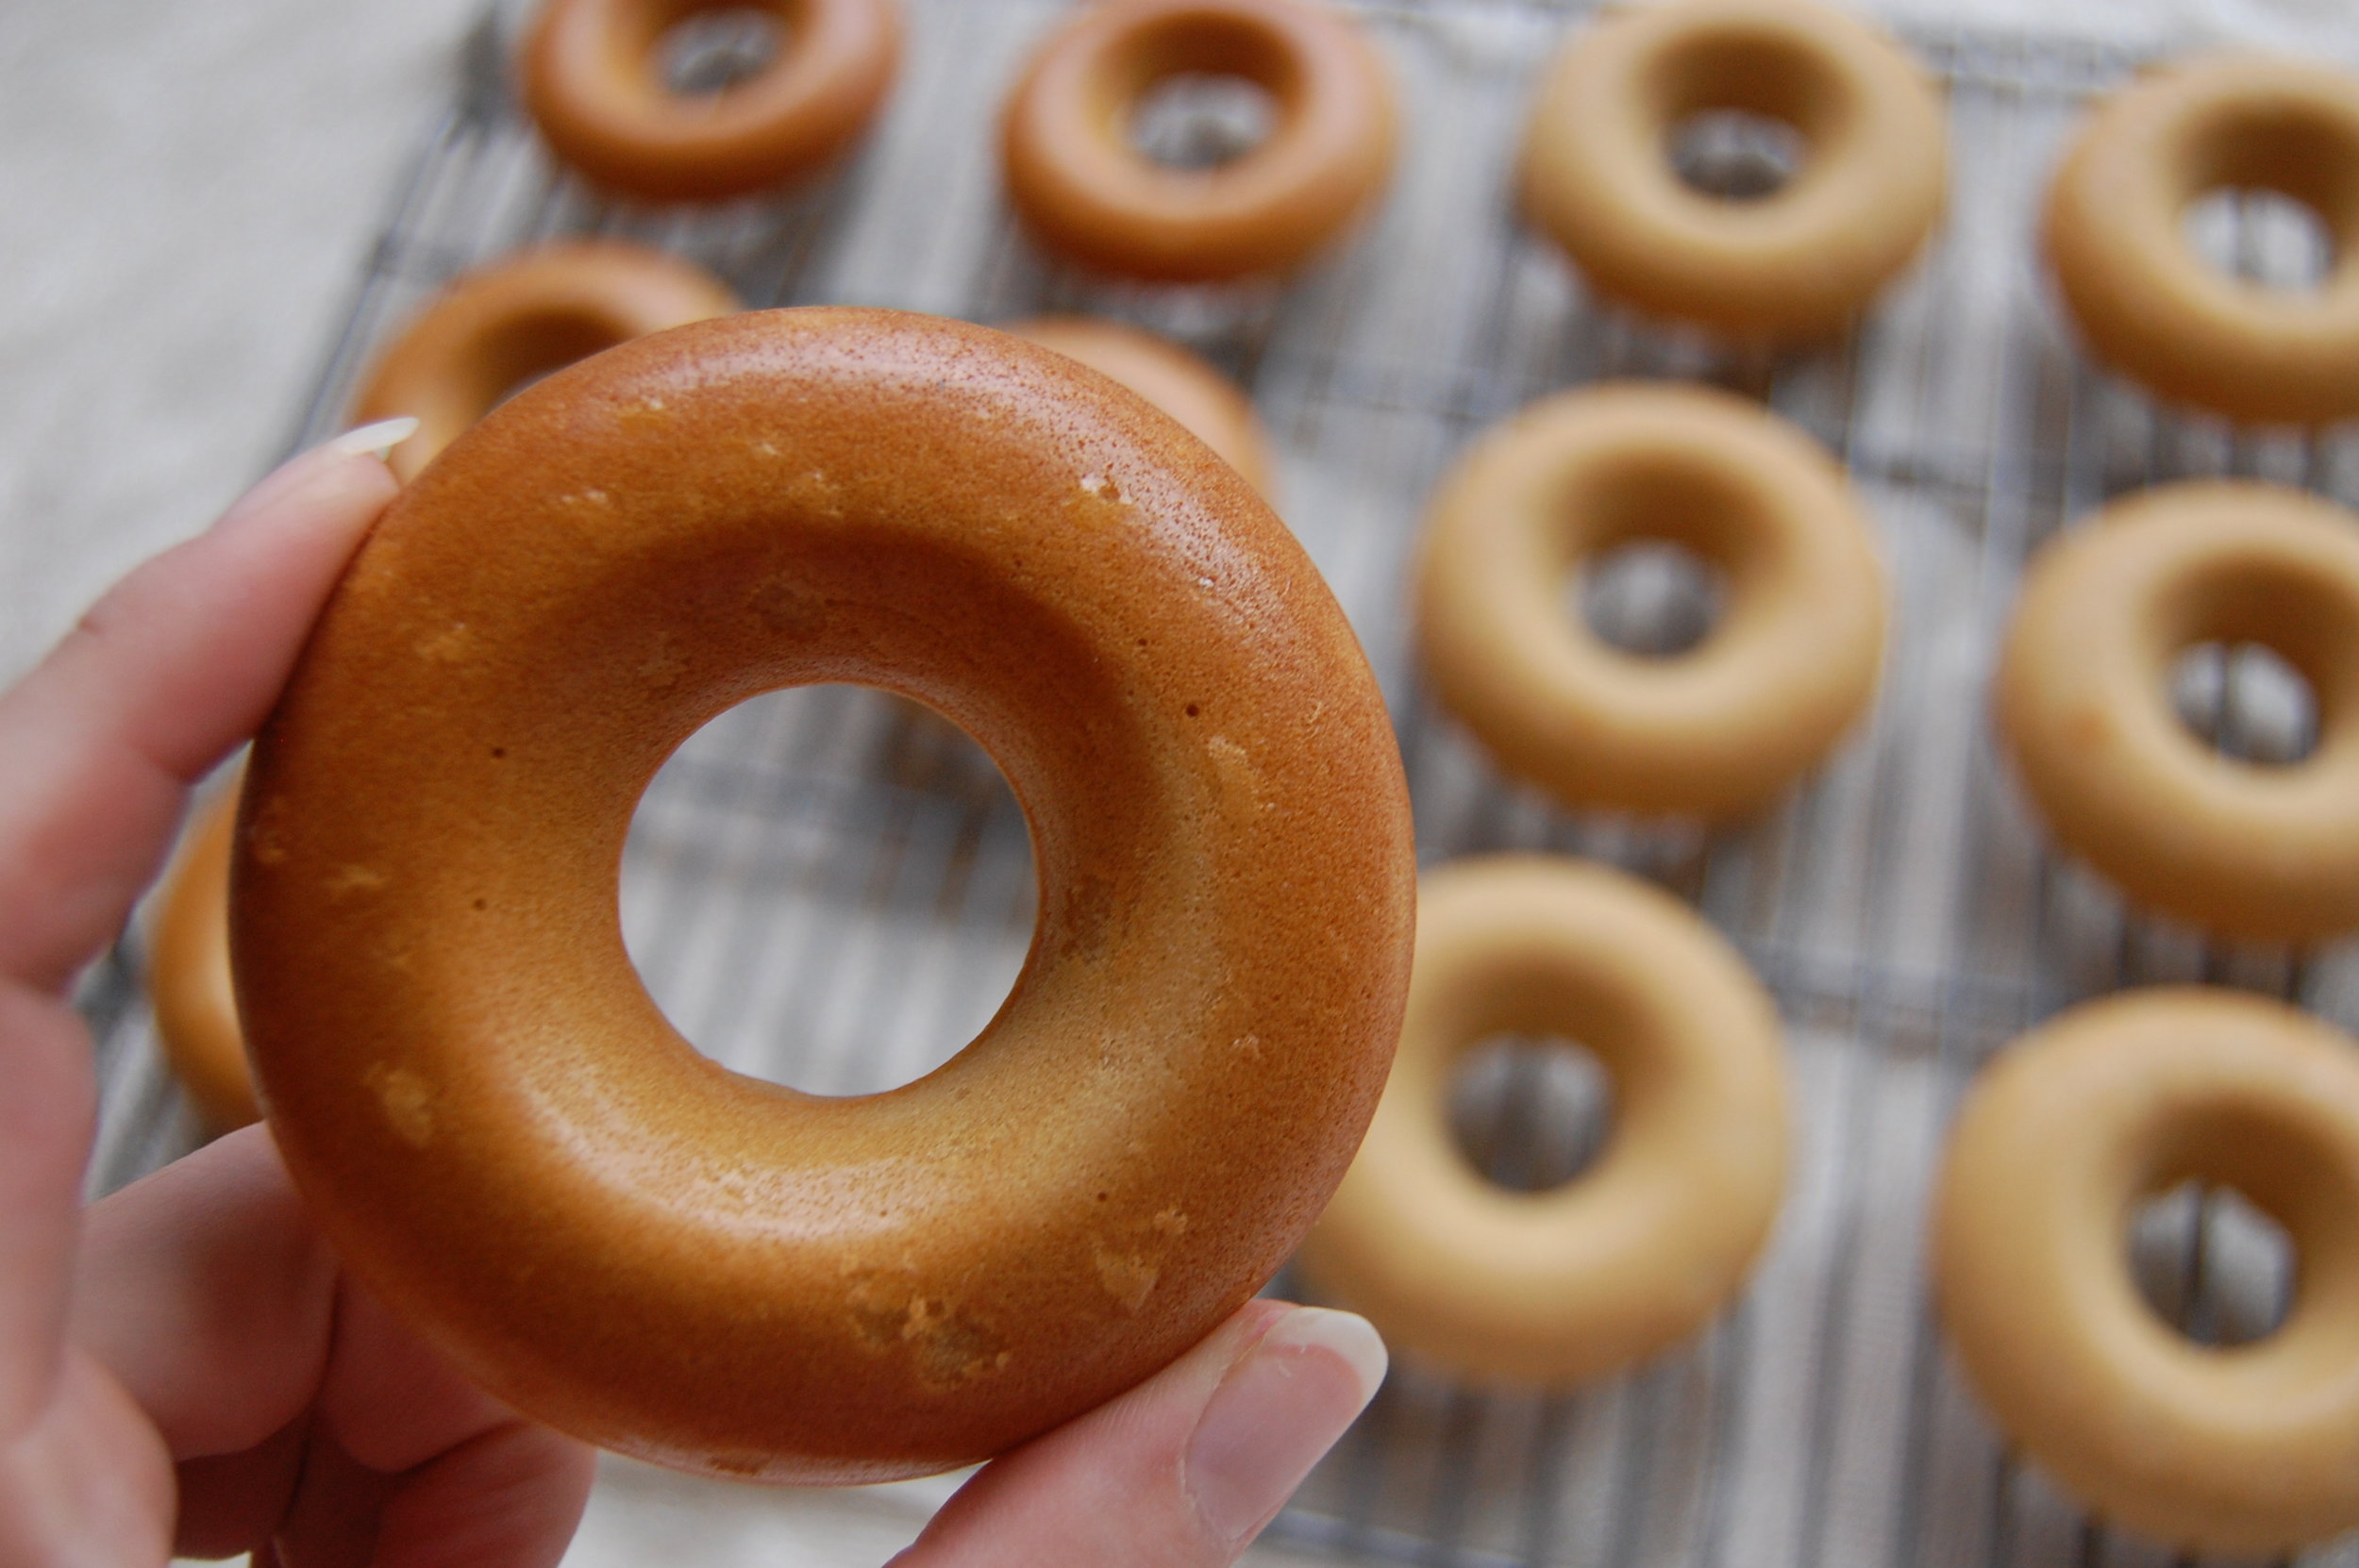
I was brainstorming about what to make with this dark night orange spice puerh blend that Plum Deluxe sent me and a light bulb went off! DONUTS! I reworked my Mini Matcha Donut recipe to create larger donuts and added a glaze!
Spring is here and we've been having such beautiful weather, it's been making me crave donuts. Not sure why! These aren't traditional donuts that you would get at a bakery, they are baked and much smaller. Although I used a larger pan from michaels they are still relatively small for donuts.

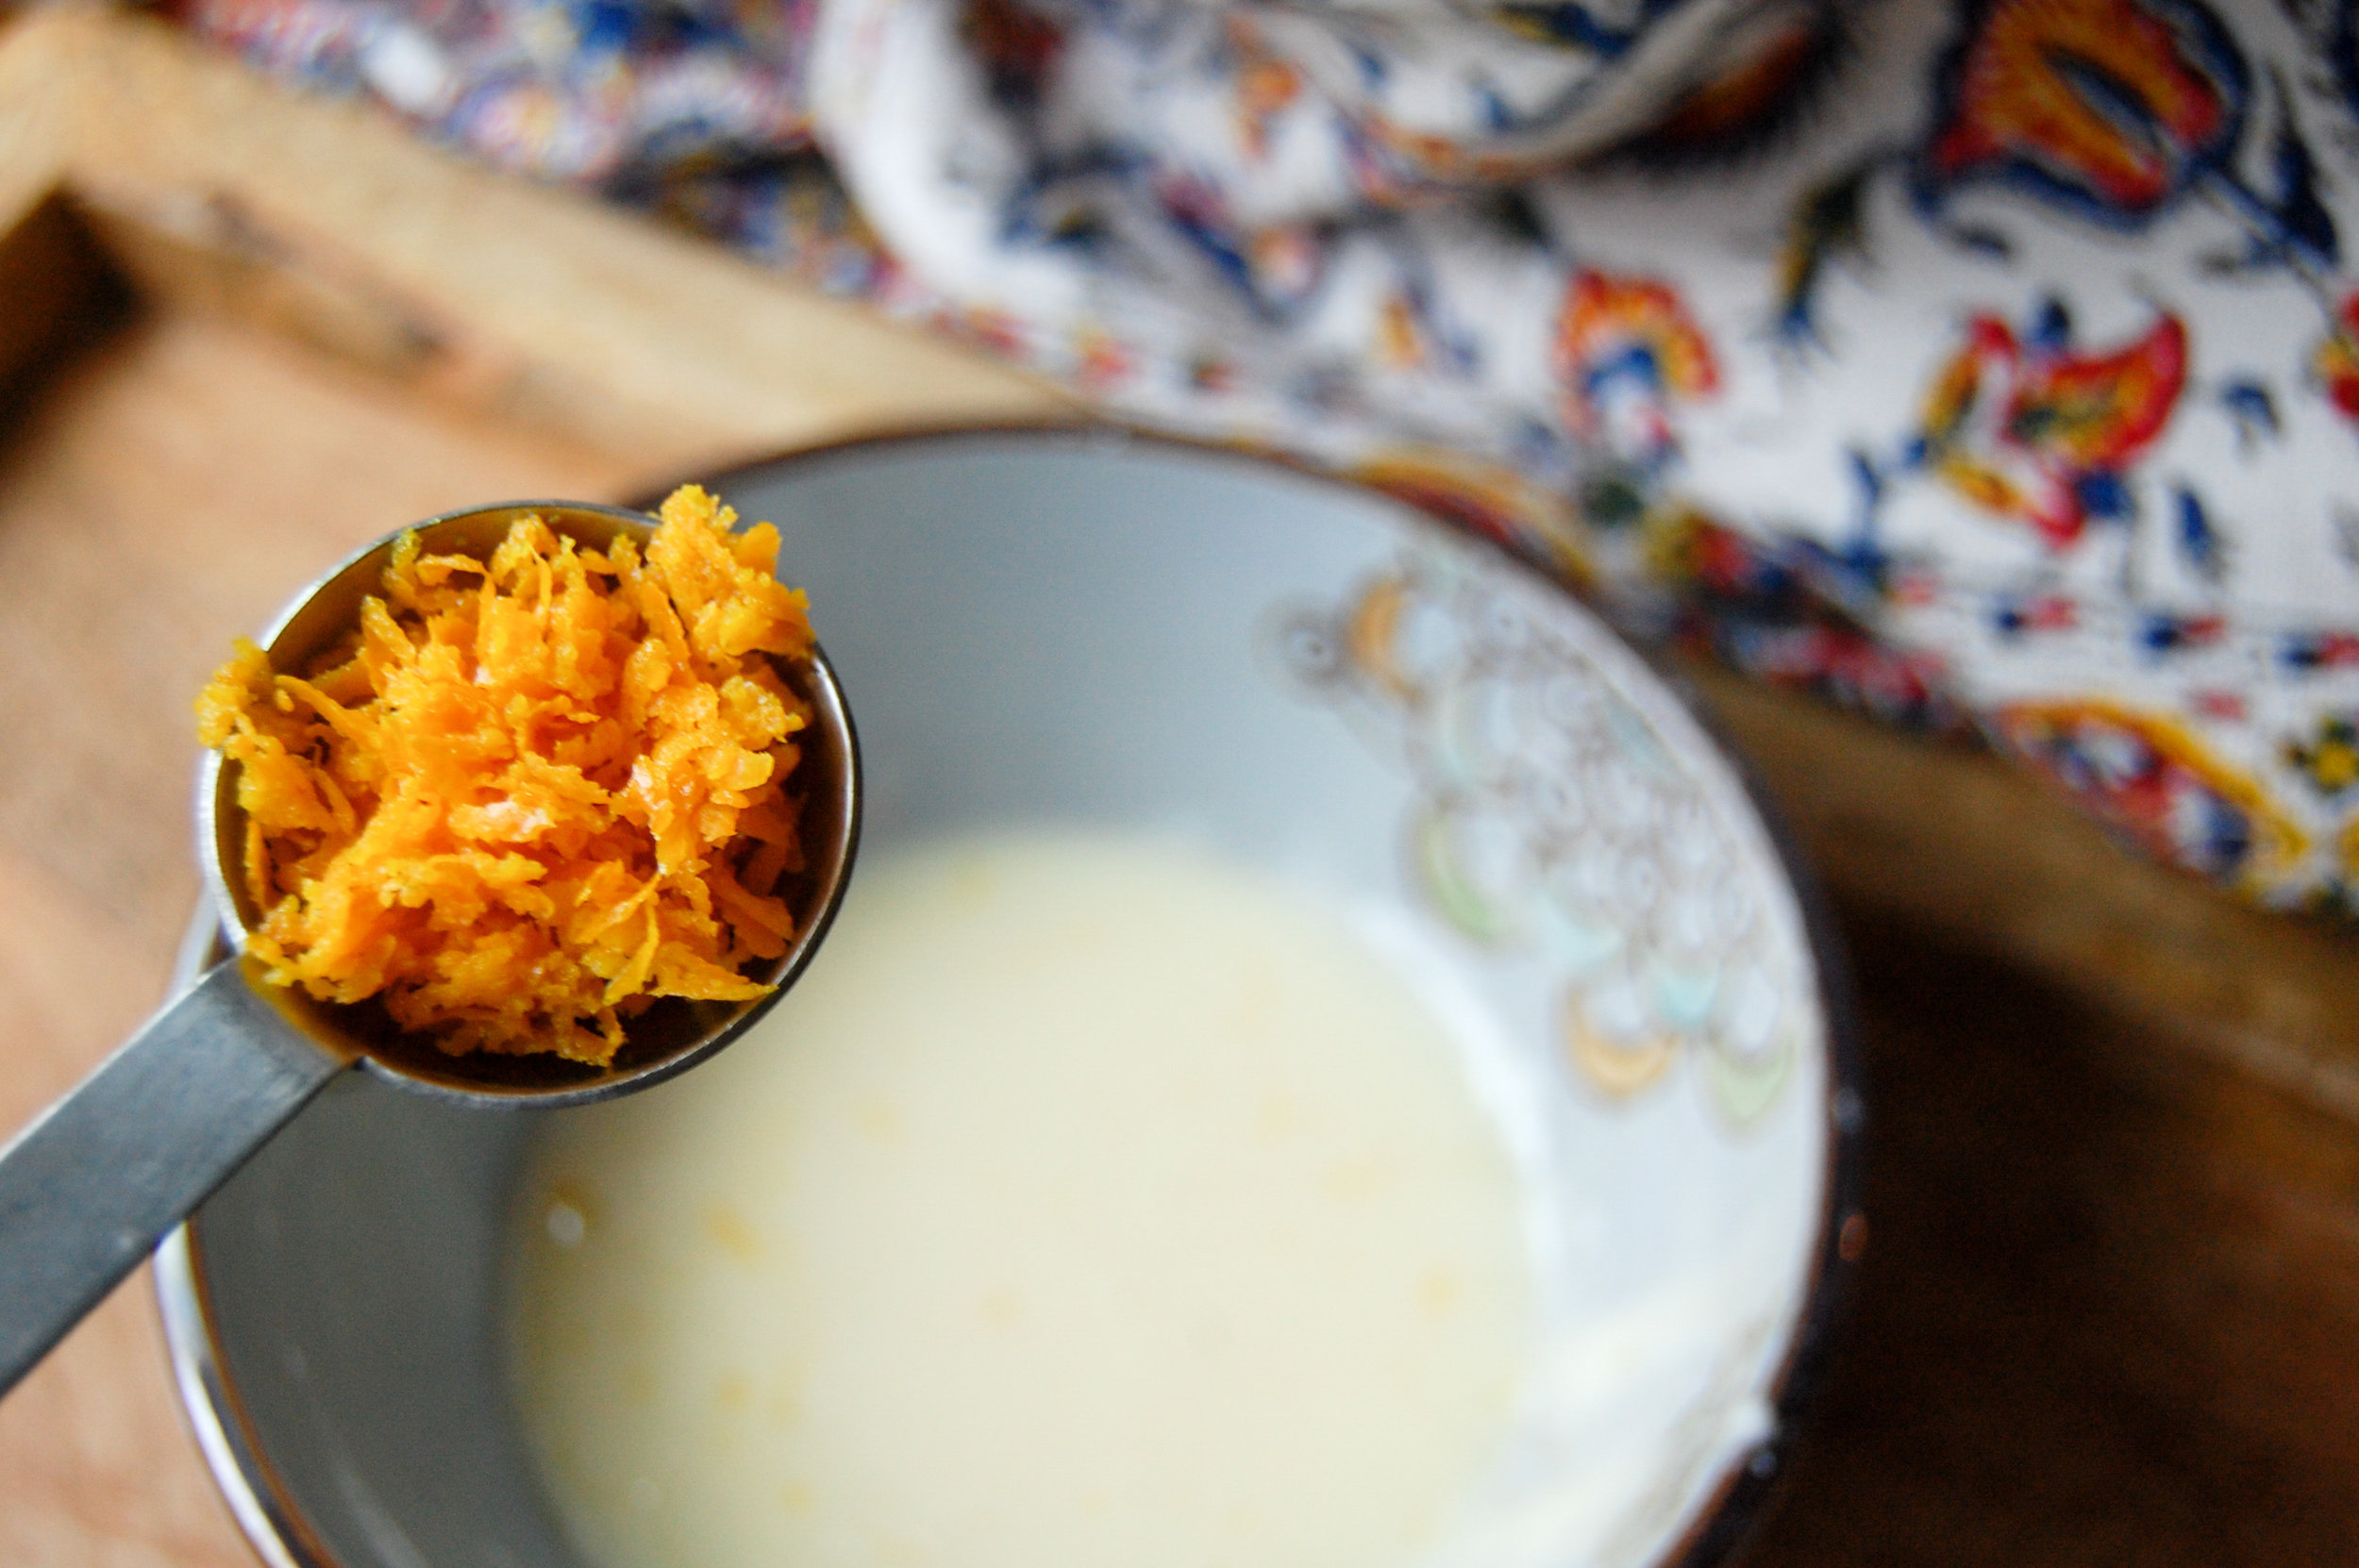
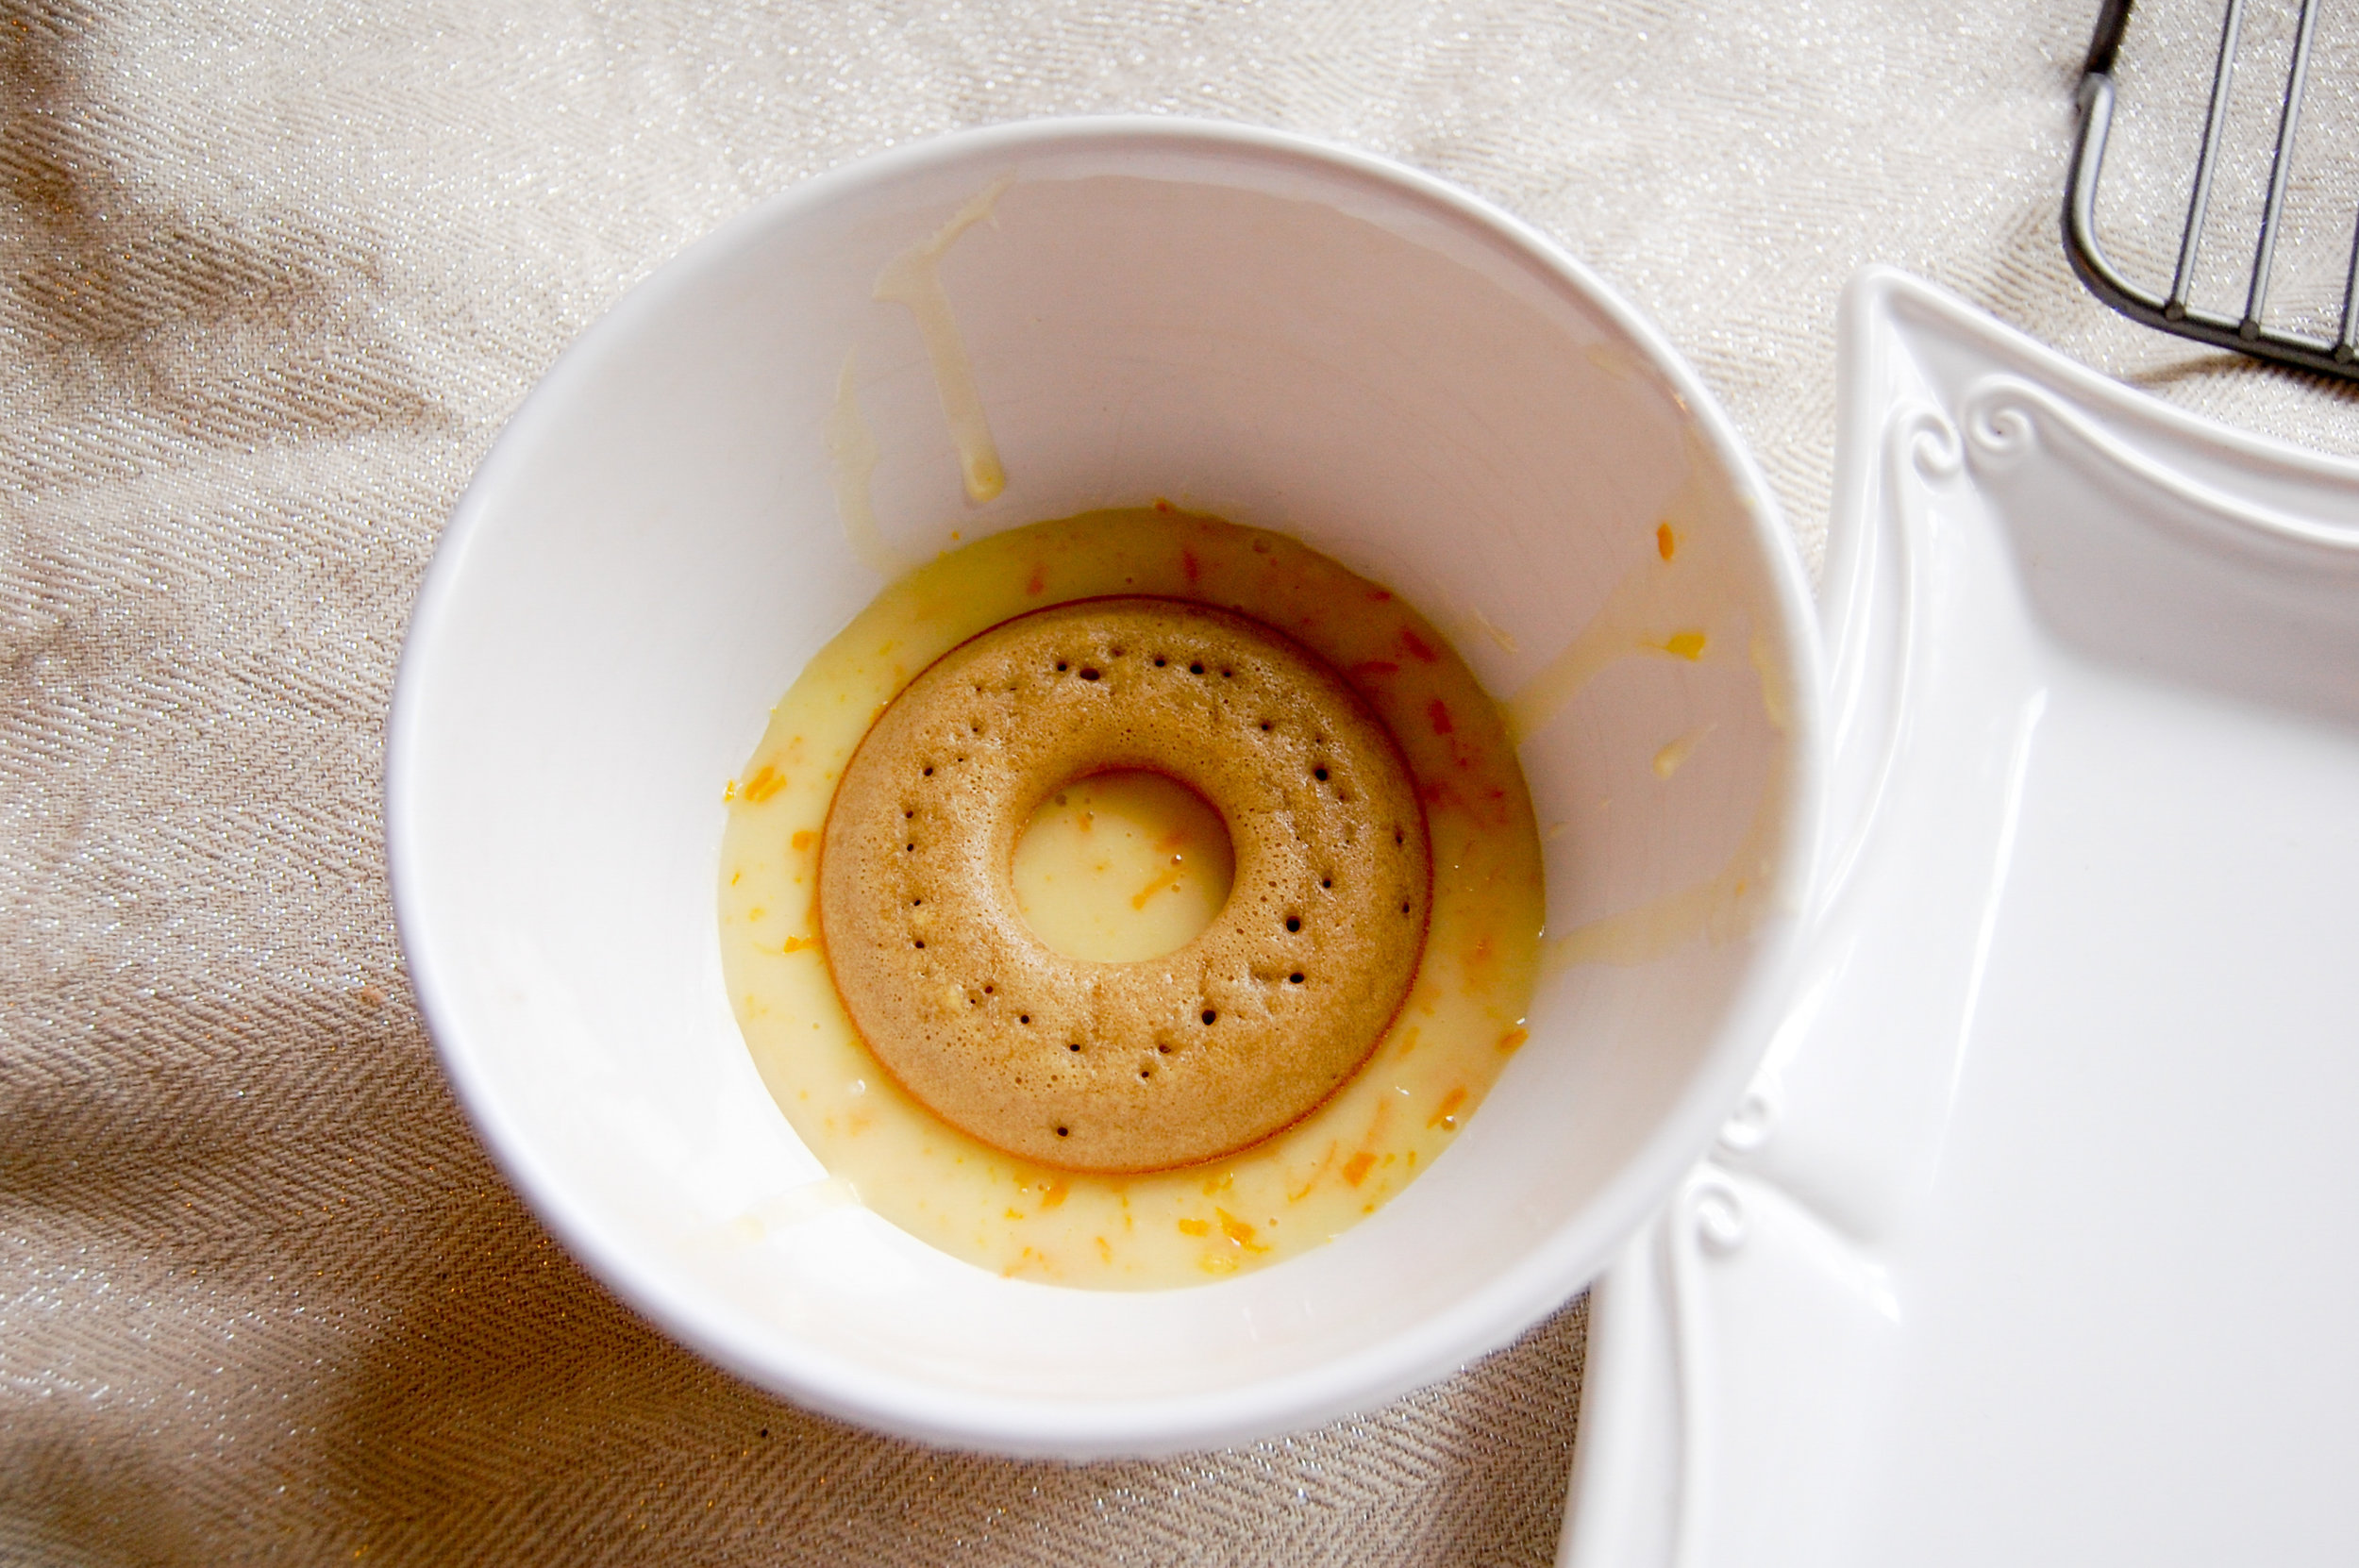
I chose an orange glaze to compliment the fruity aroma and taste of the puerh blend. The blend has orange peel, rose hips and hibiscus which I think all go together well with orange! Make sure you use an actual orange for the juice, not store bought juice!

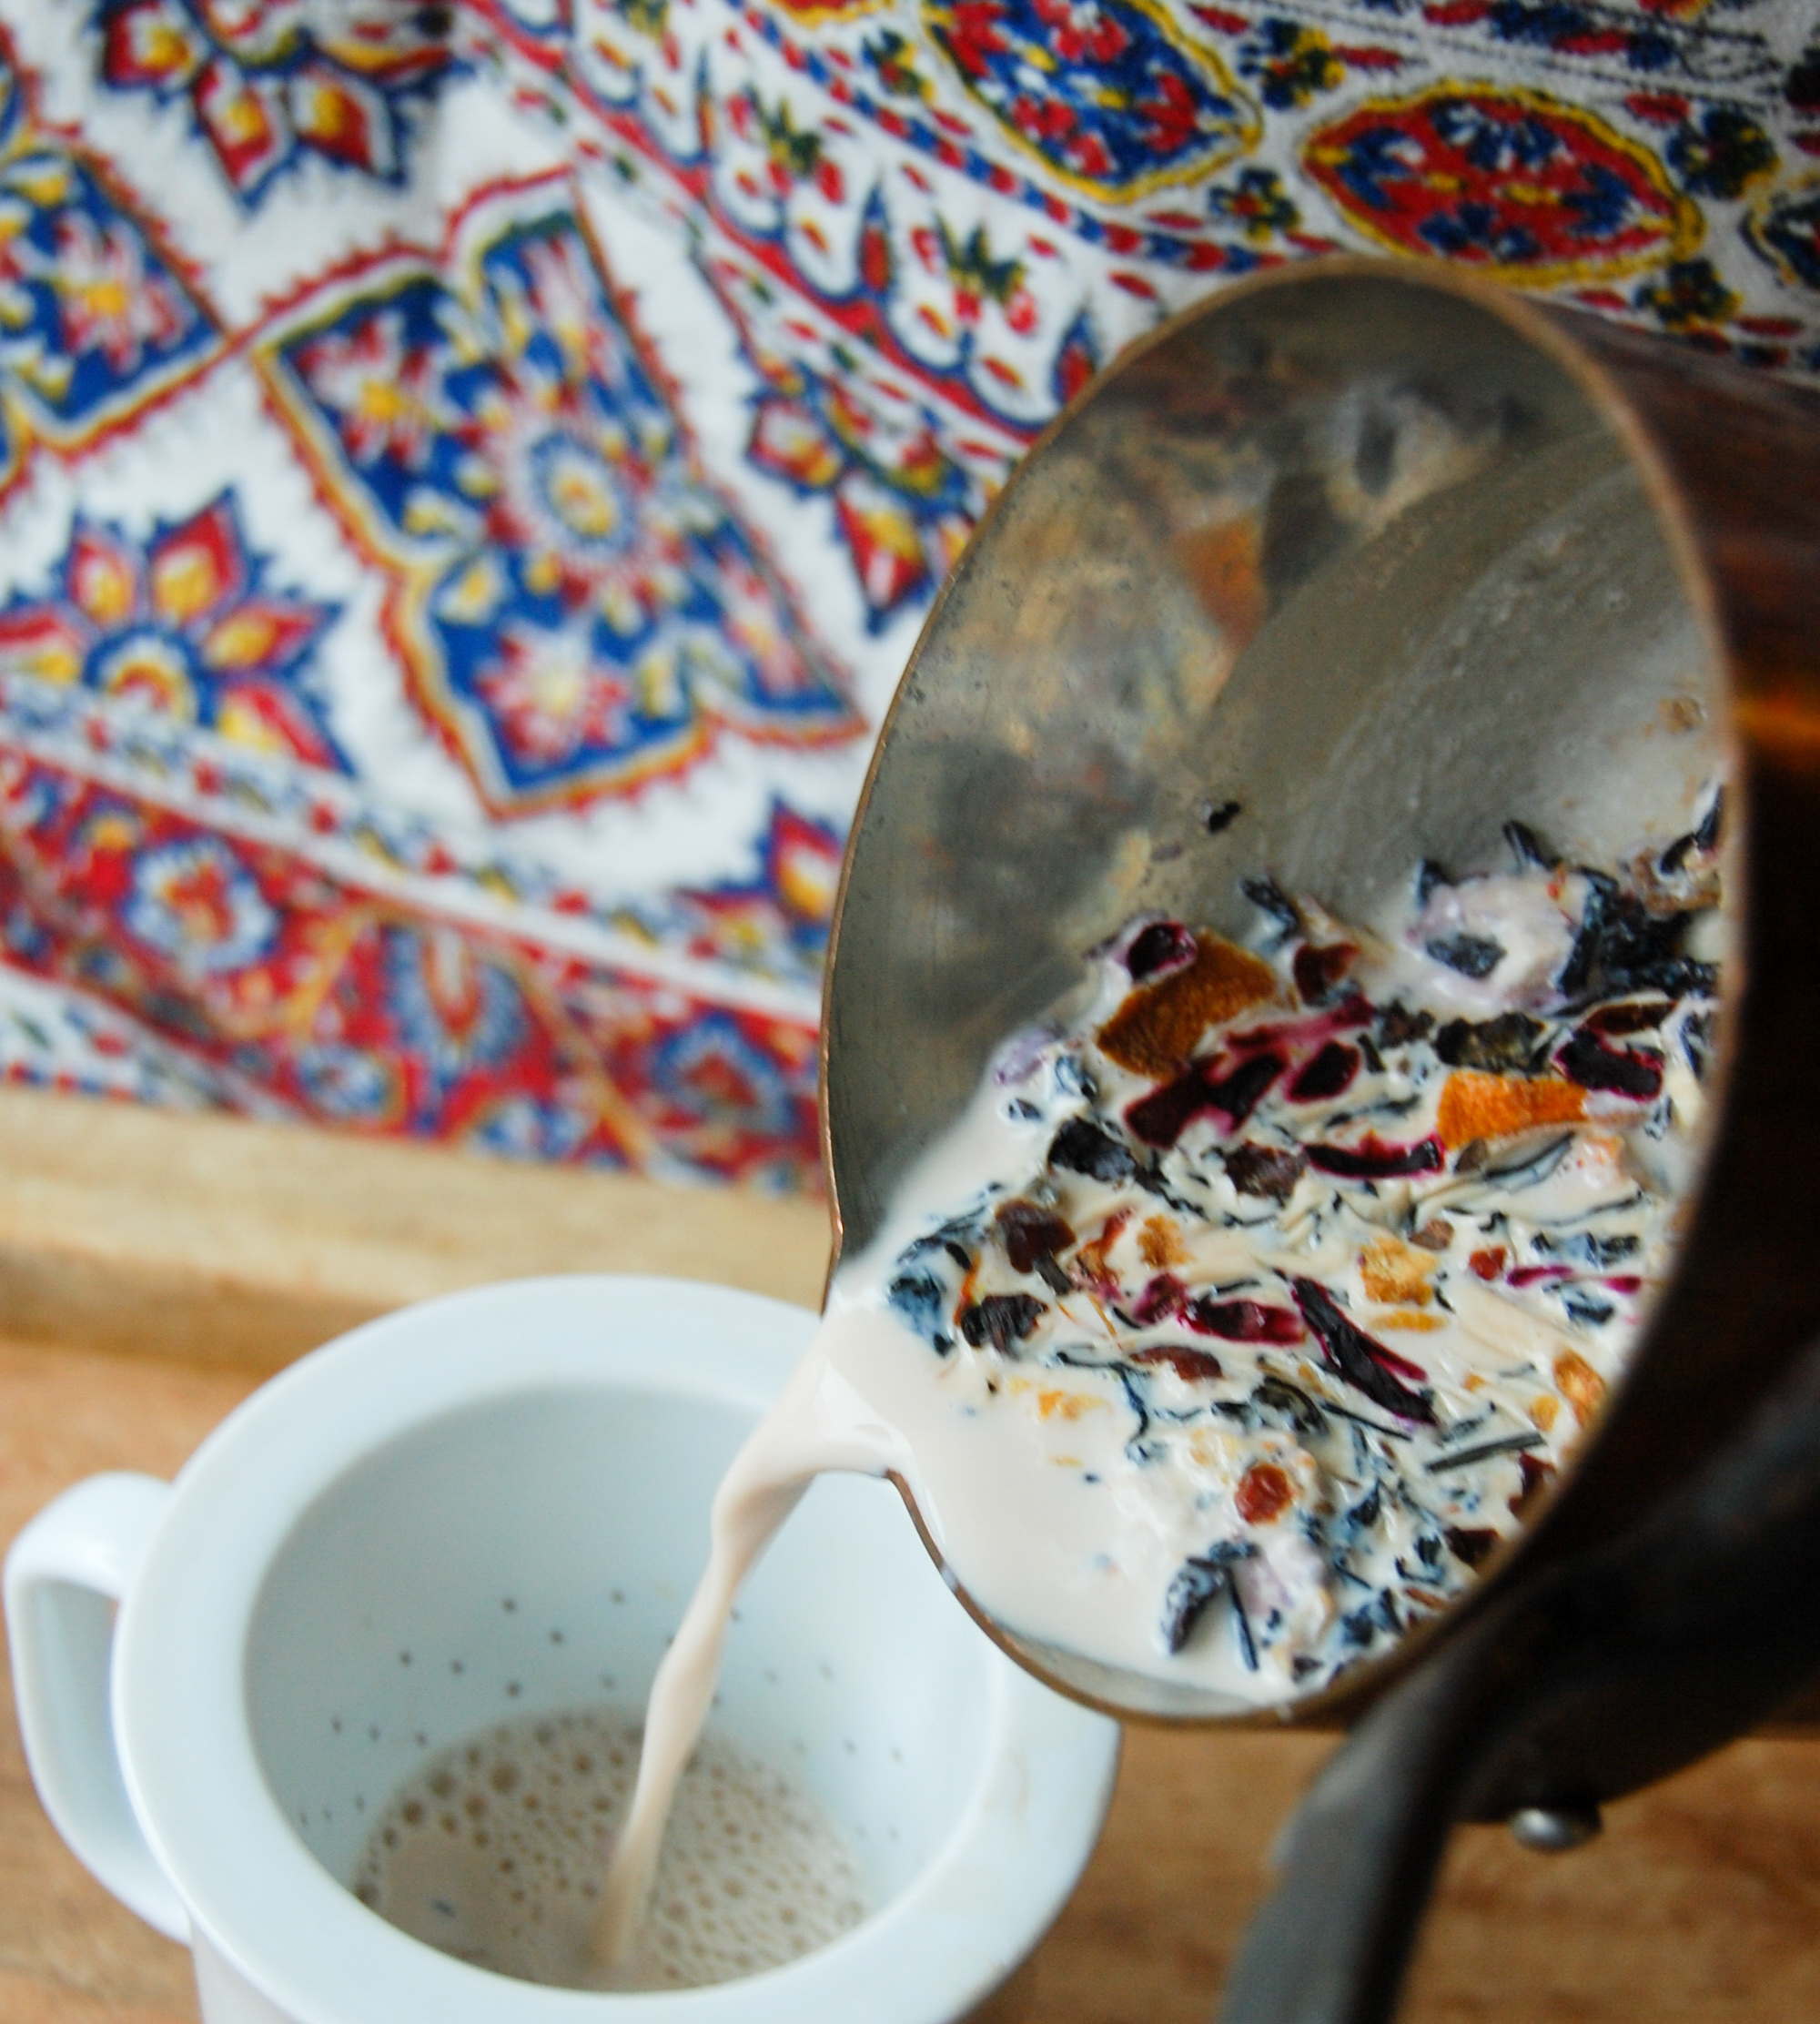
Ah yes, the tea infused milk staple. I used 1 cup of milk to infuse but only use 2/3 cup in the recipe because during the heating process some of the milk is lost.

I made two batches of these donuts to show you the different between "firm" and "spongy." The donuts on the left were the result of filling the molds about 3/4 way and baking for 8-9 minutes. The donuts on the right were filled almost to the brim and cooked for about the same time. They are both still very soft on the inside the ones on the left are just a bit firmer, which in a taste test I actually preferred!

A note on the glaze, as mentioned before, use less juice if you want a more solid glaze. I tried 2 TBSP and I just didn't like the consistency. I like how when I added one additional TBSP (to equal 3) that this is what happened when I dunked the donuts. When you let them sit they still harden but I think 3 TBSP made it easier to glaze. To each their own!
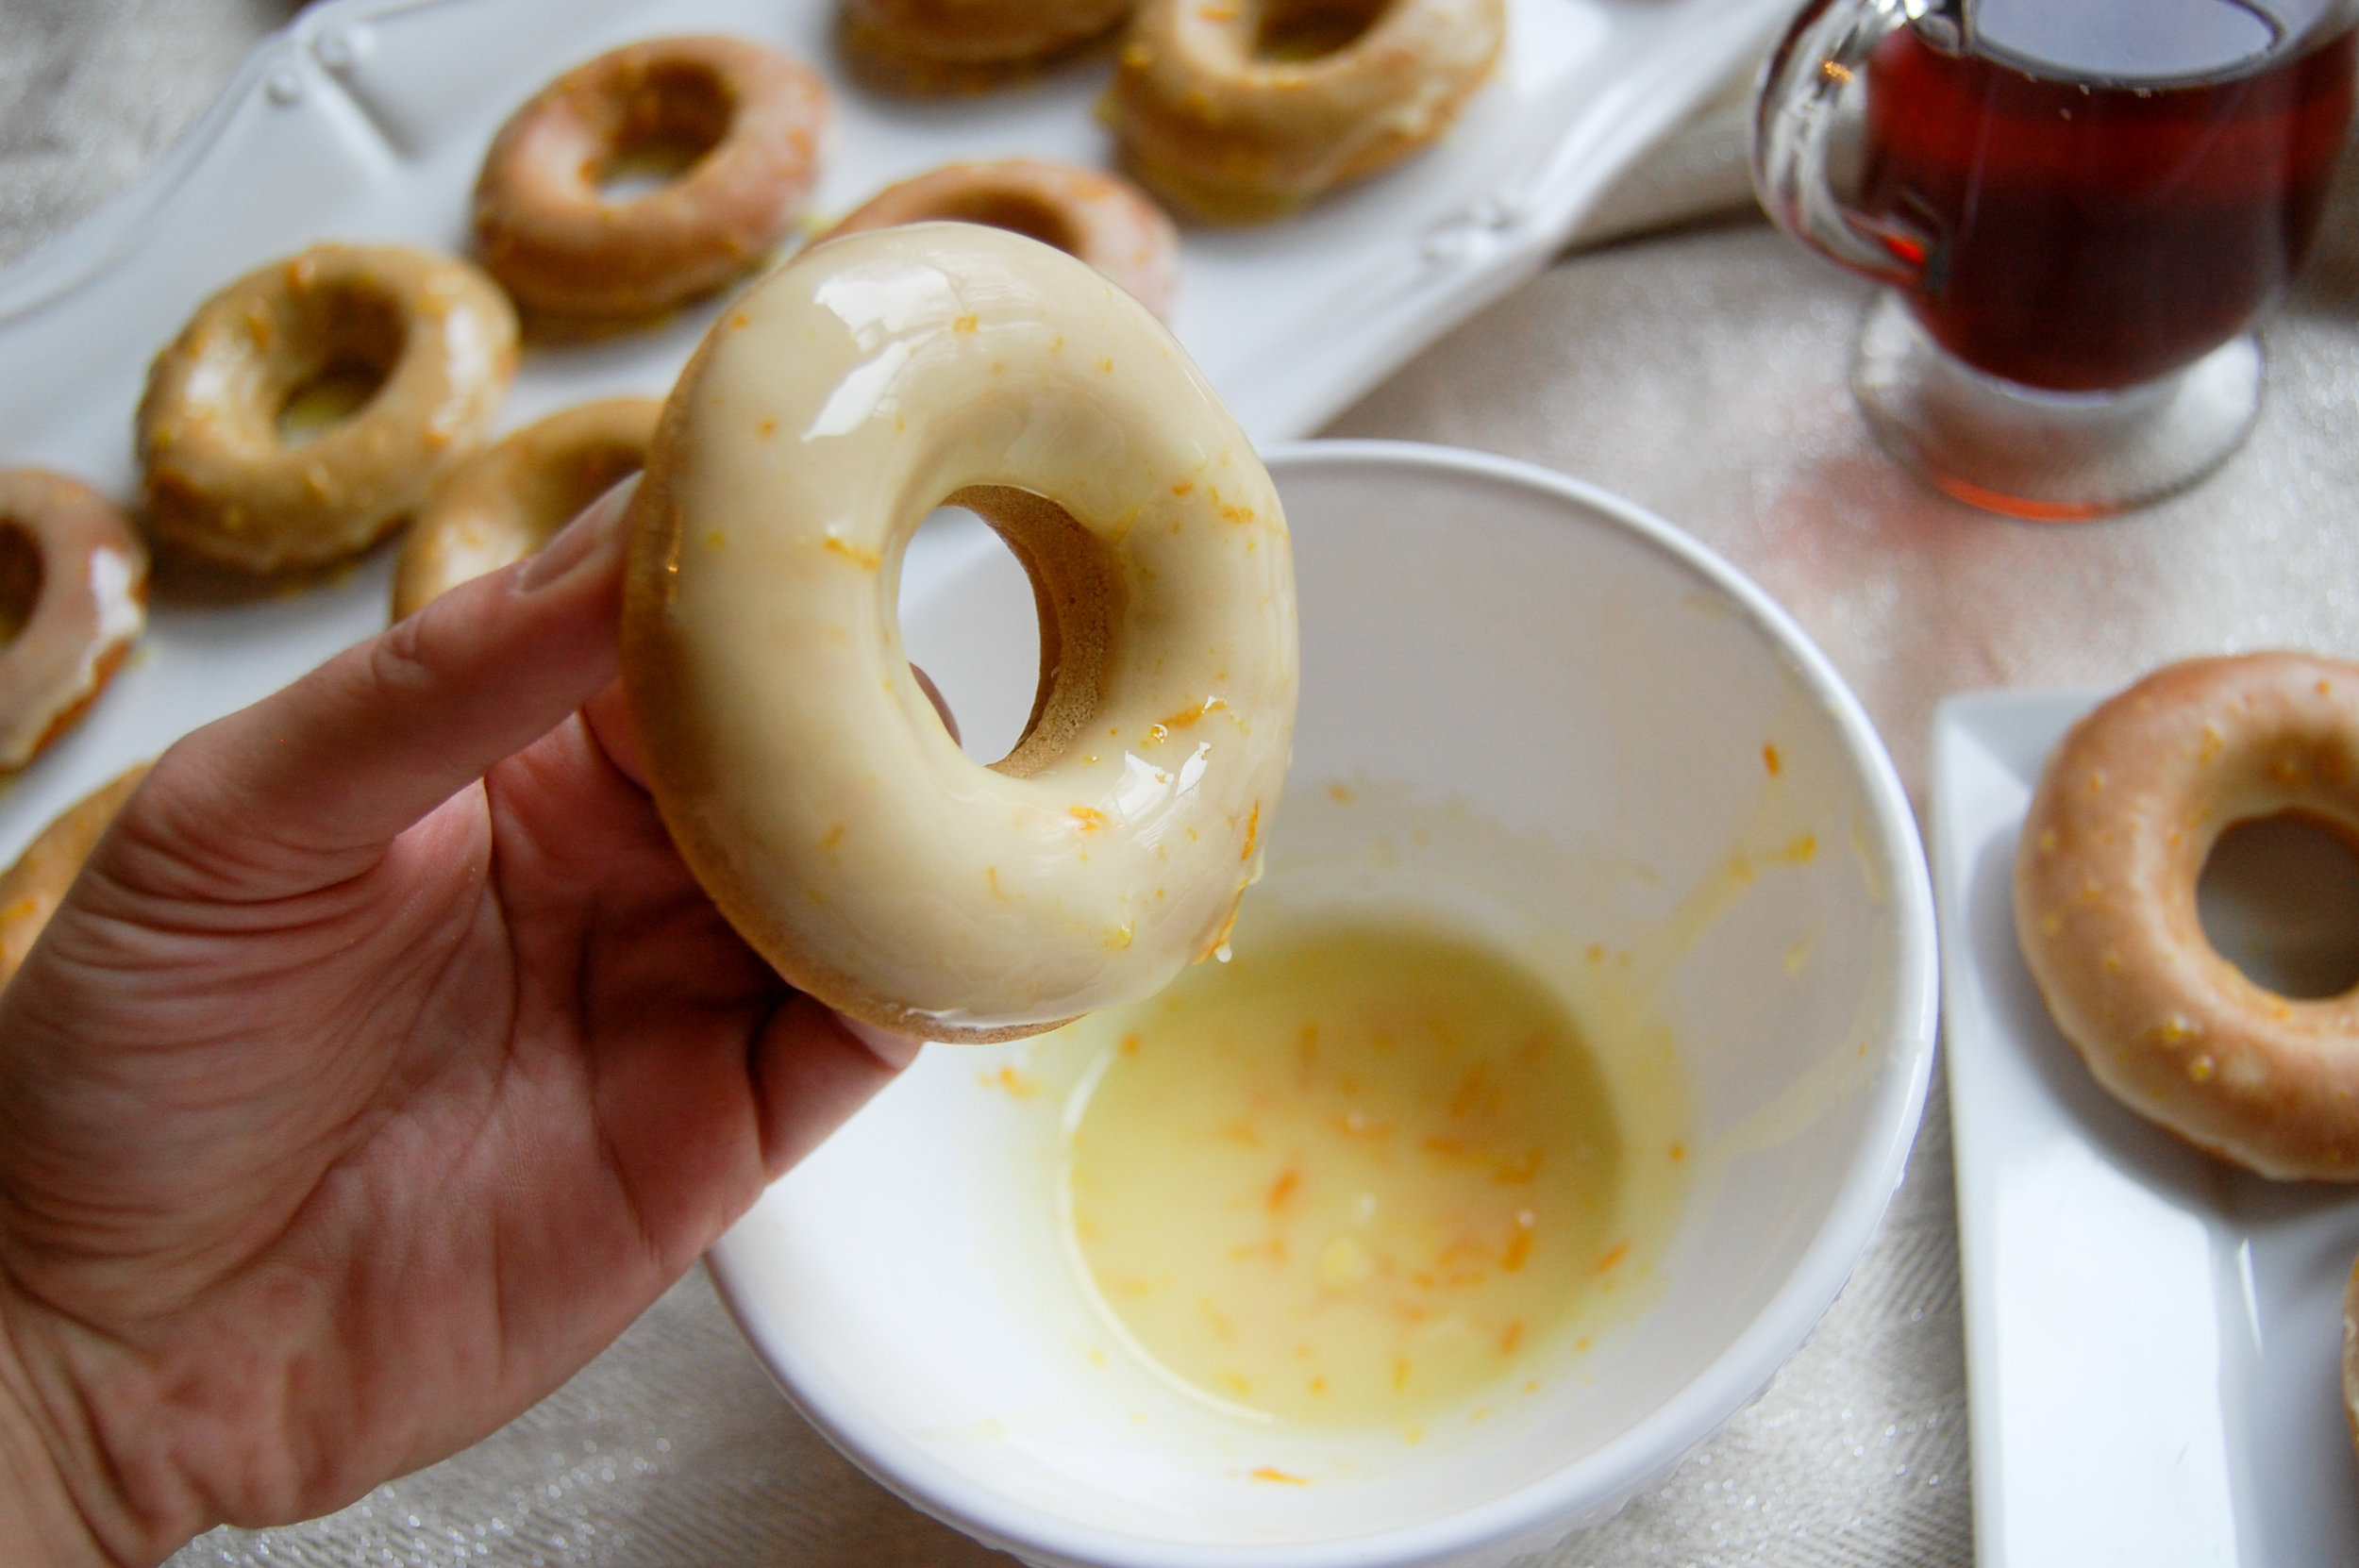
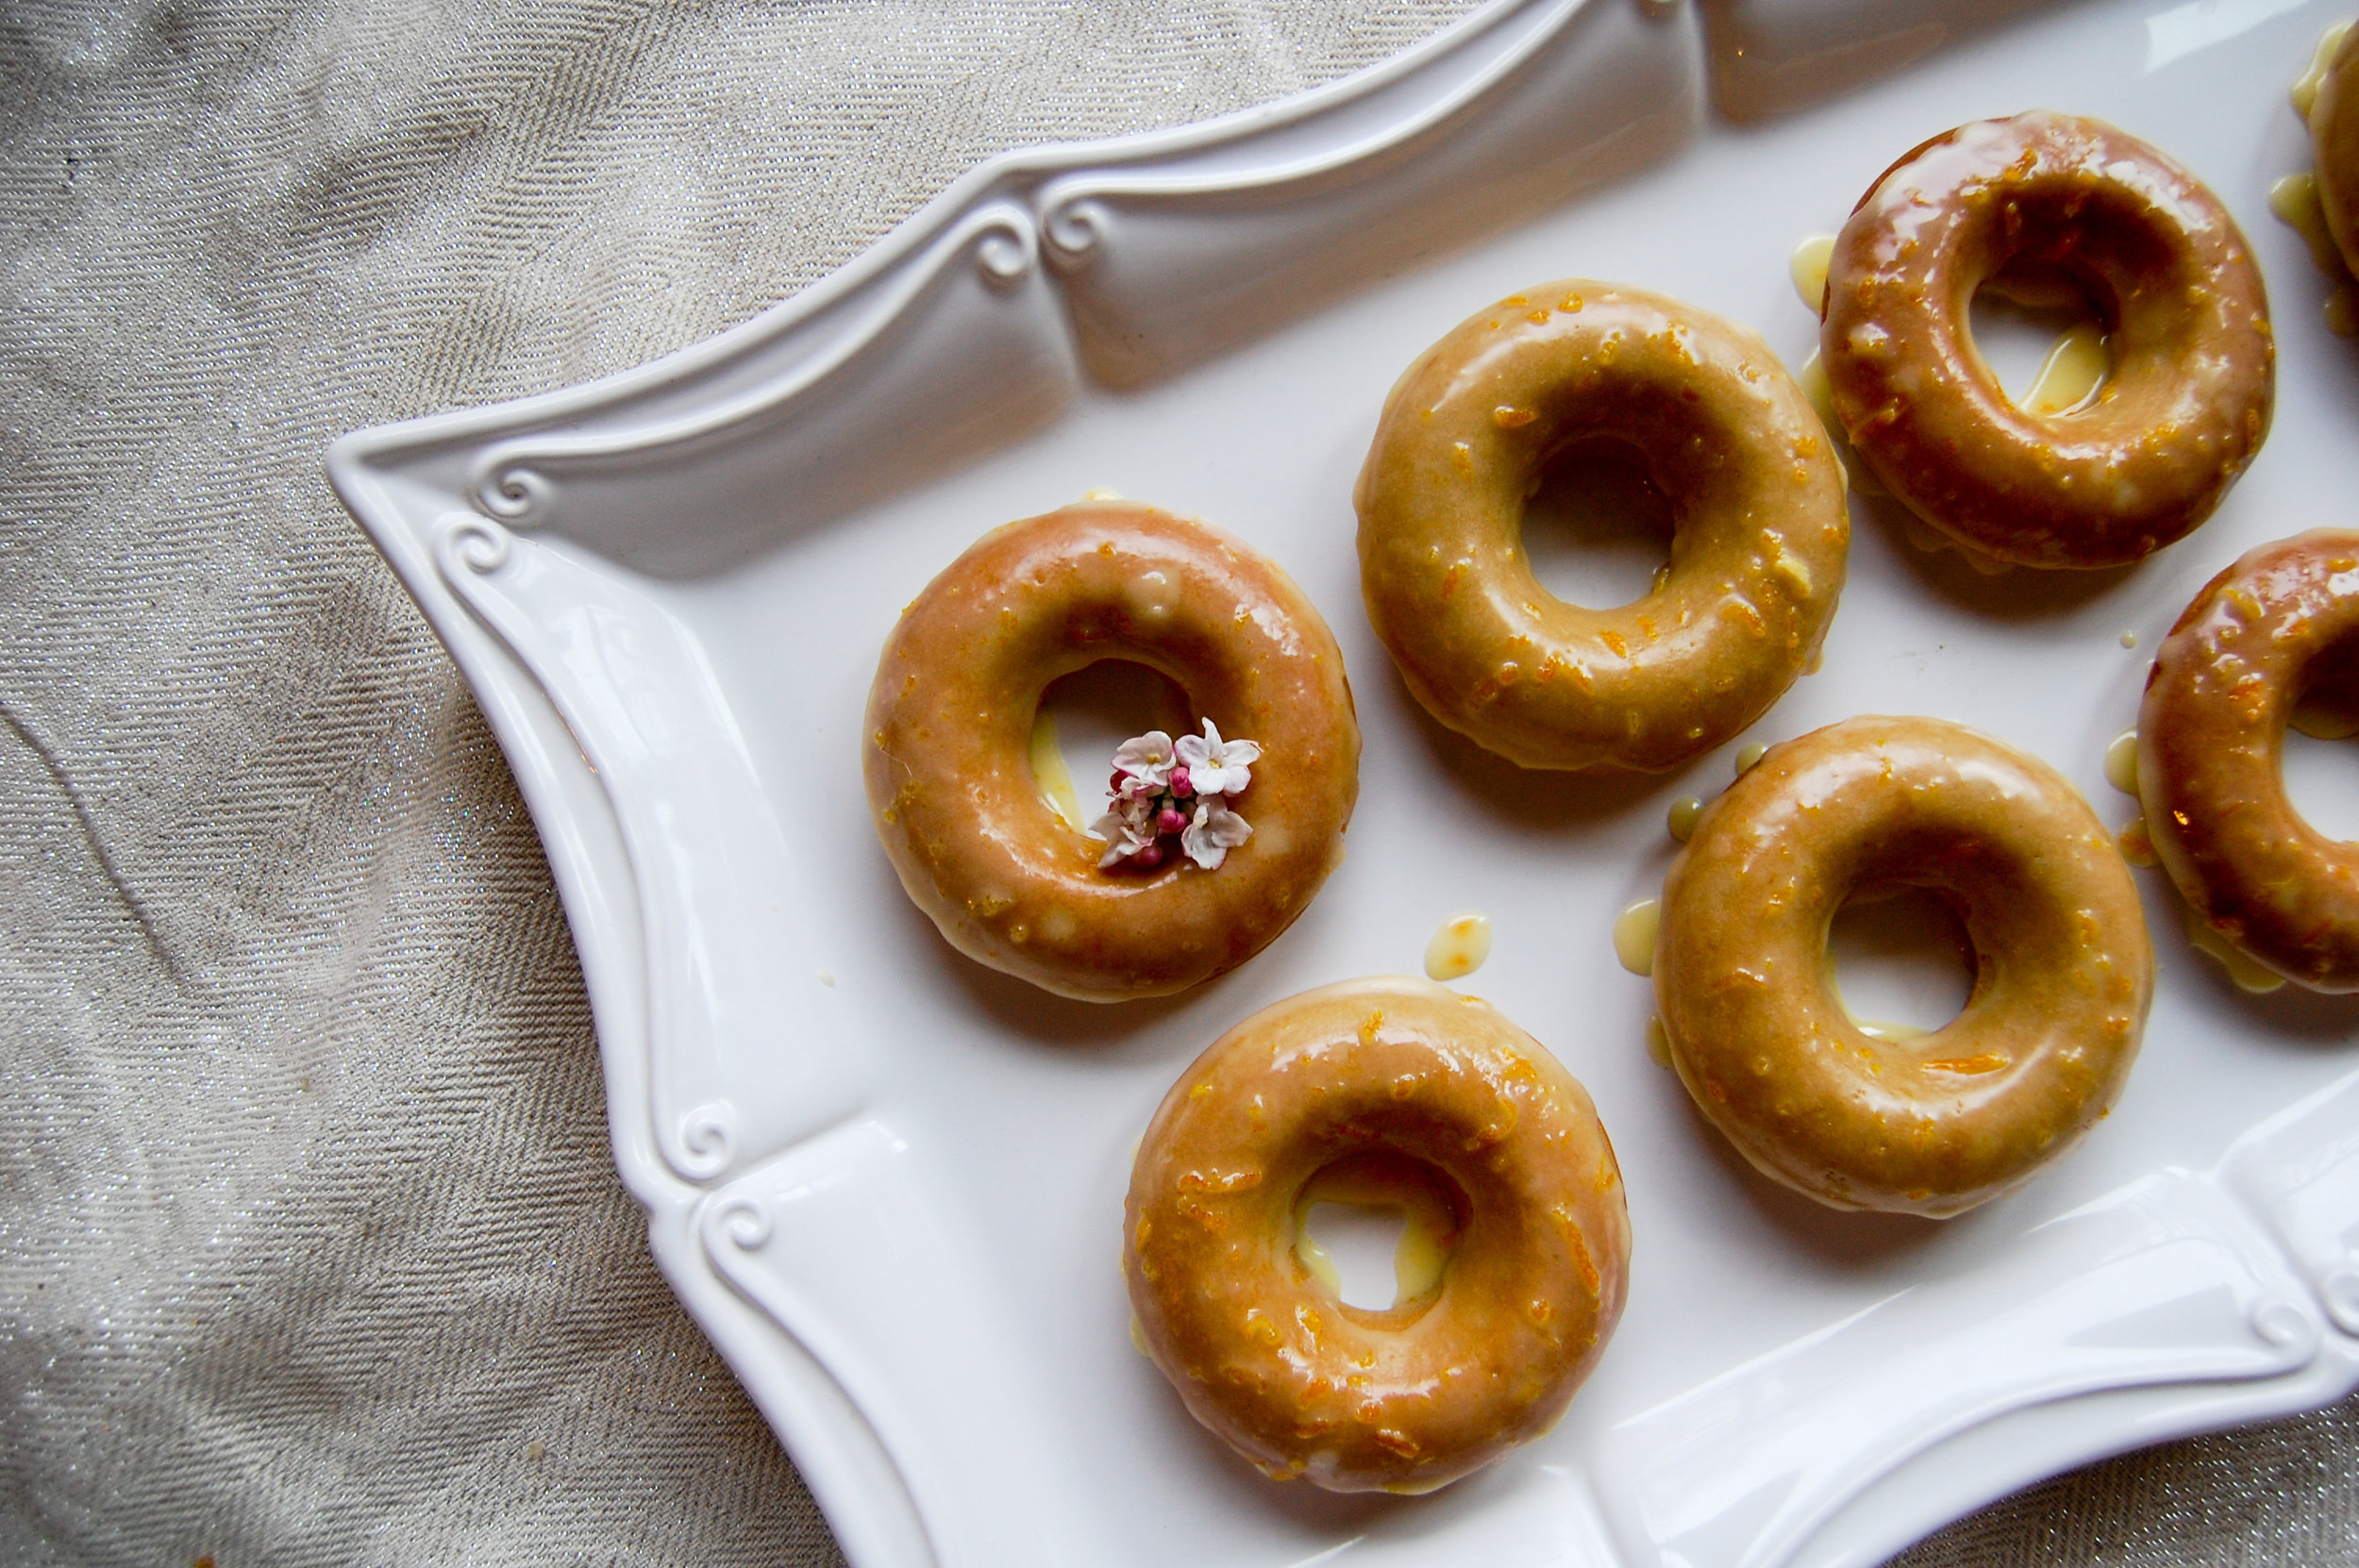

Puerh tea is so interesting and I found this to be a unique opportunity to create a fruity donut with a very flavorful tea. These donuts are definitely sweet but they are super fruity, specifically orange. I suggest making extra glaze for dipping :)
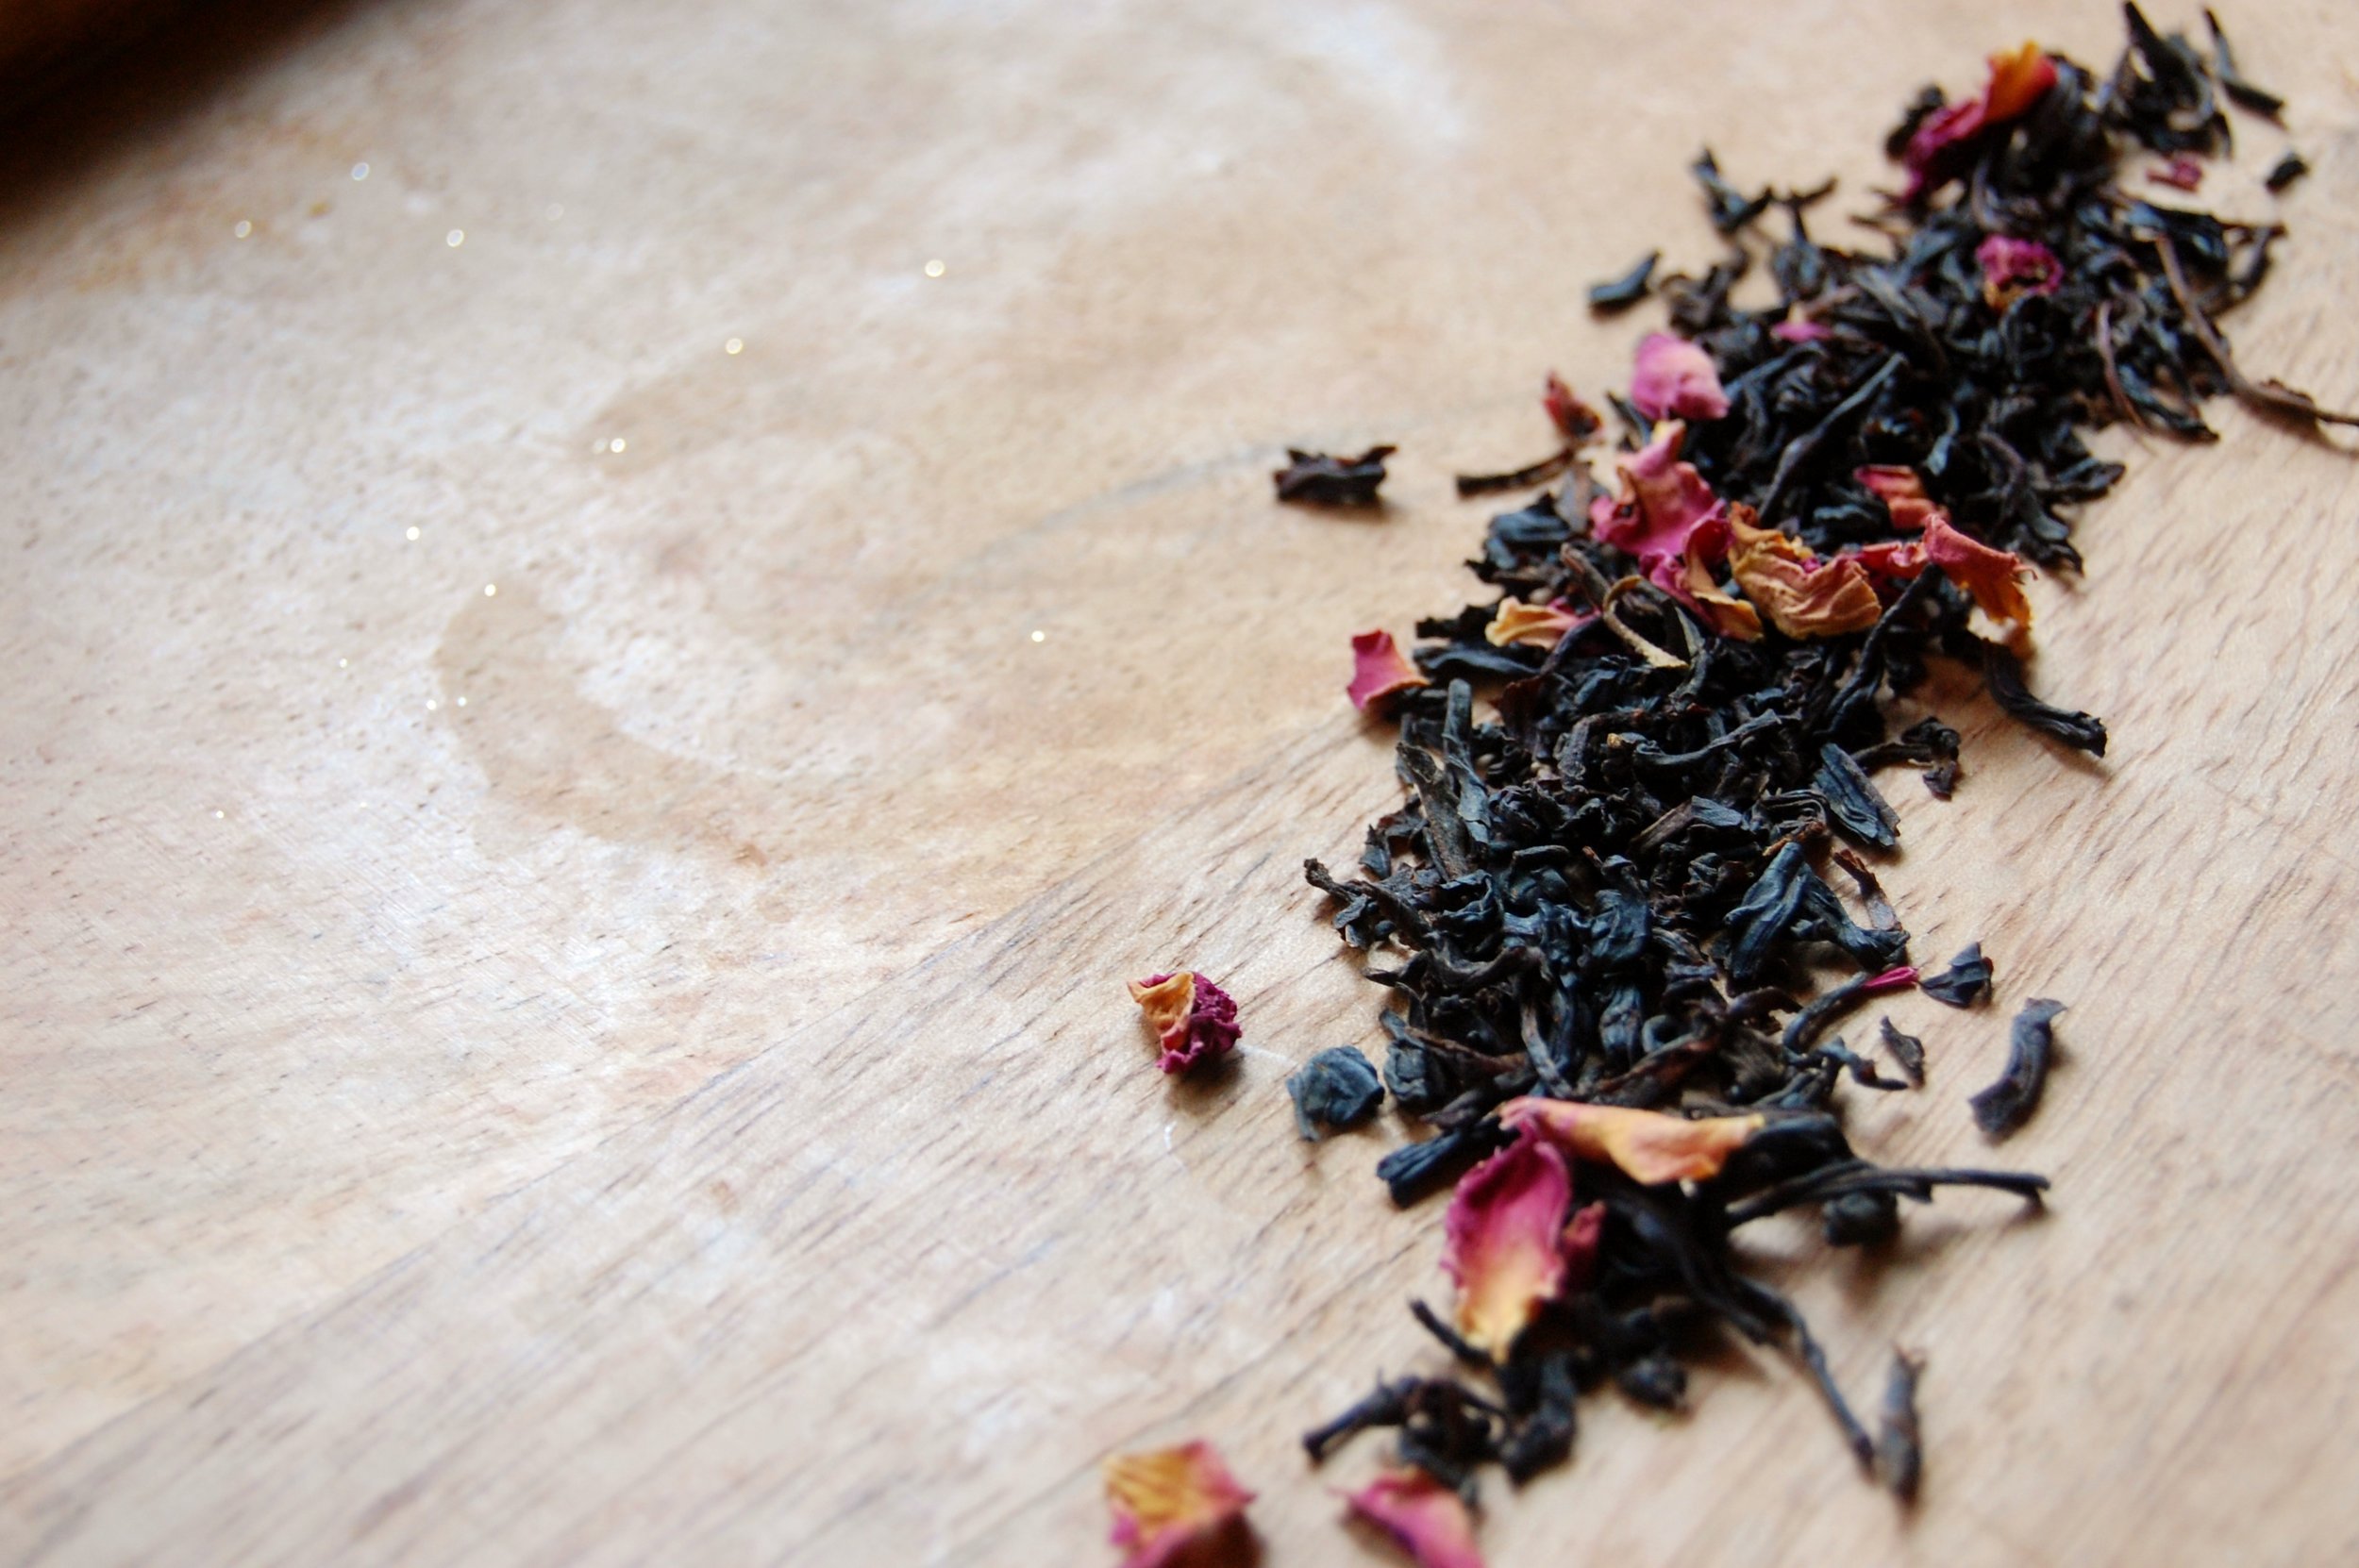
Vanilla Rose Pistachio Cookies
Pistachi Rose.
You may have guessed but I LOVE rose in tea. It doesn't matter if it's buds or petals, I love the flavor and aroma that rose gives to a blend. The Vanilla Rose Tea from Zhi tea is no exception. This blend uses assam as the base tea so it gives it that delicious black tea flavor that I love and that is so good in sweets.
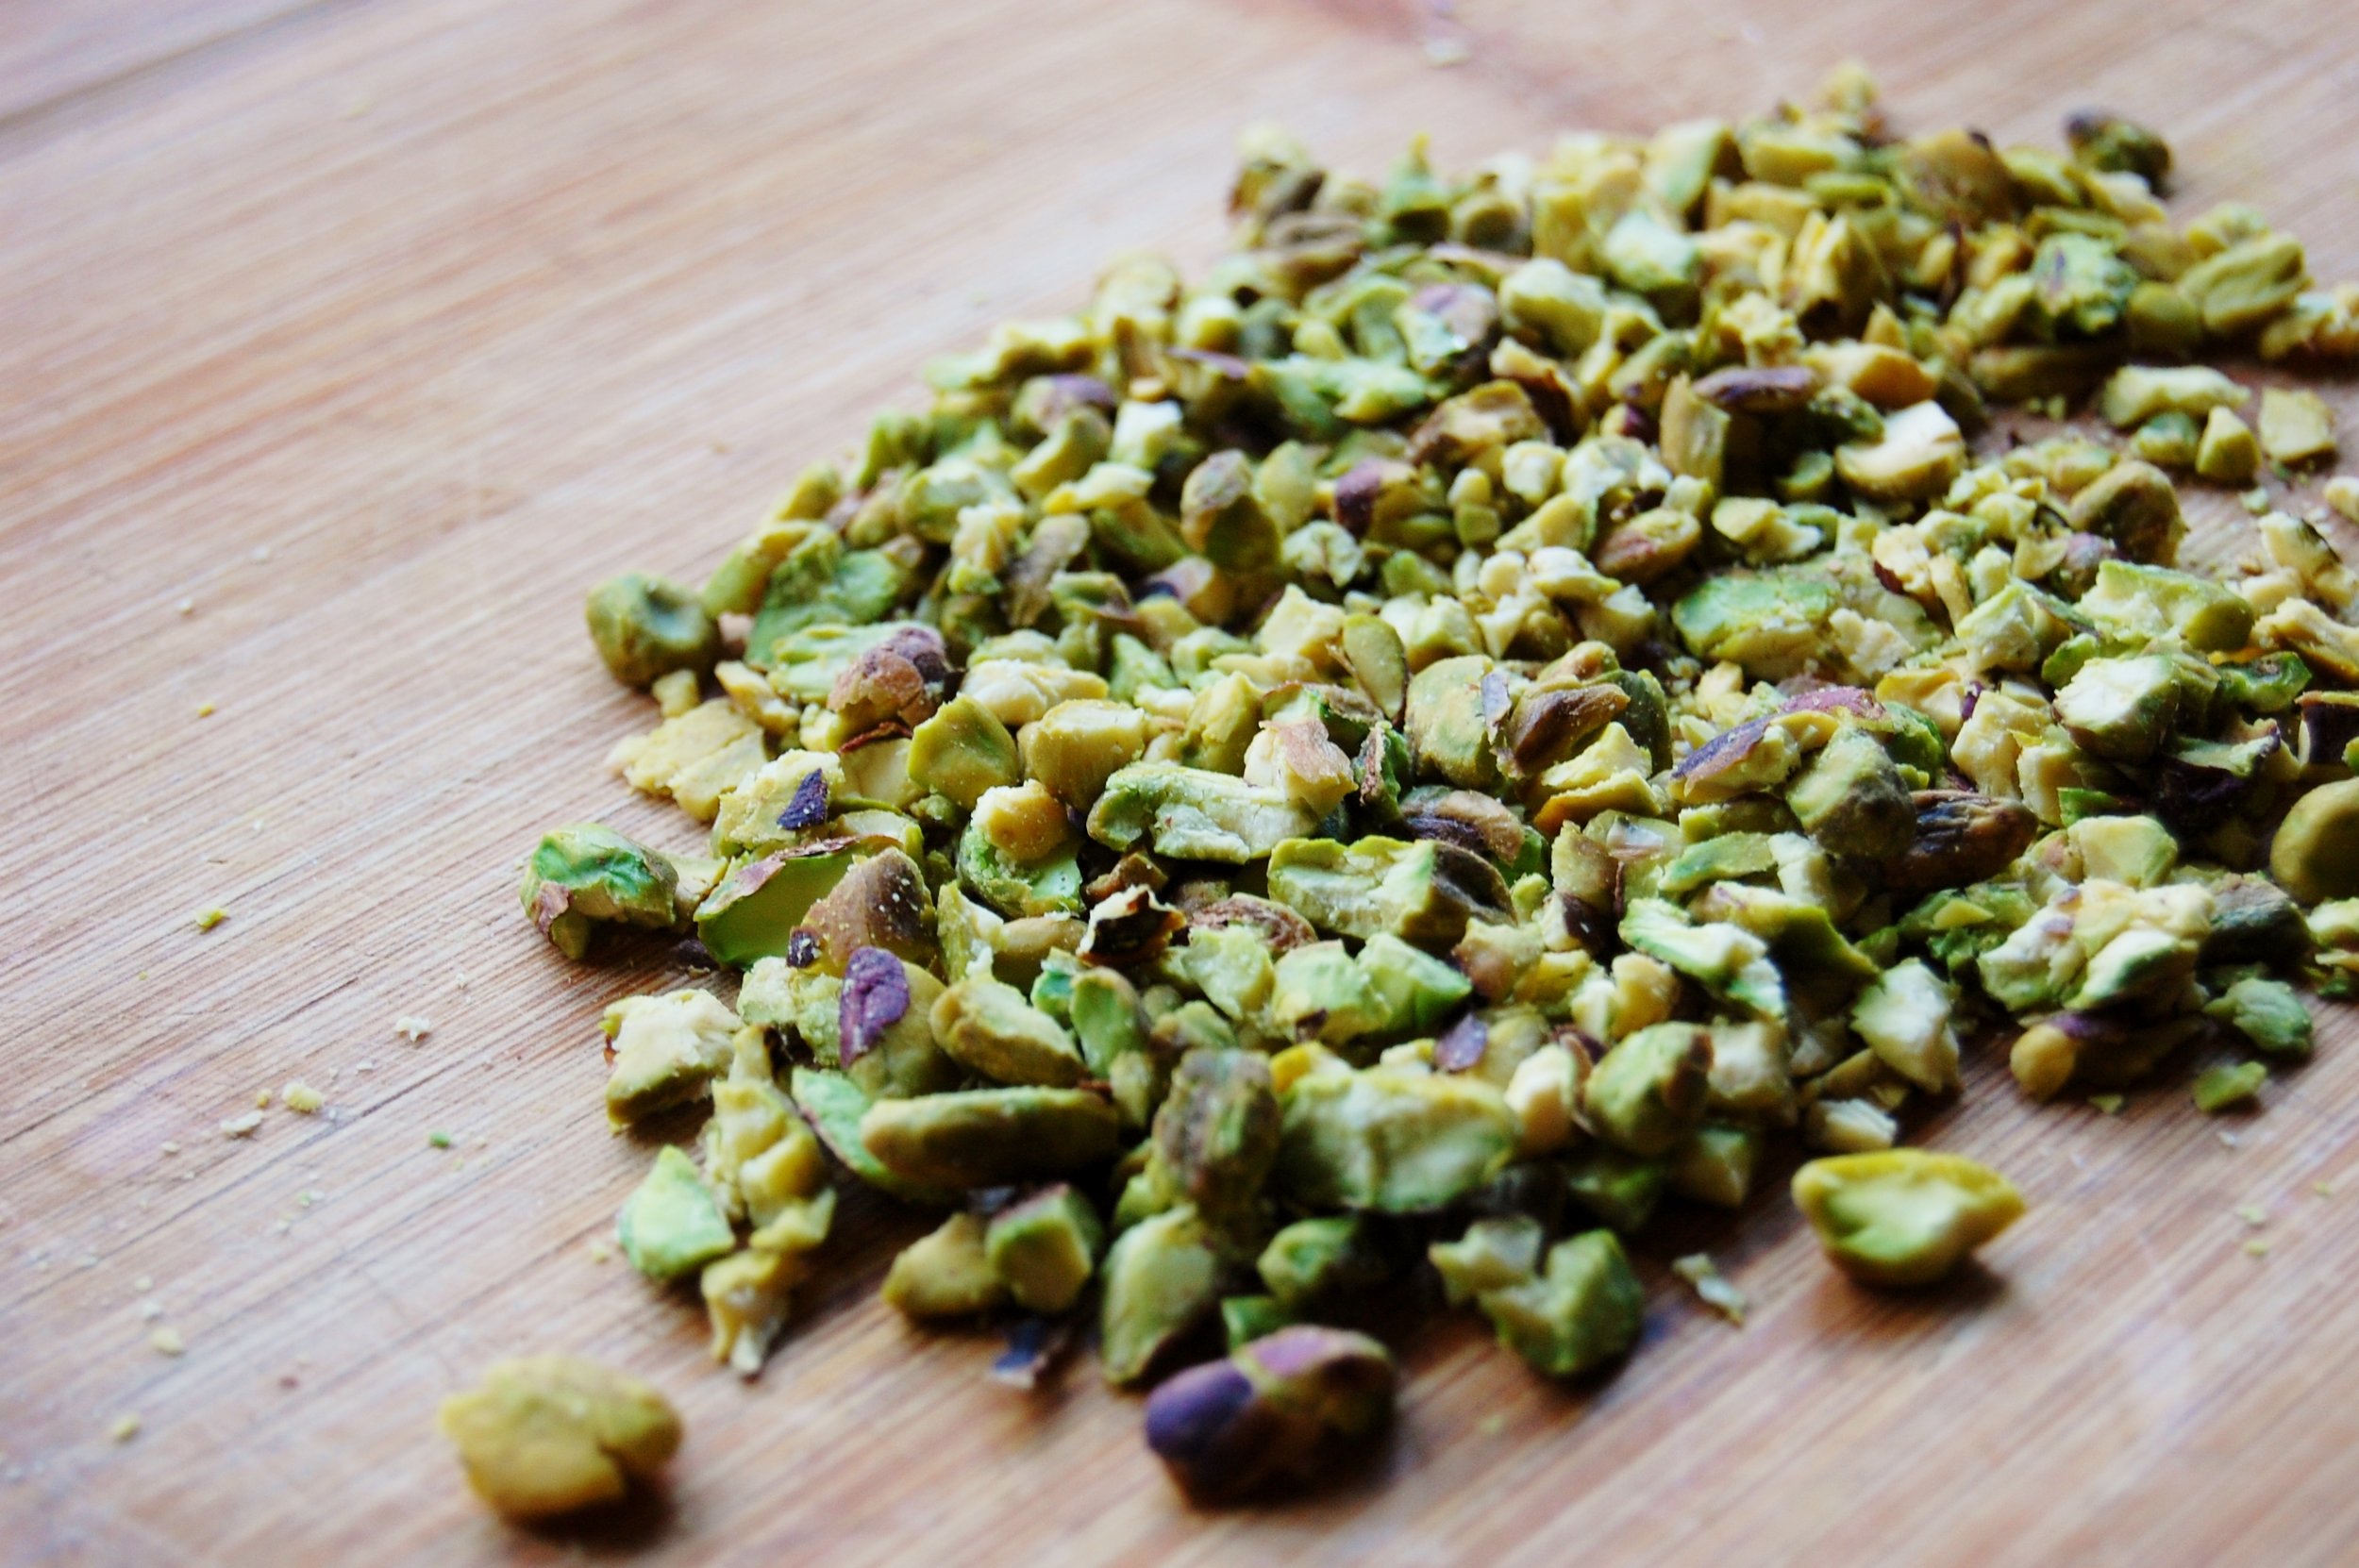
I wanted to make cookies with this blend and I put my thinking cap on to find what would go well with the rose. Ding, ding ding! Pistachio! It may be because norouz (Persian New Year) is so close but rose and pistachio are a match made in heaven. These are two ingredients that were common to everyday life growing up.
For this recipe I took an each chocolate chip recipe and tweaked it slightly for my purpose.

What you'll need:
1 1/2 cups packed dark brown sugar
2 eggs
3/4 cup - 1 cup slightly crushed pistachios
1 cup Vanilla Rose butter
1 teaspoon baking soda
2 1/4 cup flour
Pinch of salt

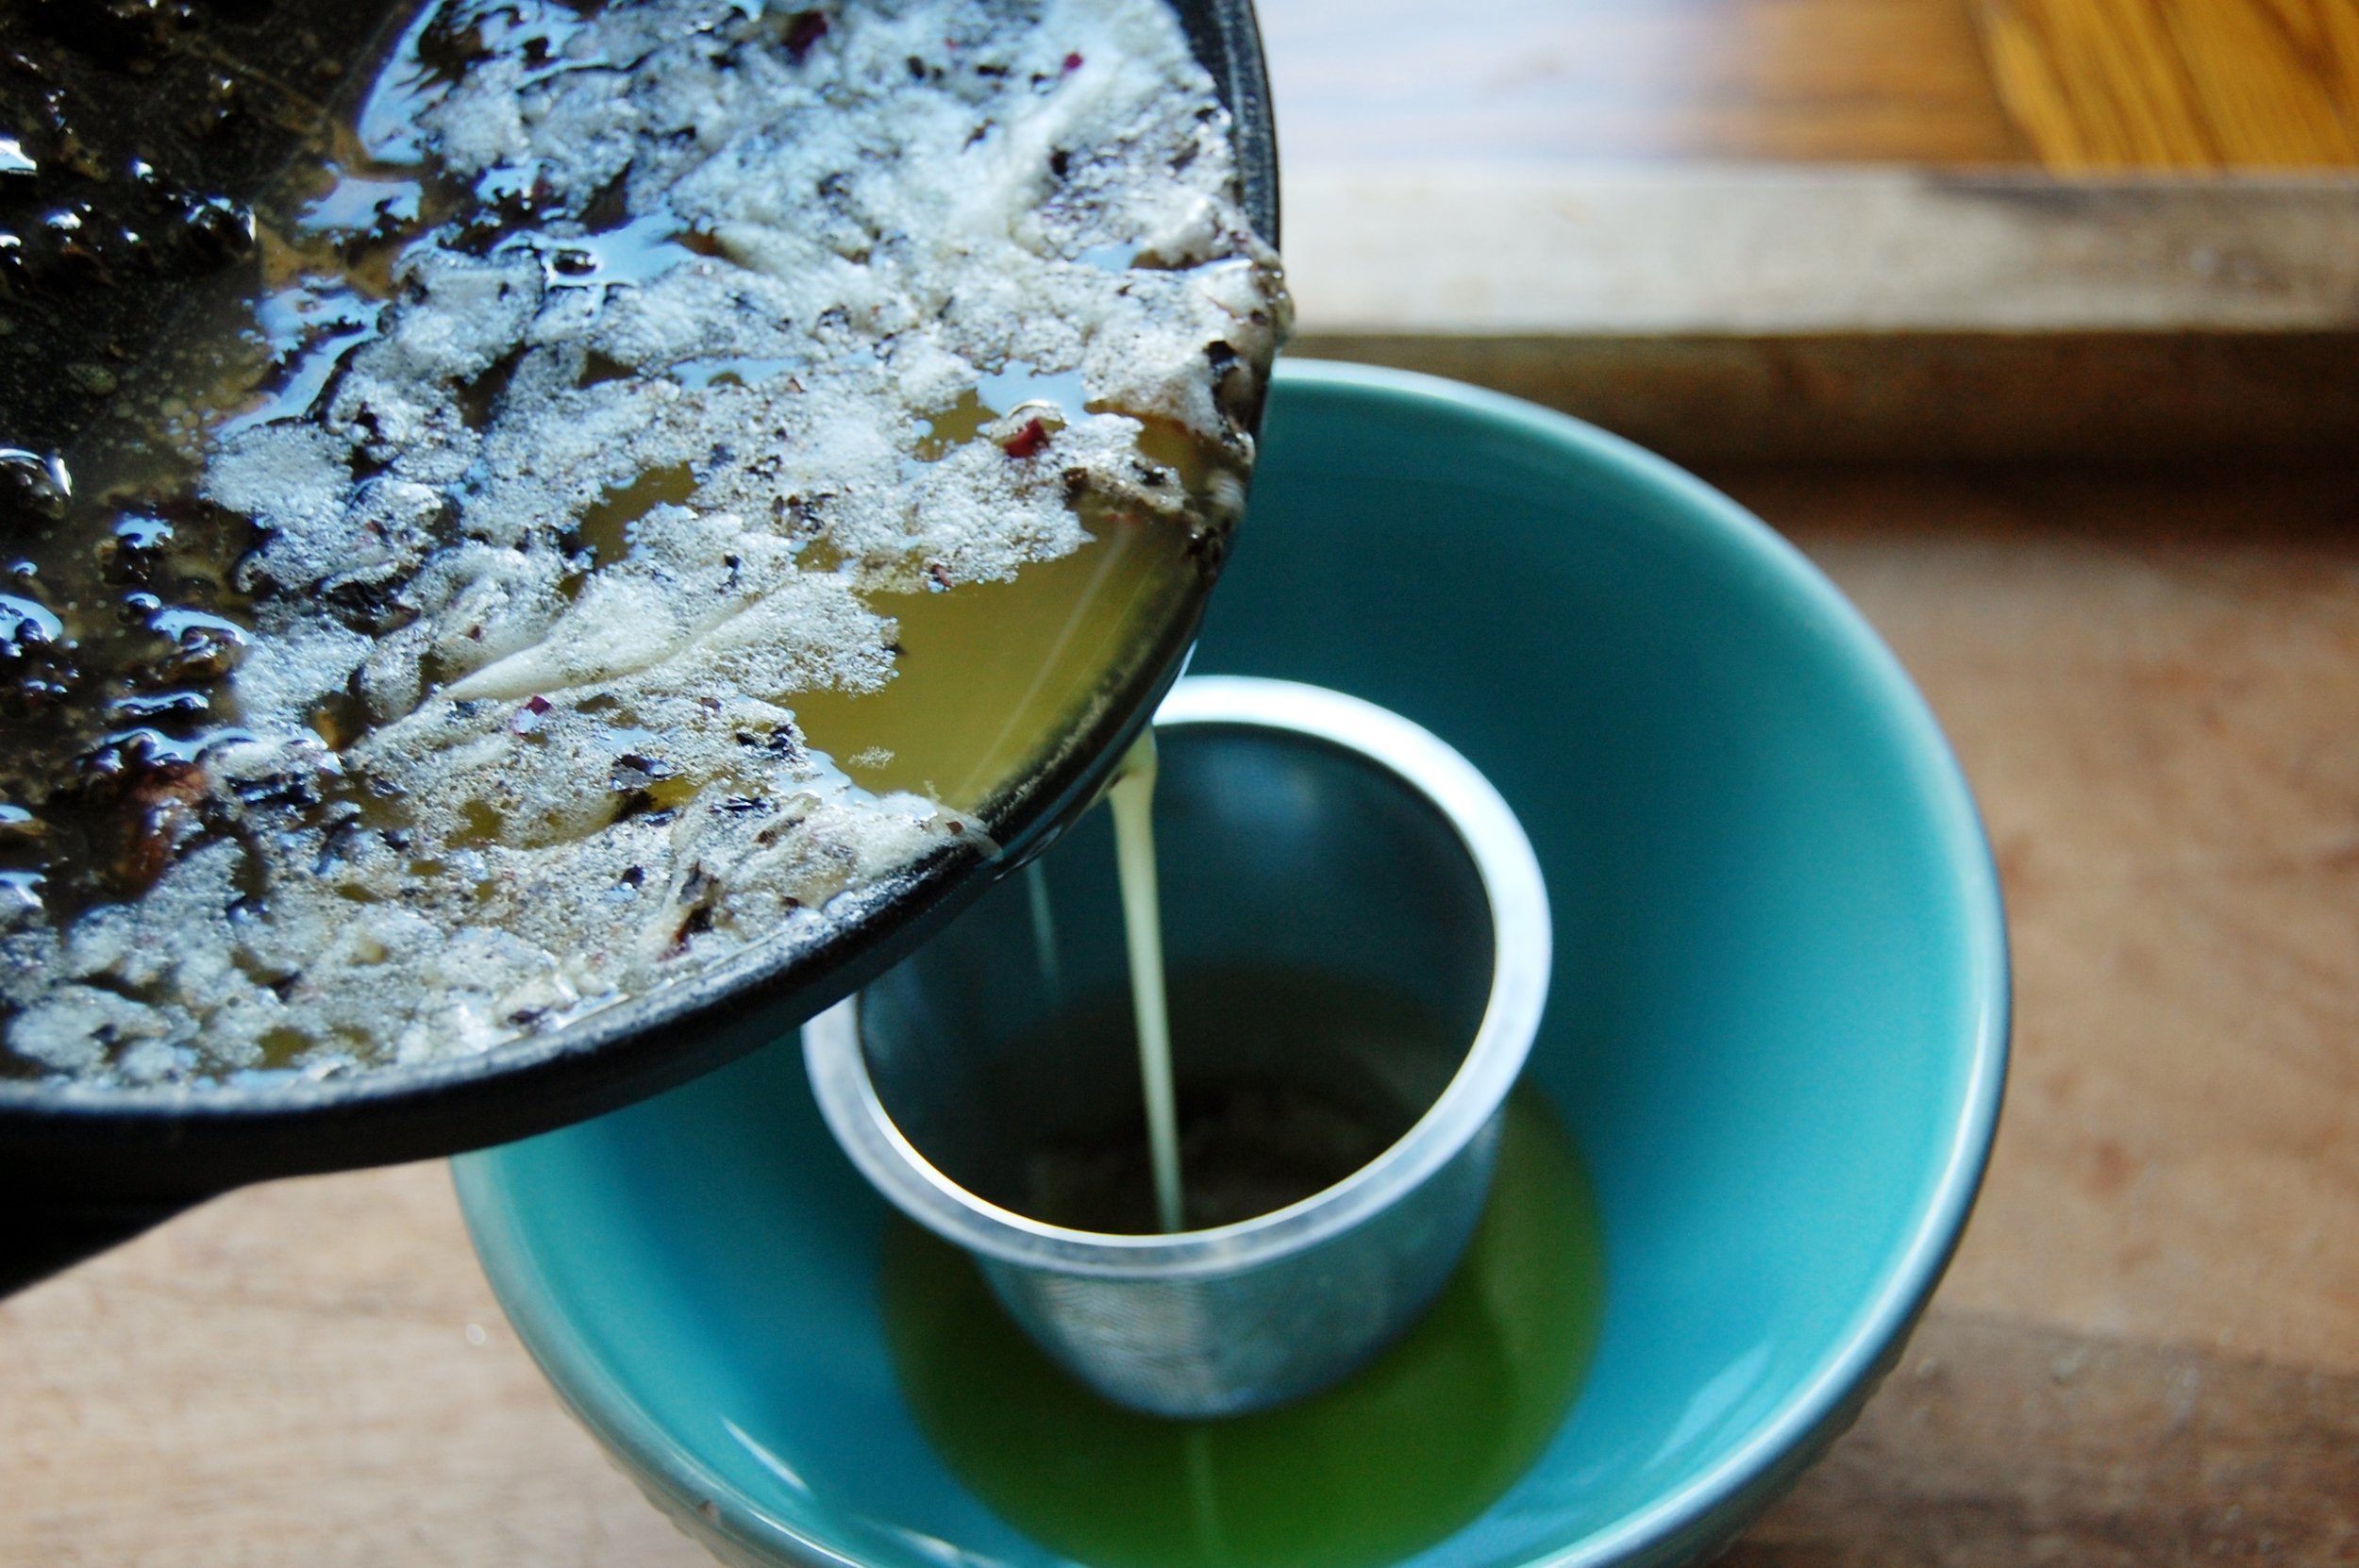
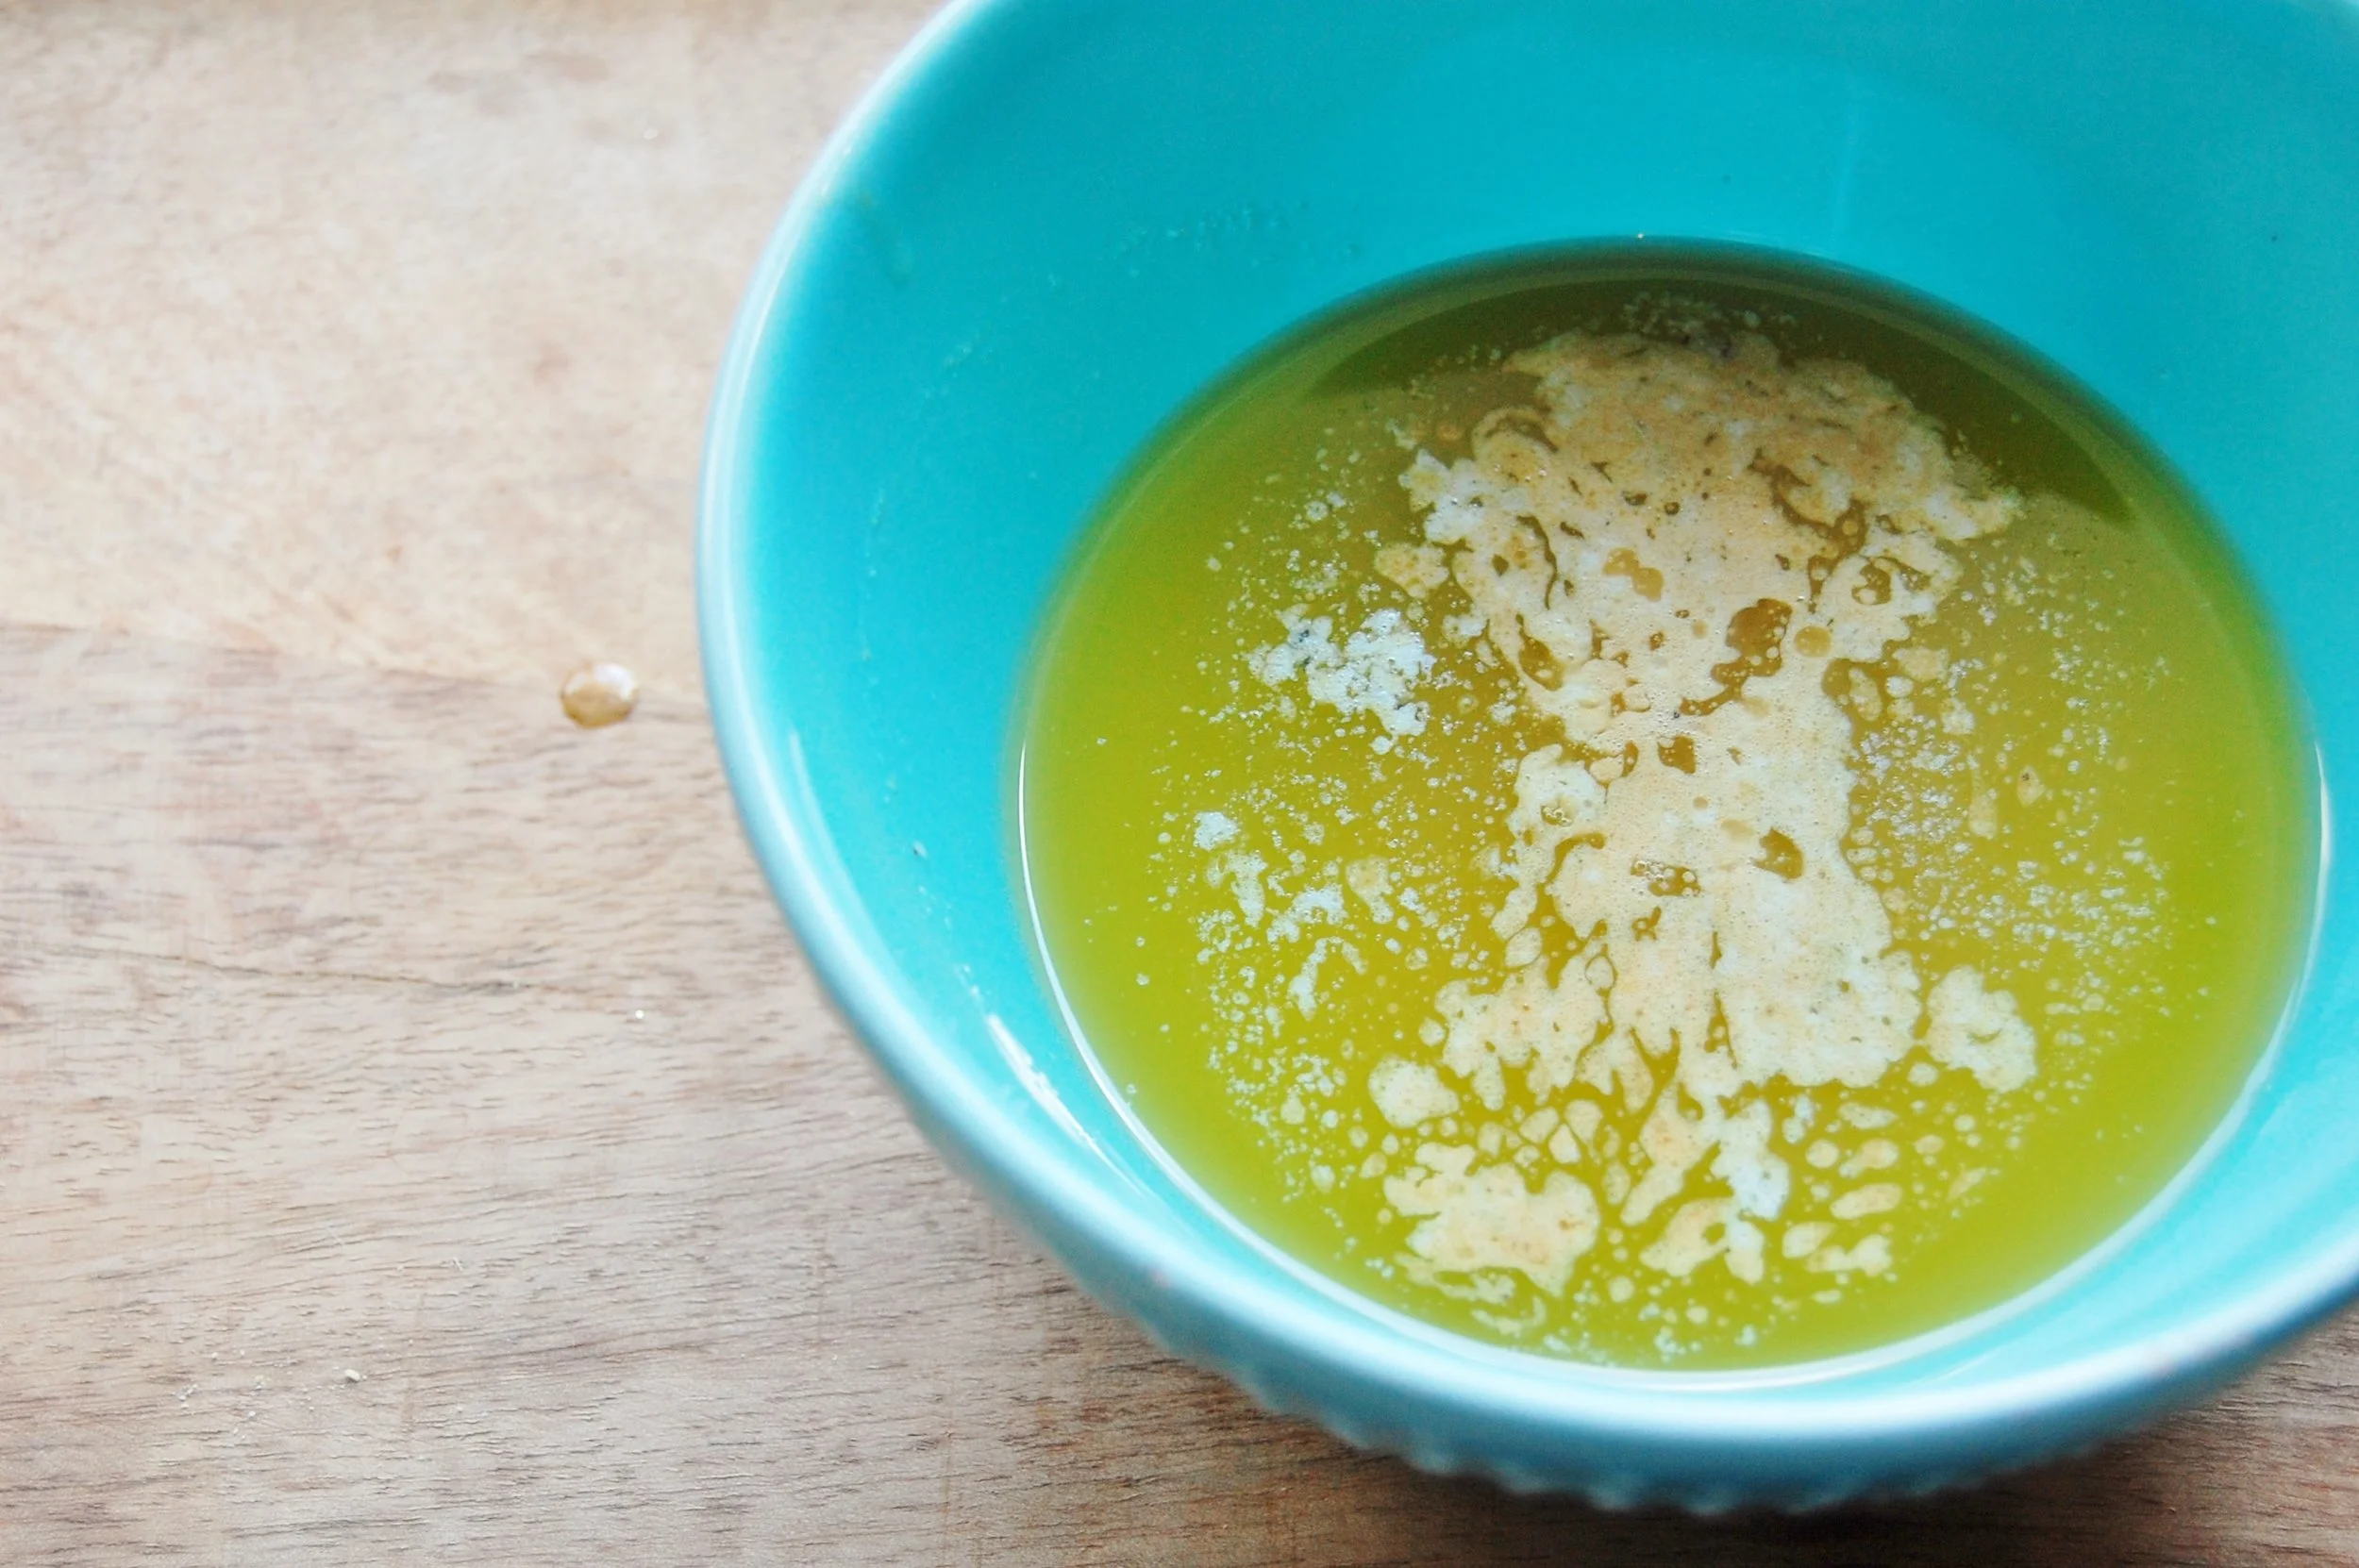
To make the tea infused butter, you need to melt 1 cup of unsalted butter. Once melted pour 2 - 4 tablespoons of Vanilla Rose tea into the butter. The amount of tea depends on your taste and if you want there to be a hint of flavor or a punch of flavor!

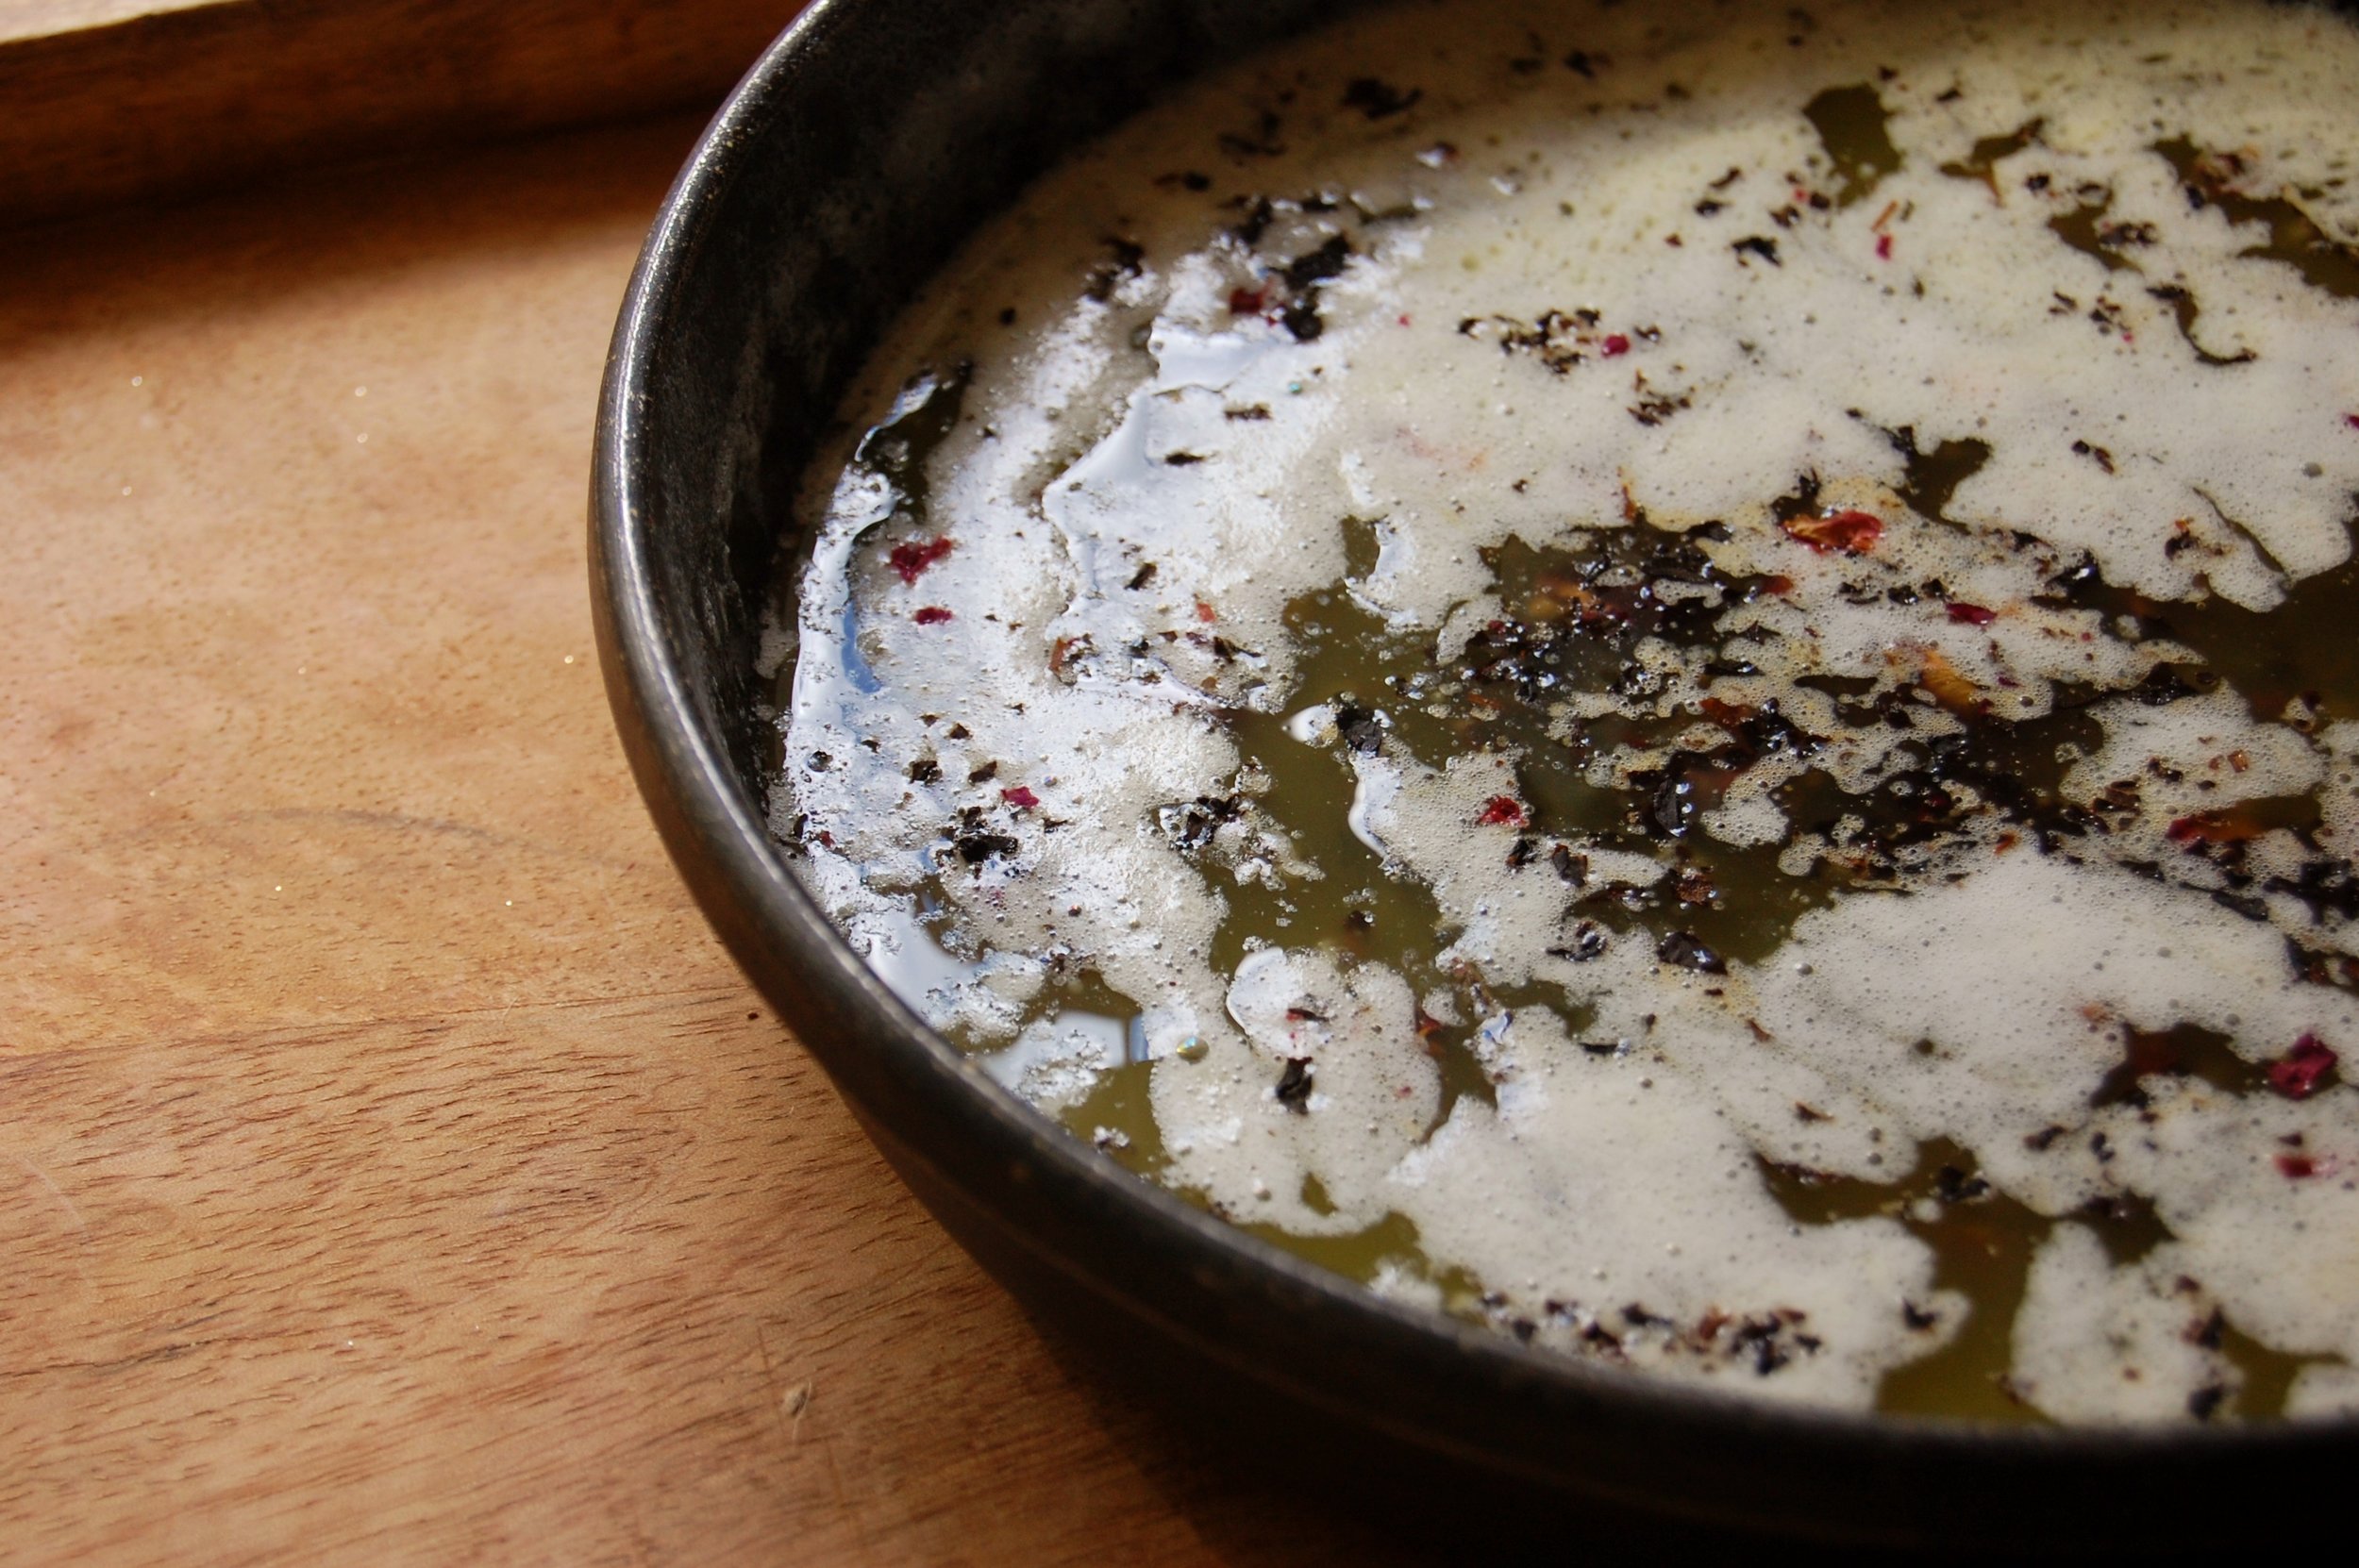
Let the tea brew for about 5-6 minutes in the butter. Once brewed strain the butter.
Let it sit and harden.
Your butter should feel like softened butter, you don't want it to be too liquid so make sure you leave time for it to solidify.


Instructions:
Heat oven to 350 degrees
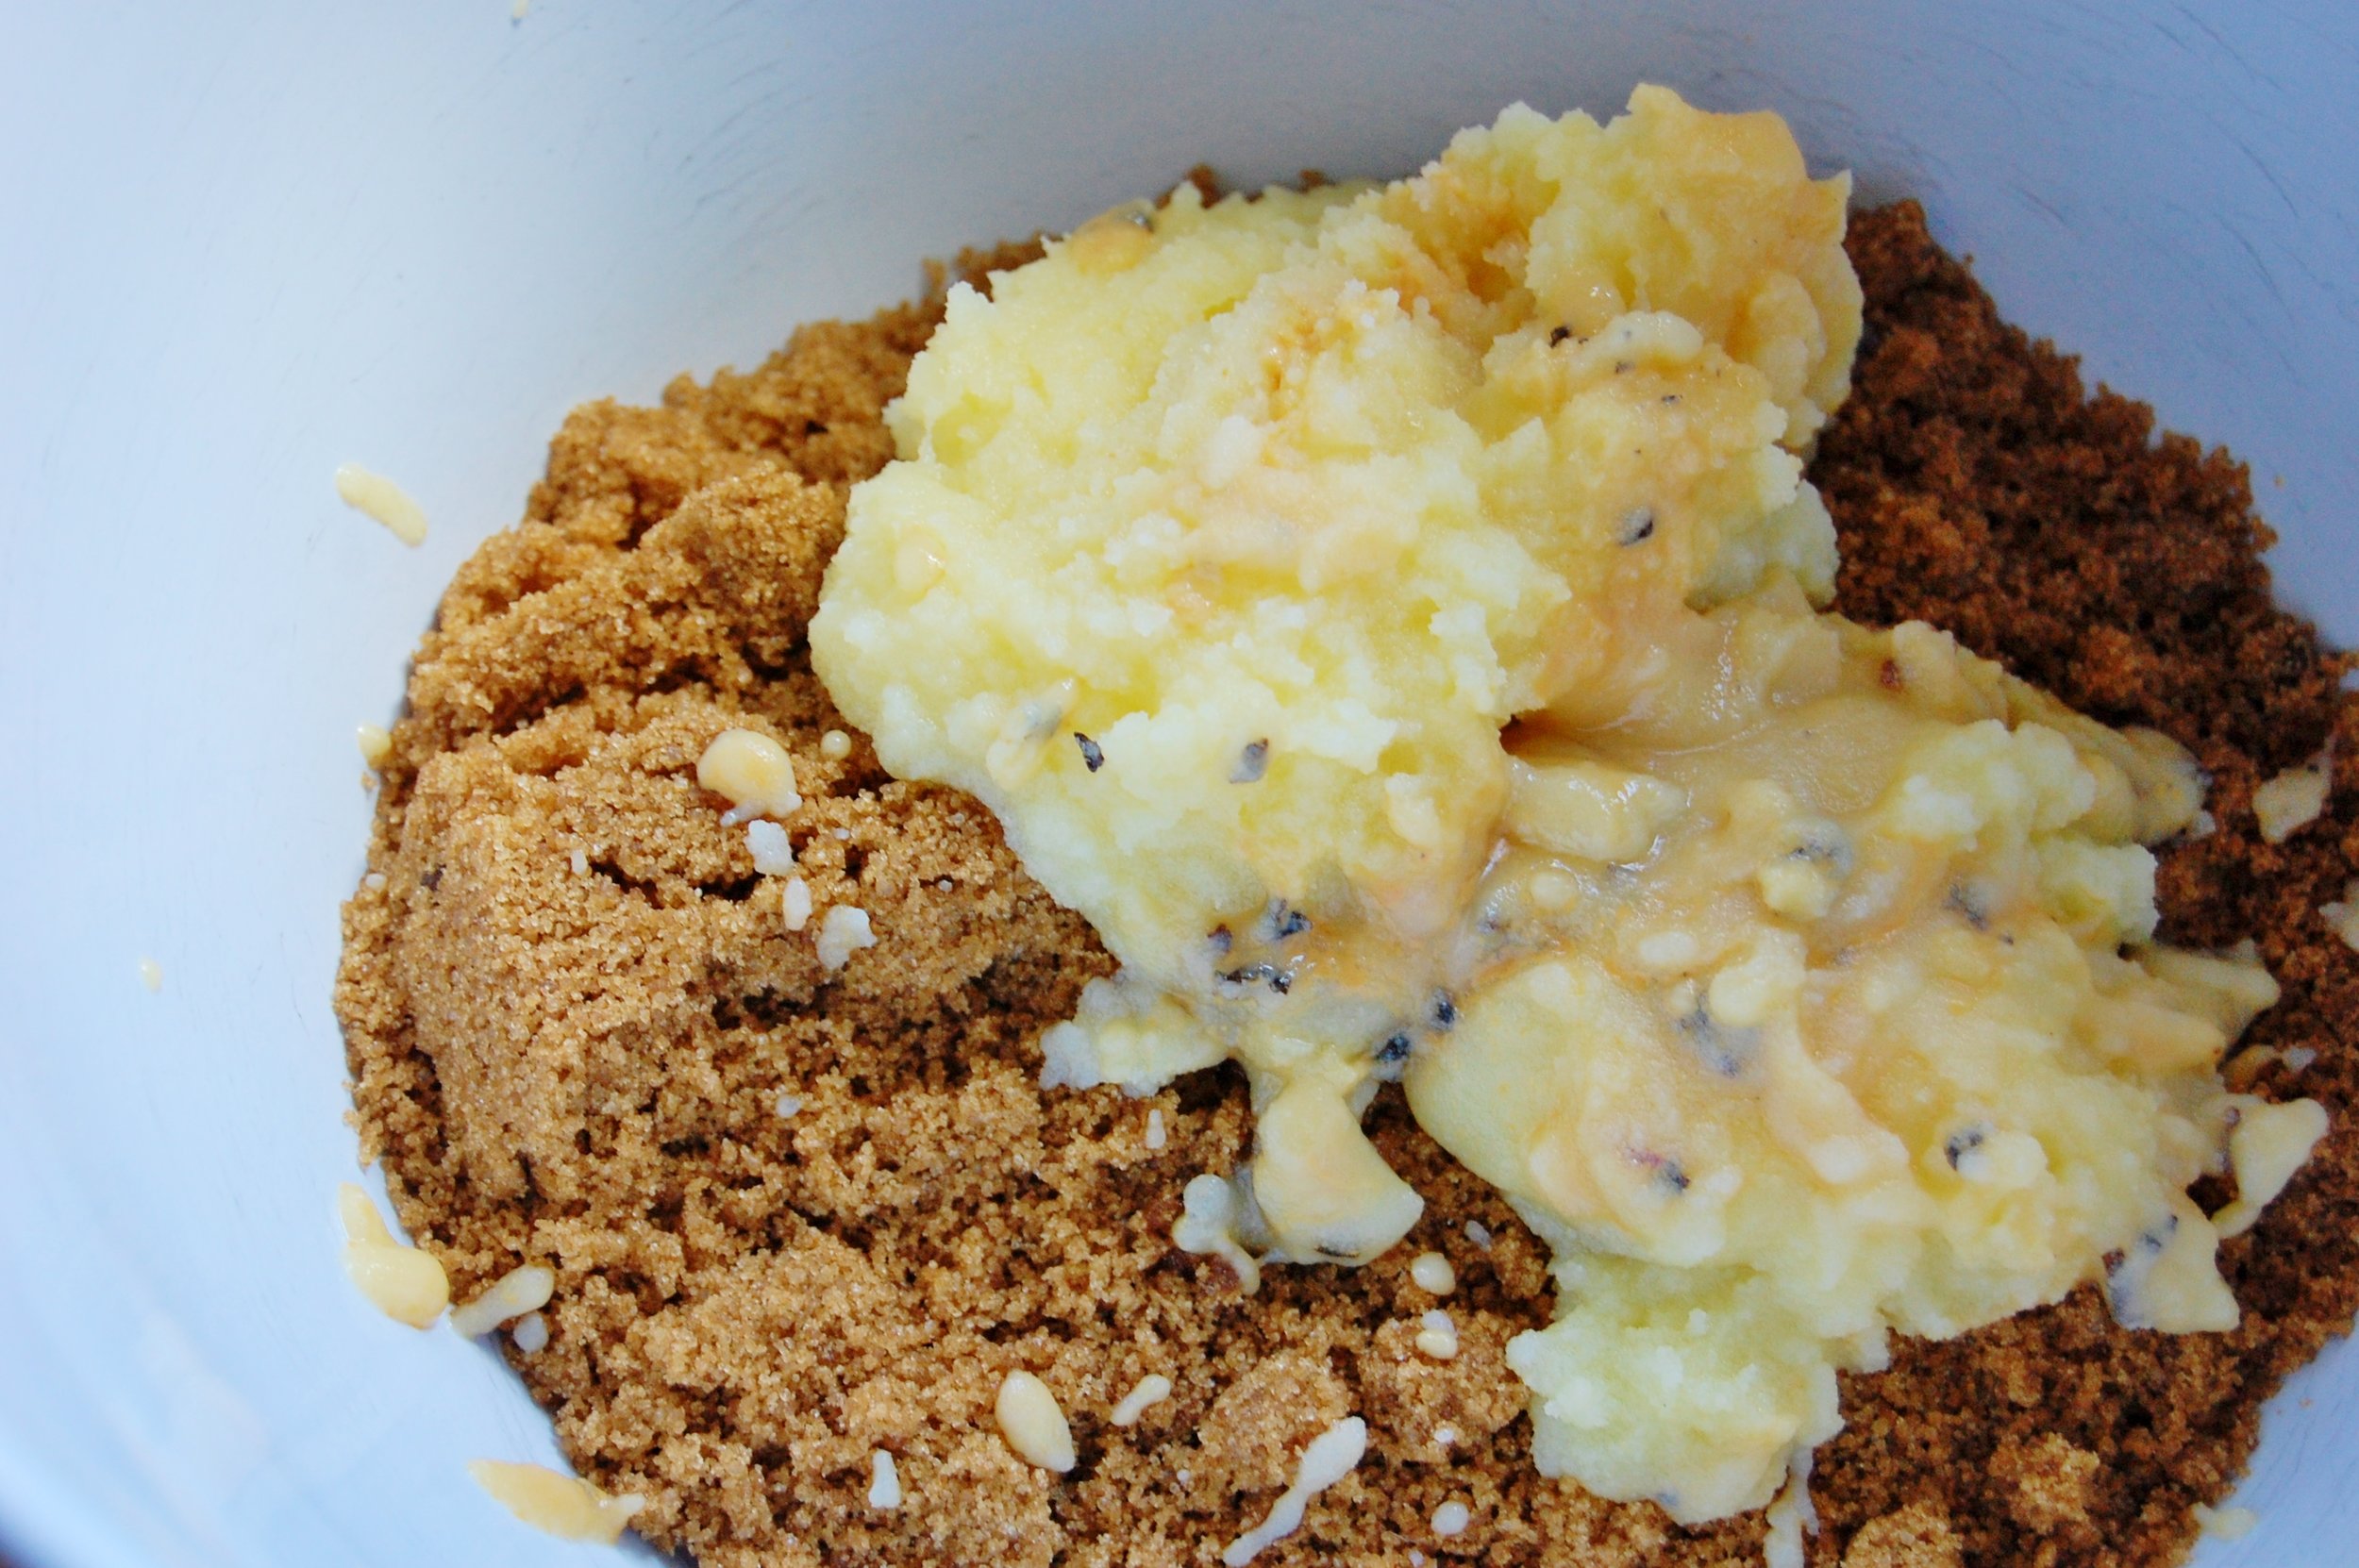
Cream the butter and sugar
Mix in the eggs
Add in the flour, baking soda and salt
Gently mix in the pistachios
Roll dough into 2 -3 in balls and place on a baking sheet
Bake foe 10-12 minutes until slightly golden
Remove cookies from oven and transfer gently to a cooling rack
Scarf down cookies!

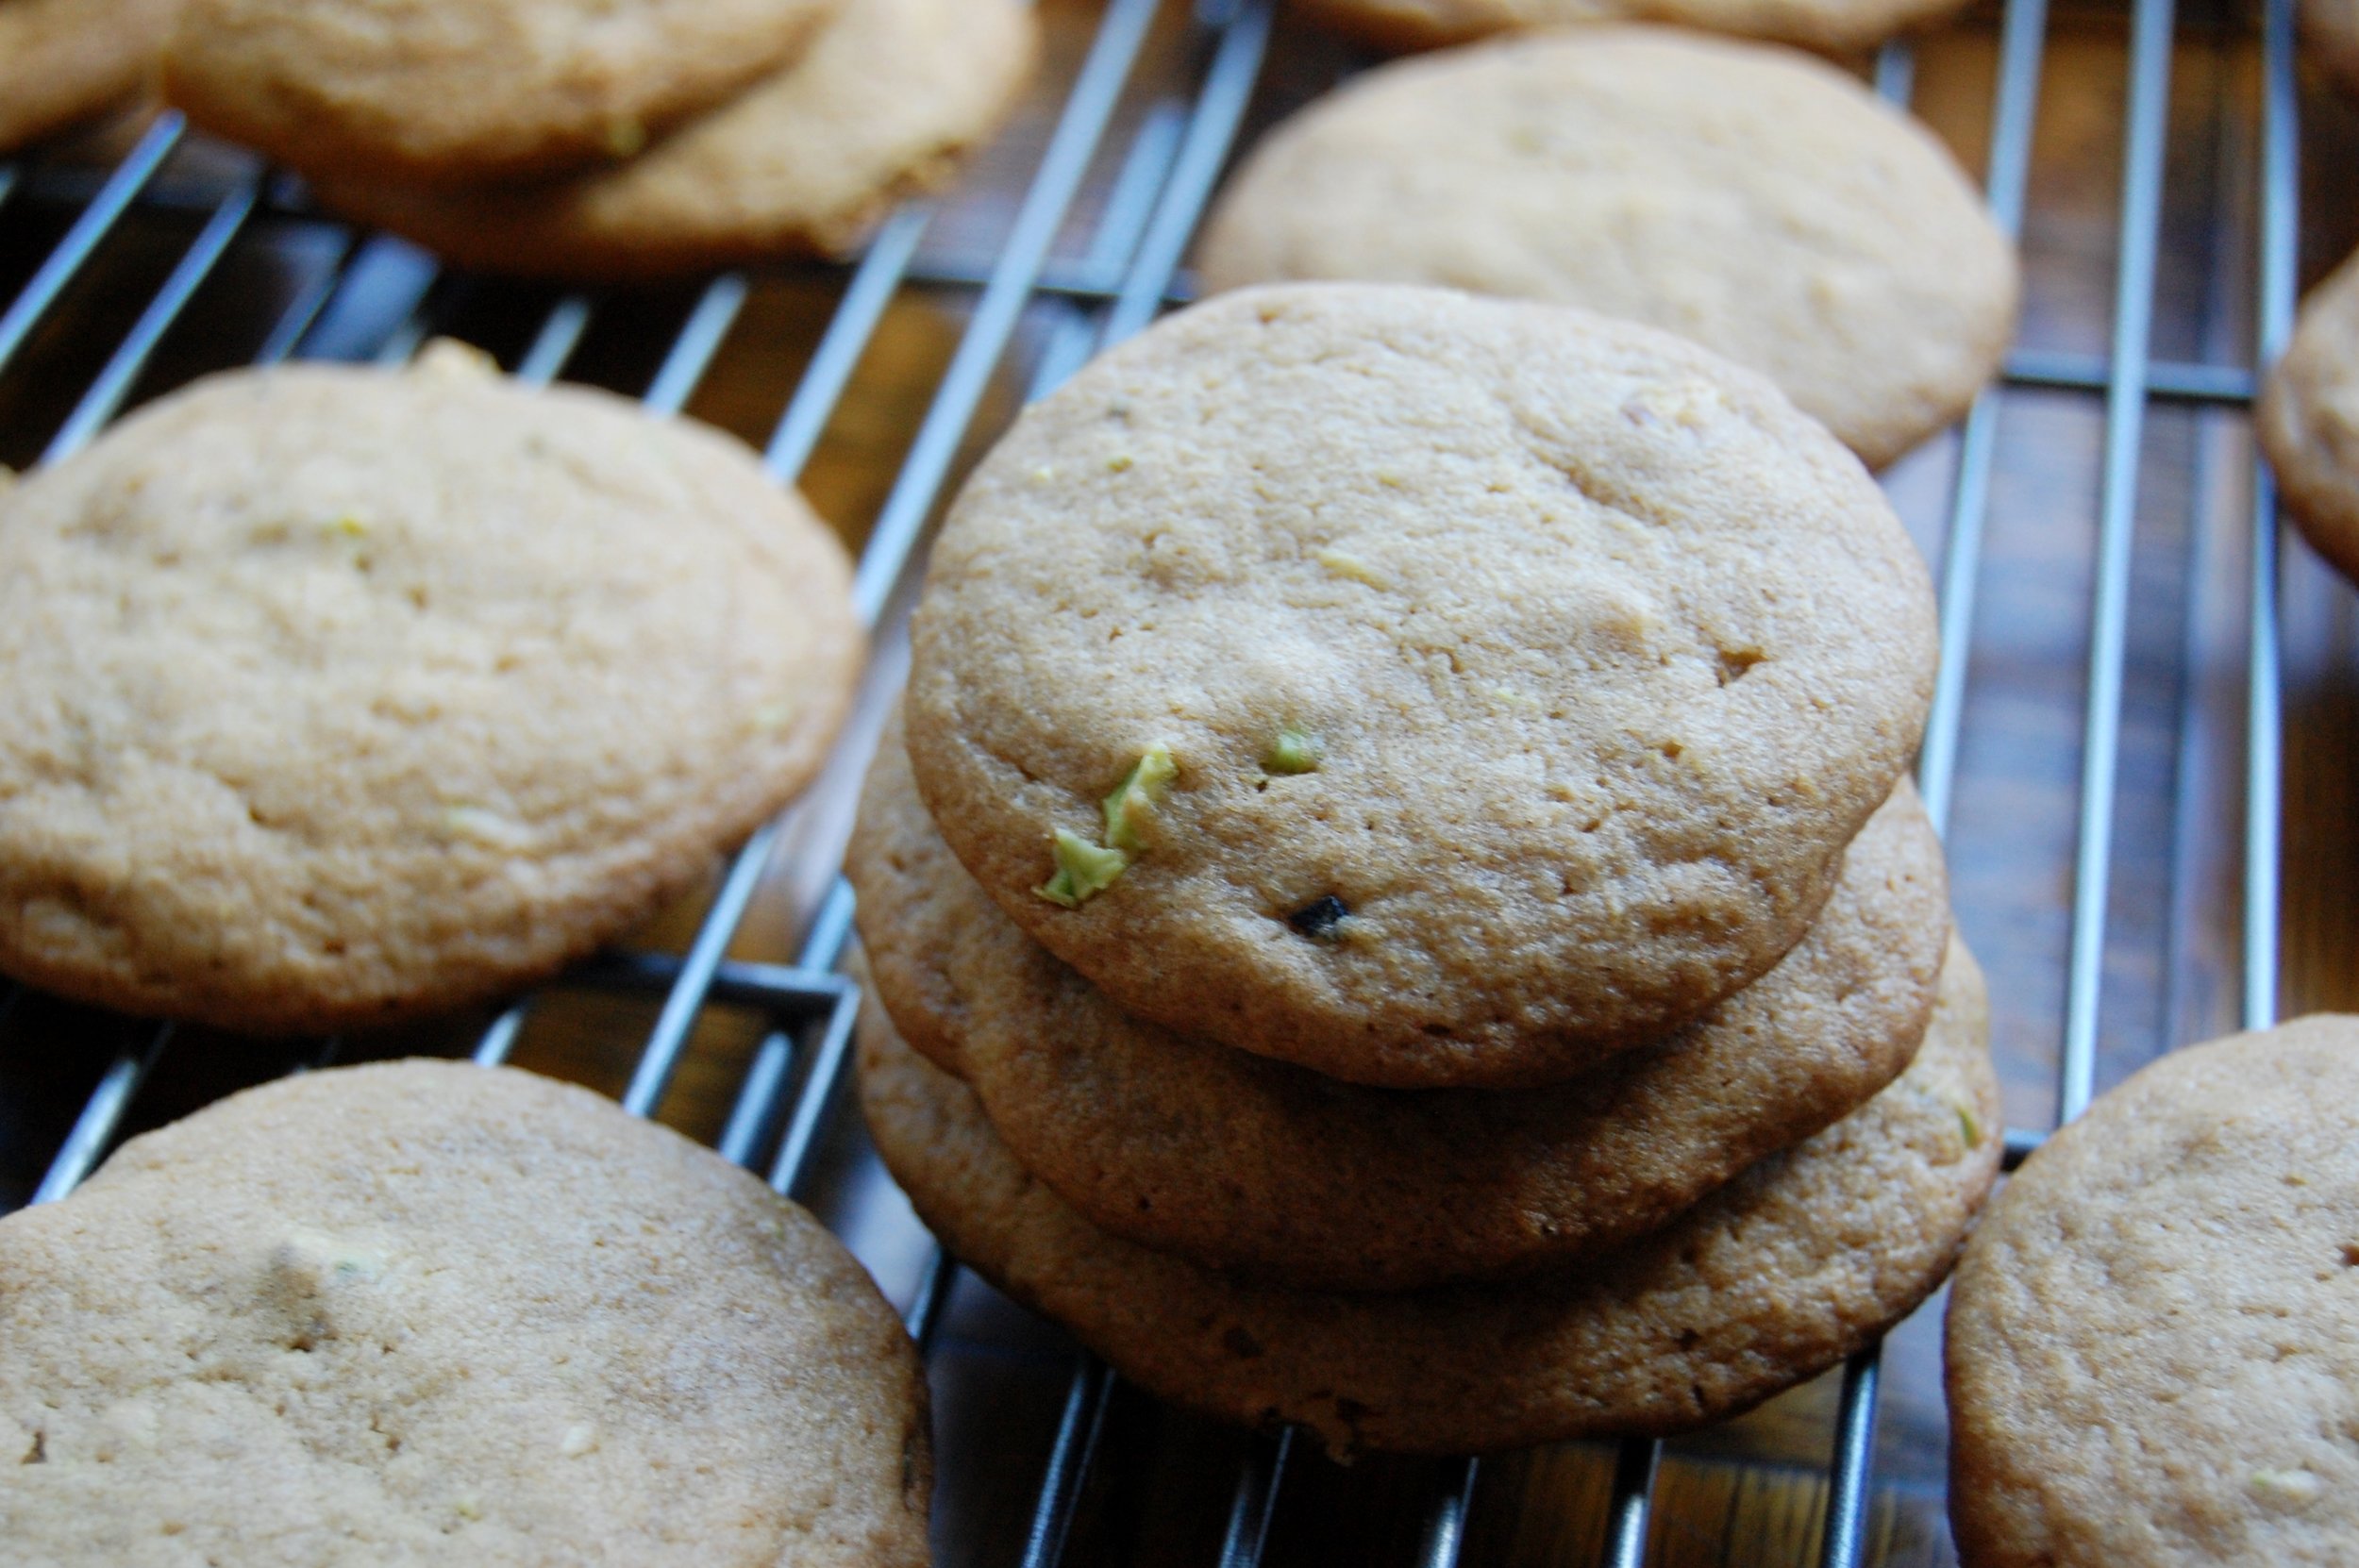
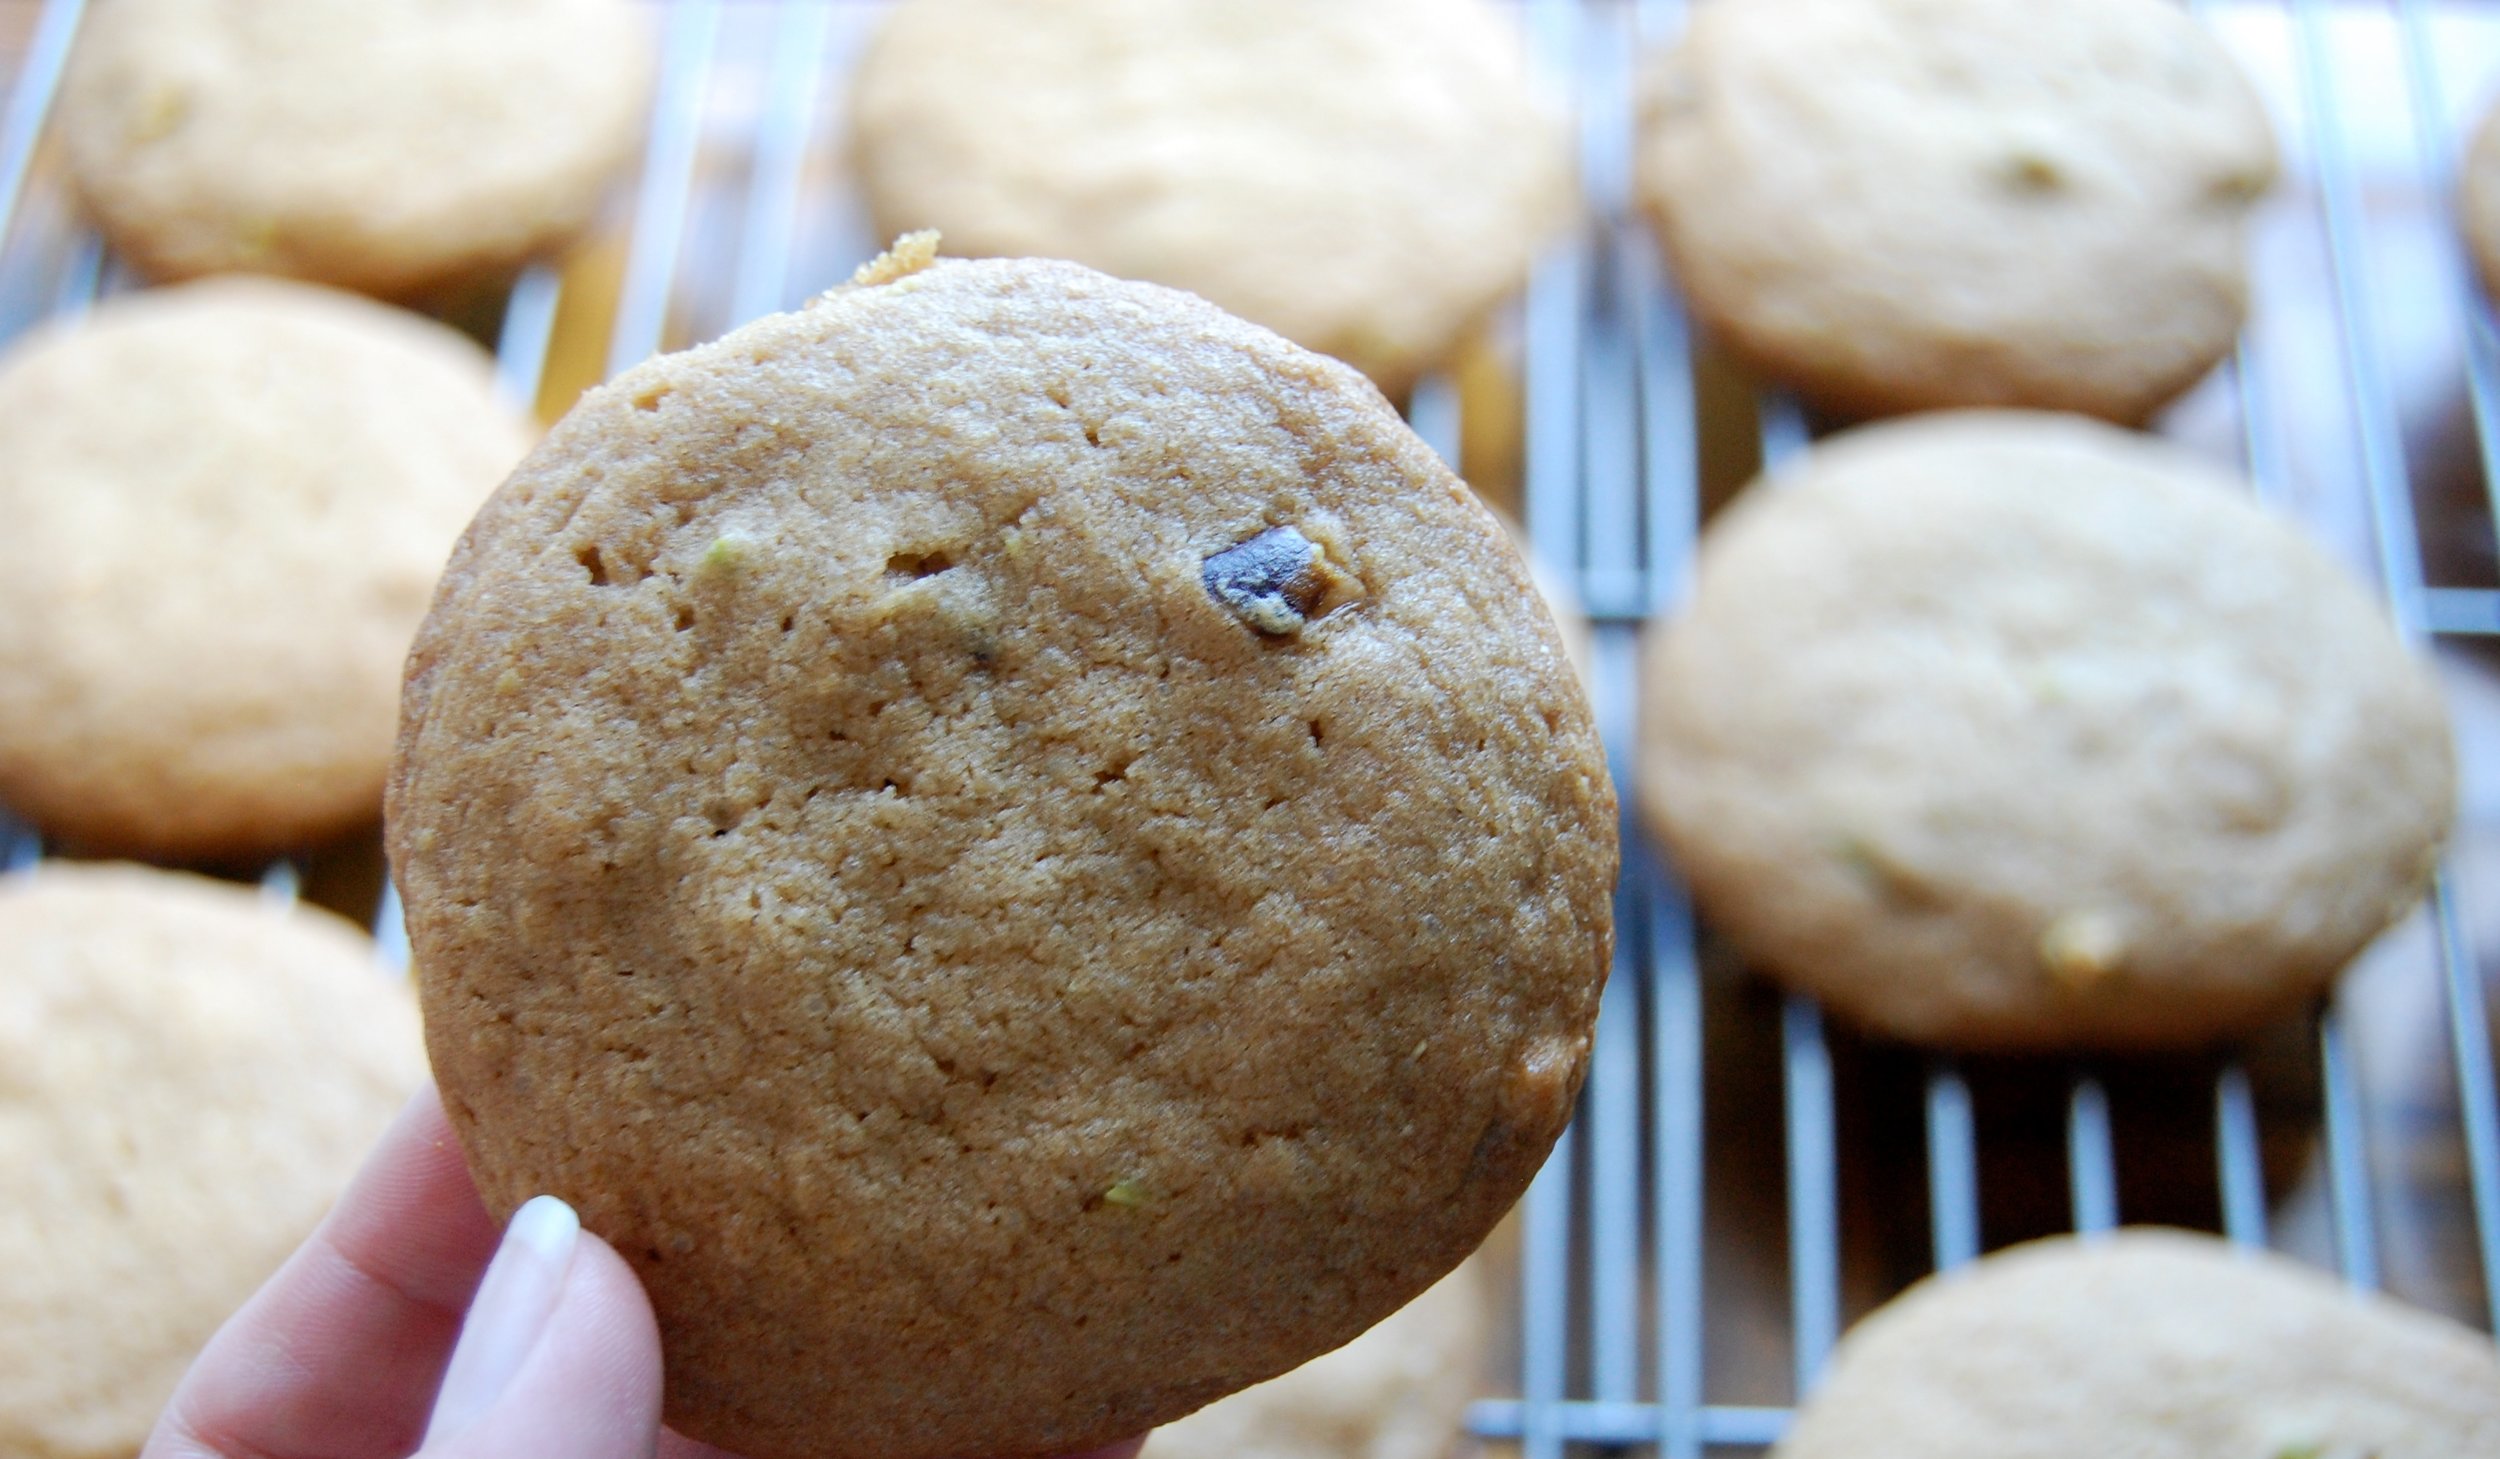
My favorite thing about these cookies is that they aren't as sweet as chocolate chip cookies because of the lack of chocolate chips. The pistachios give you a good crunch to contrast with the soft cookie. These are perfect for tea dunking!
Chocolate Honeybush Cake w/ Honey Buttercream Frosting
Honeybush.
Robert's (my guy <3) mother is from South Africa and she introduced me to rooibos tea and the traditions surrounding it. She recently mentioned honeybush which I had never tried but was interested in. Along with the Persian Plum Rose , Blossom sent me a sample of Honeybush as well.

I used one of my favorite recipes for chocolate cake and adapted it to make it extra honeybush infused!
This tea was fascinating, it almost looks like mulch and smells very earthy. From the scent, I did not expect the taste in the cake.

While I was mixing the cake and also while I was baking it, the brewed honeybush had such a strong aroma it was filling the apartment. It was wonderful!

Honeybush infused milk.

Hot honeybush tea.
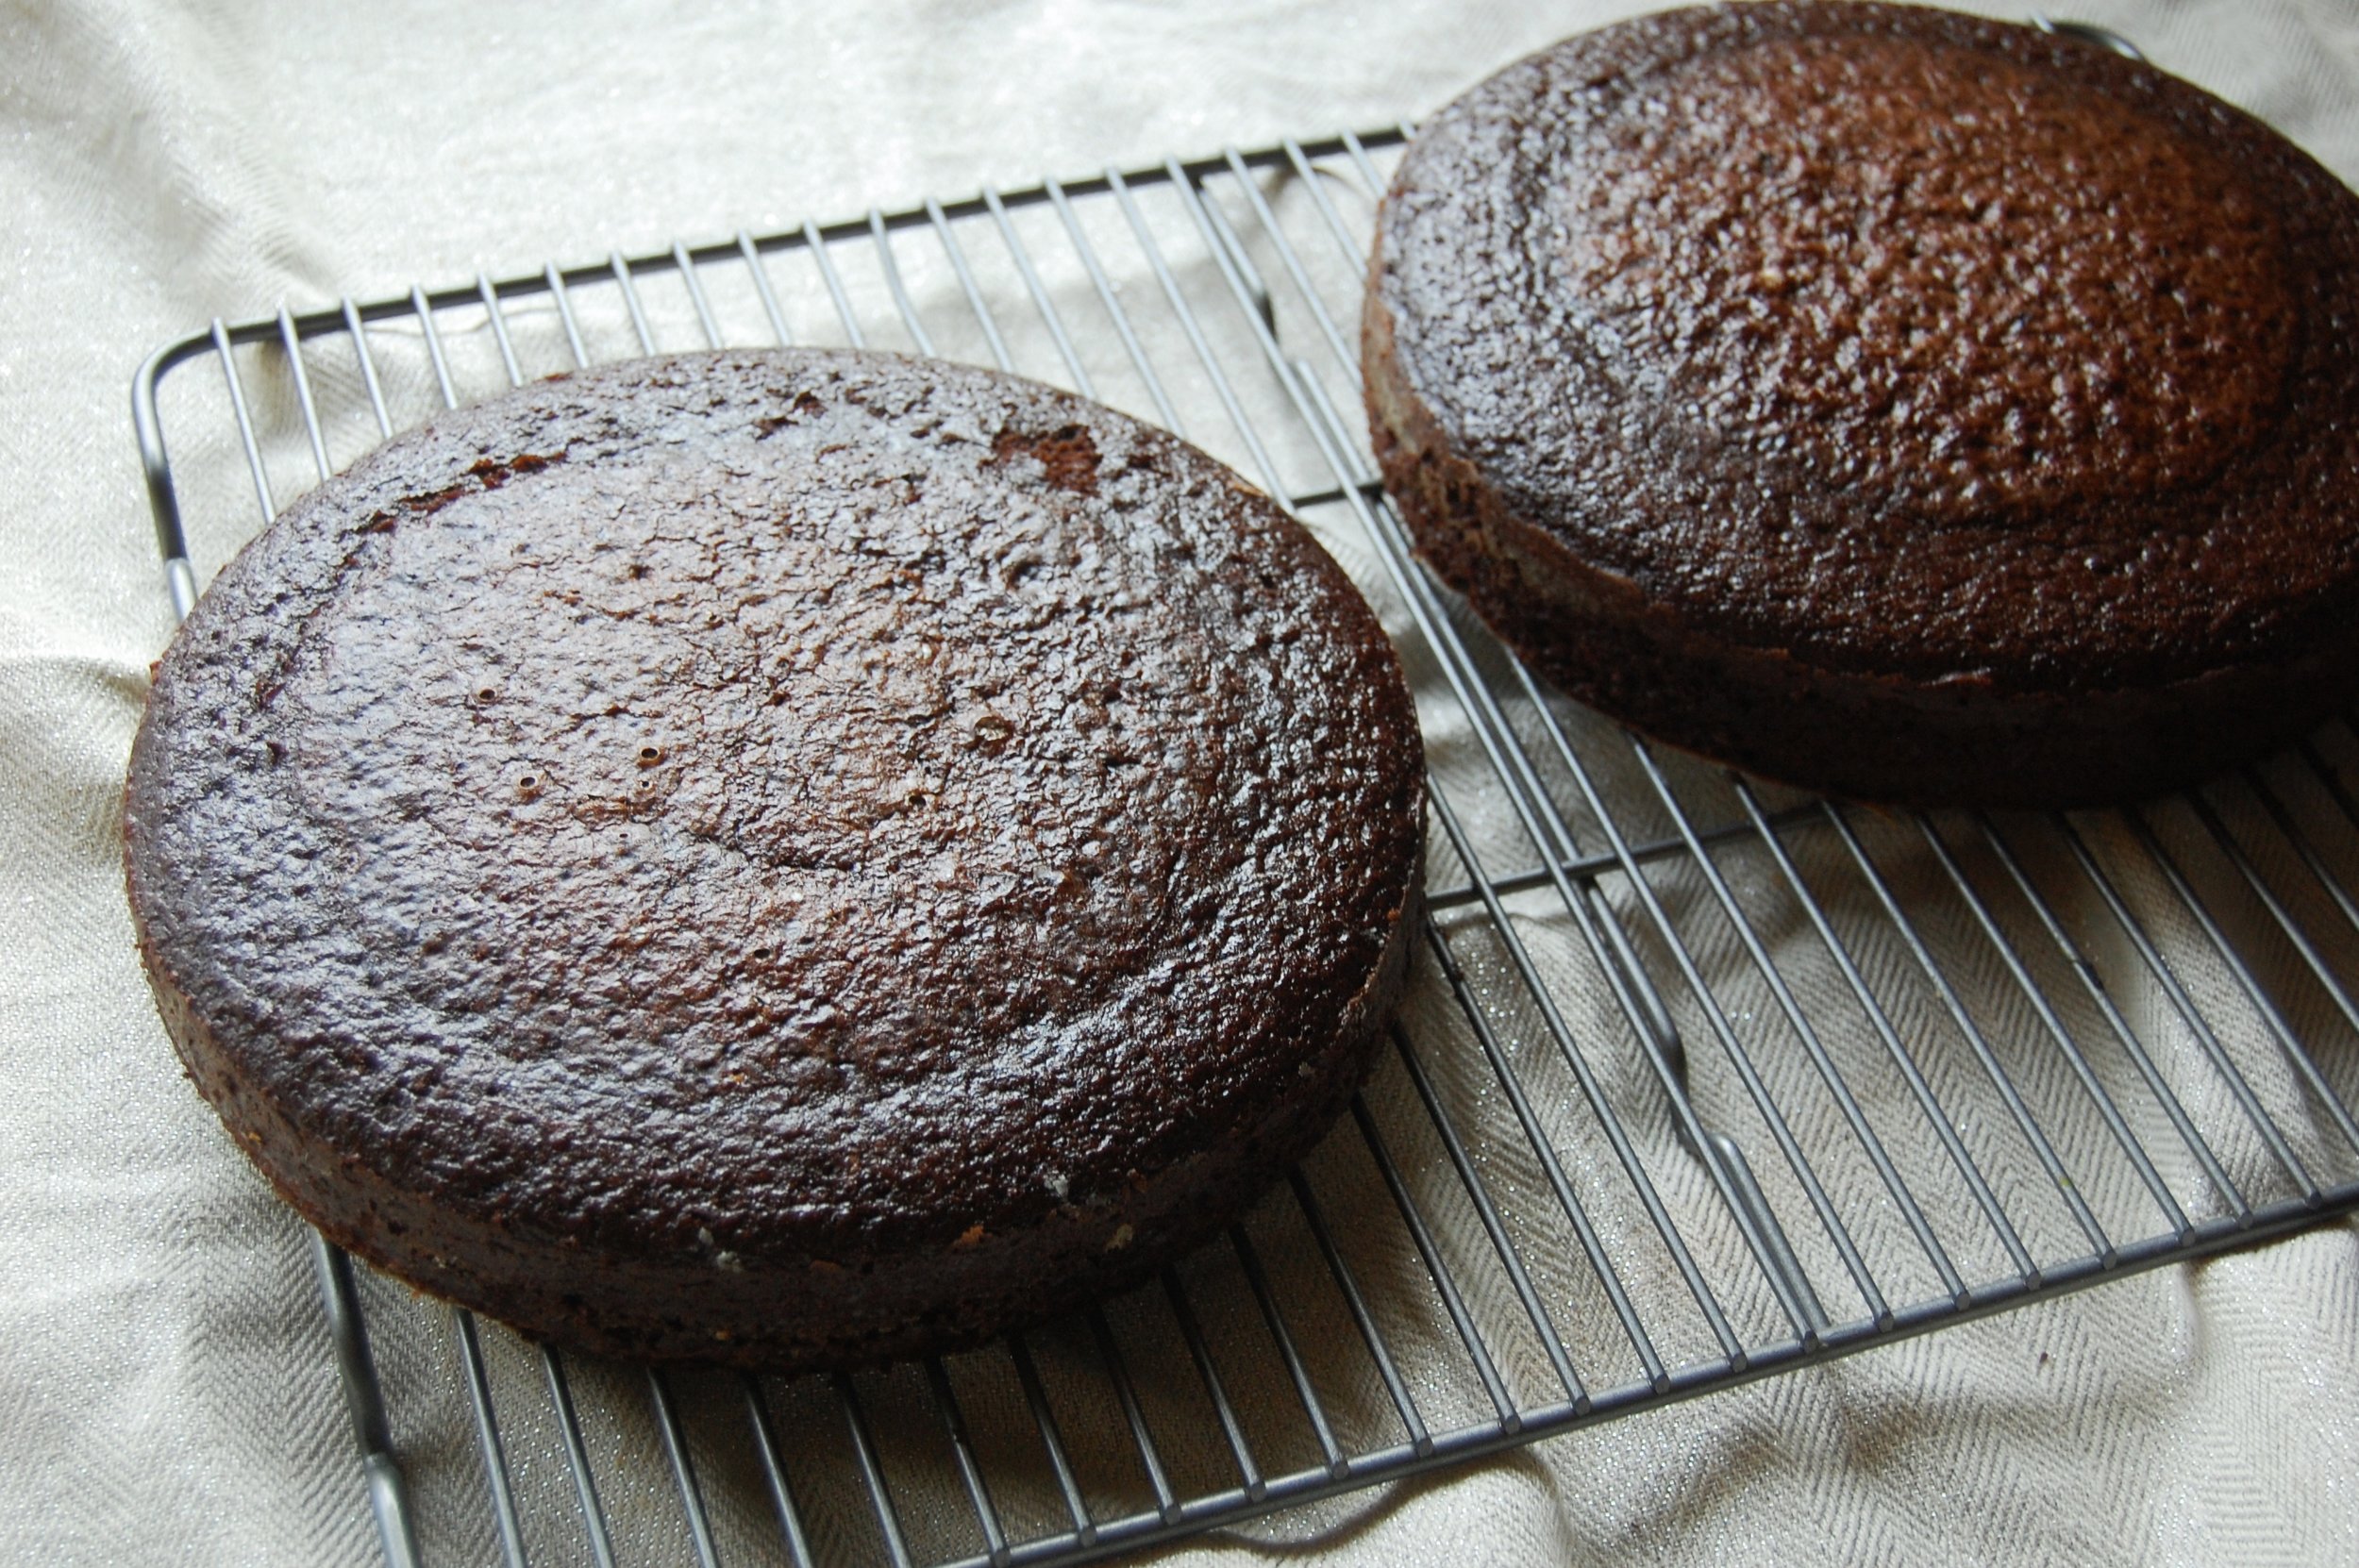
Two layers of honeybush goodness.
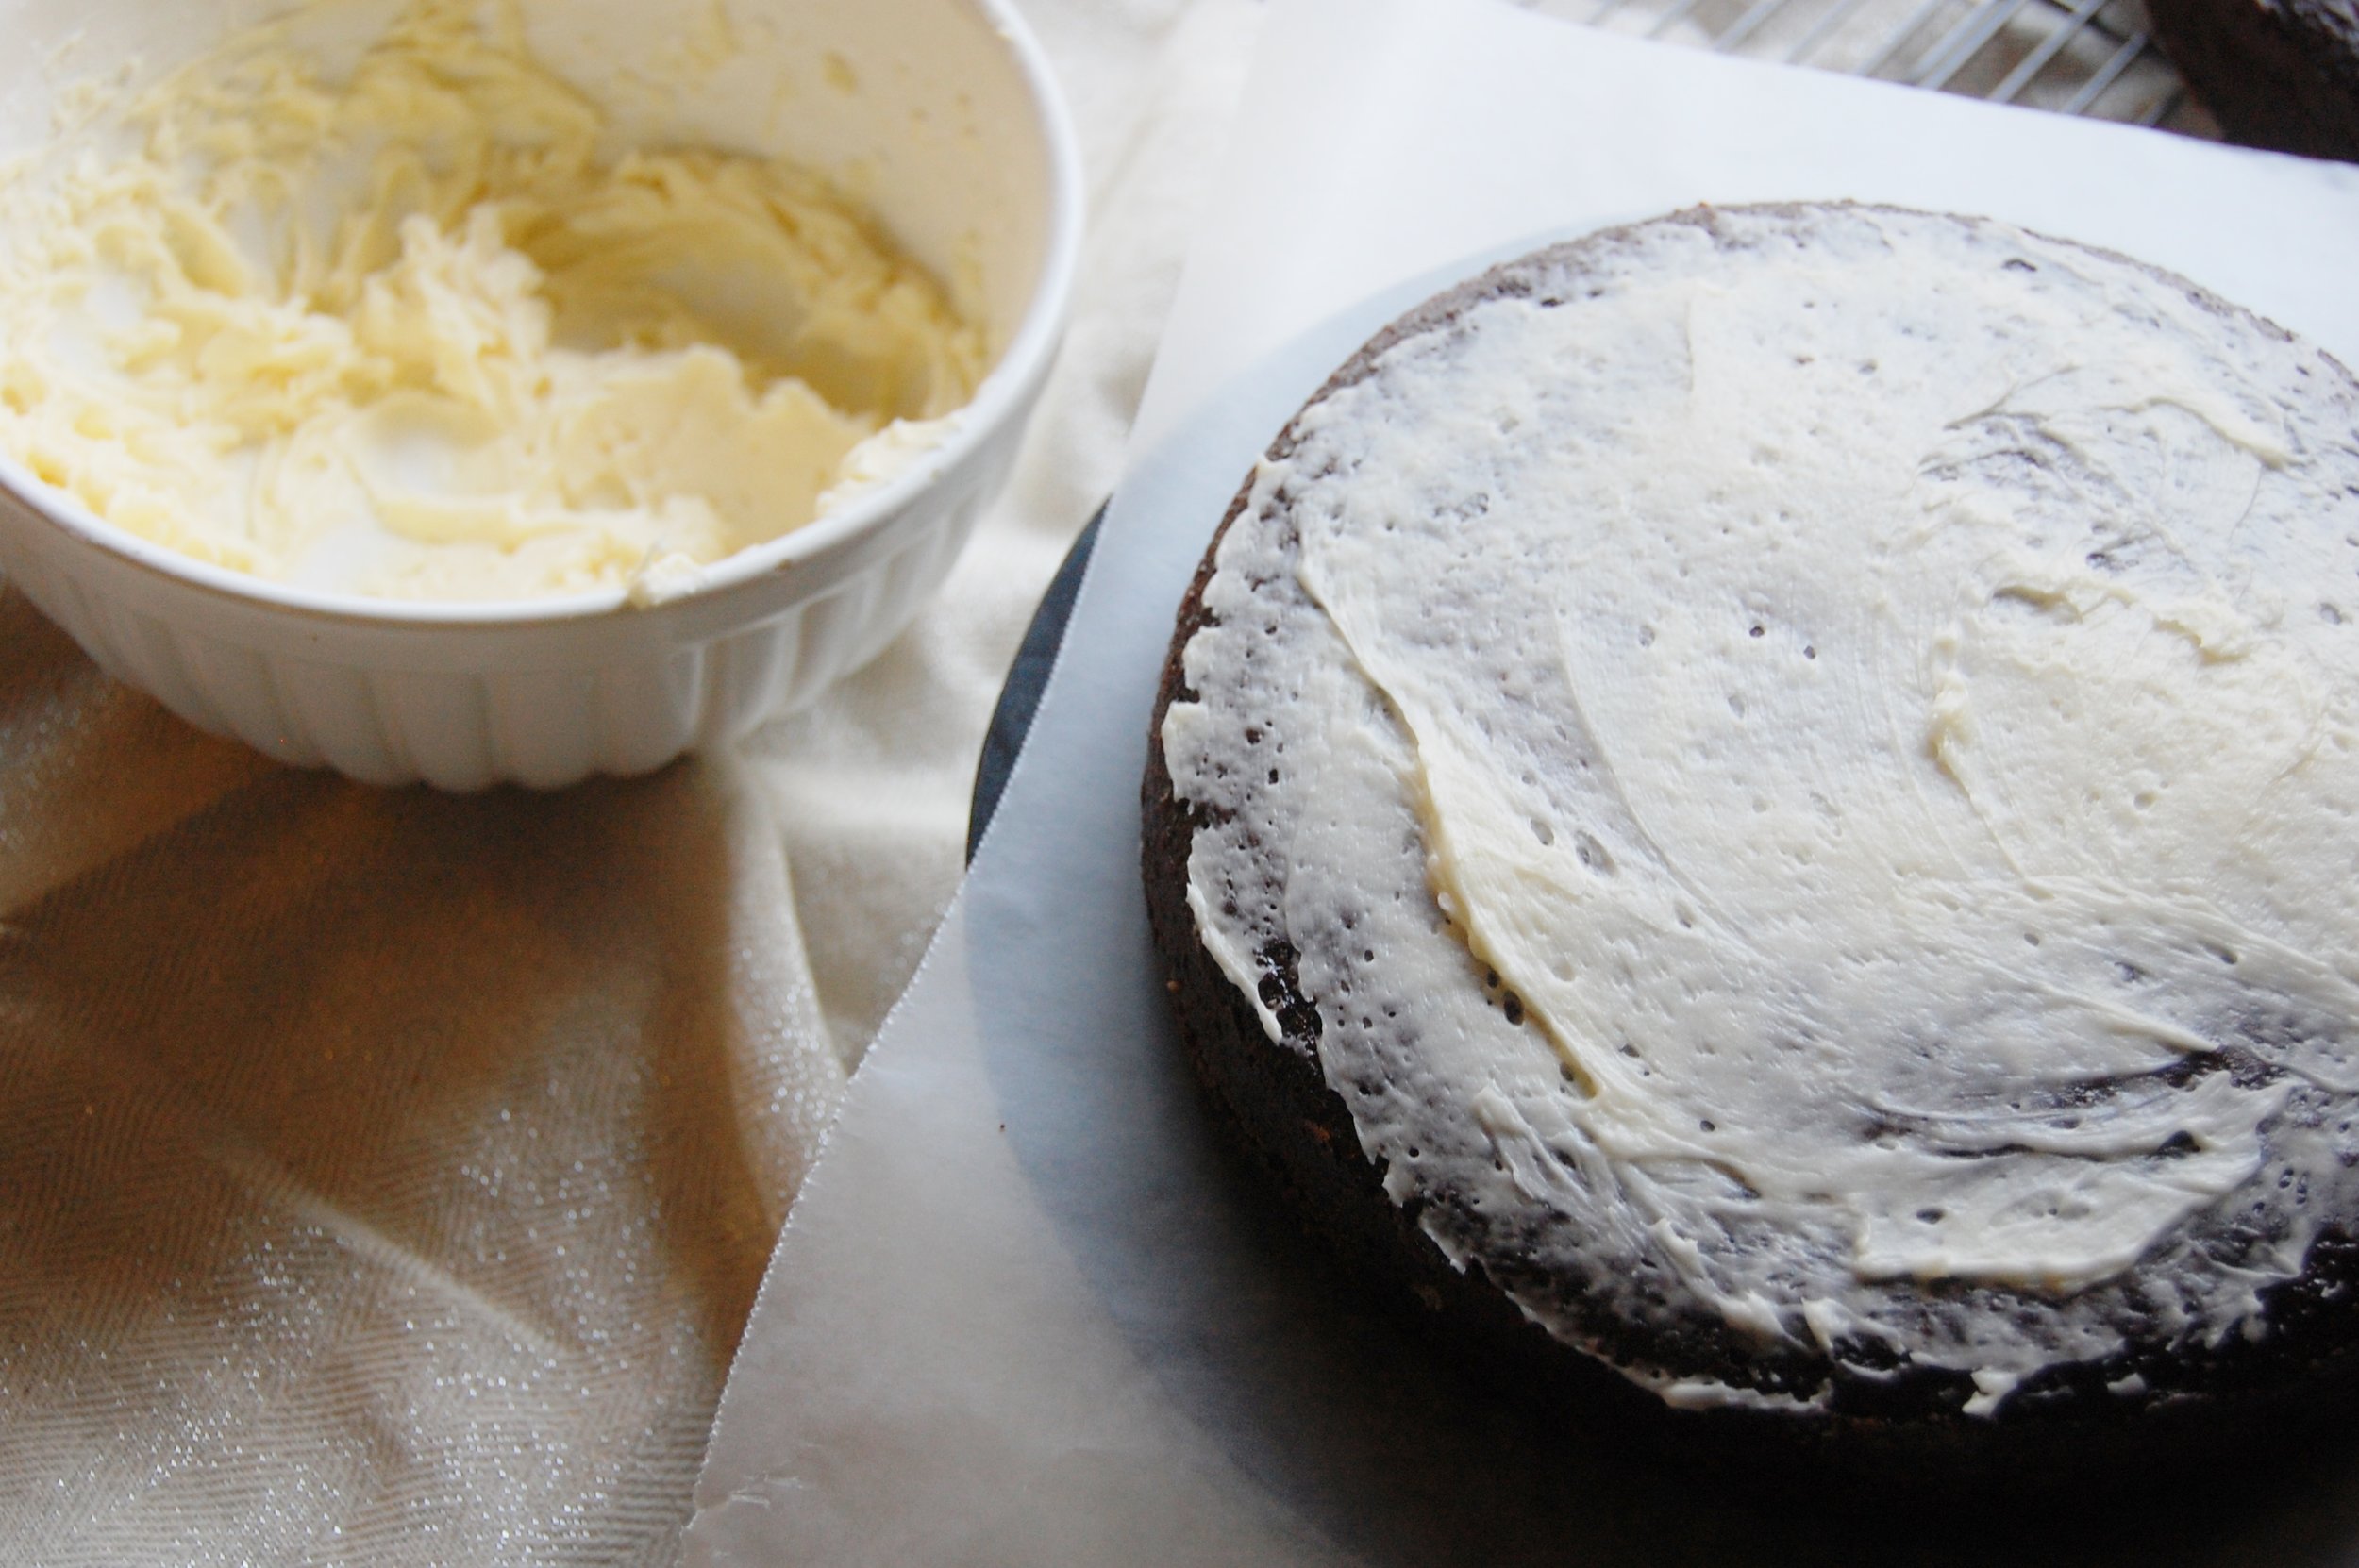
I decided to top this off with a honey buttercream frosting that I've made before and is SO good.


Cake:
2 cups brown sugar
1 3/4 cup flour
3/4 cup cocoa powder
1 1/2 teaspoon baking powder
1 1/2 teaspoon baking soda
2 eggs
1 cup milk infused with honeybush
1/2 cup plain yogurt
2 teaspoons vanilla
1 cup hot Honeybush
pinch of salt
Frosting:
2 sticks of butter, room temperature
4 tablespoons honey
1 cups powdered sugar*
What I like to do is mix the honey and the butter then gradually add in powdered sugar little by little until I like the consistency of the frosting. So it may be less than 1 cup or more based on preference. Don't forget to taste test too because frosting gets sweet fast!
Cake Instructions
1. Prepare the honeybush infused milk by heating the 1 cup of milk. Do not let it boil. Drop 2 tablespoons or more of honeybush into the tea depending on how strong you want it. Let it sit for several minutes. Pour the milk through a strainer and let cool.
2. Mix all the dry ingredients together.
3. Add in eggs, yogurt, vanilla and honeybush infused milk.
4. Boil water and pour one cup of boiling water in a cup. Place 1-2 tablespoons of honeybush in a teabag and place in boiling water. Let it brew for a few minutes then pour hot, brewed tea into cake mixture. Gently mix.
5. Pour batter (will be thin) into two 9 inch pans that are greased and floured. Bake at 350 for 30-35 minutes.
6. Let cool in pans for 10 minutes then place on a wire rack to cool completely. Once cooled, frost with honey buttercream. I used a thin layer to make them almost "naked" but feel free to use more!
Do you have a favorite tea infused sweet?!
Matcha Candy Experiment!
ChocoMatcha.
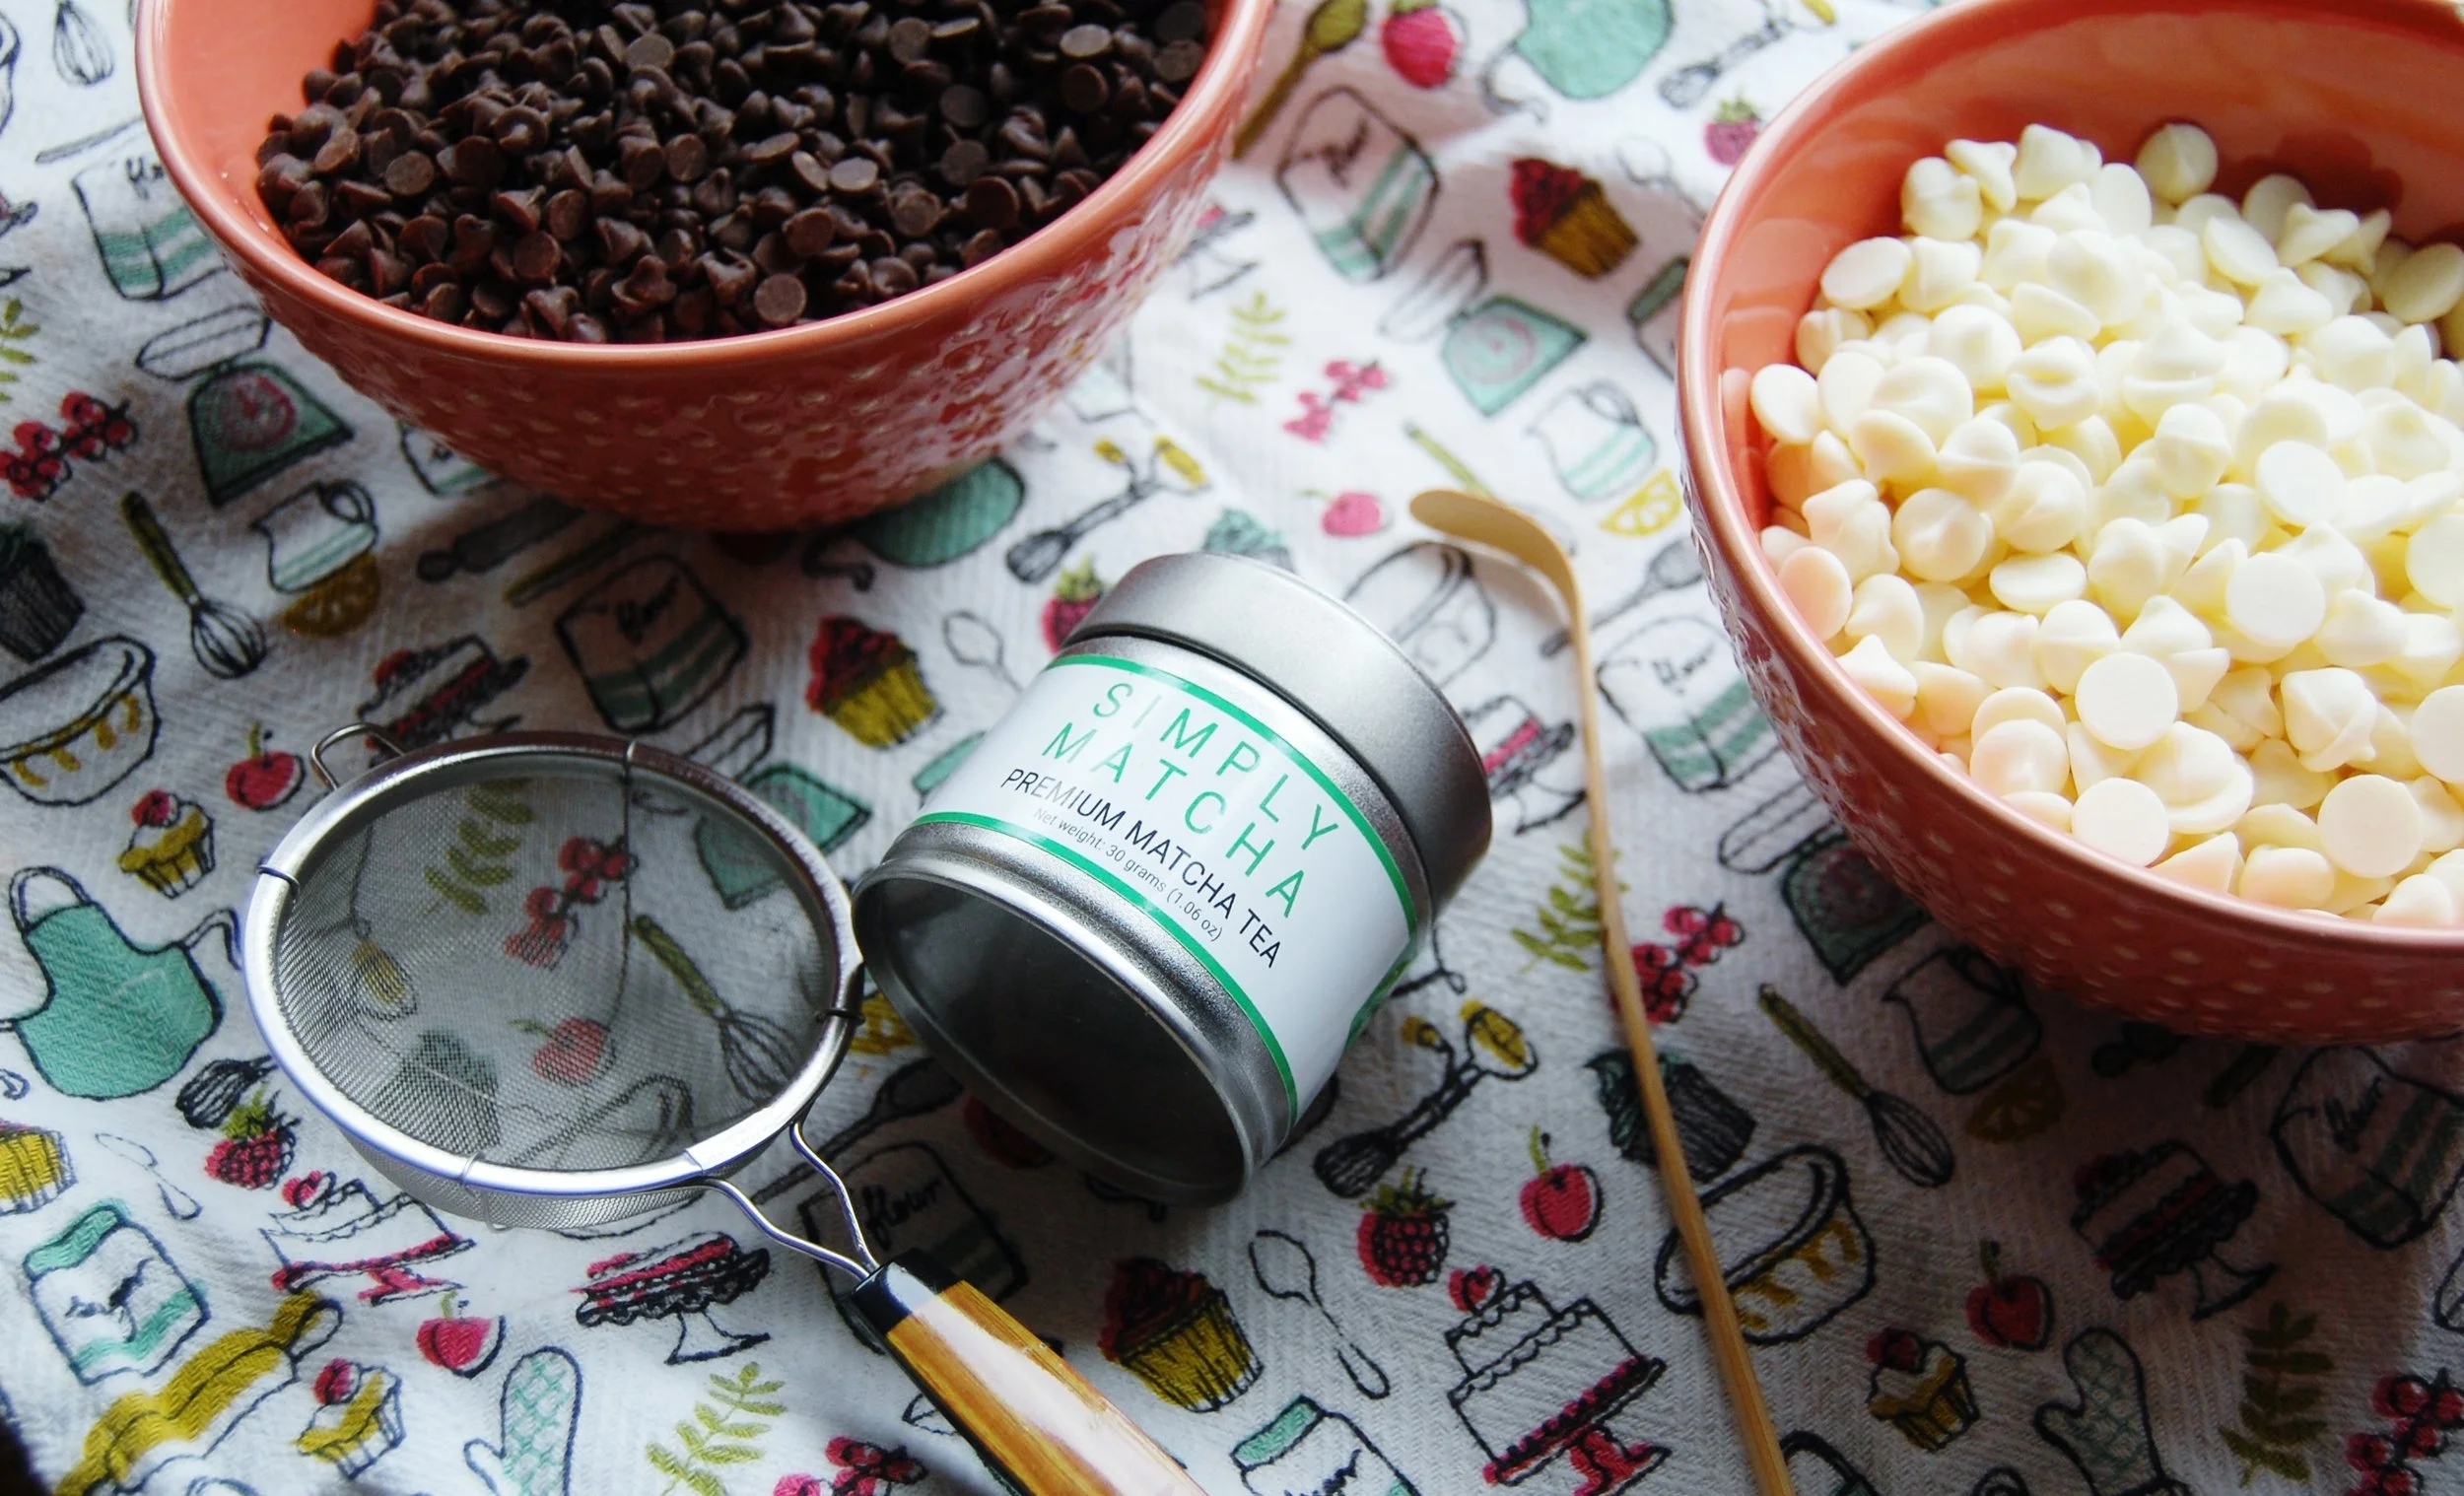
I did a little experiment this past weekend and I wanted to share it with you! I created these chocolates with matcha but I wanted them to be greener so I added white chocolate. I wanted to keep the semi sweet since I'm not the biggest white chocolate fan. The chocolates didn't turn out any greener but they were delicious!

What you'll need:
1 package mini semi sweet chocolate chips
1 package white chocolate chips
12 tablespoons butter
1/2 cup light whipping cream (optional)
4 tablespoons matcha
Wooden candy sticks
Heart Candy Mold
Instructions
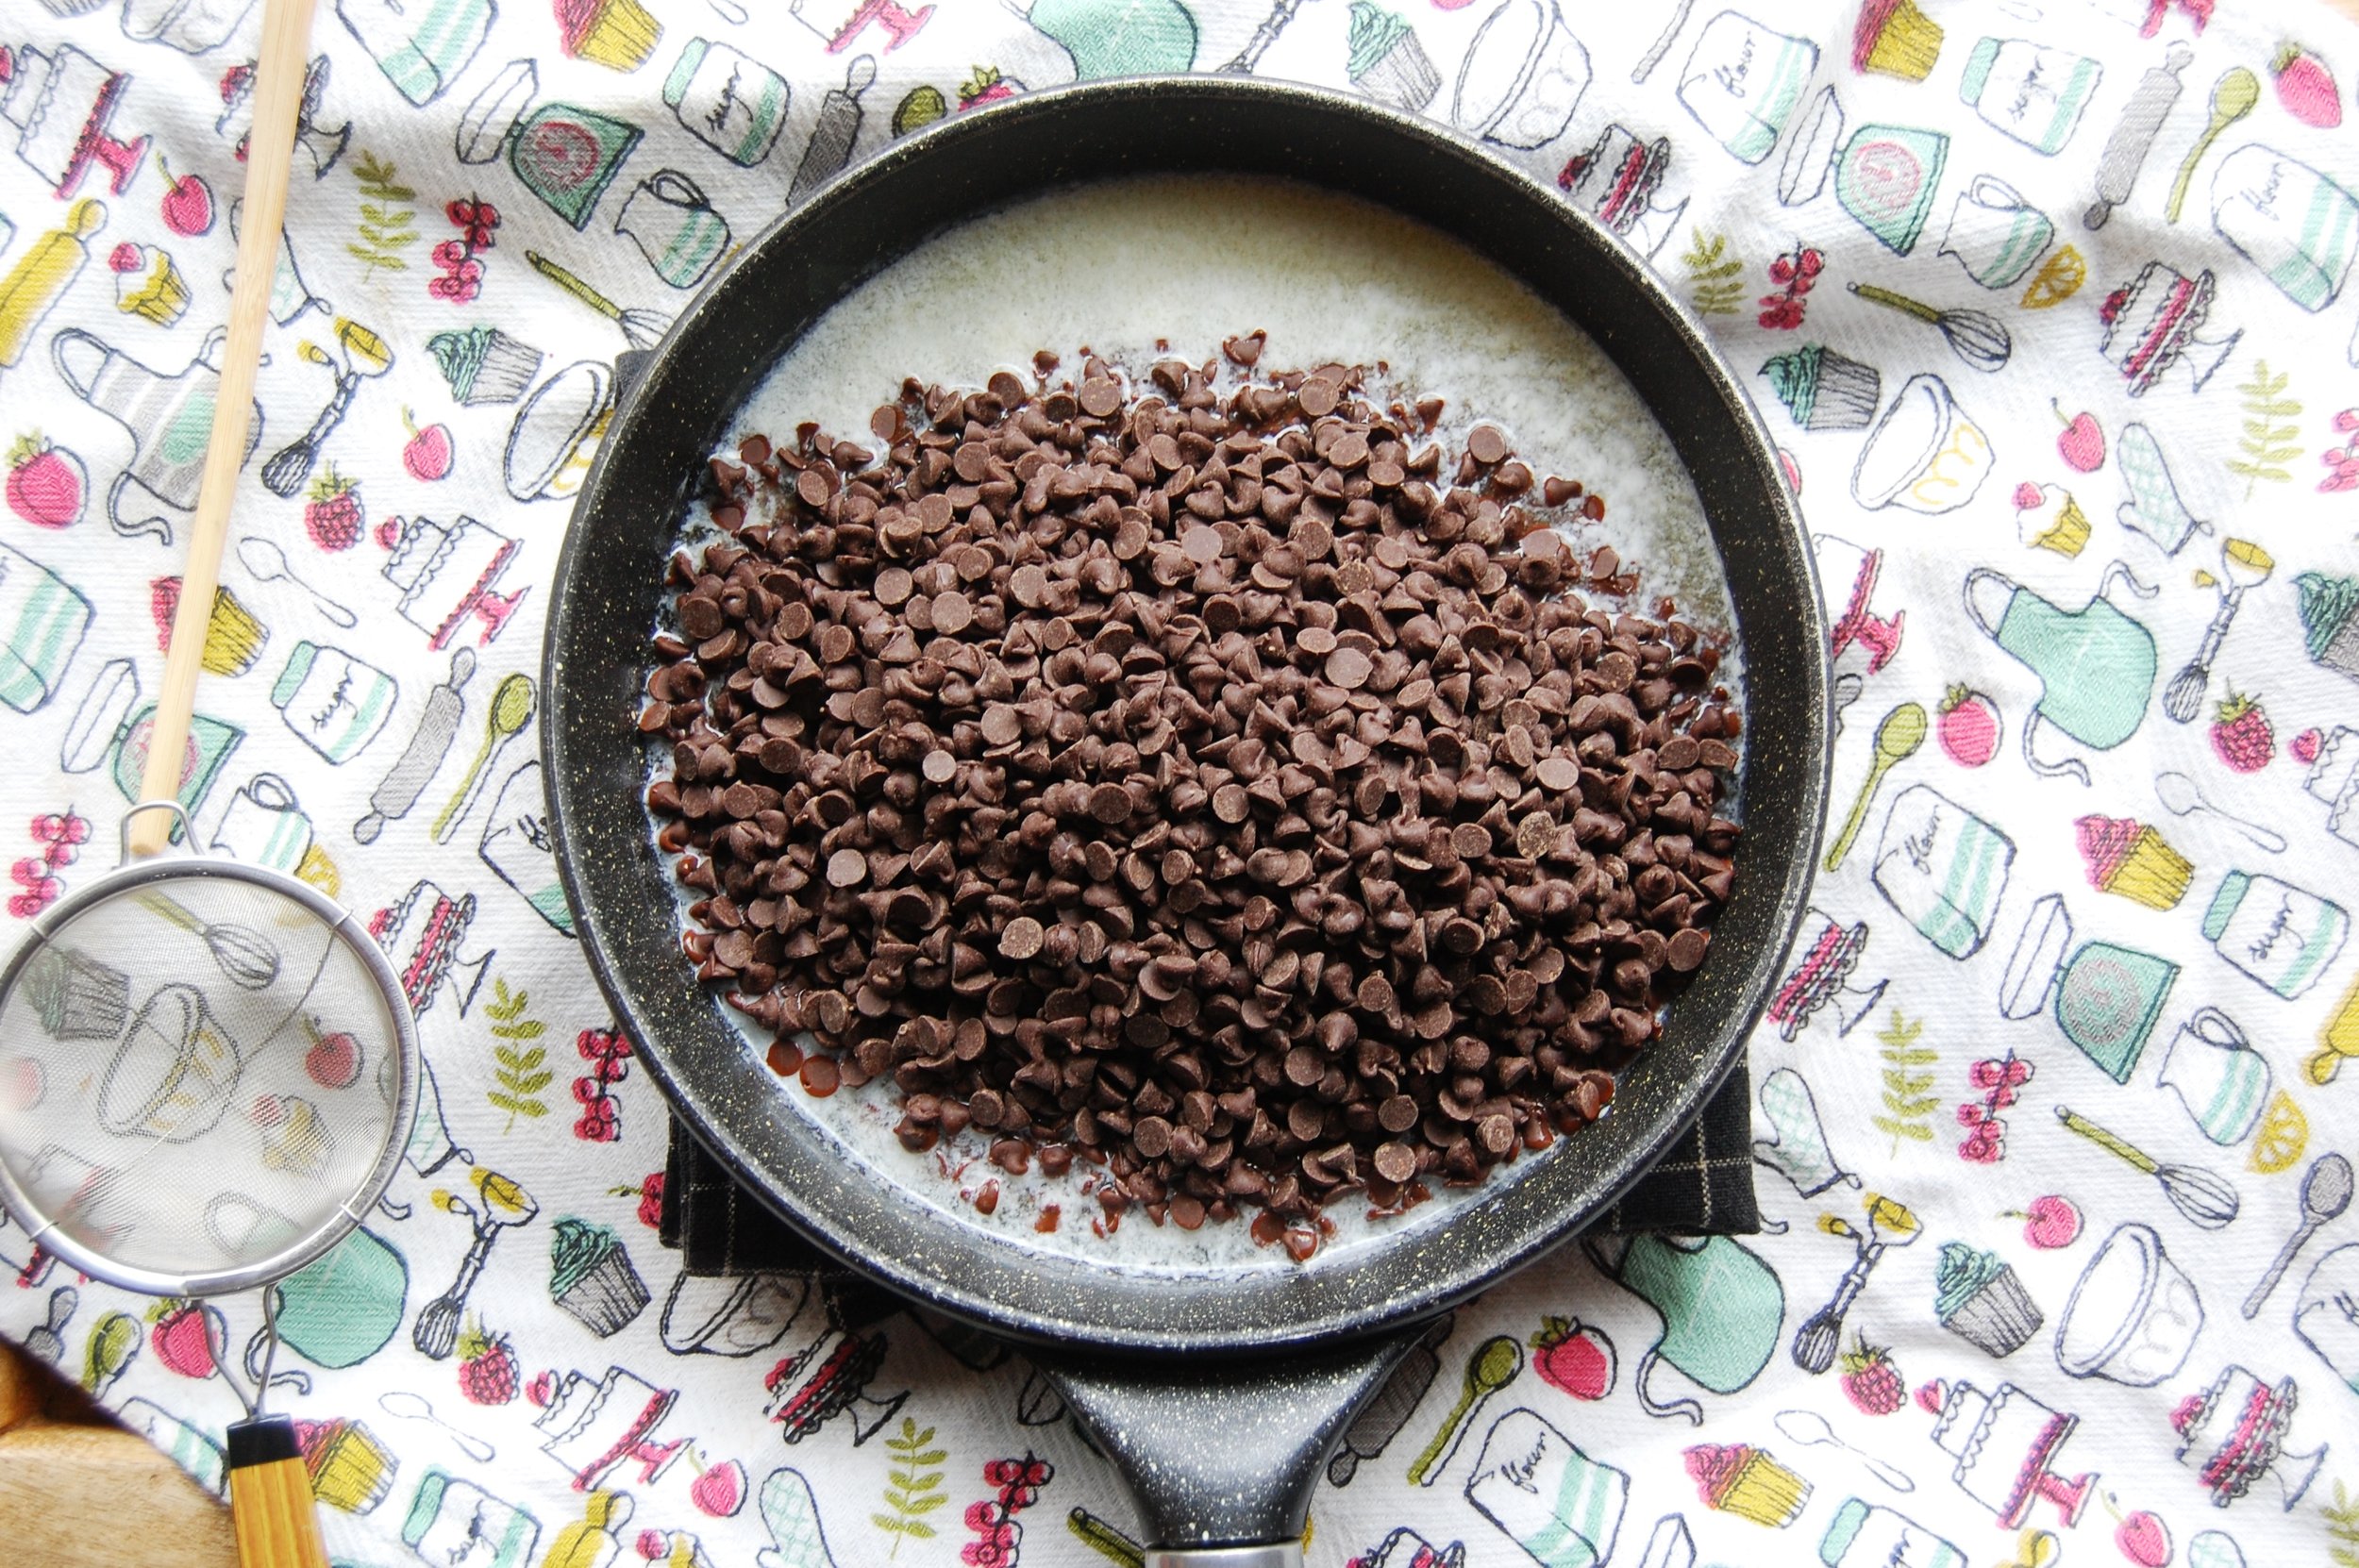
1) Melt the butter! I would use a double boiler, I just put water in a pot, boil it and put a pan with the butter on top.

2) Place the chocolate chips into the pan and mix it around until it's all melted
3) Add the white chocolate chips to the mix and let them melt. I kept the white chocolate chips a little lumpy, you'll see why later.
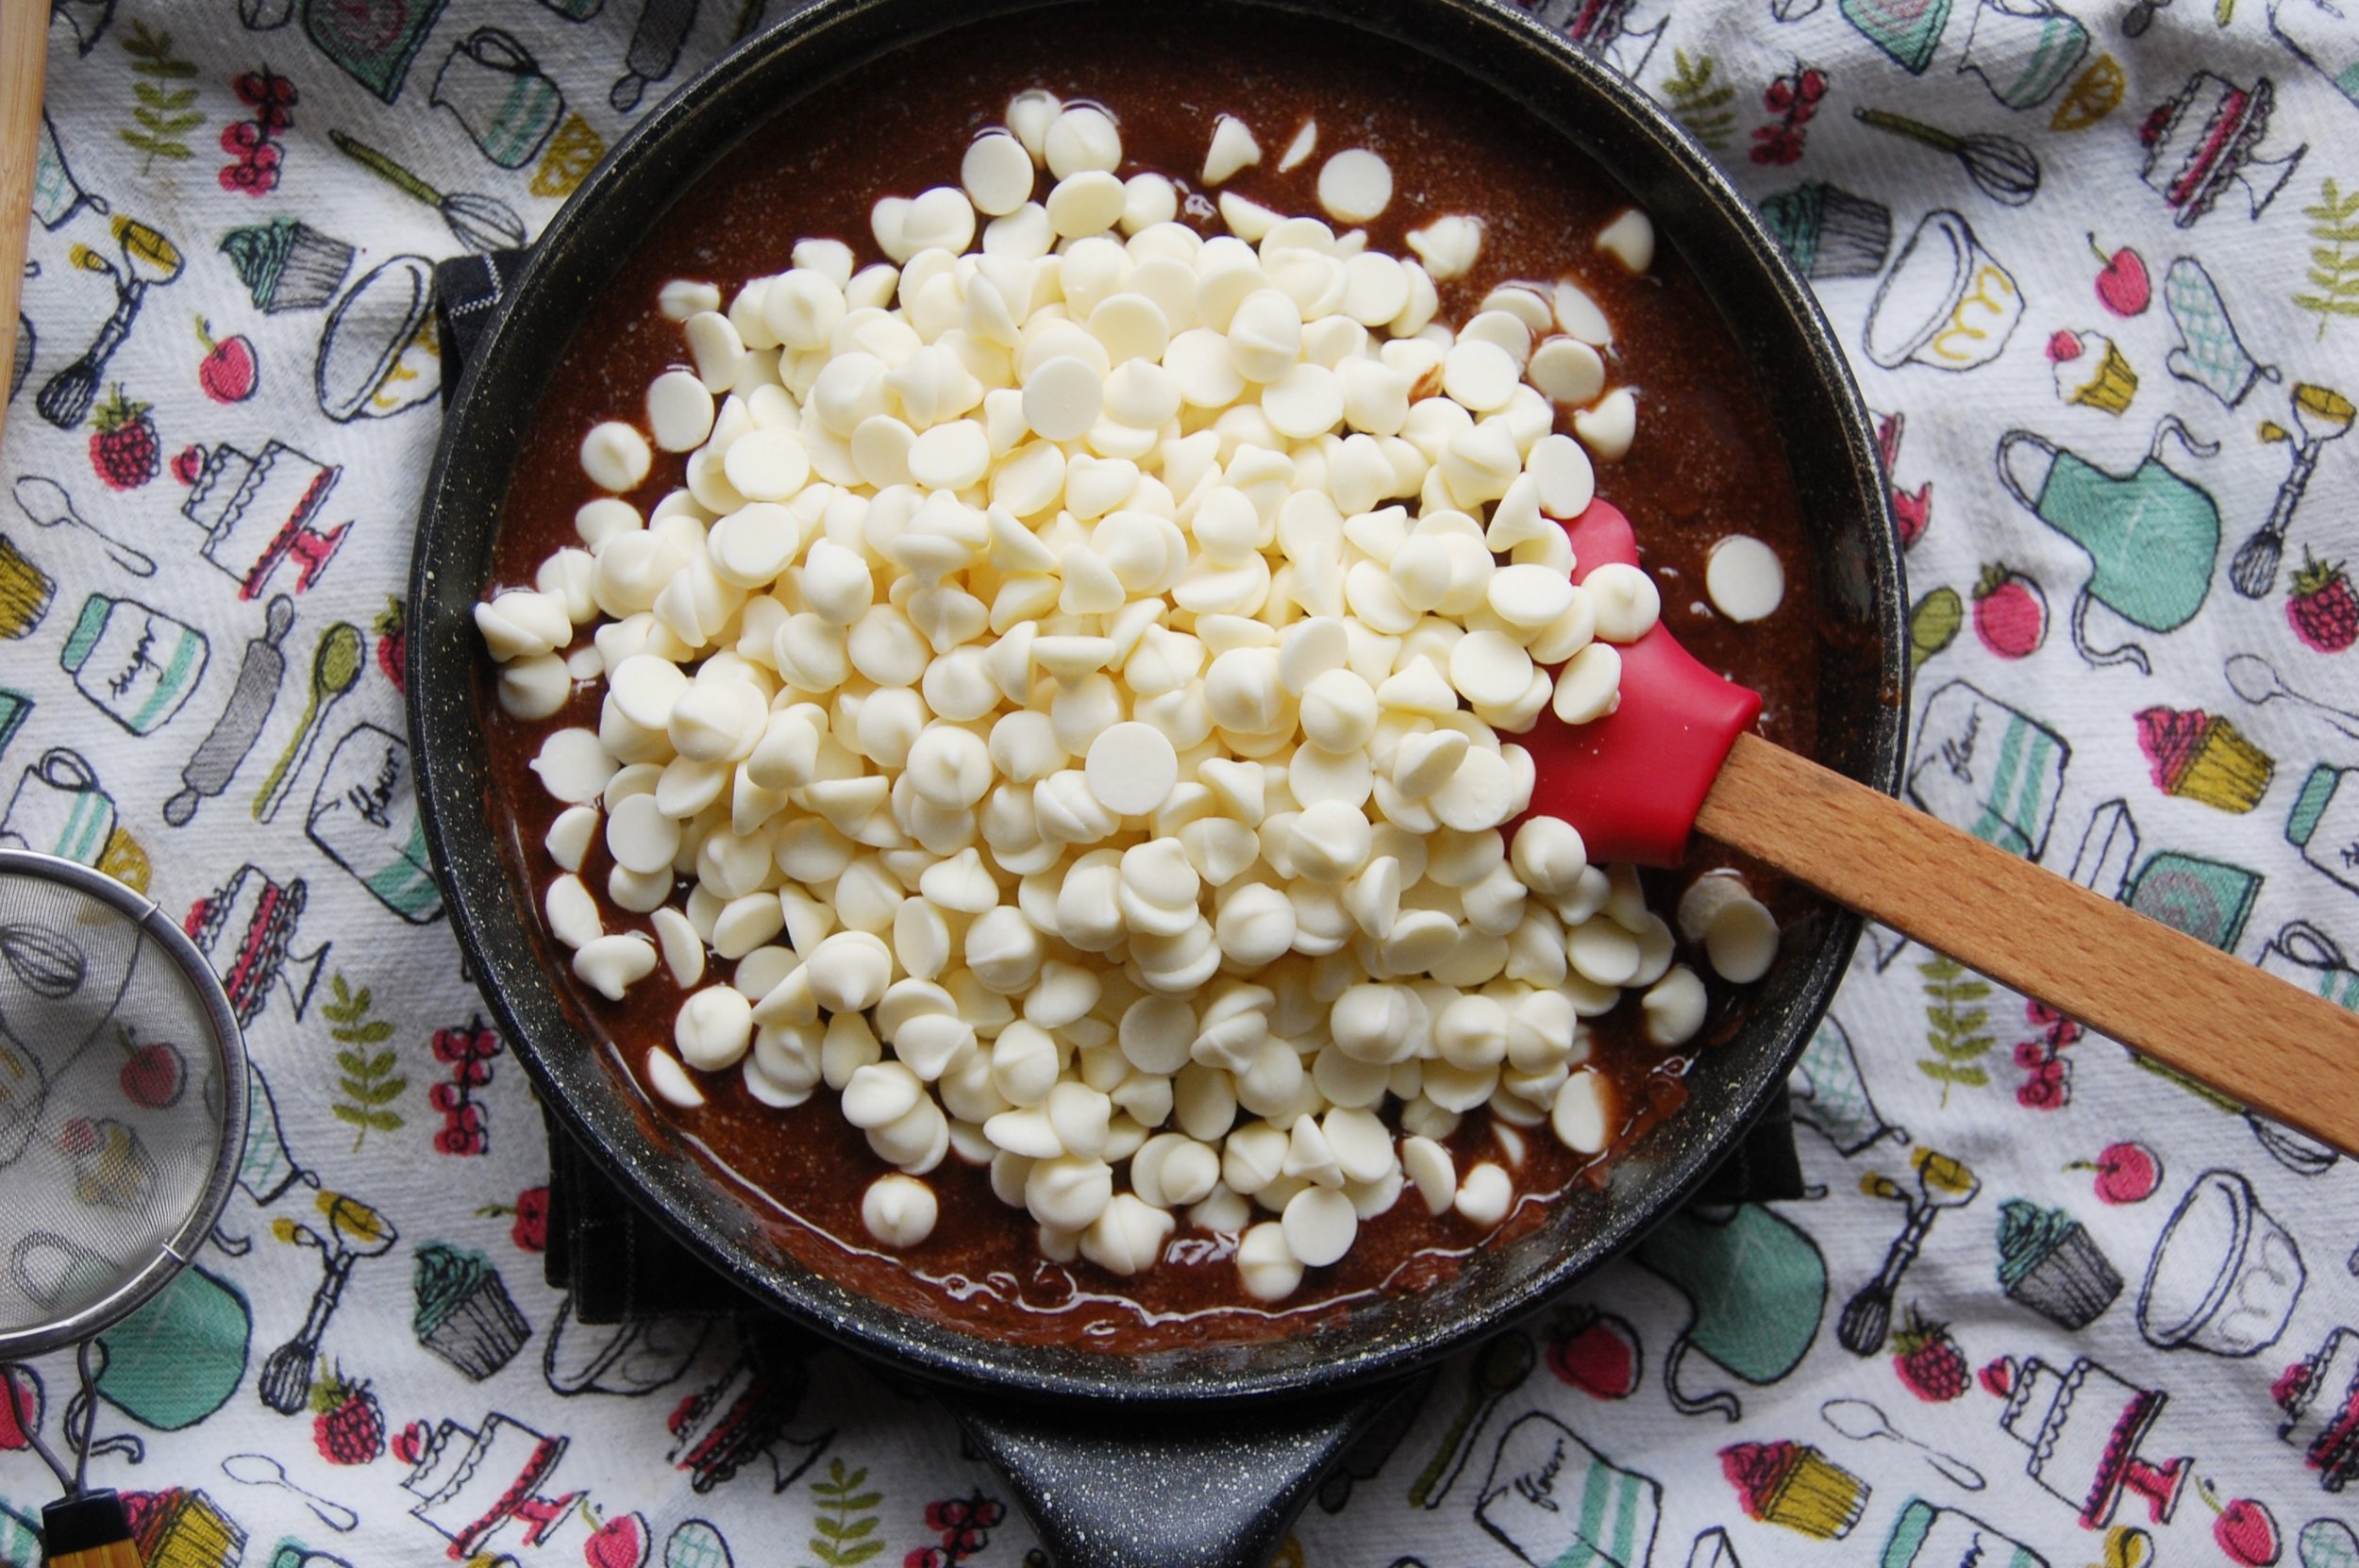
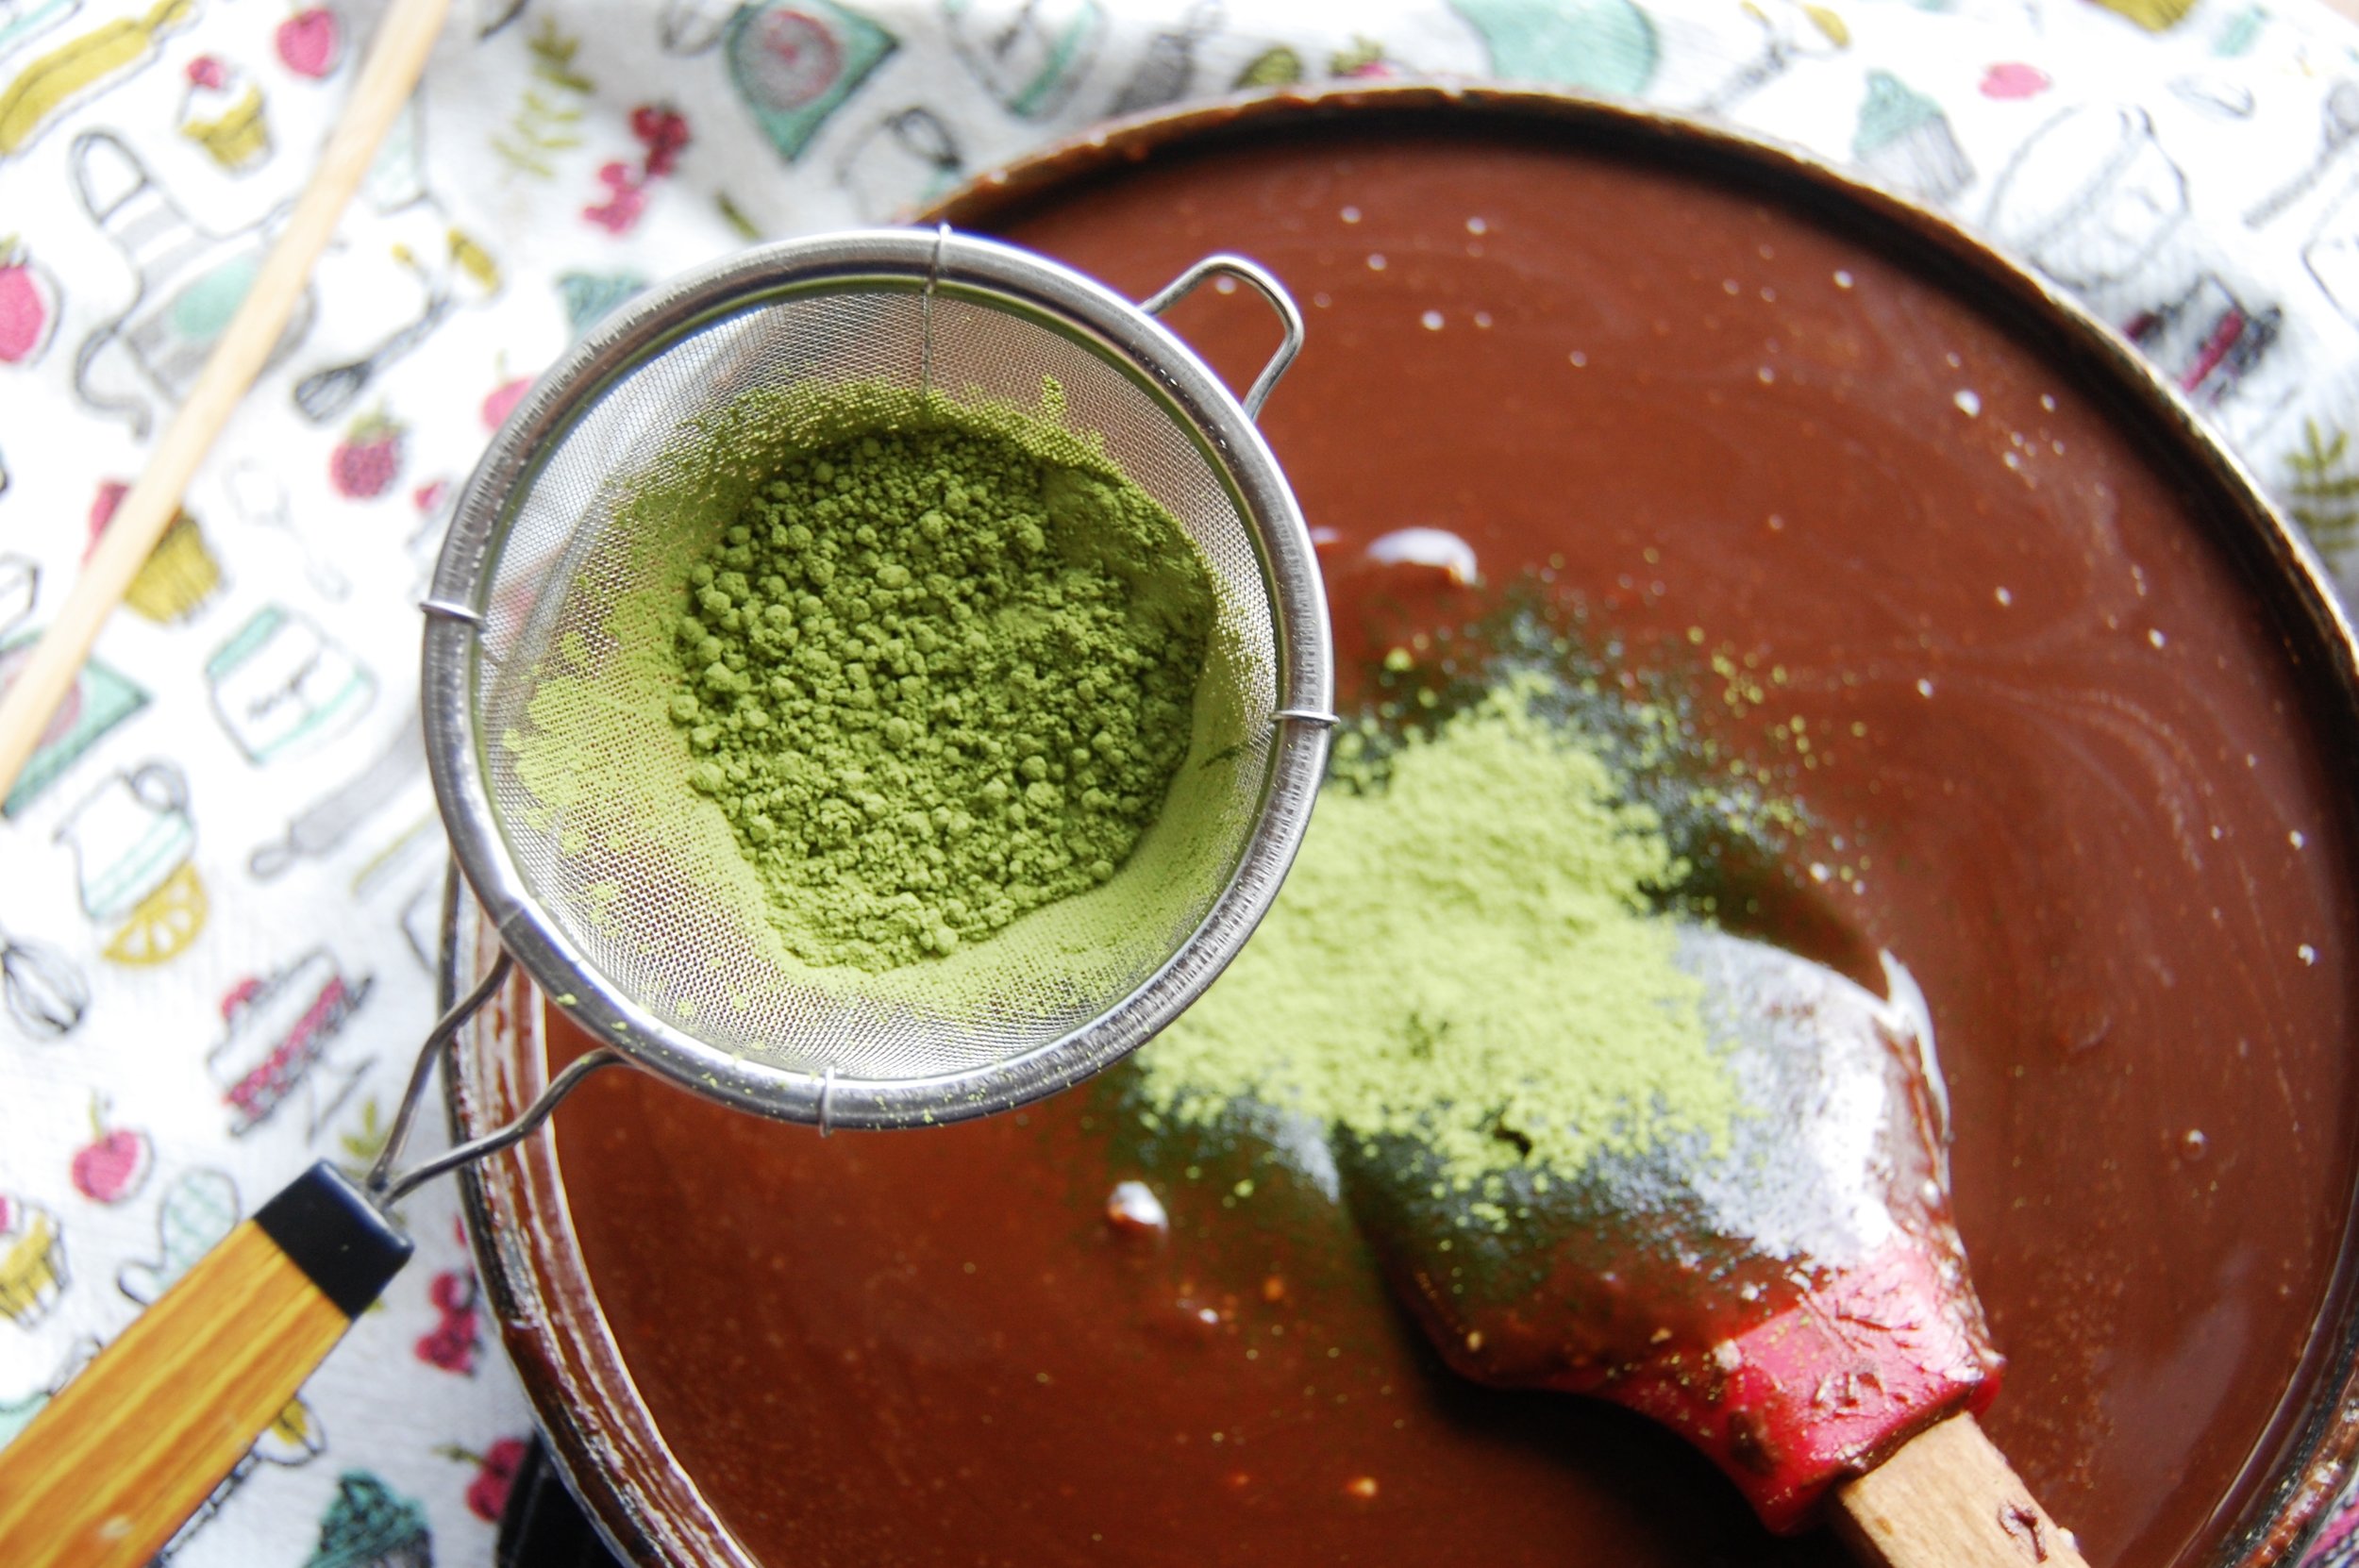
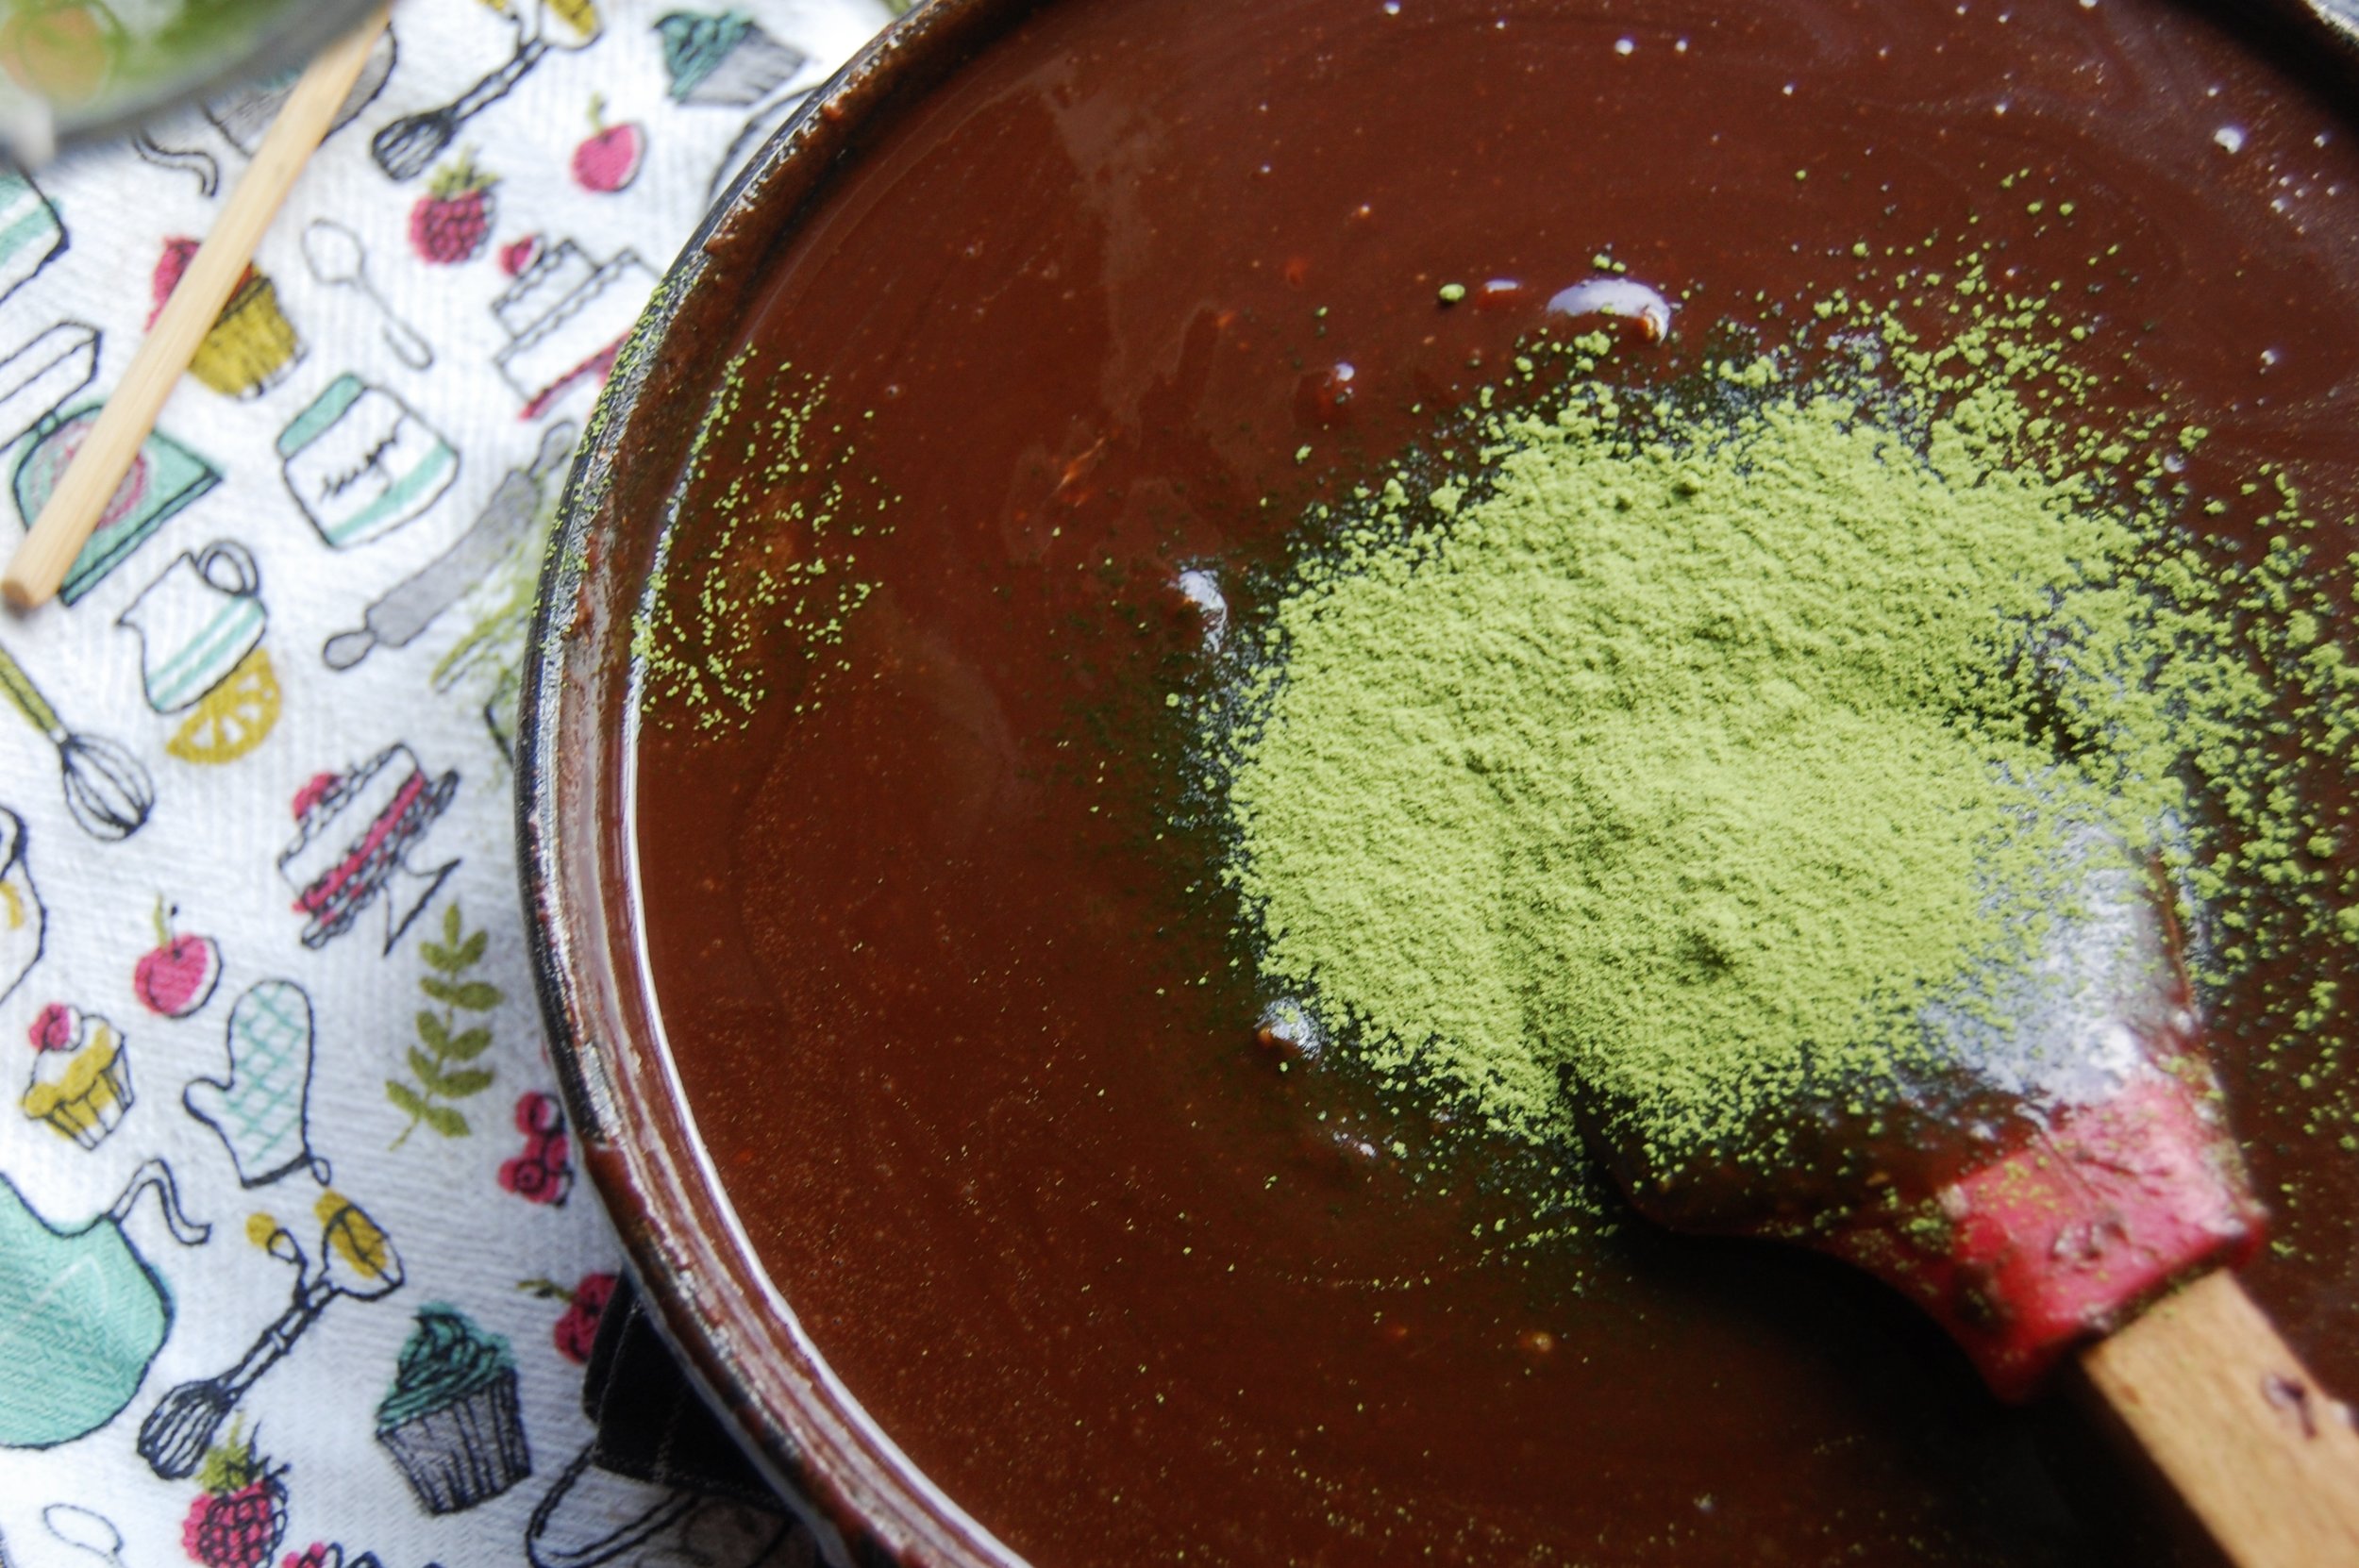
4) Sift your matcha into the chocolate and mix it completley.


5) Using a spoon fill your heart silicone molds with chocolate
6) Put it in the freezer for 5 -10 minutes
7) Place the wooden sticks into each mold
8) Keep in freezer for an hour or two
9) ENJOY!

YUM!
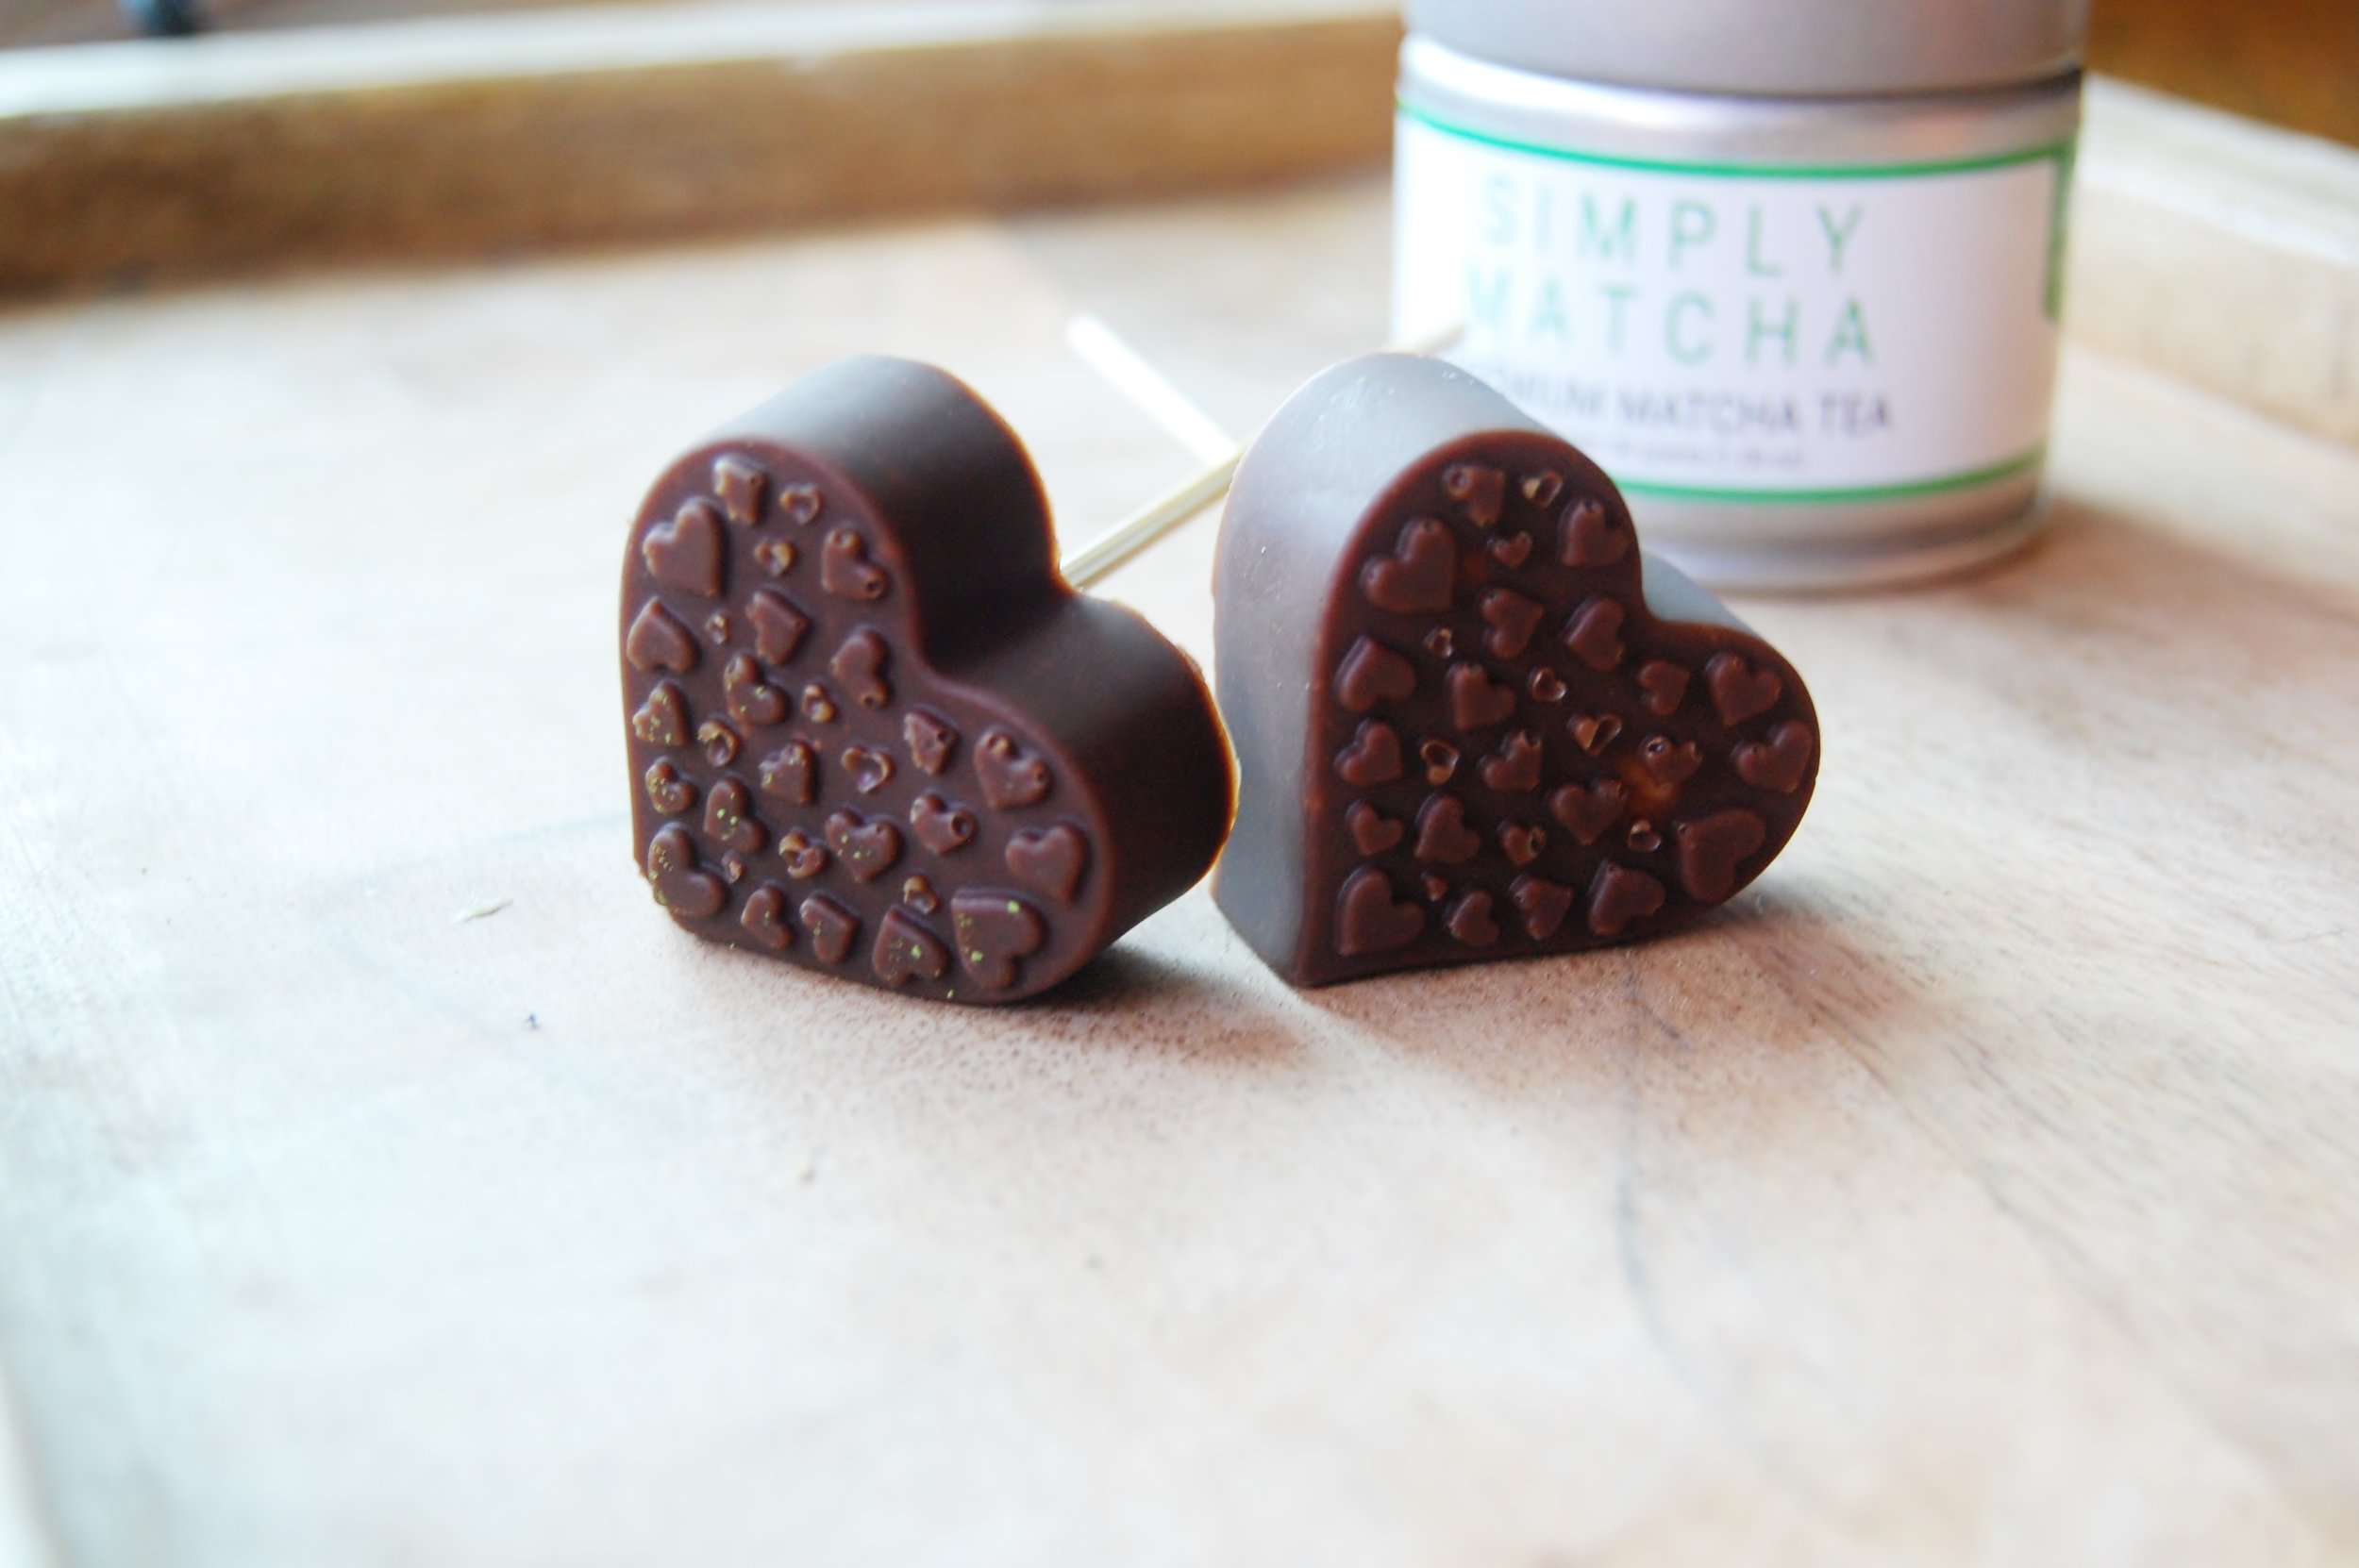


I didn't let the white chocolate chips melt all the way so there would be chunks in each heart!

Although these aren't green like matcha, they are certainly delicious and the matcha flavor comes through!
Next, I'll fight my dislike of white chocolate and use only white chocolate so they will be green! Give this simple recipe a try and let me know how you like it!
Last Minute Gift Idea: Tea Leaf Chocolate Bark!
Tis the season for tea.
Have you ever made or received chocolate bark for the holidays? It's quite possibly one of the simplest and most delicious sweets. The past week I've been debating different gift ideas for the last few people on my list and then I saw a video of someone making chocolate bark. Oh my gosh, it was so simple. It's literally melted chocolate and whatever other ingredients you want!
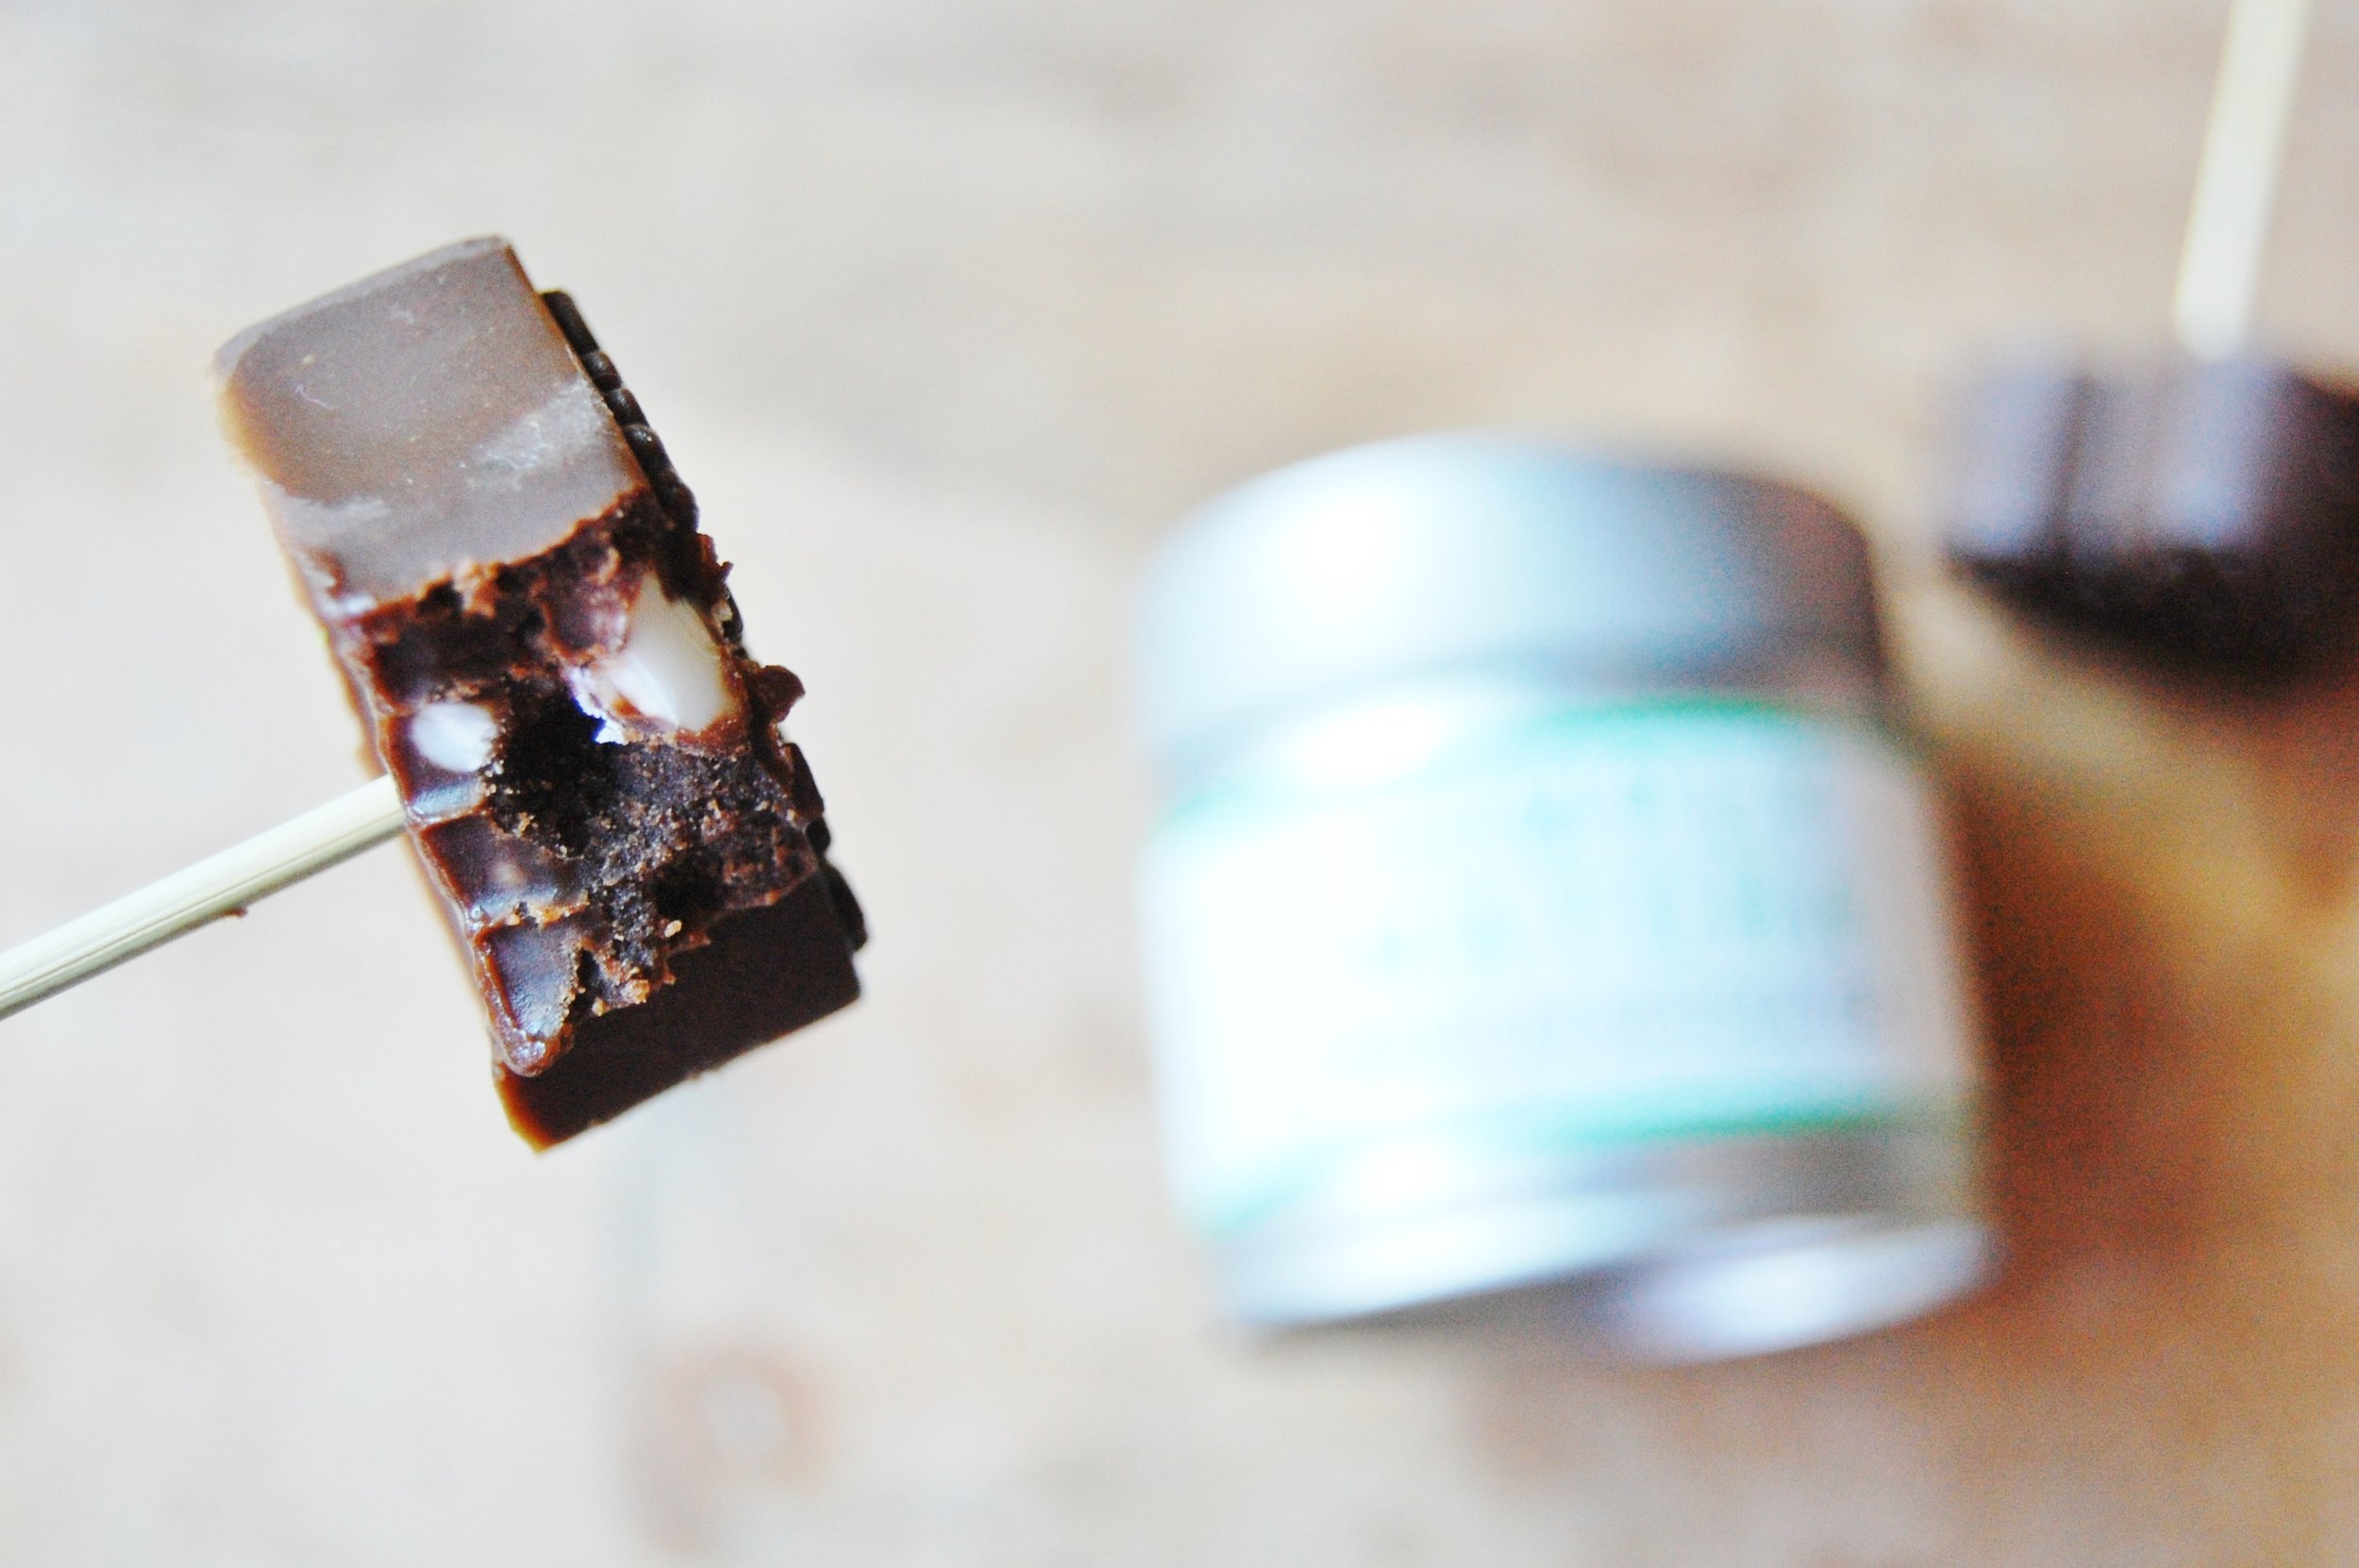
I first tried a "smores" bard that was a layer of chocolate, a layer of marshmallow fluff, another layer of chocolate then topped with graham crushed graham crackers. Spoiler alert, it was FANTASTIC! I've been thinking about a recipe for my last installment of For Tea's Sake blends I was sent and due to the ingredients (pieces of banana and cocoa!) I wanted to do something with chocolate.

The result: Tea bark! This is a really simple recipe but it's unique and perfect for any tea lover on your list!
You will need:
1) 24 ounces semi sweet chocolate. I used mini chocolate chips because I think theyre easier to melt. You can alternatively use some semi sweet and some bittersweet !
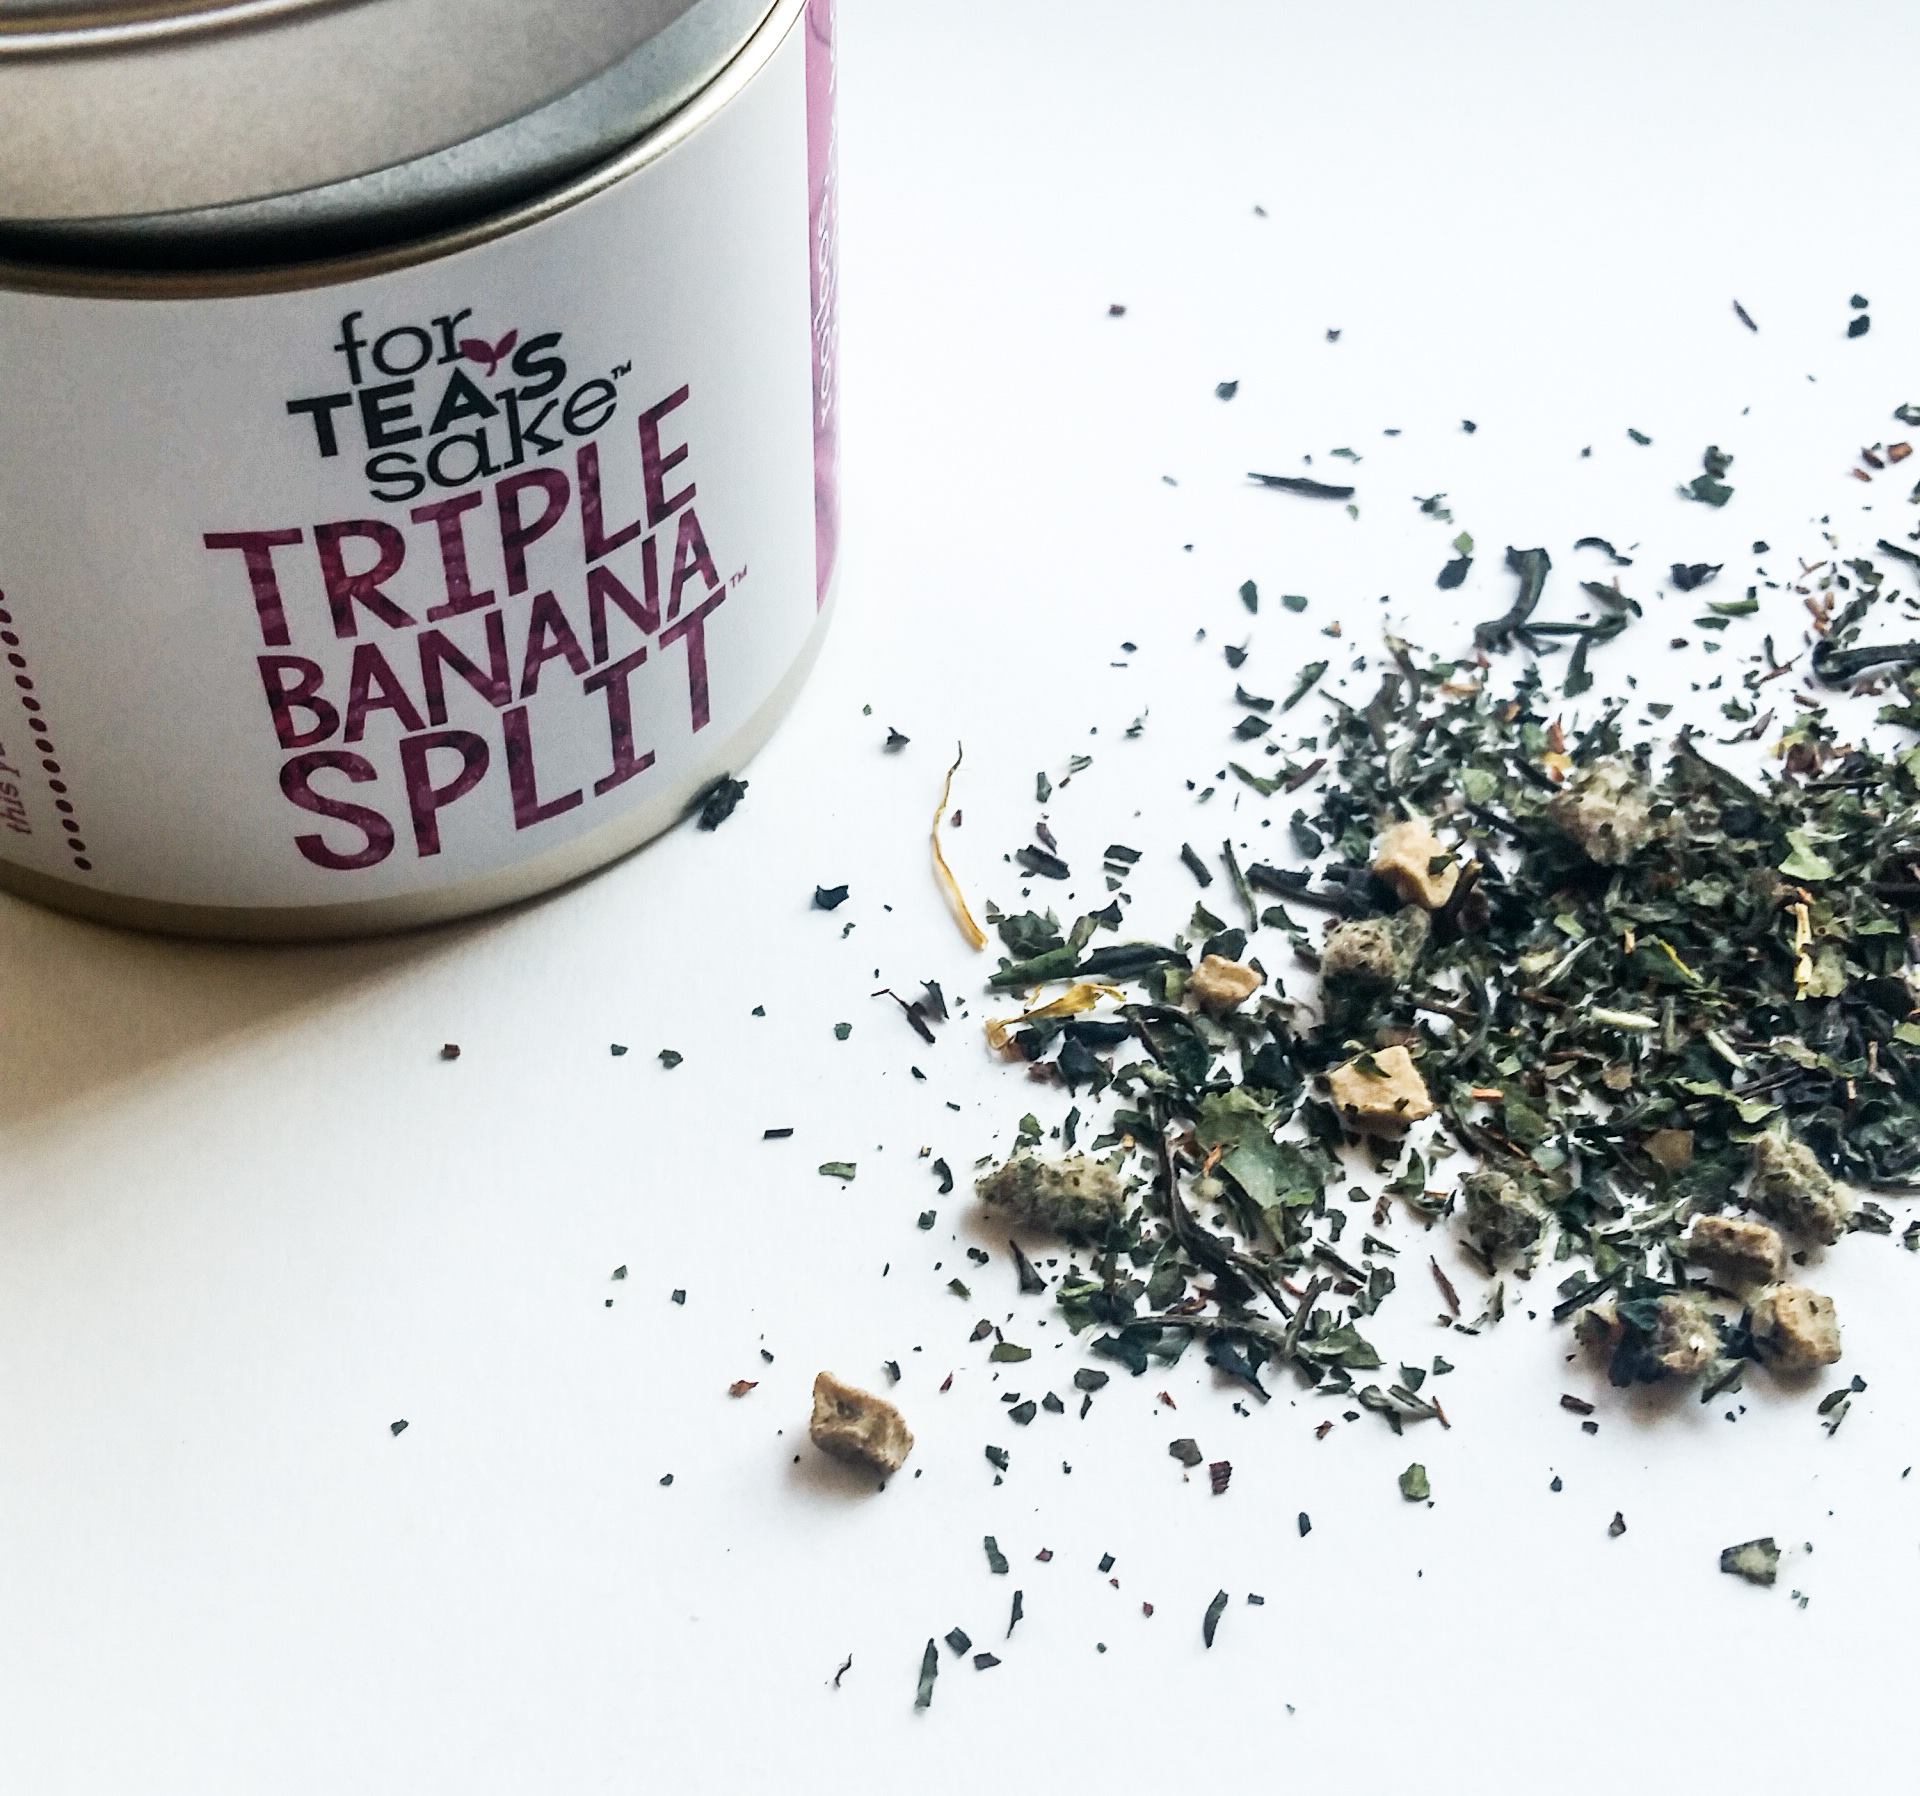
2) Triple Banana Split tea blend from For Tea's Sake.
3) Baking sheet
4) Parchment paper
5) Christmas sprinkles (optional)
6) Double Boiler
Step 1: Crush up the tea blend. This will make it a bit more palpable on top of the chocolate. The image below shows the tea crushed by hand. You could also use a food processor.

Step 2: Melt the chocolate in a double boiler and then spread onto the parchment paper covered baking pan. You don't need an actual double boiler to melt the chocolate. I used a rounded pot filled with boiling water and a flat pan that fit on top of that.

Step 3: Sprinkle crushed tea on top of the chocolate while it is still hot. Use sprinkles here as well if you are adding them. I wanted to give the chocolate a little bit of a Christmas feel with these white dots...almost like snow!

Step 4: Place the pan in the fridge for 2 hours or until chocolate is set.

Step 5: Break apart the chocolate with a knife or your hands. If you reach under the chocolate you should be able to free it from the parchment paper easily and break it up!

Step 6: ENJOY! or if you're making this as a gift, pack it up in a sweets box and keep cool until delviery.

Have you ever made tea bark? What is your favorite bark recipe?!