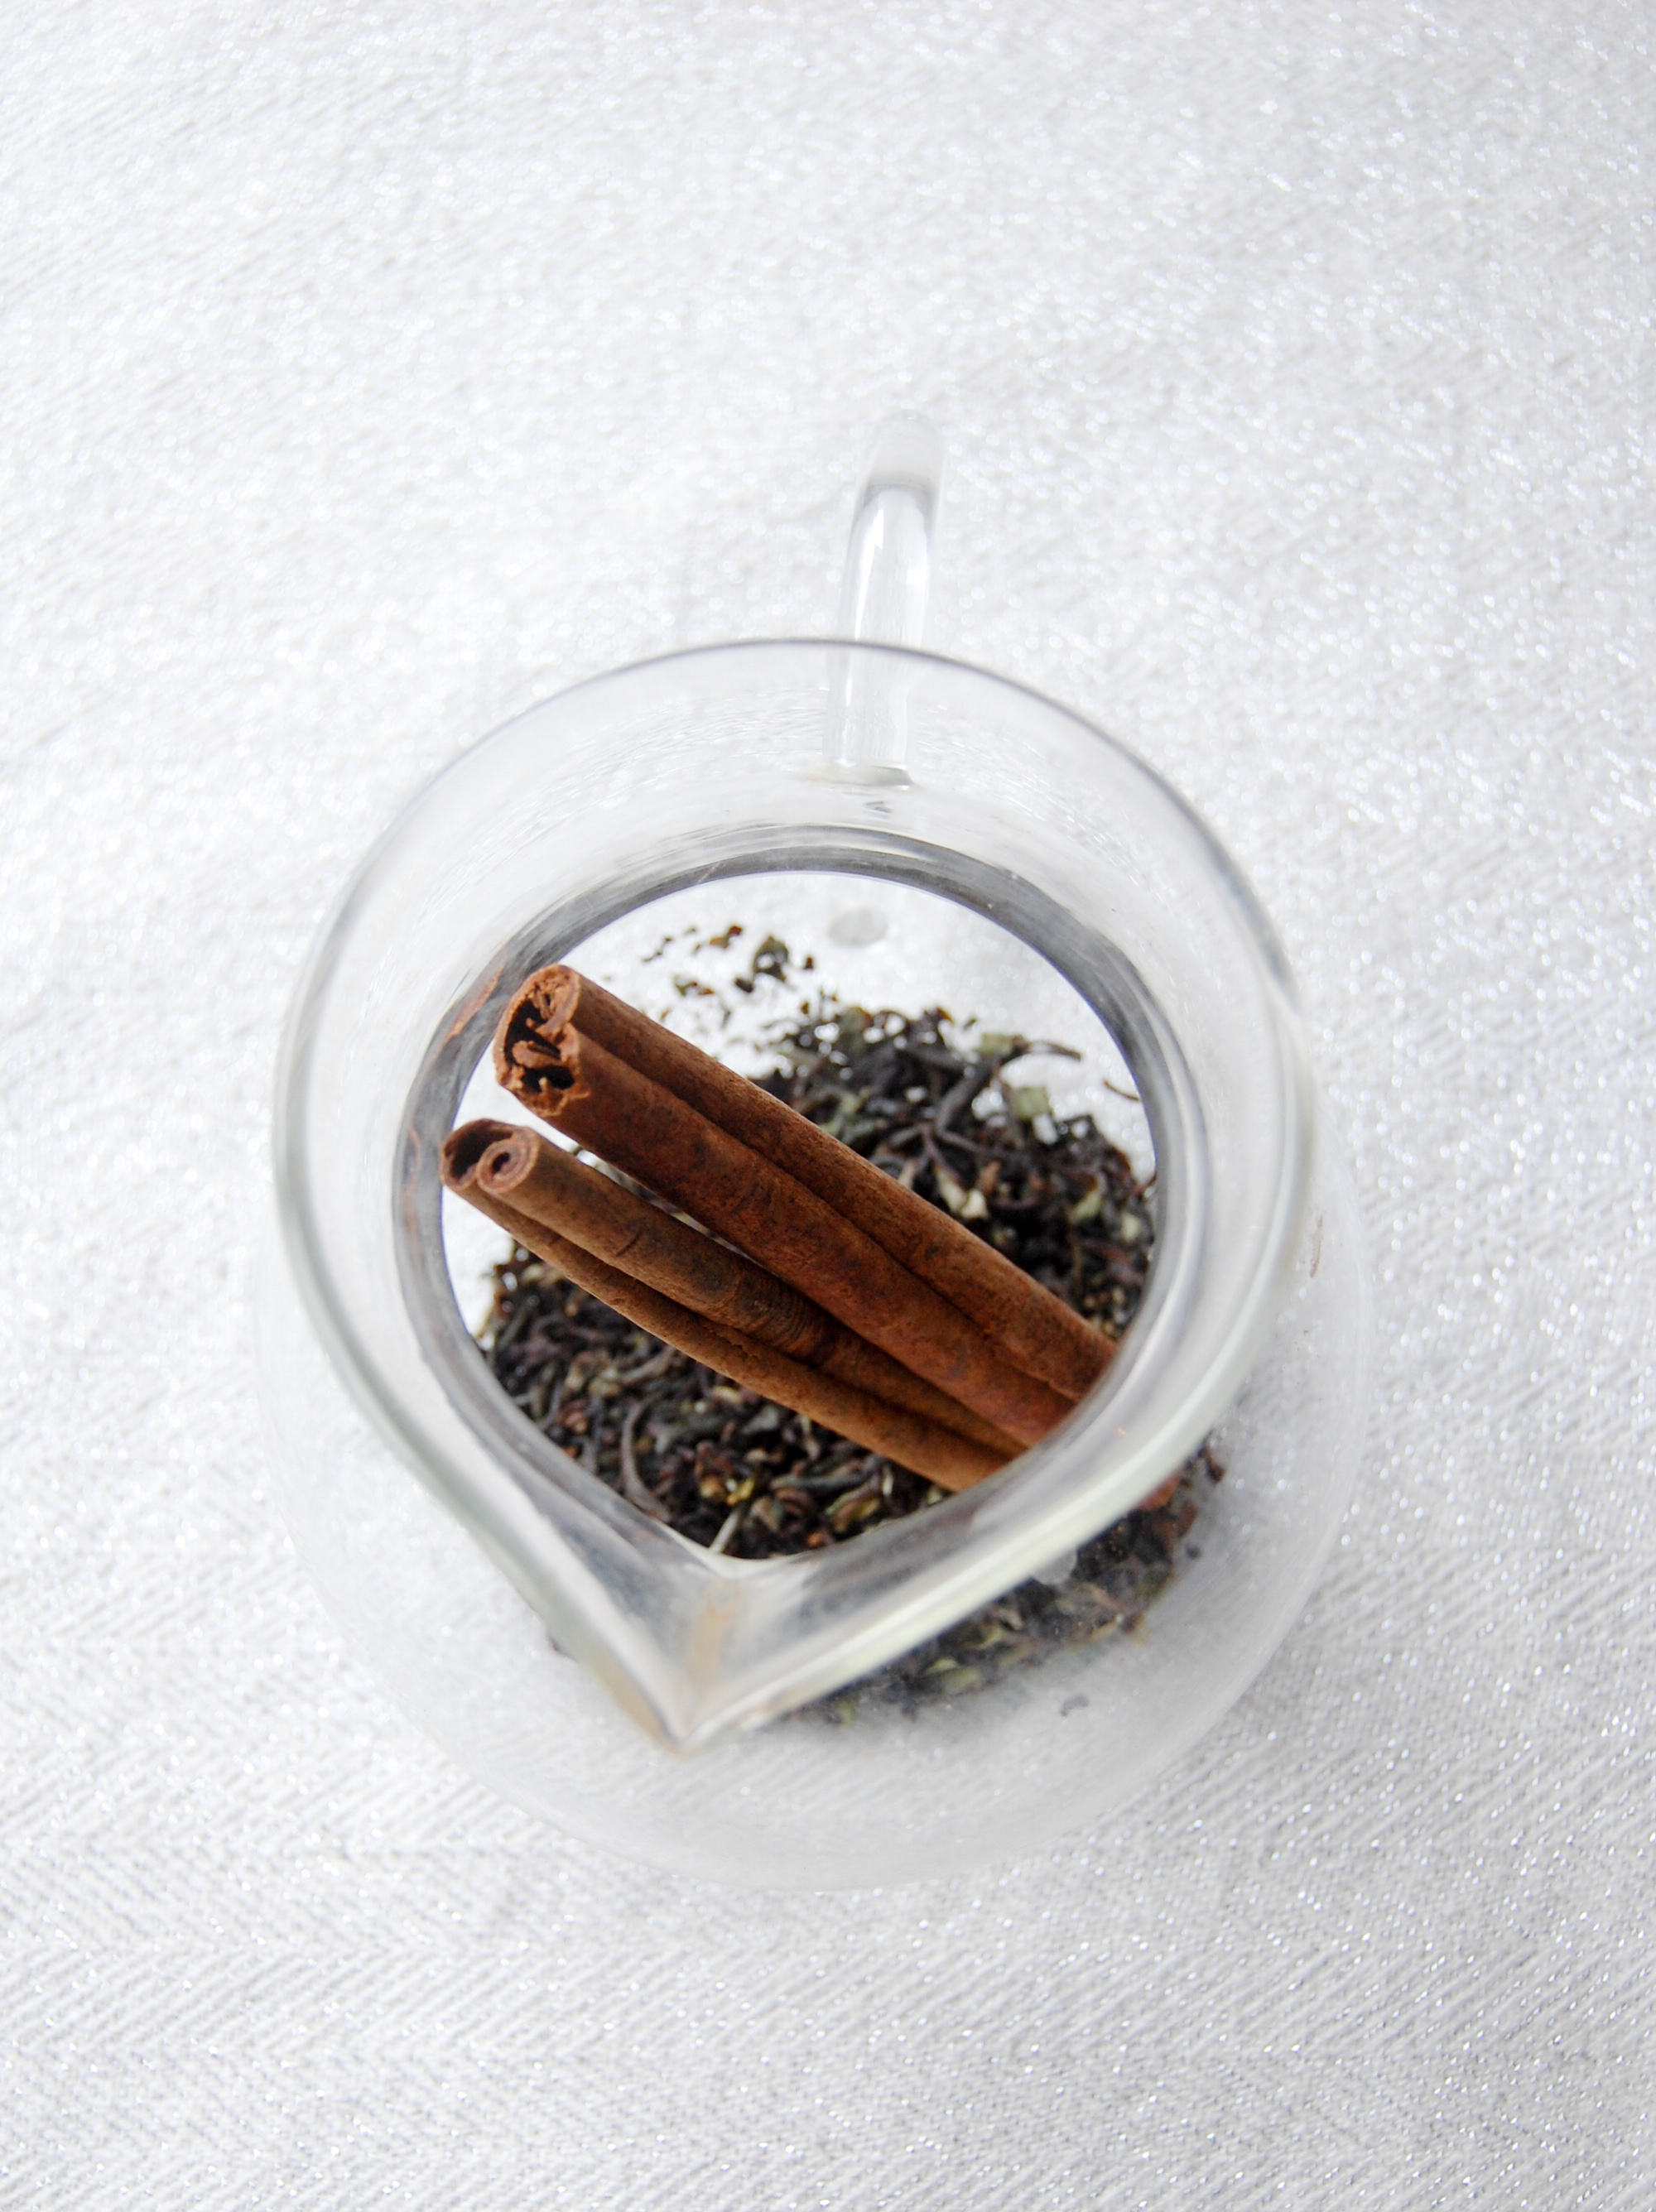
Bangkok Chai Sugar Cubes

Chai Sugar.

Have you ever seen fancy sugar cubes?! Different flavors and shapes? I've been sent some and I've also seen them sold at a bunch of places. It's a simple way to make tea time fancier!

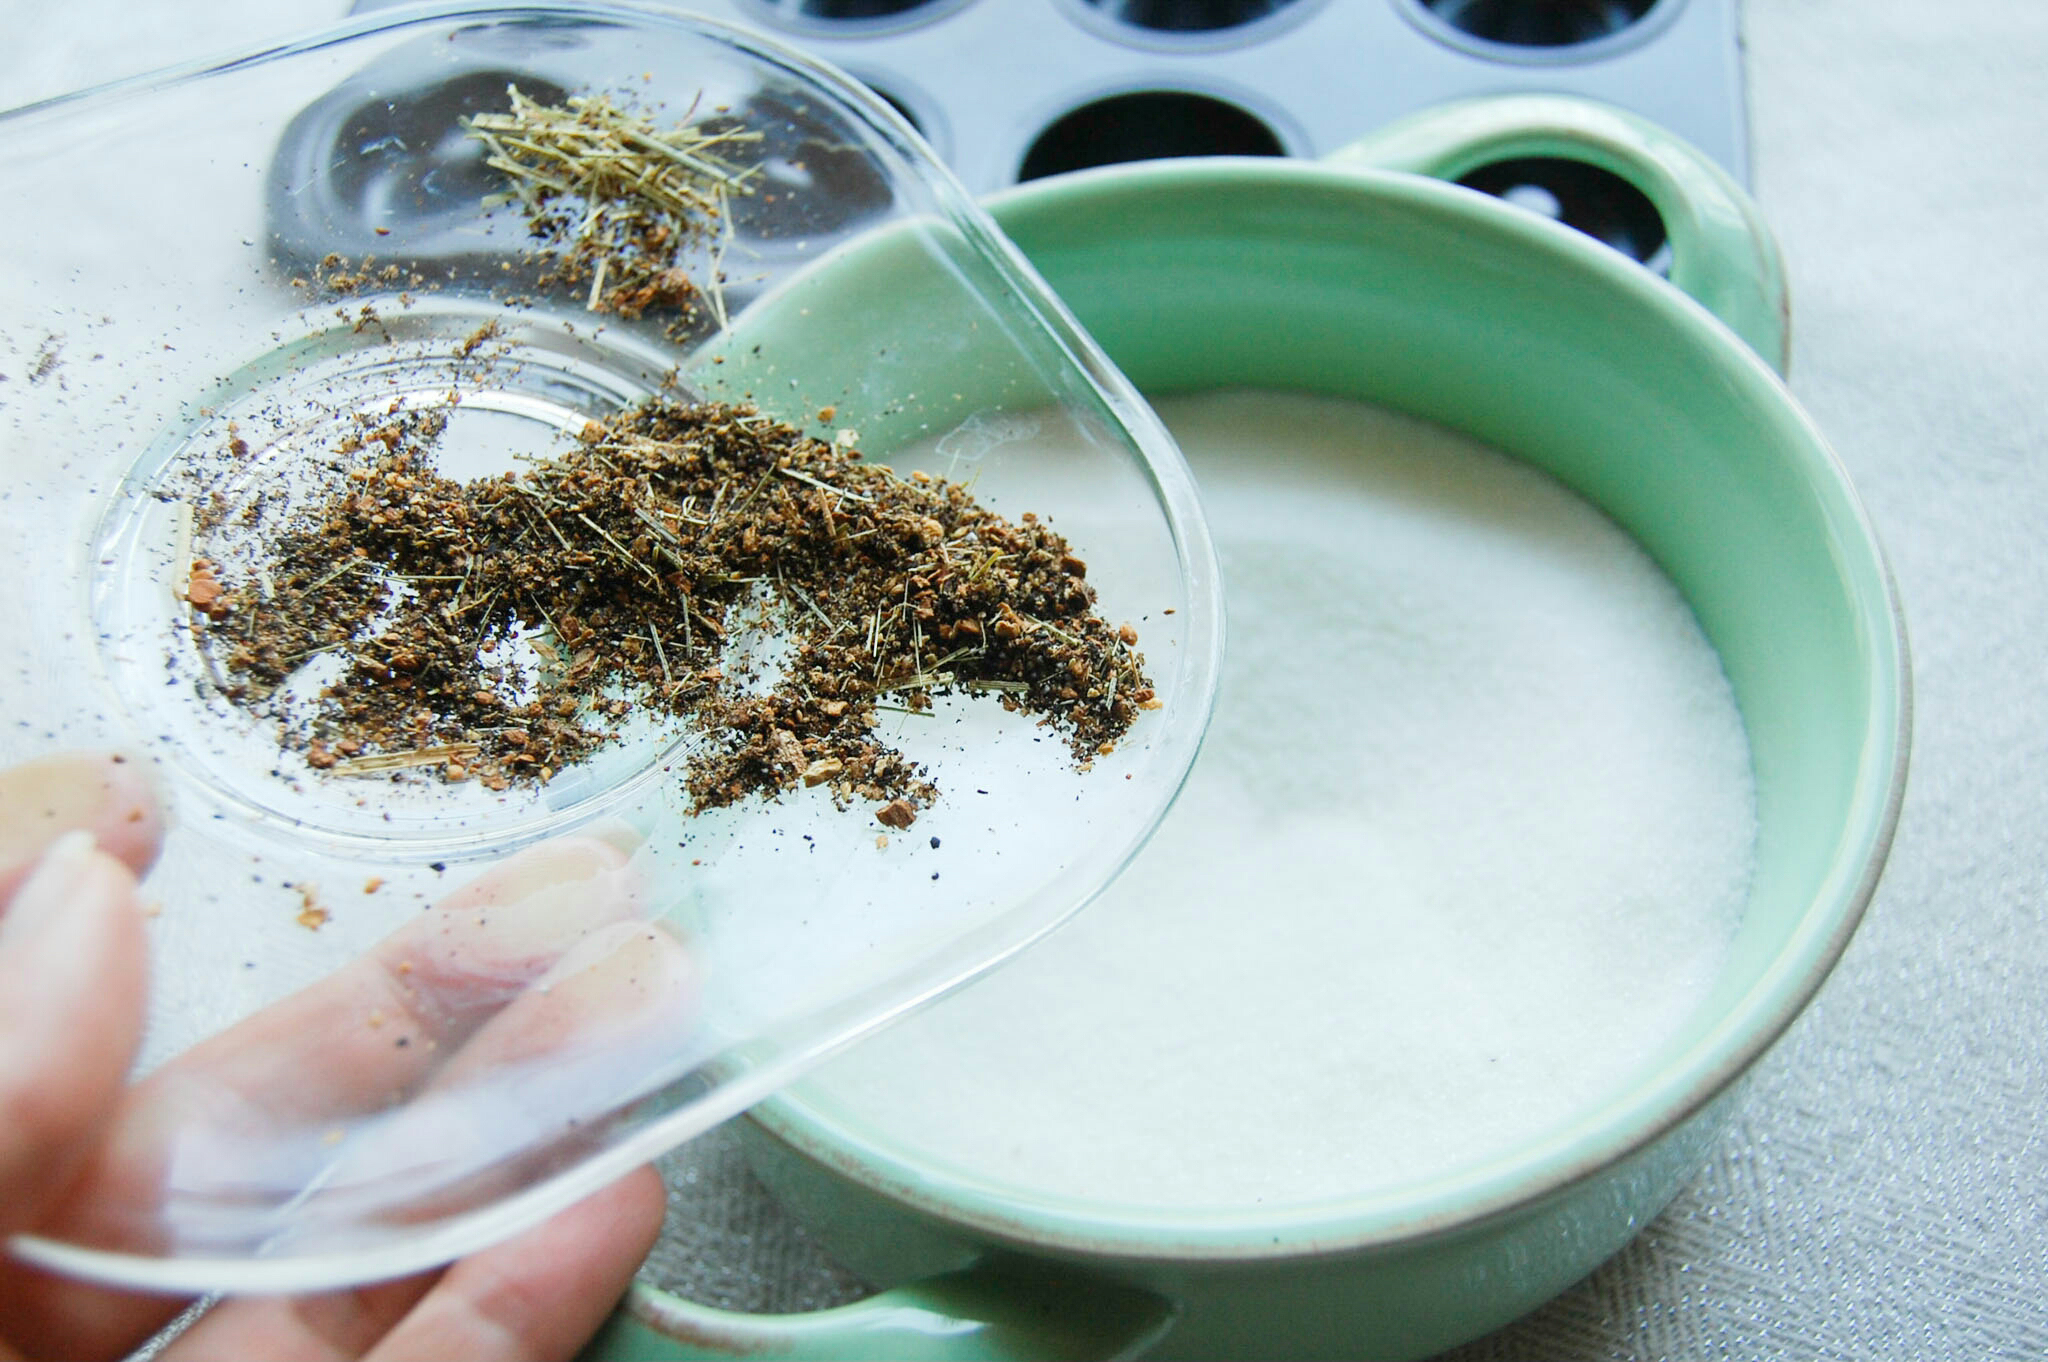
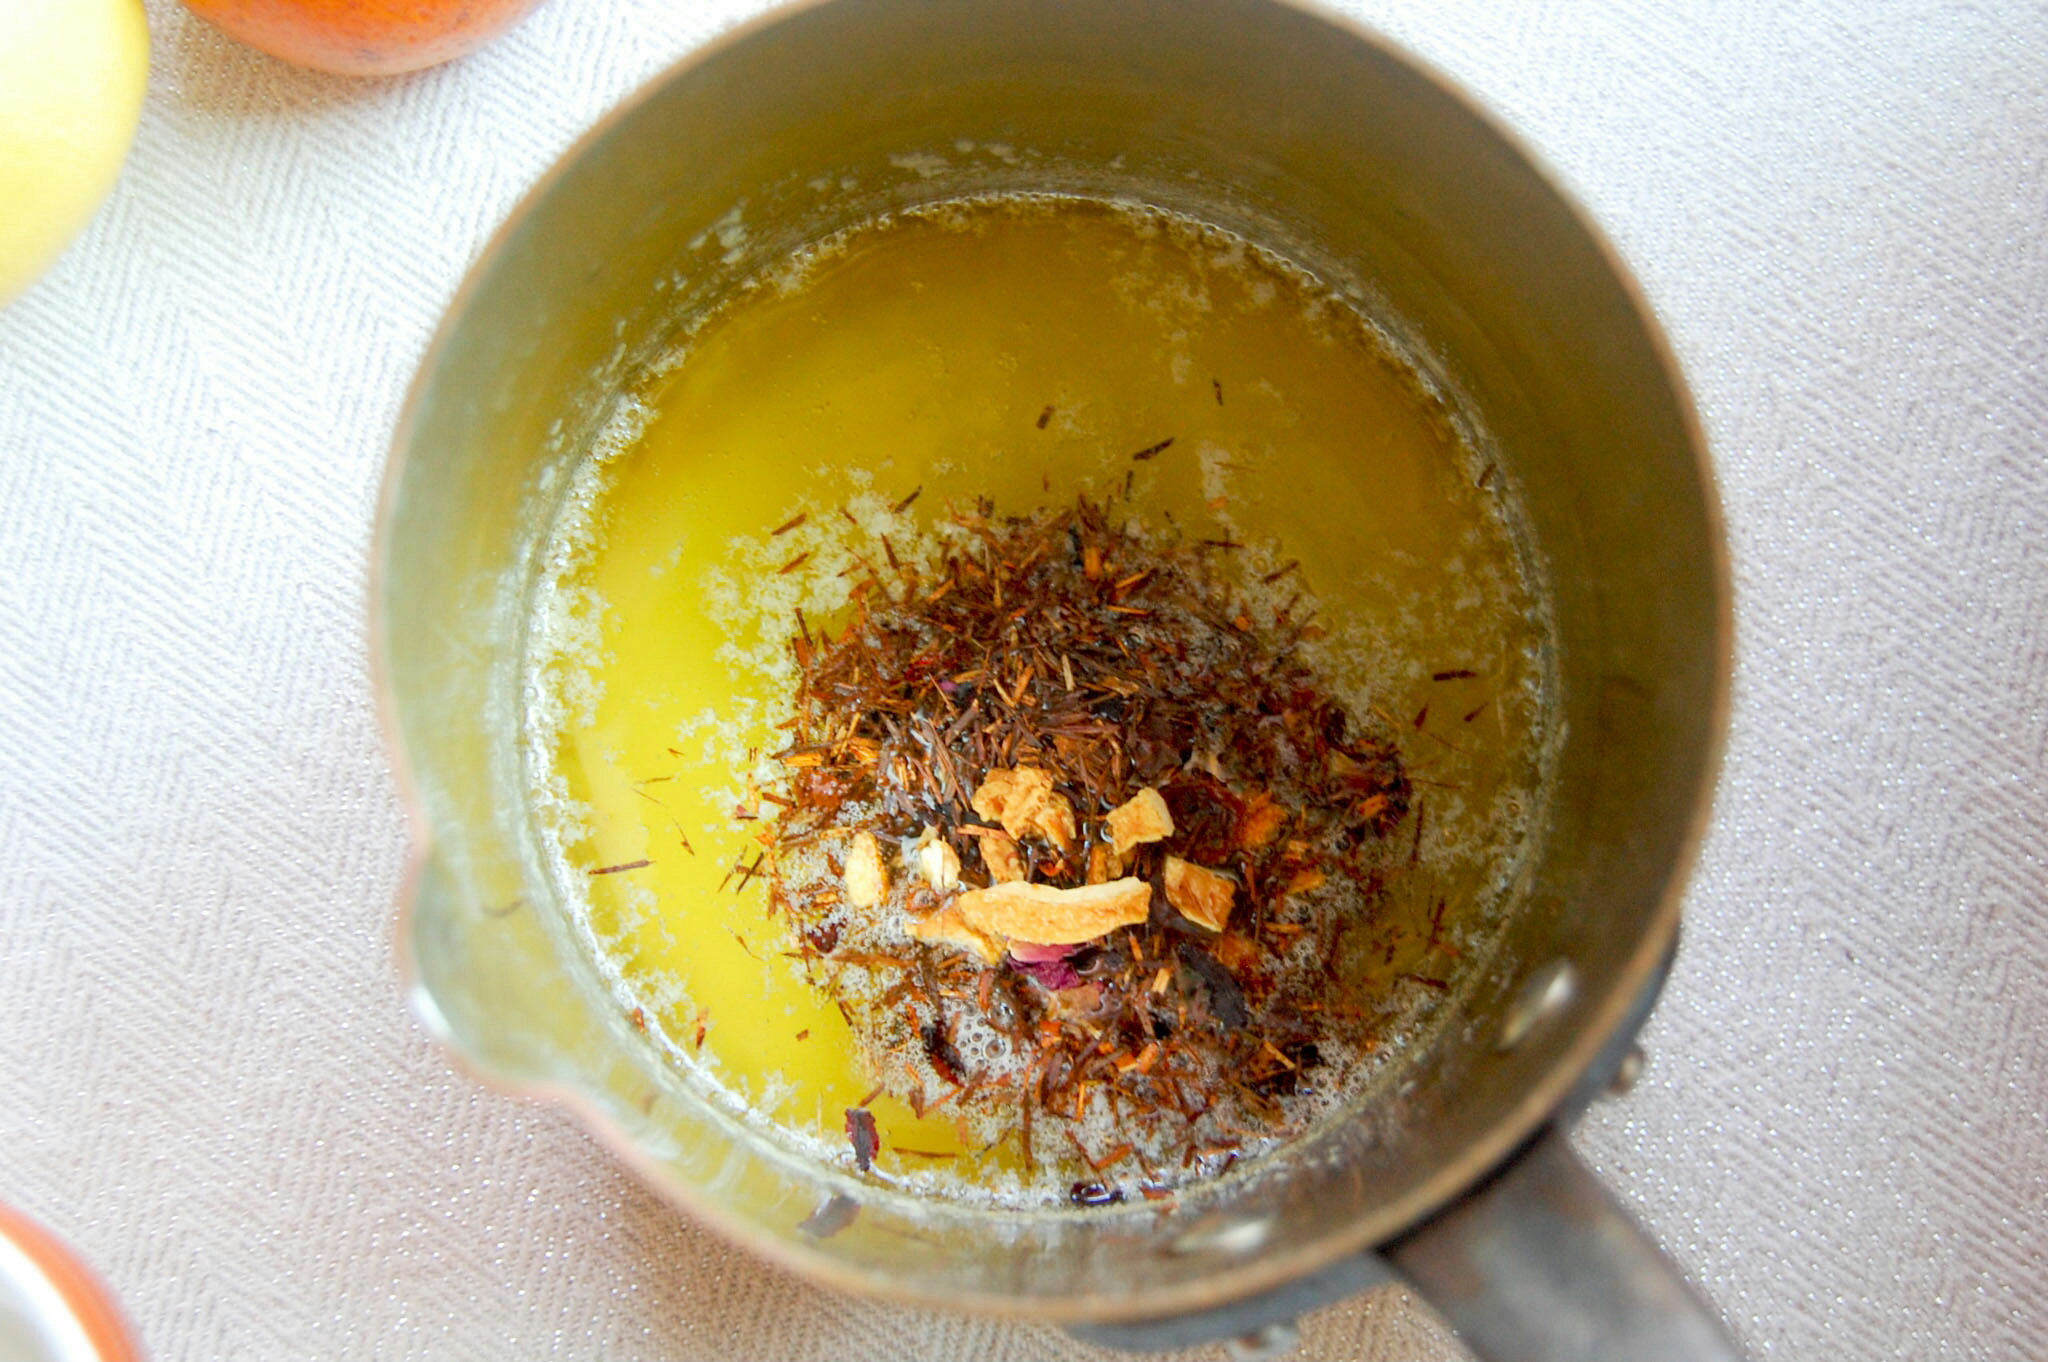
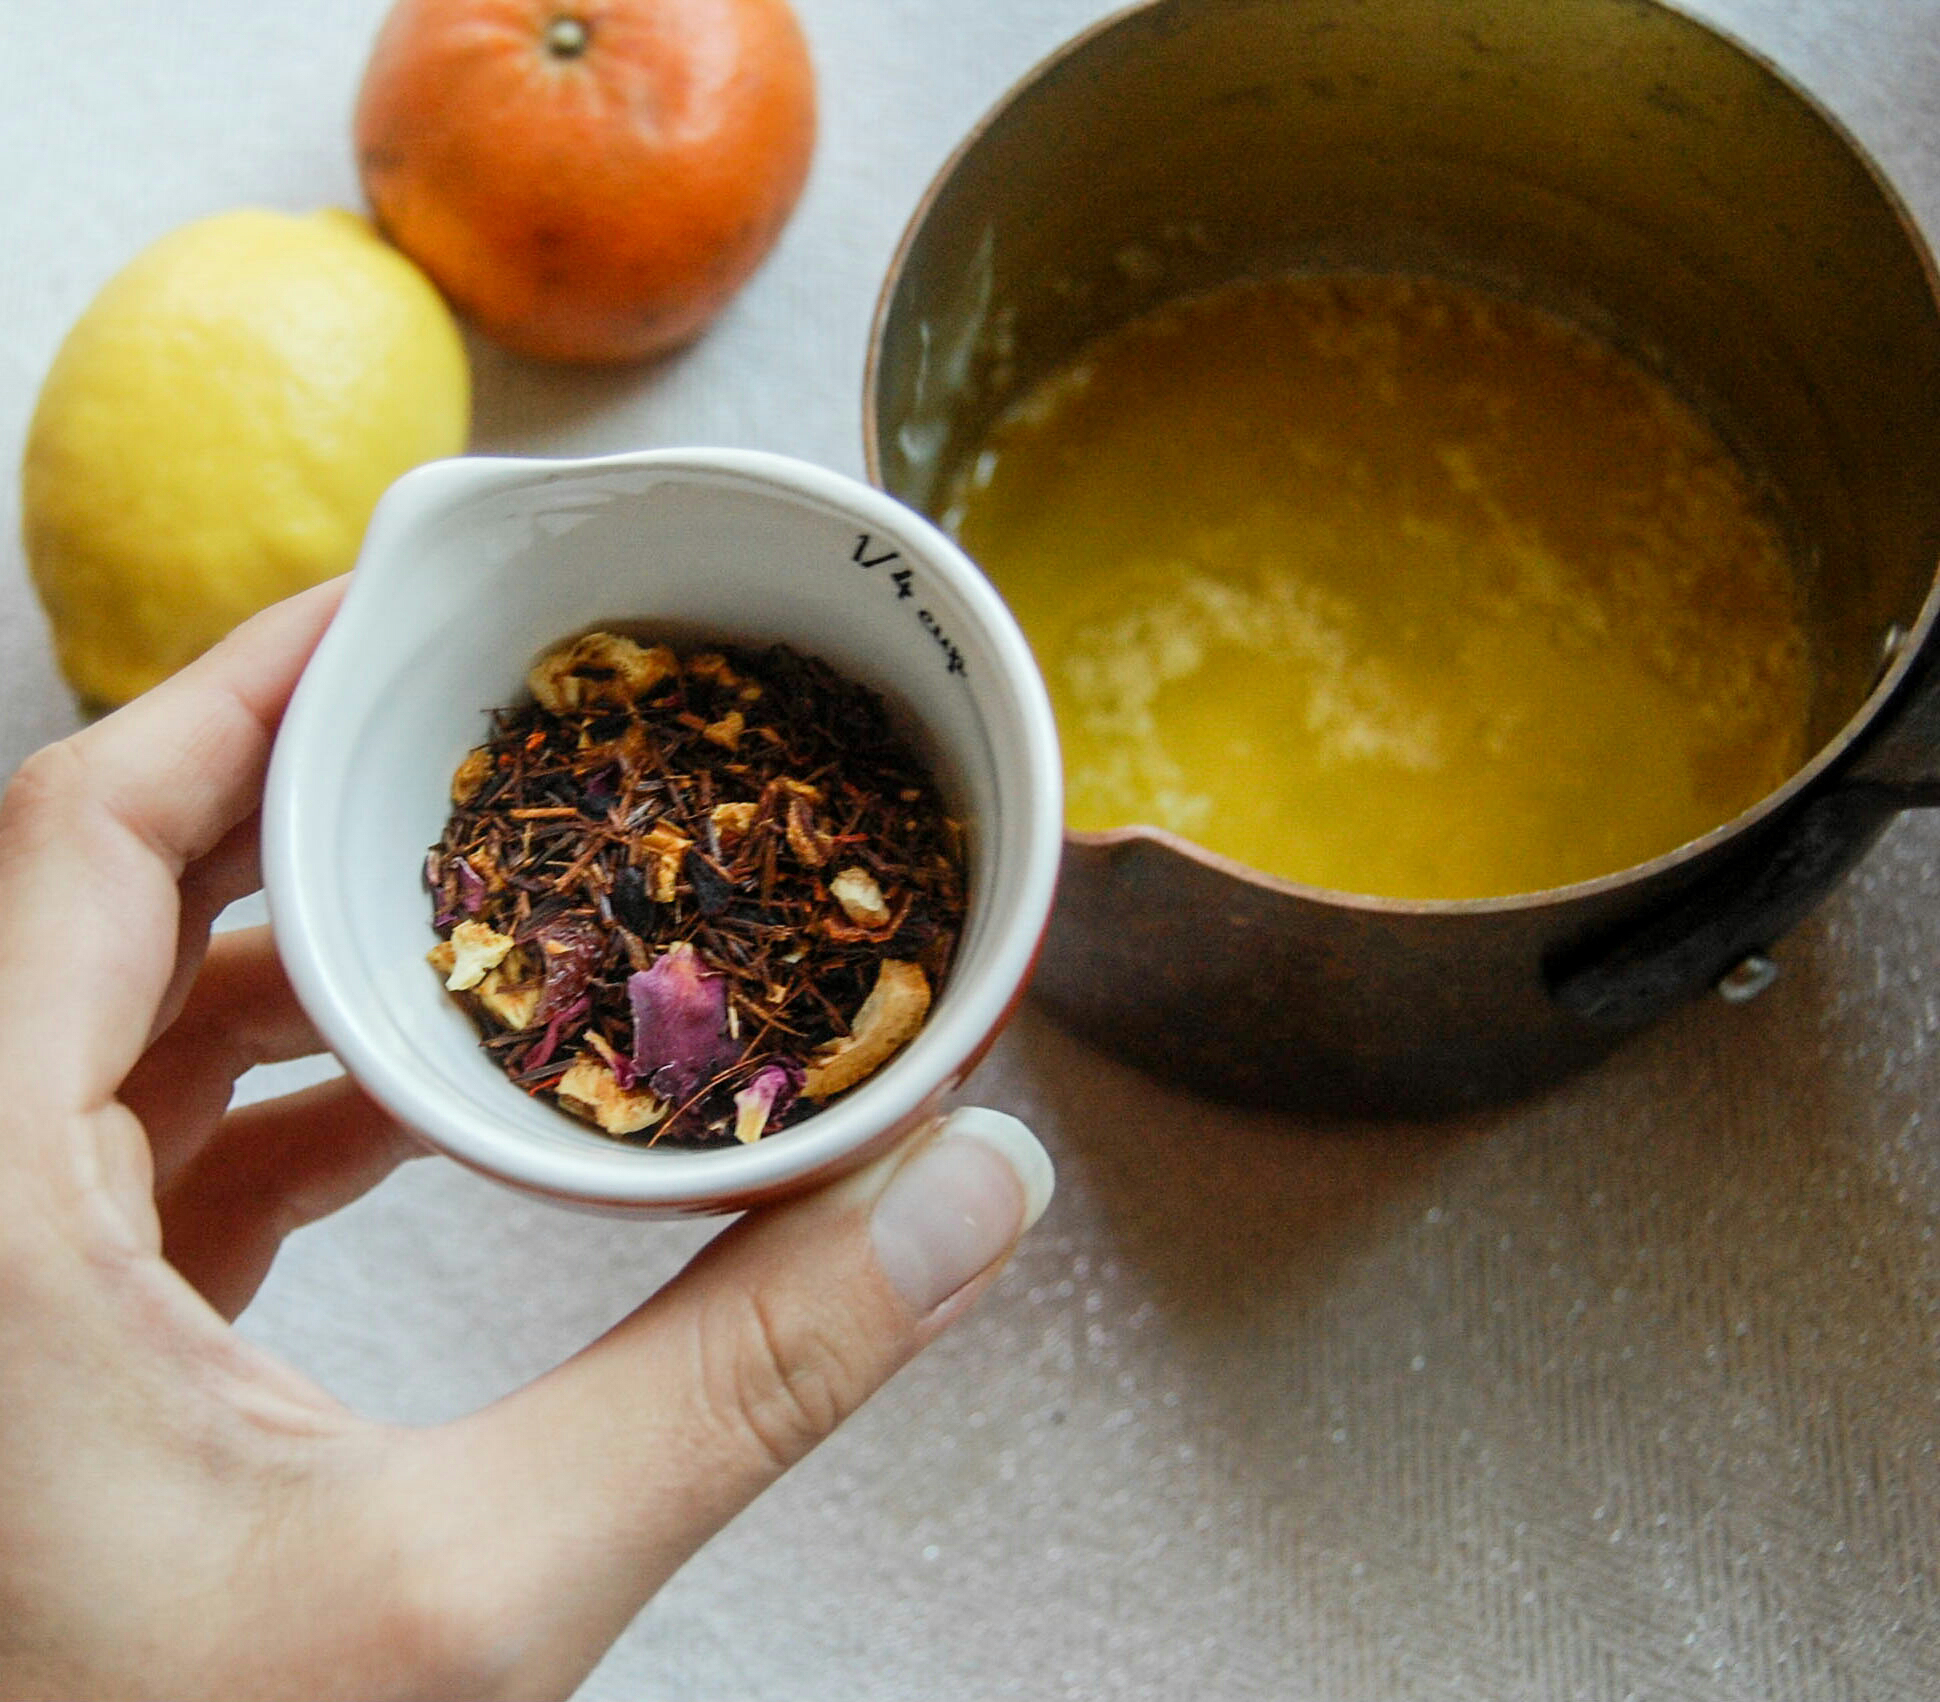
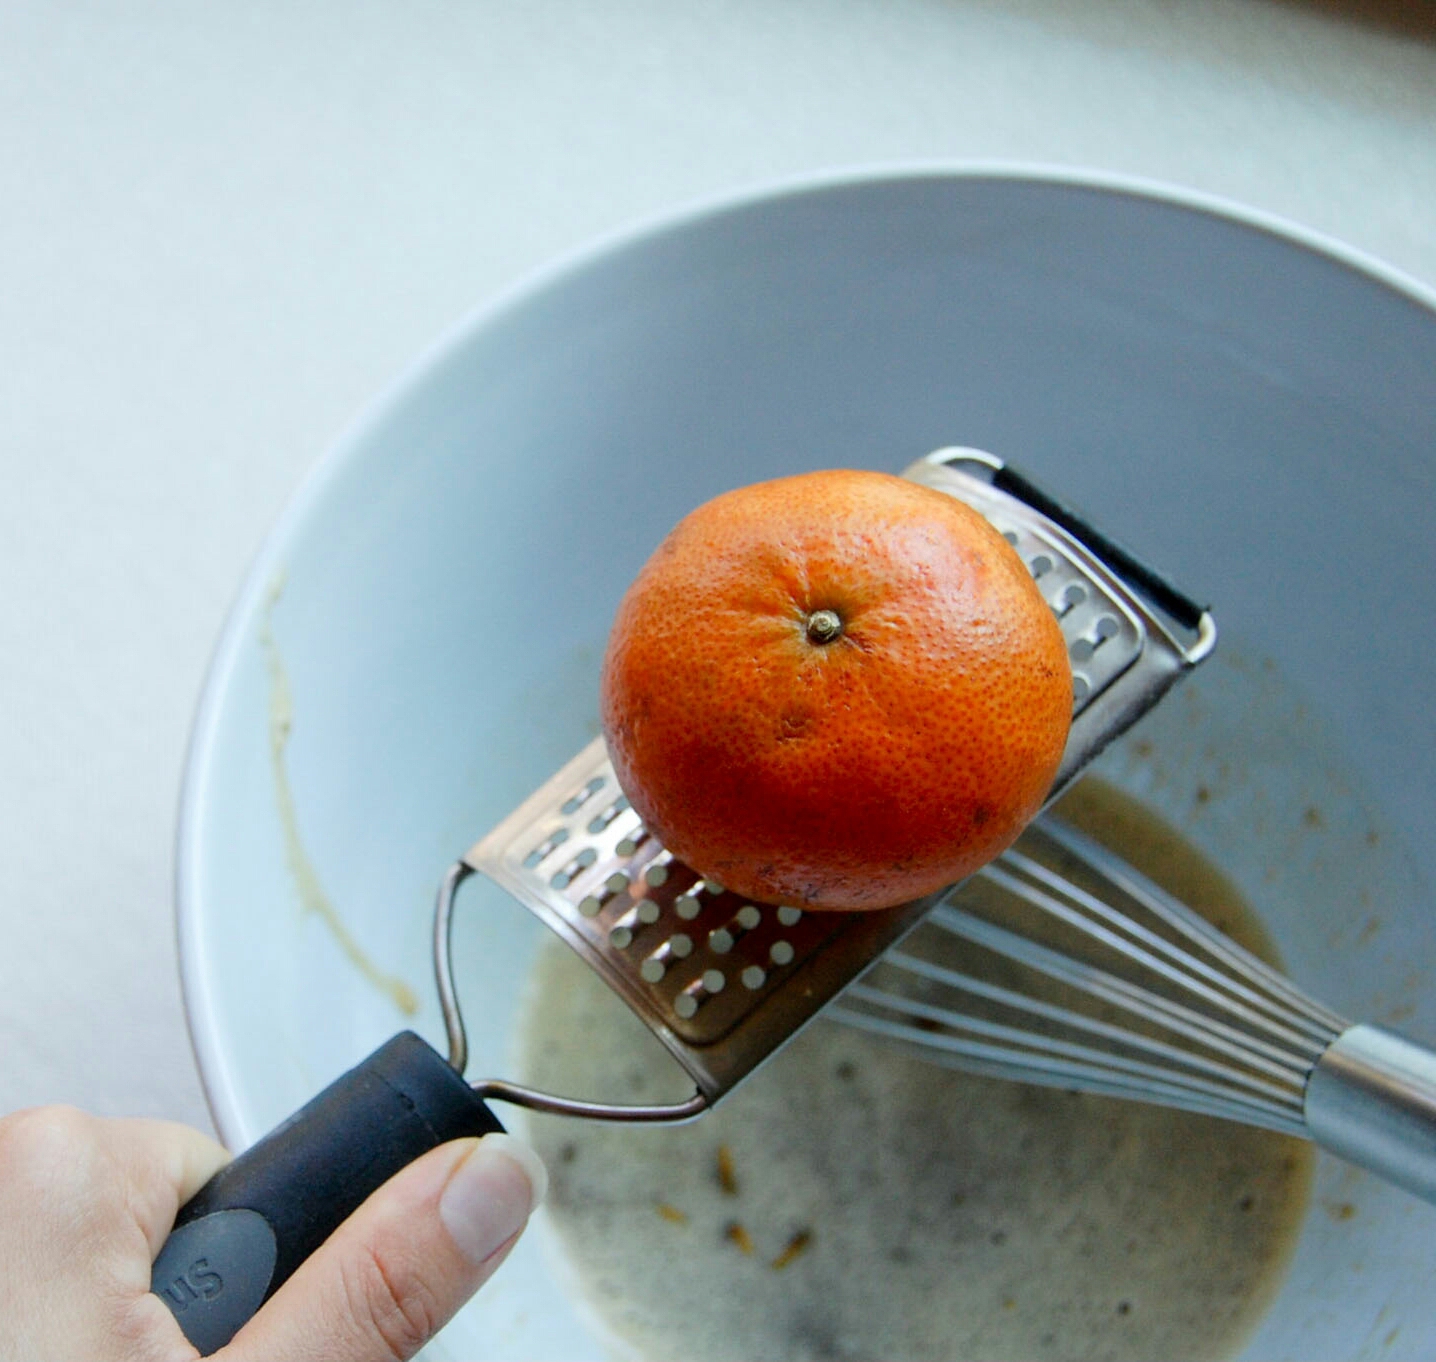
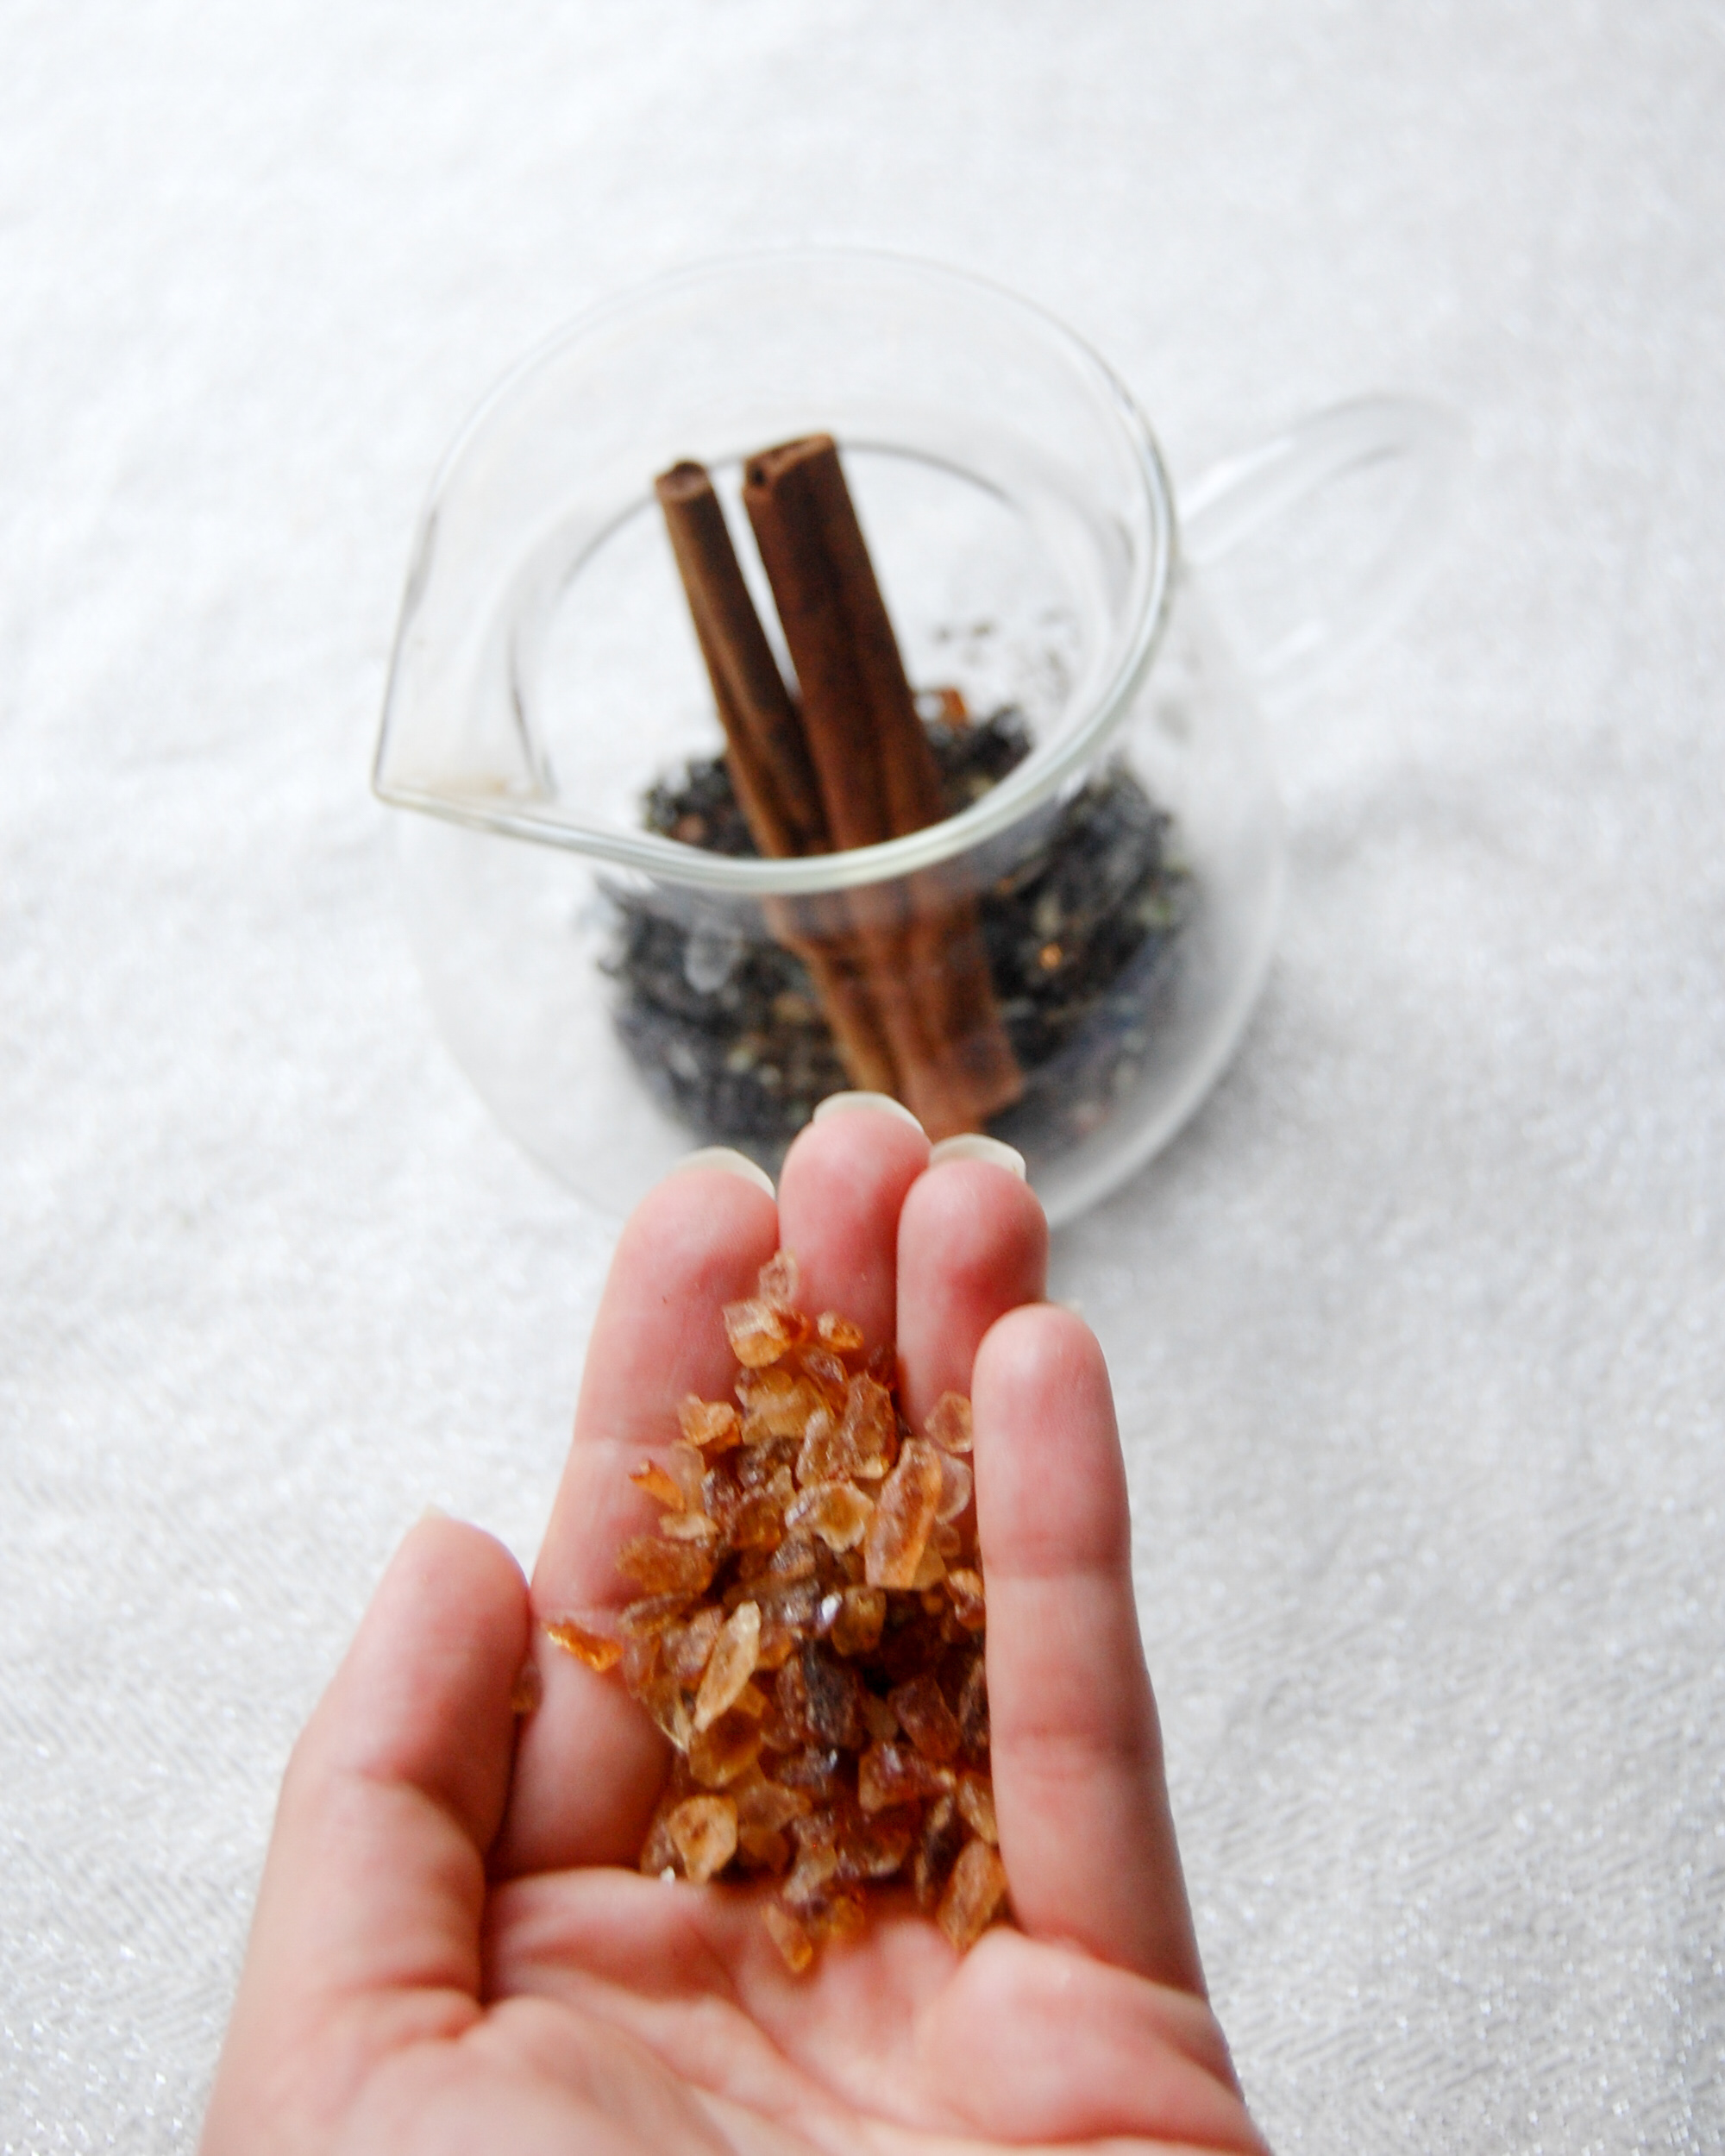
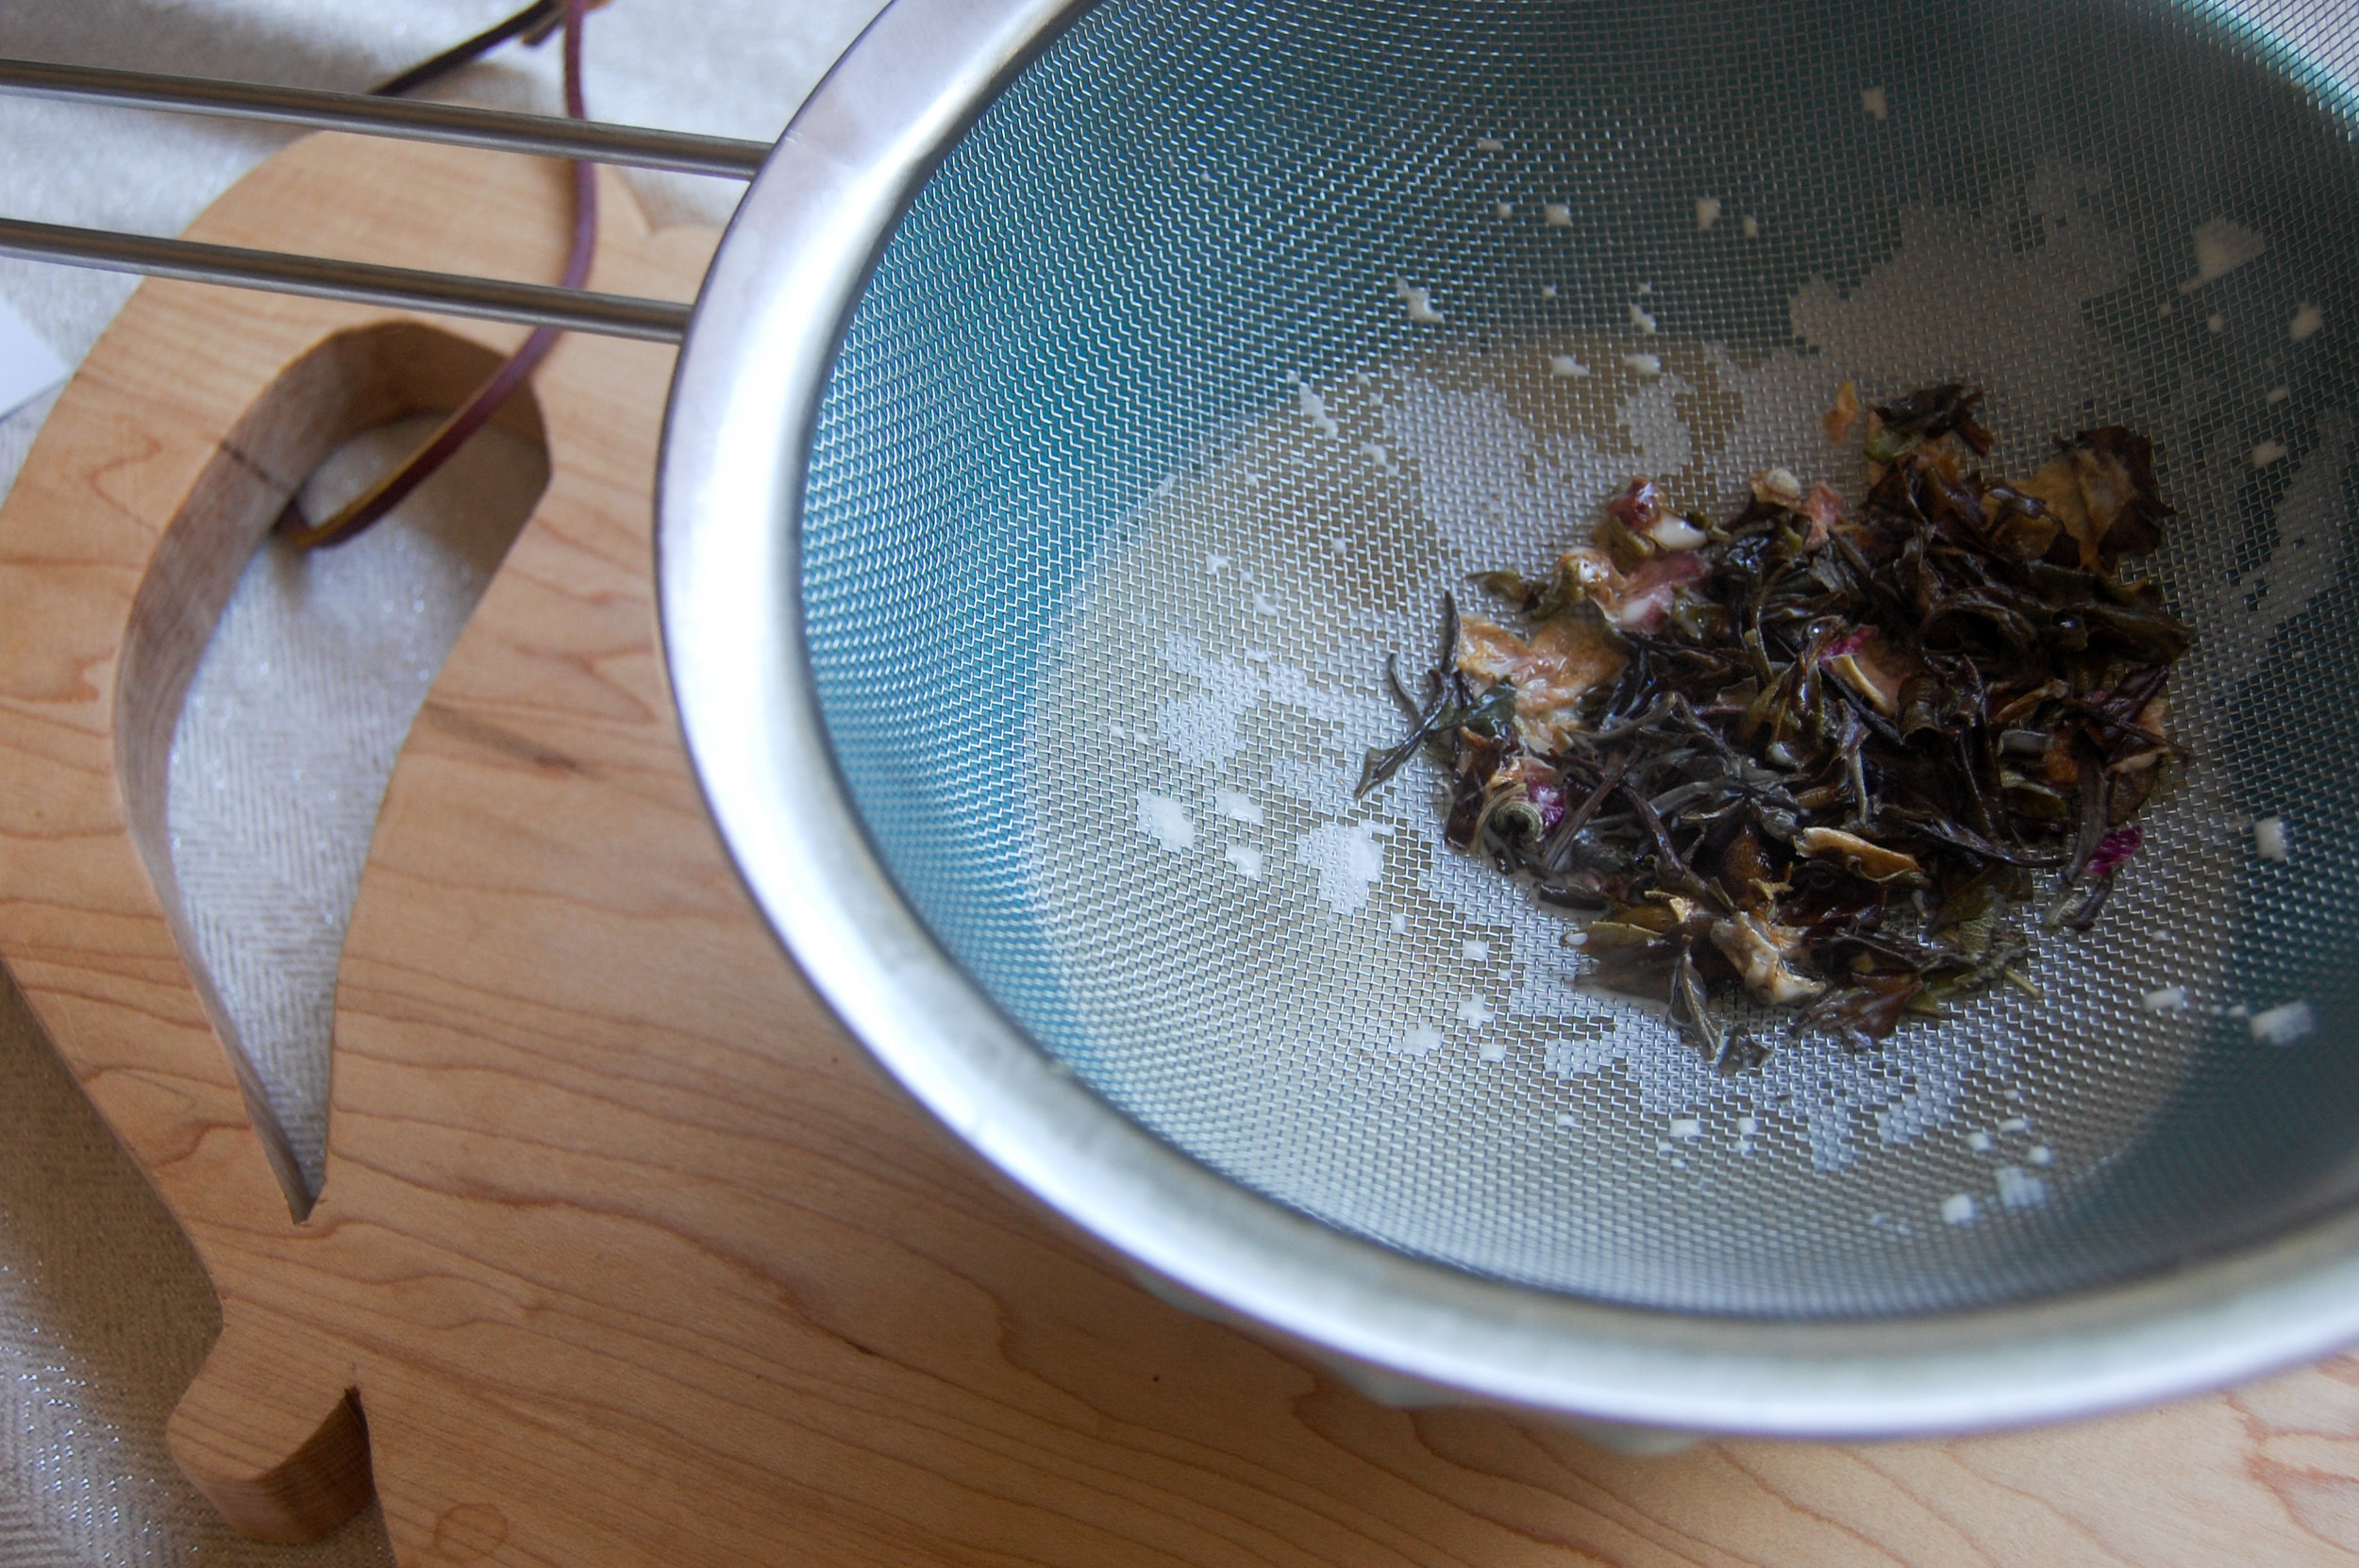
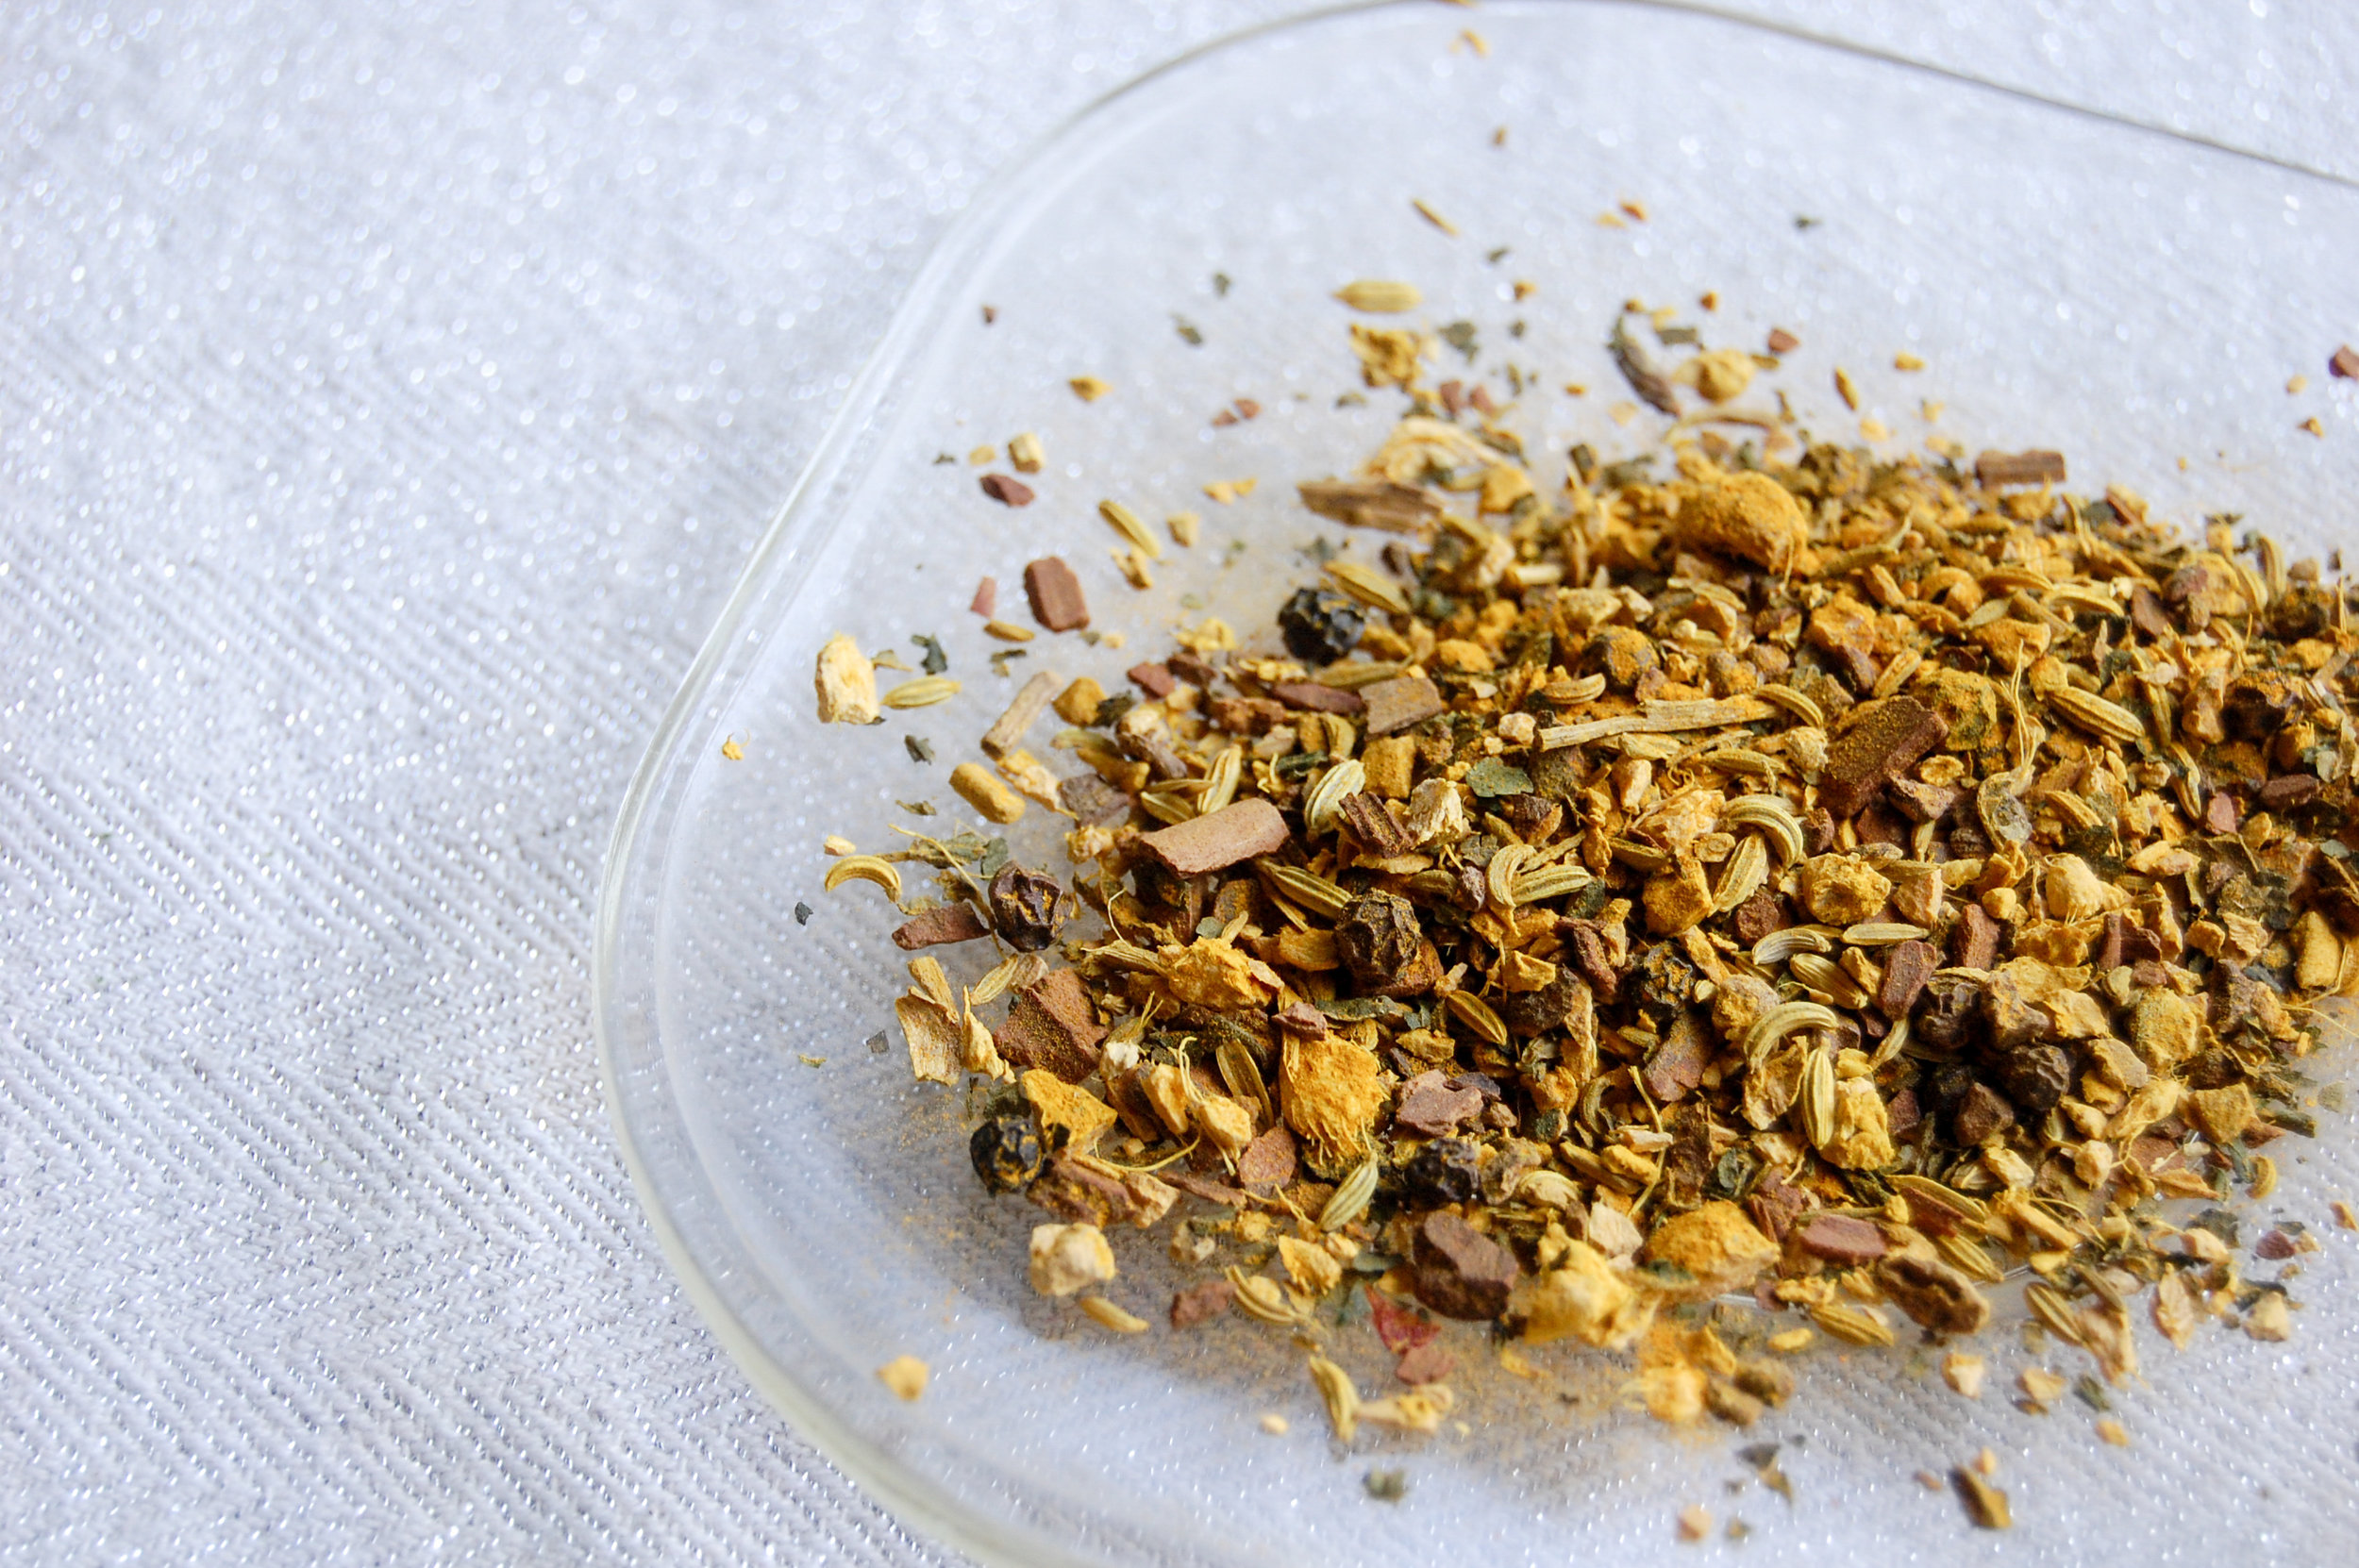
After researching how they're made, I decided that the Bangkok chai I got in my sipsby box would be perfect because it's not your typical chai blend! This chai blend from Kleff tea has Black tea, cinnamon bark, ginger root, cardamom pods, lemon grass, dried coconut in it!

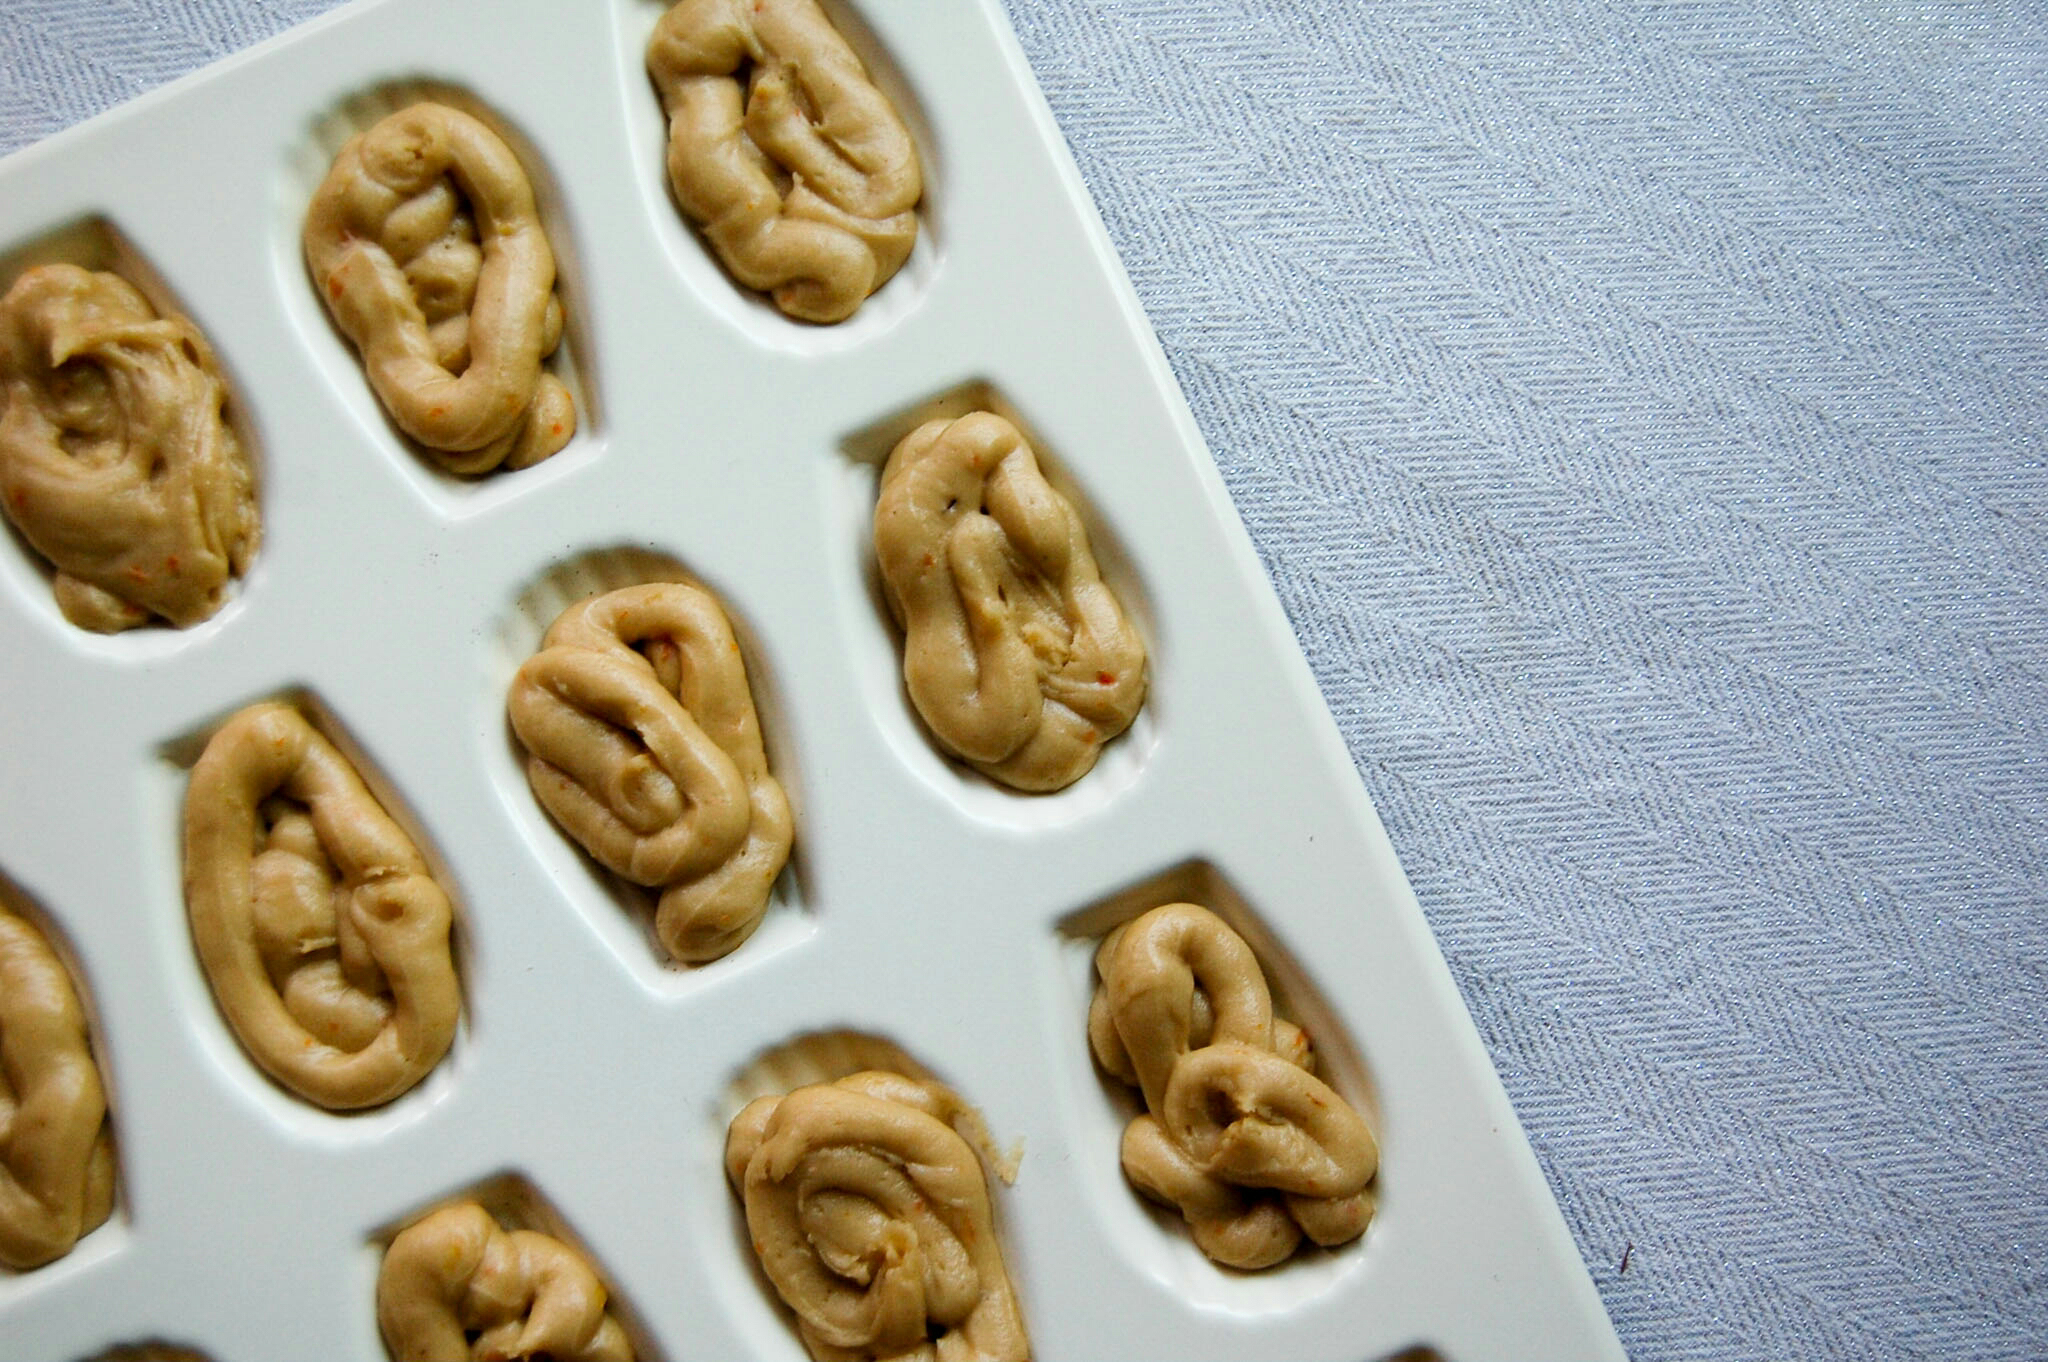
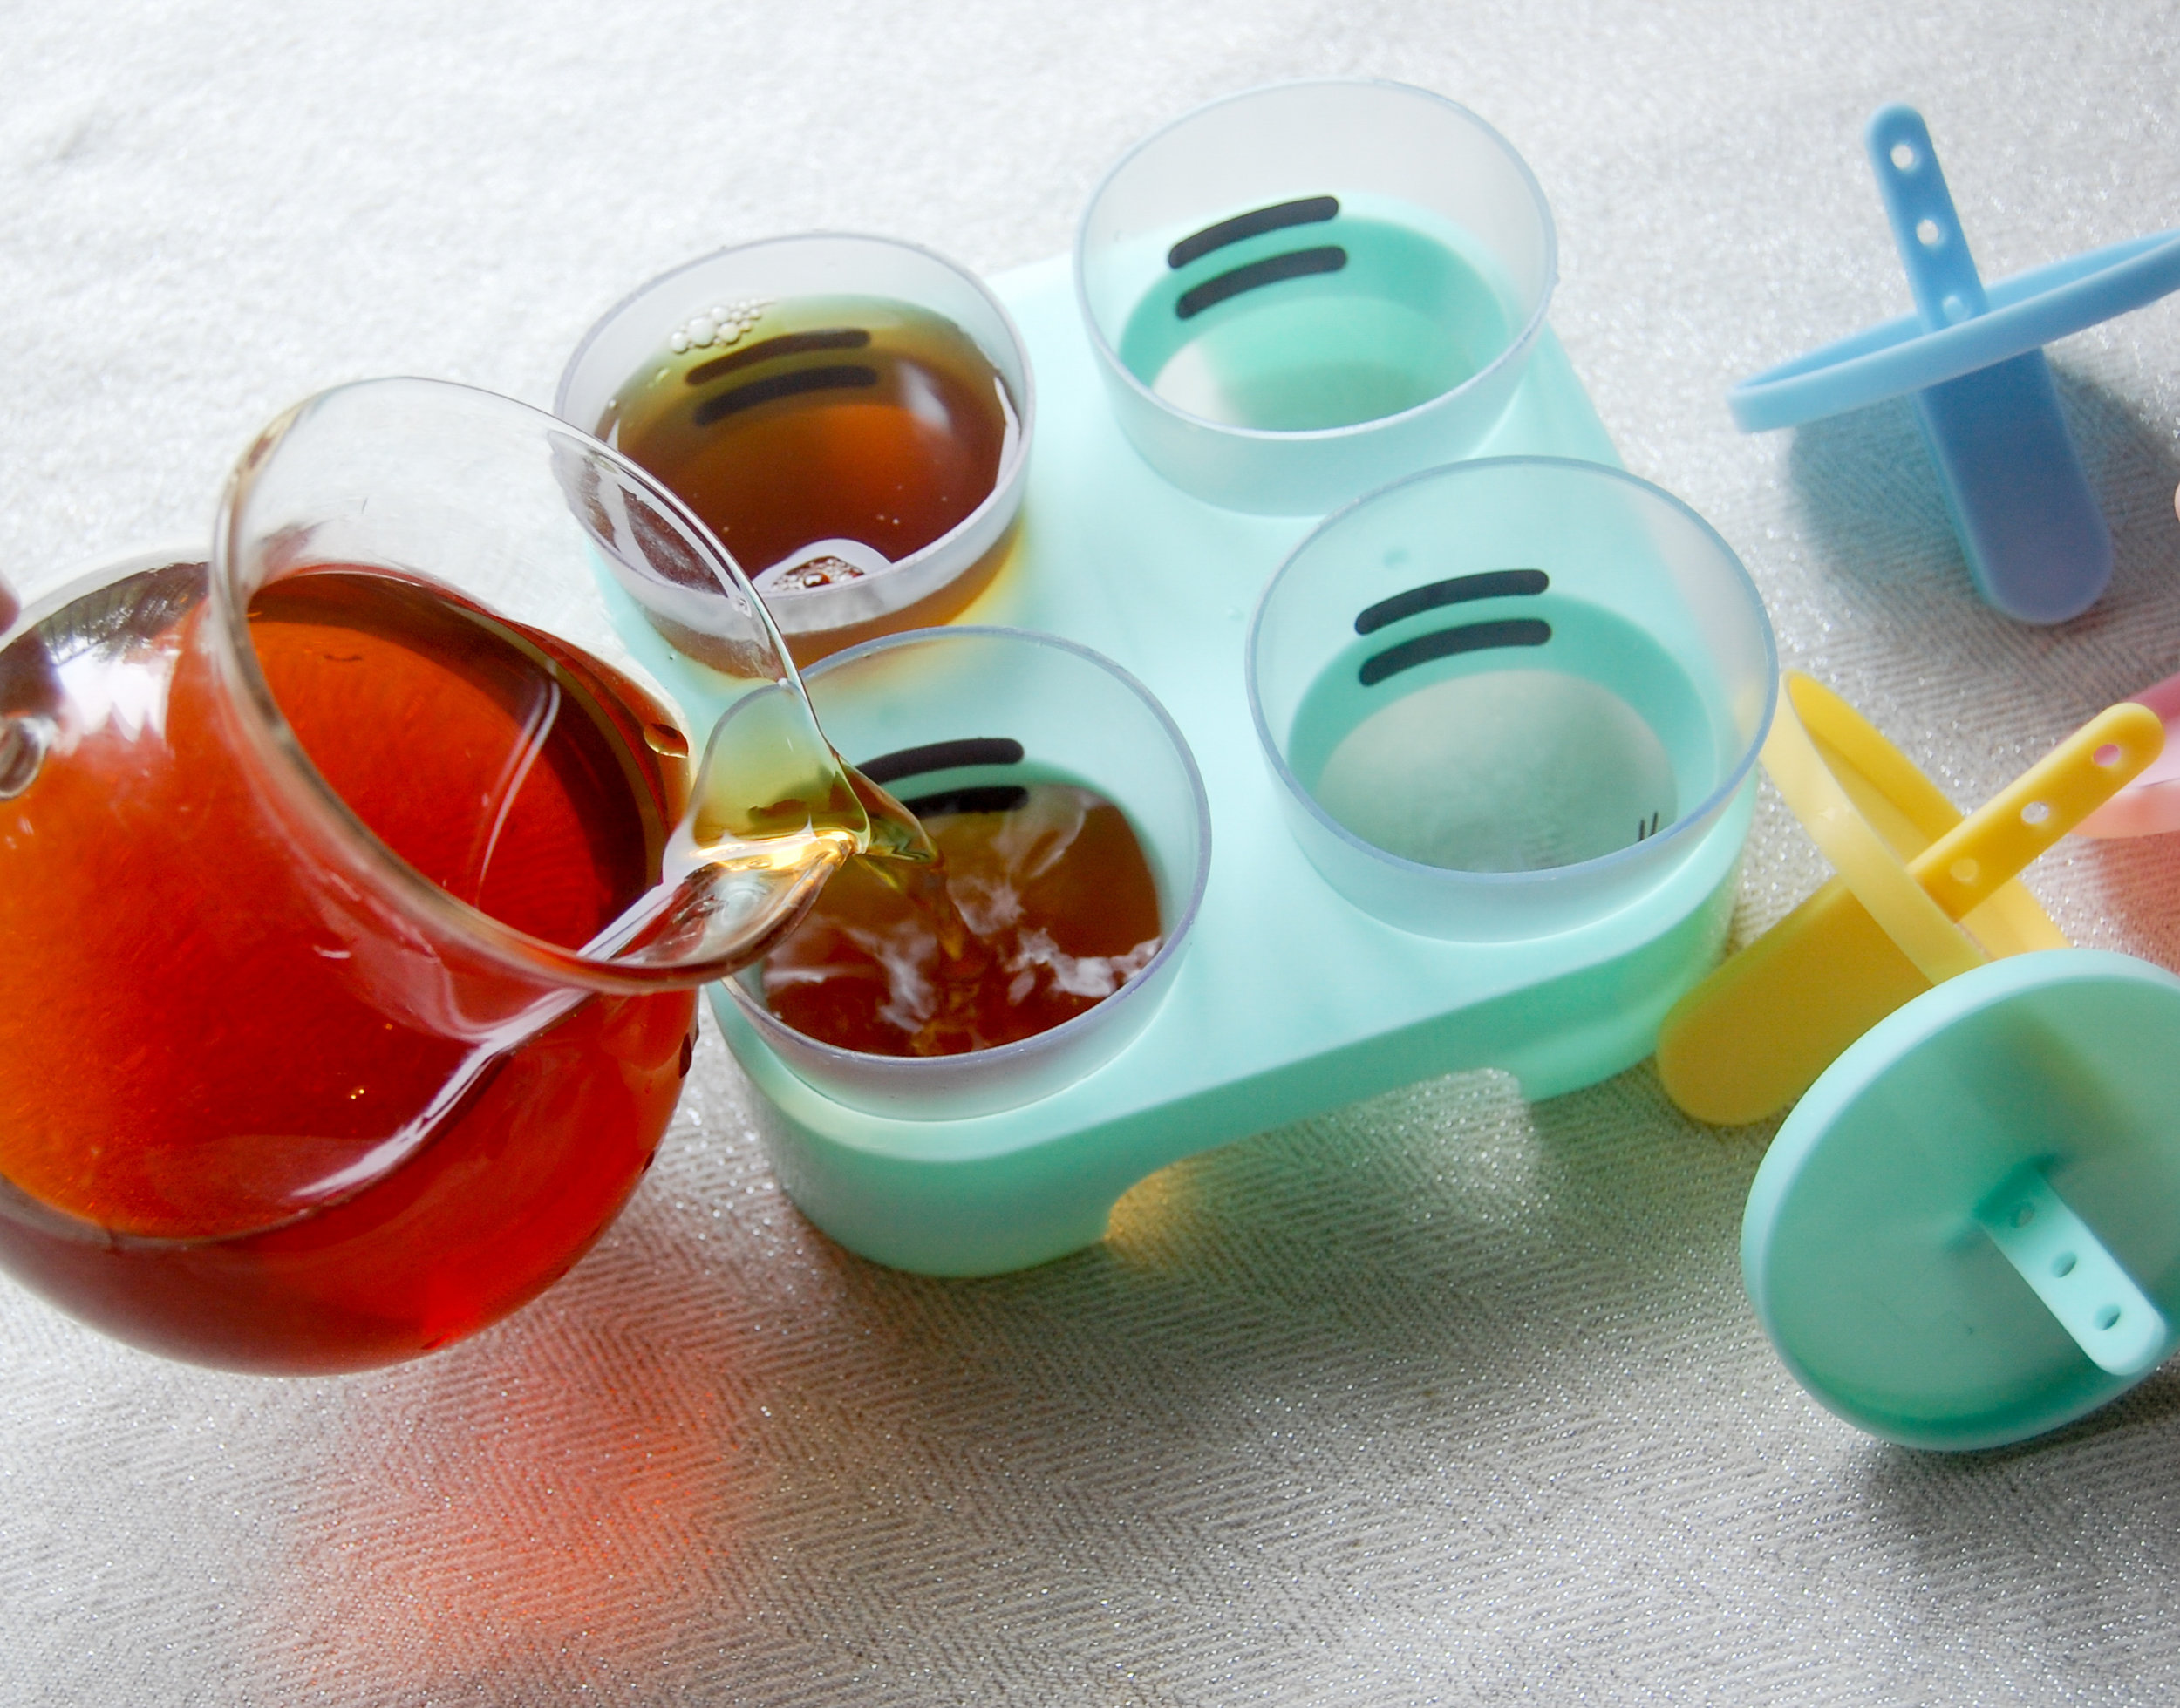
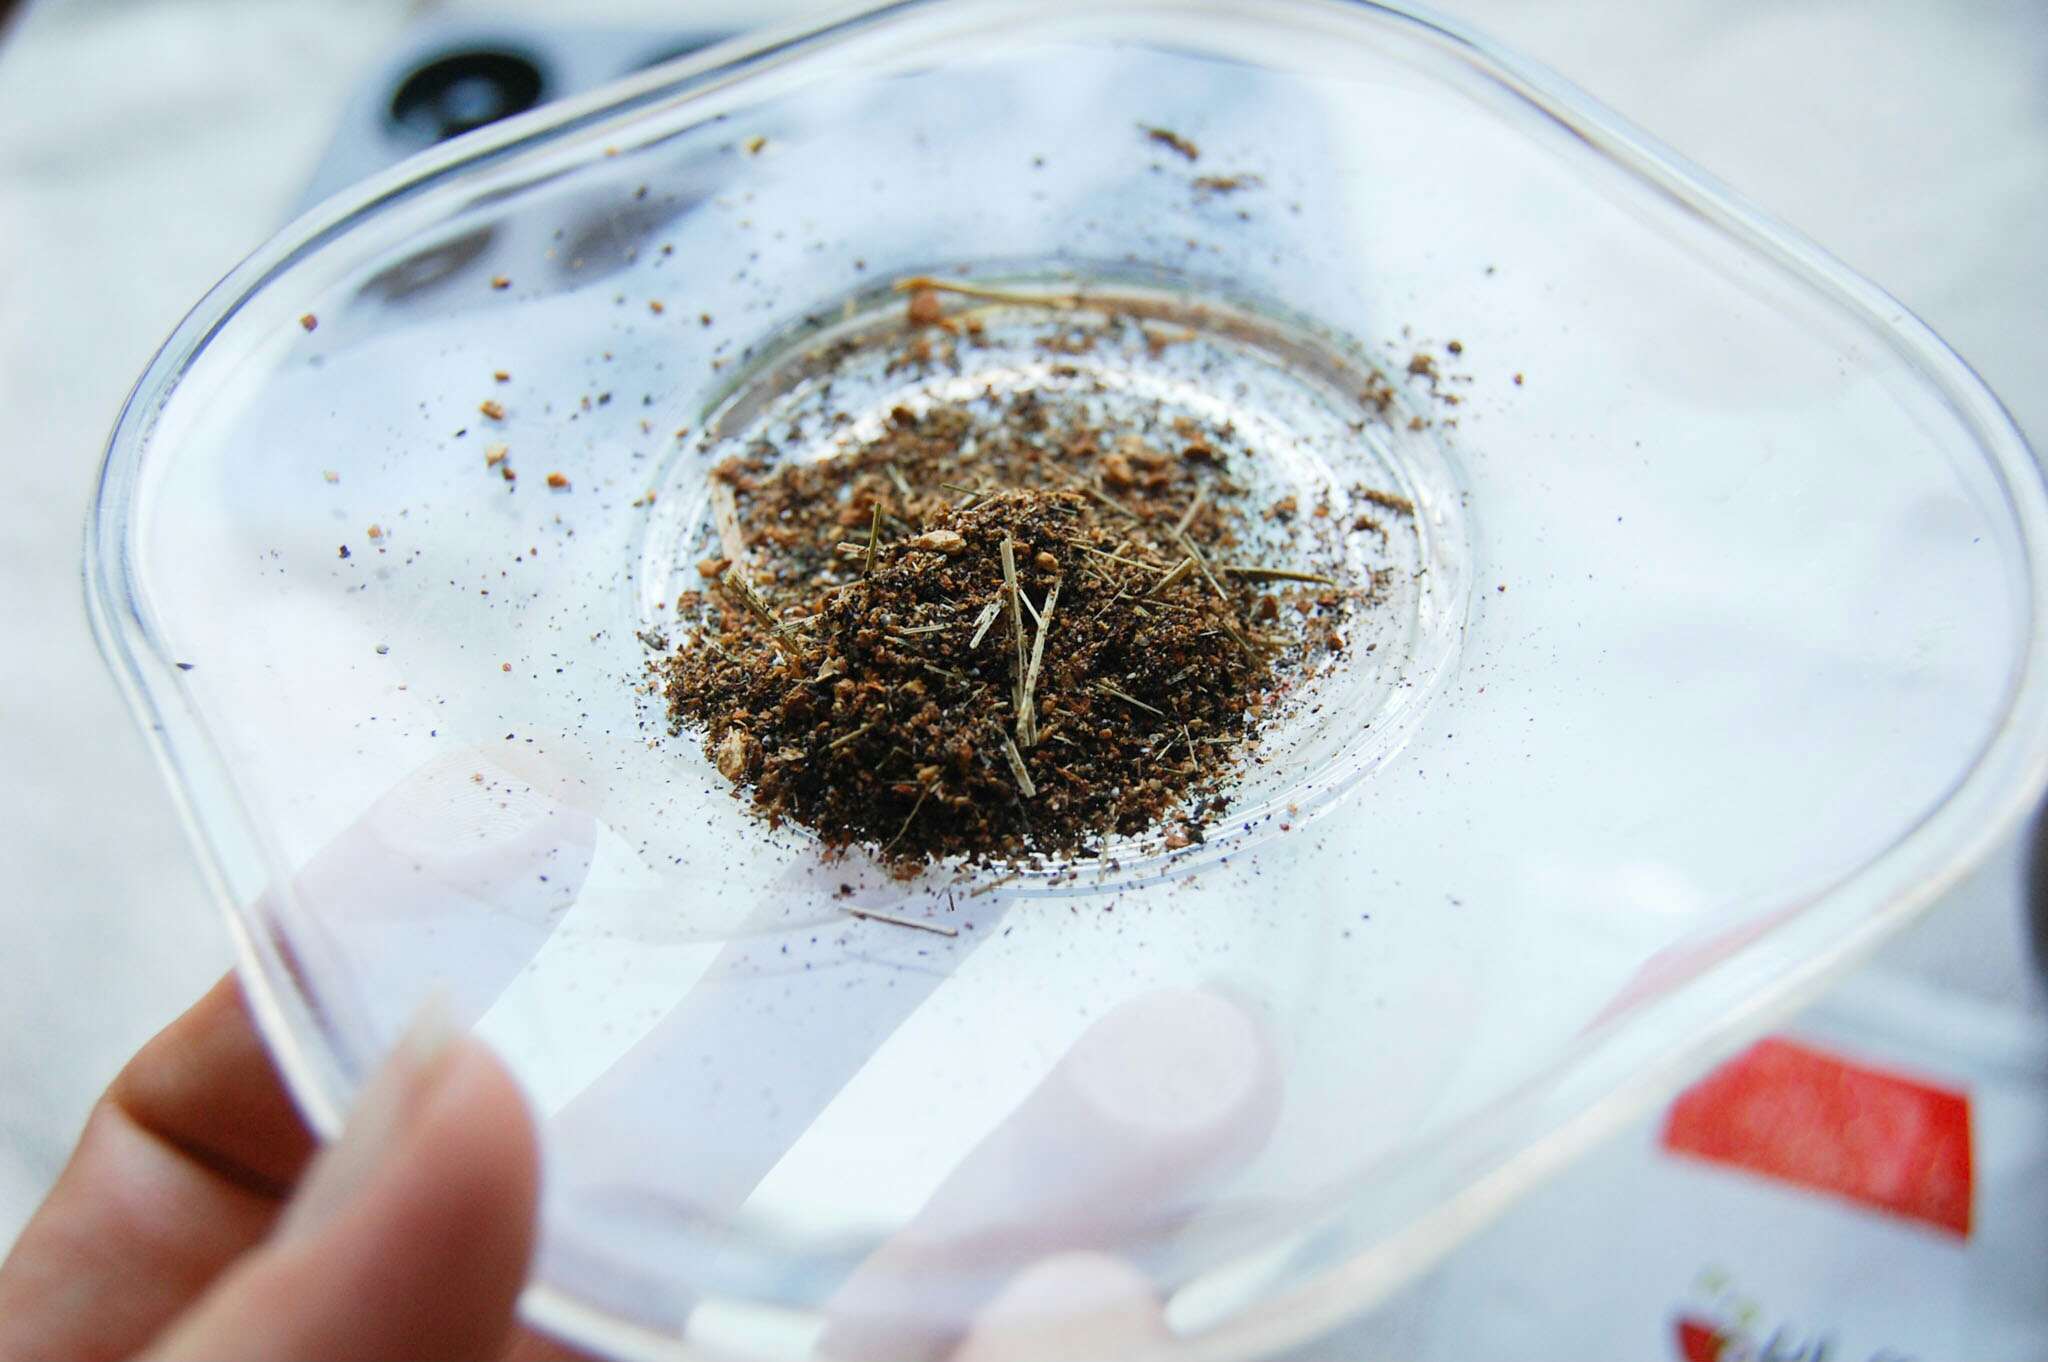
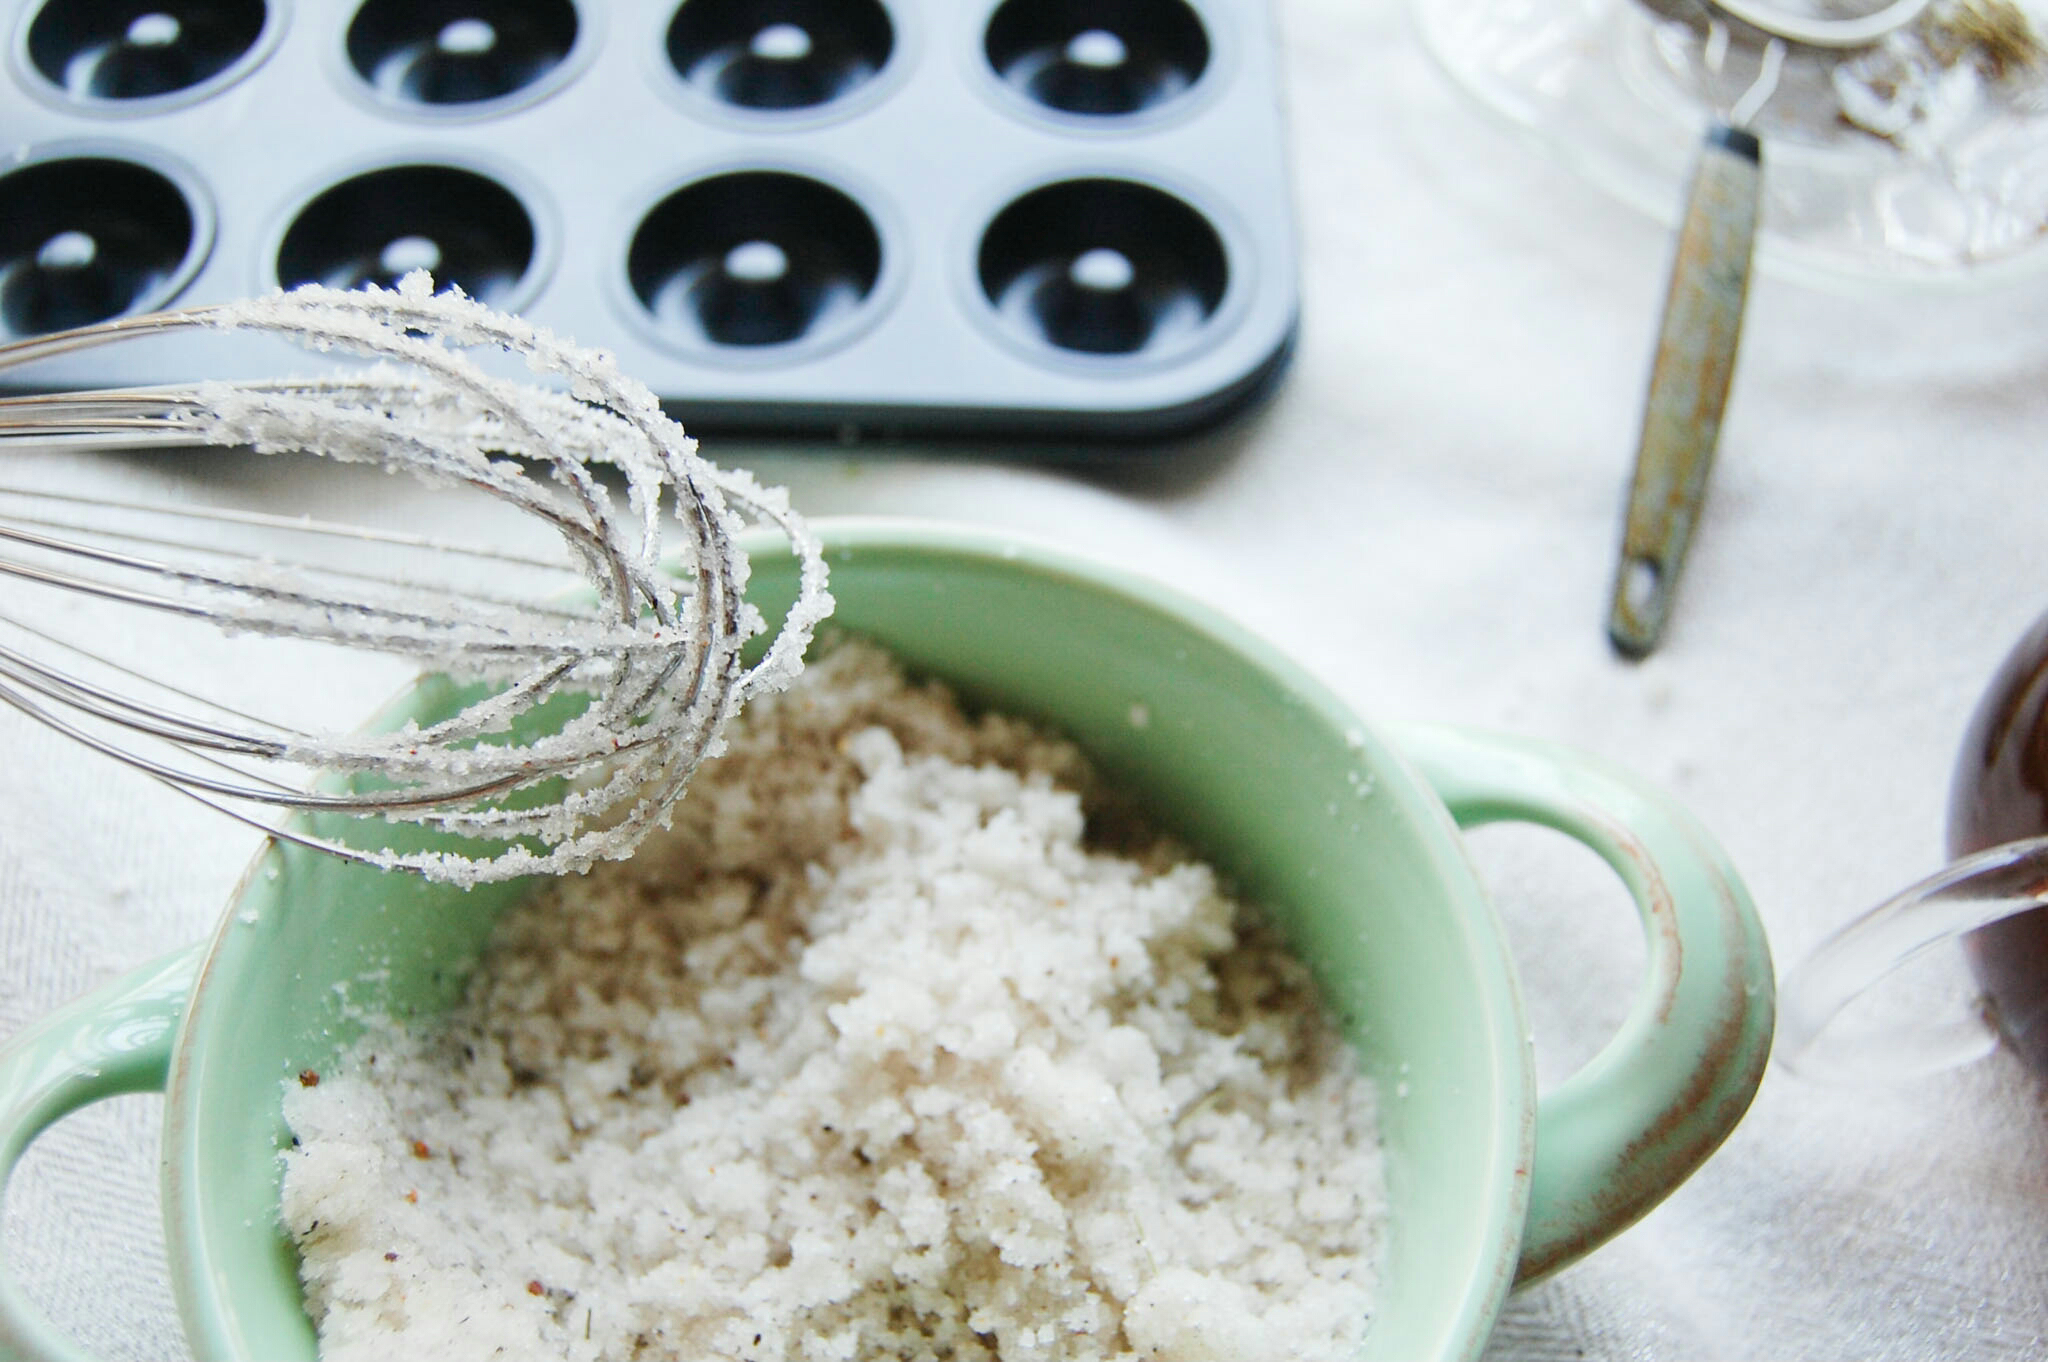
In my recipe I mention using up to one tablespoon of tea. You may need less than this but definitely not more than this! I didn't actually measure the amount I used completely but it wasn't a lot. What I did was added a tiny amount of tea then I would mix, mix, mix and see how much more I needed. I read somewhere that it should be like damp sand, not wet sand and I think that is a great way to think about it!

1403-2018-045869502466316597.jpeg

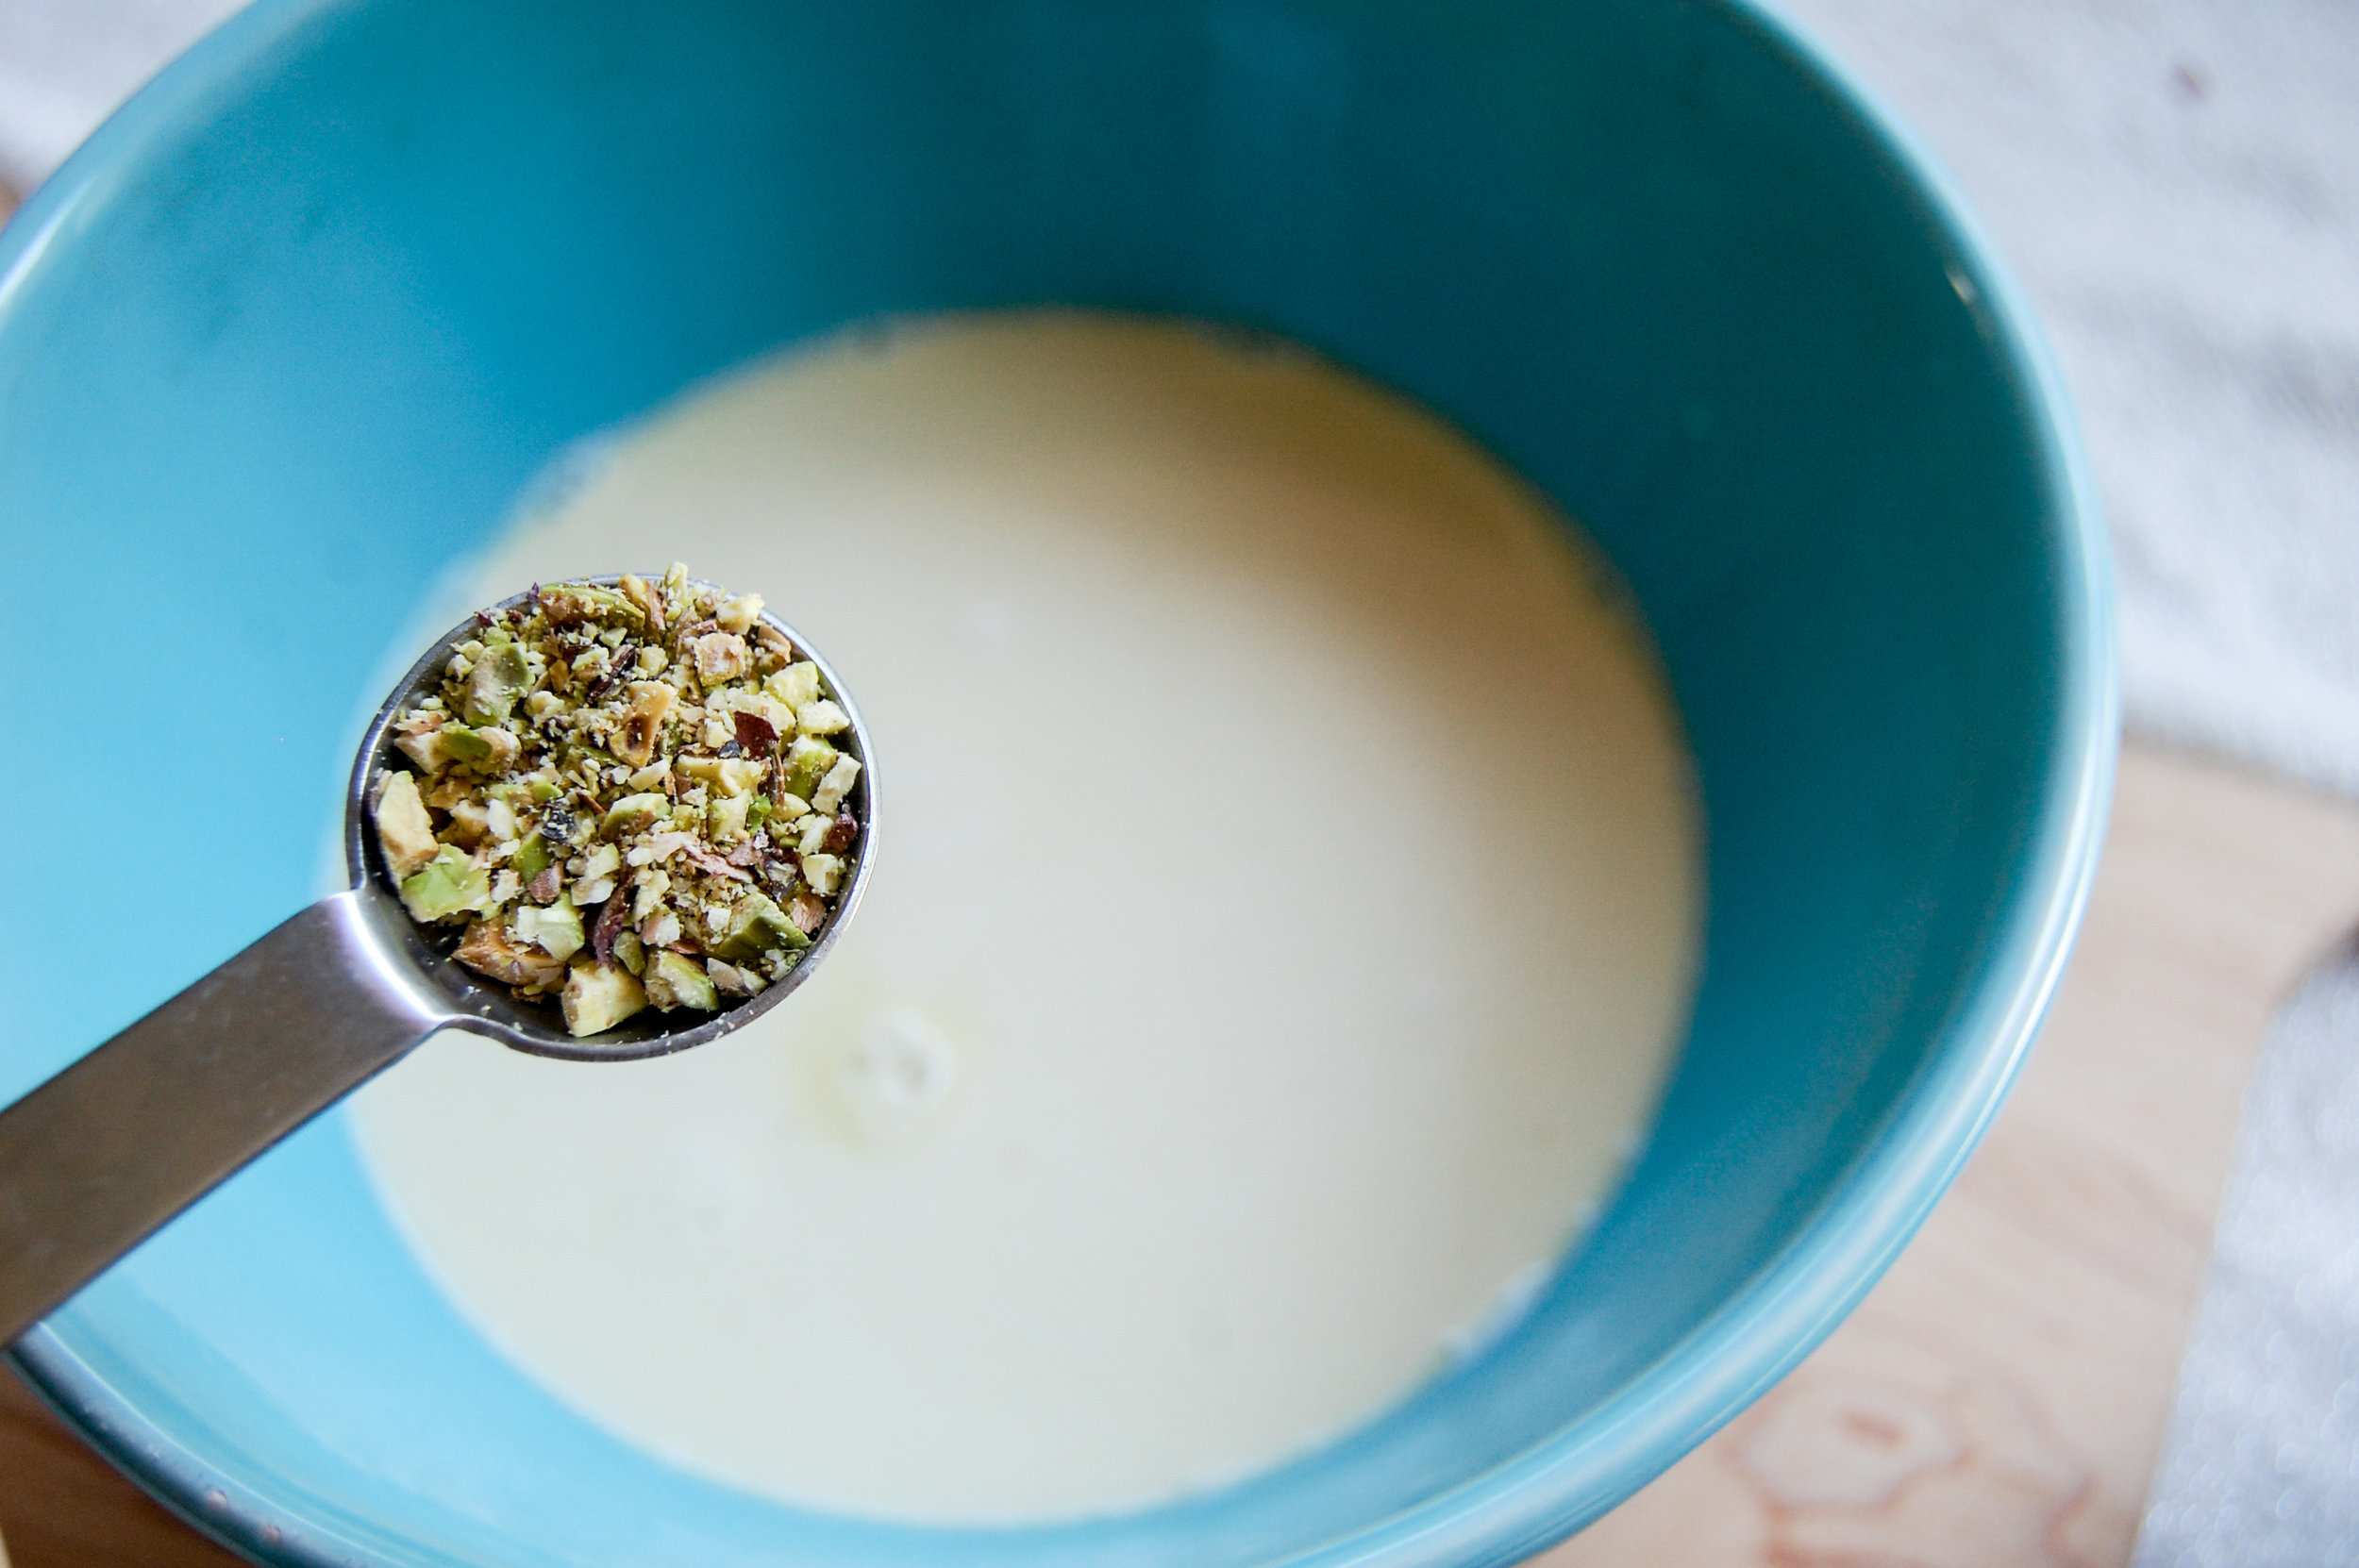
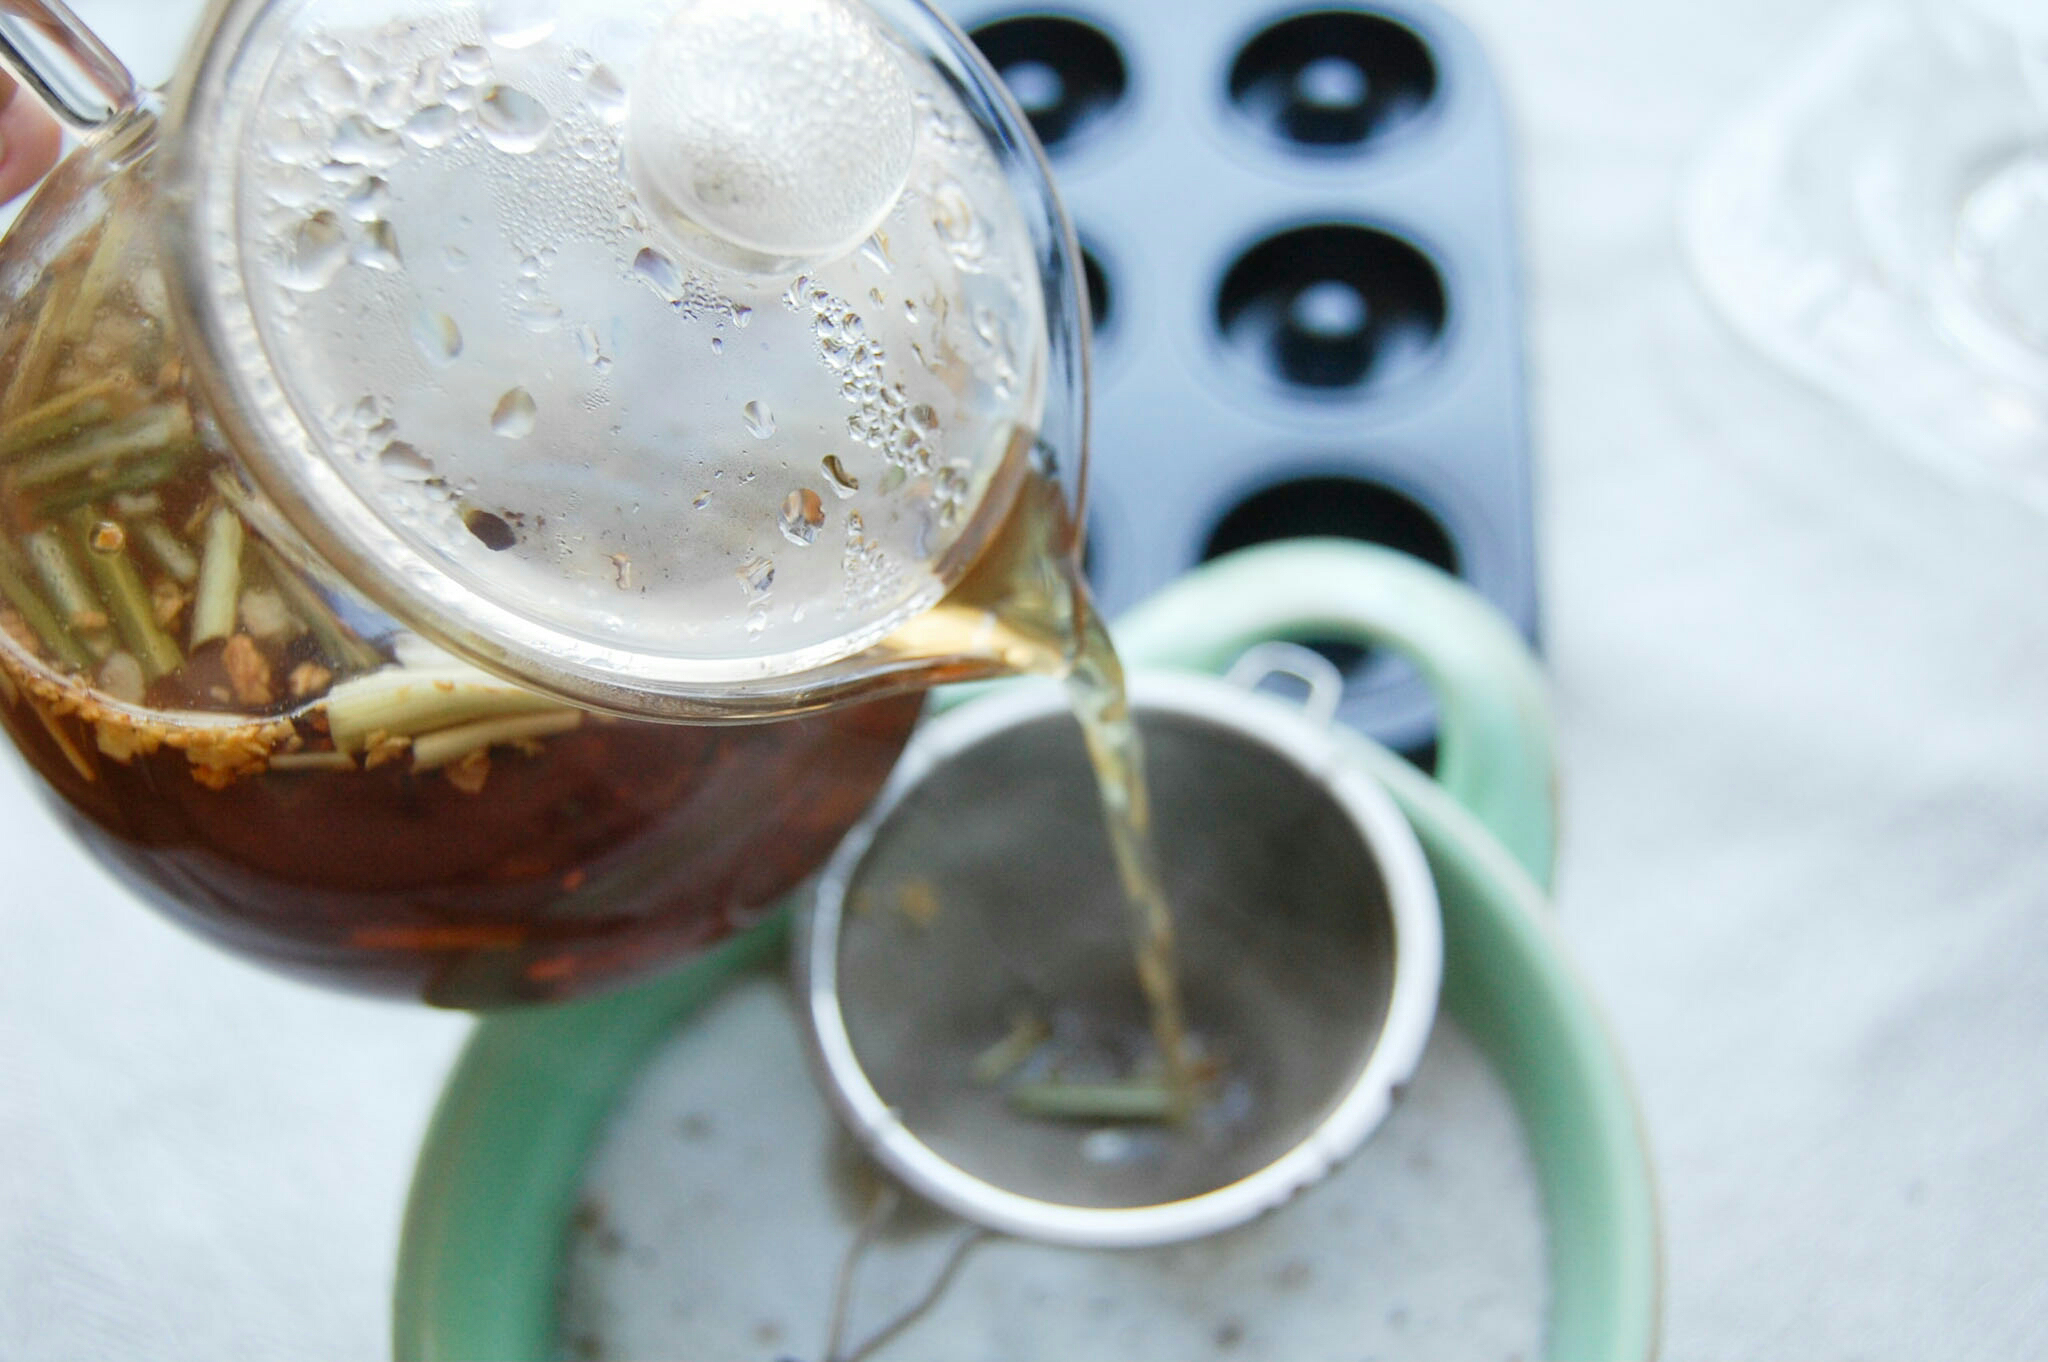
Probably the most important note, MAKE SURE YOUR TEA IS COOL. If your tea is hot, it will melt the sugar and all you will have is sweetened tea! I crushed up some of the chai and put it in the sugar as well to give it a fun look but this is not required!

1403-2018-040769511020360605.jpeg

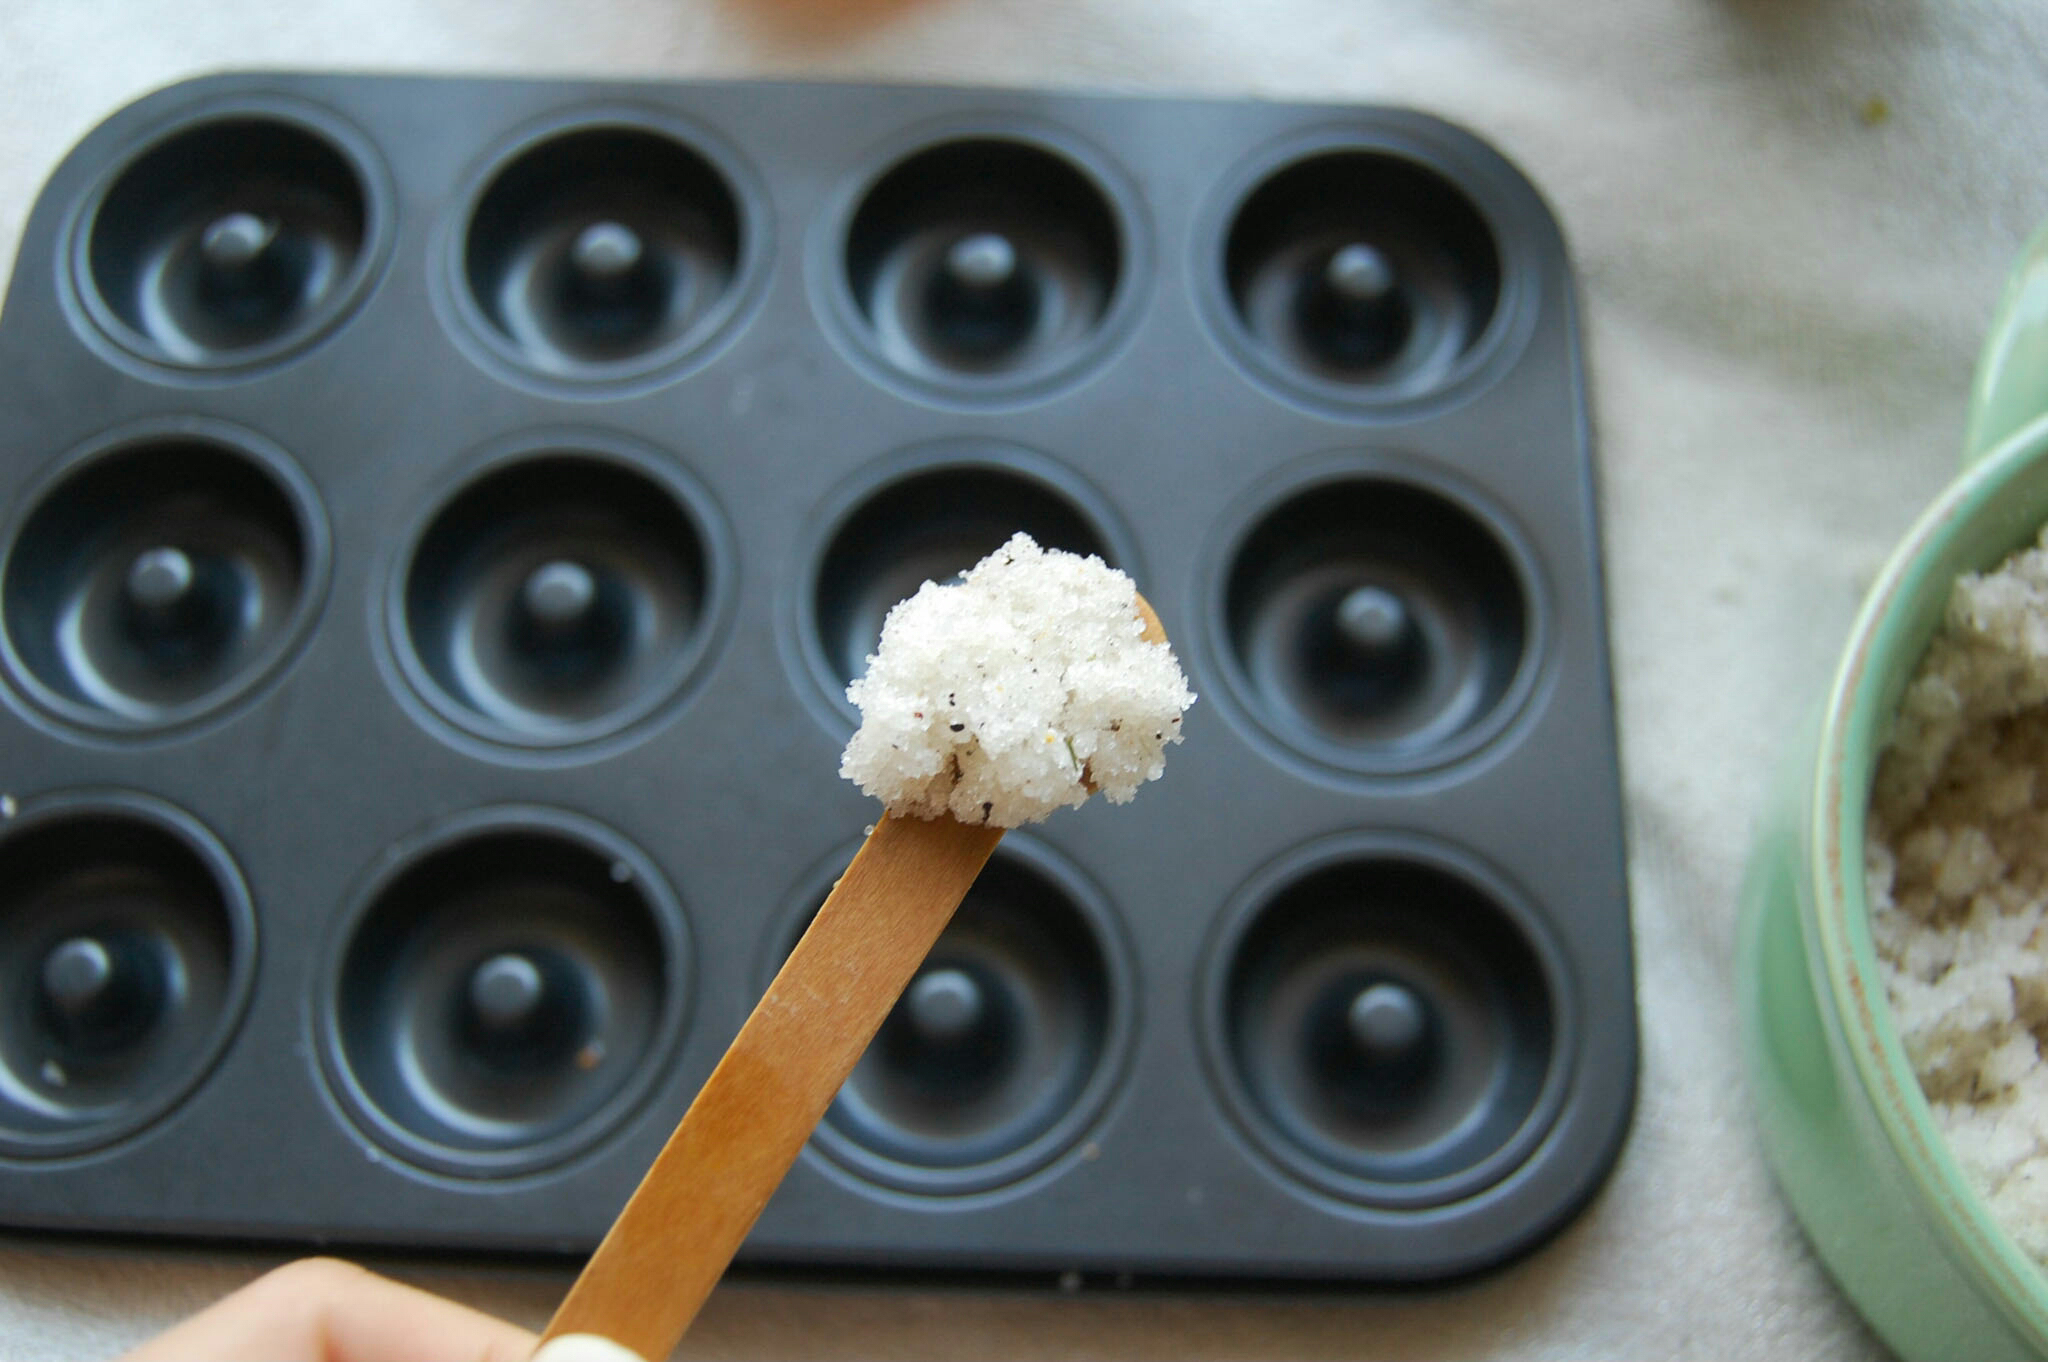
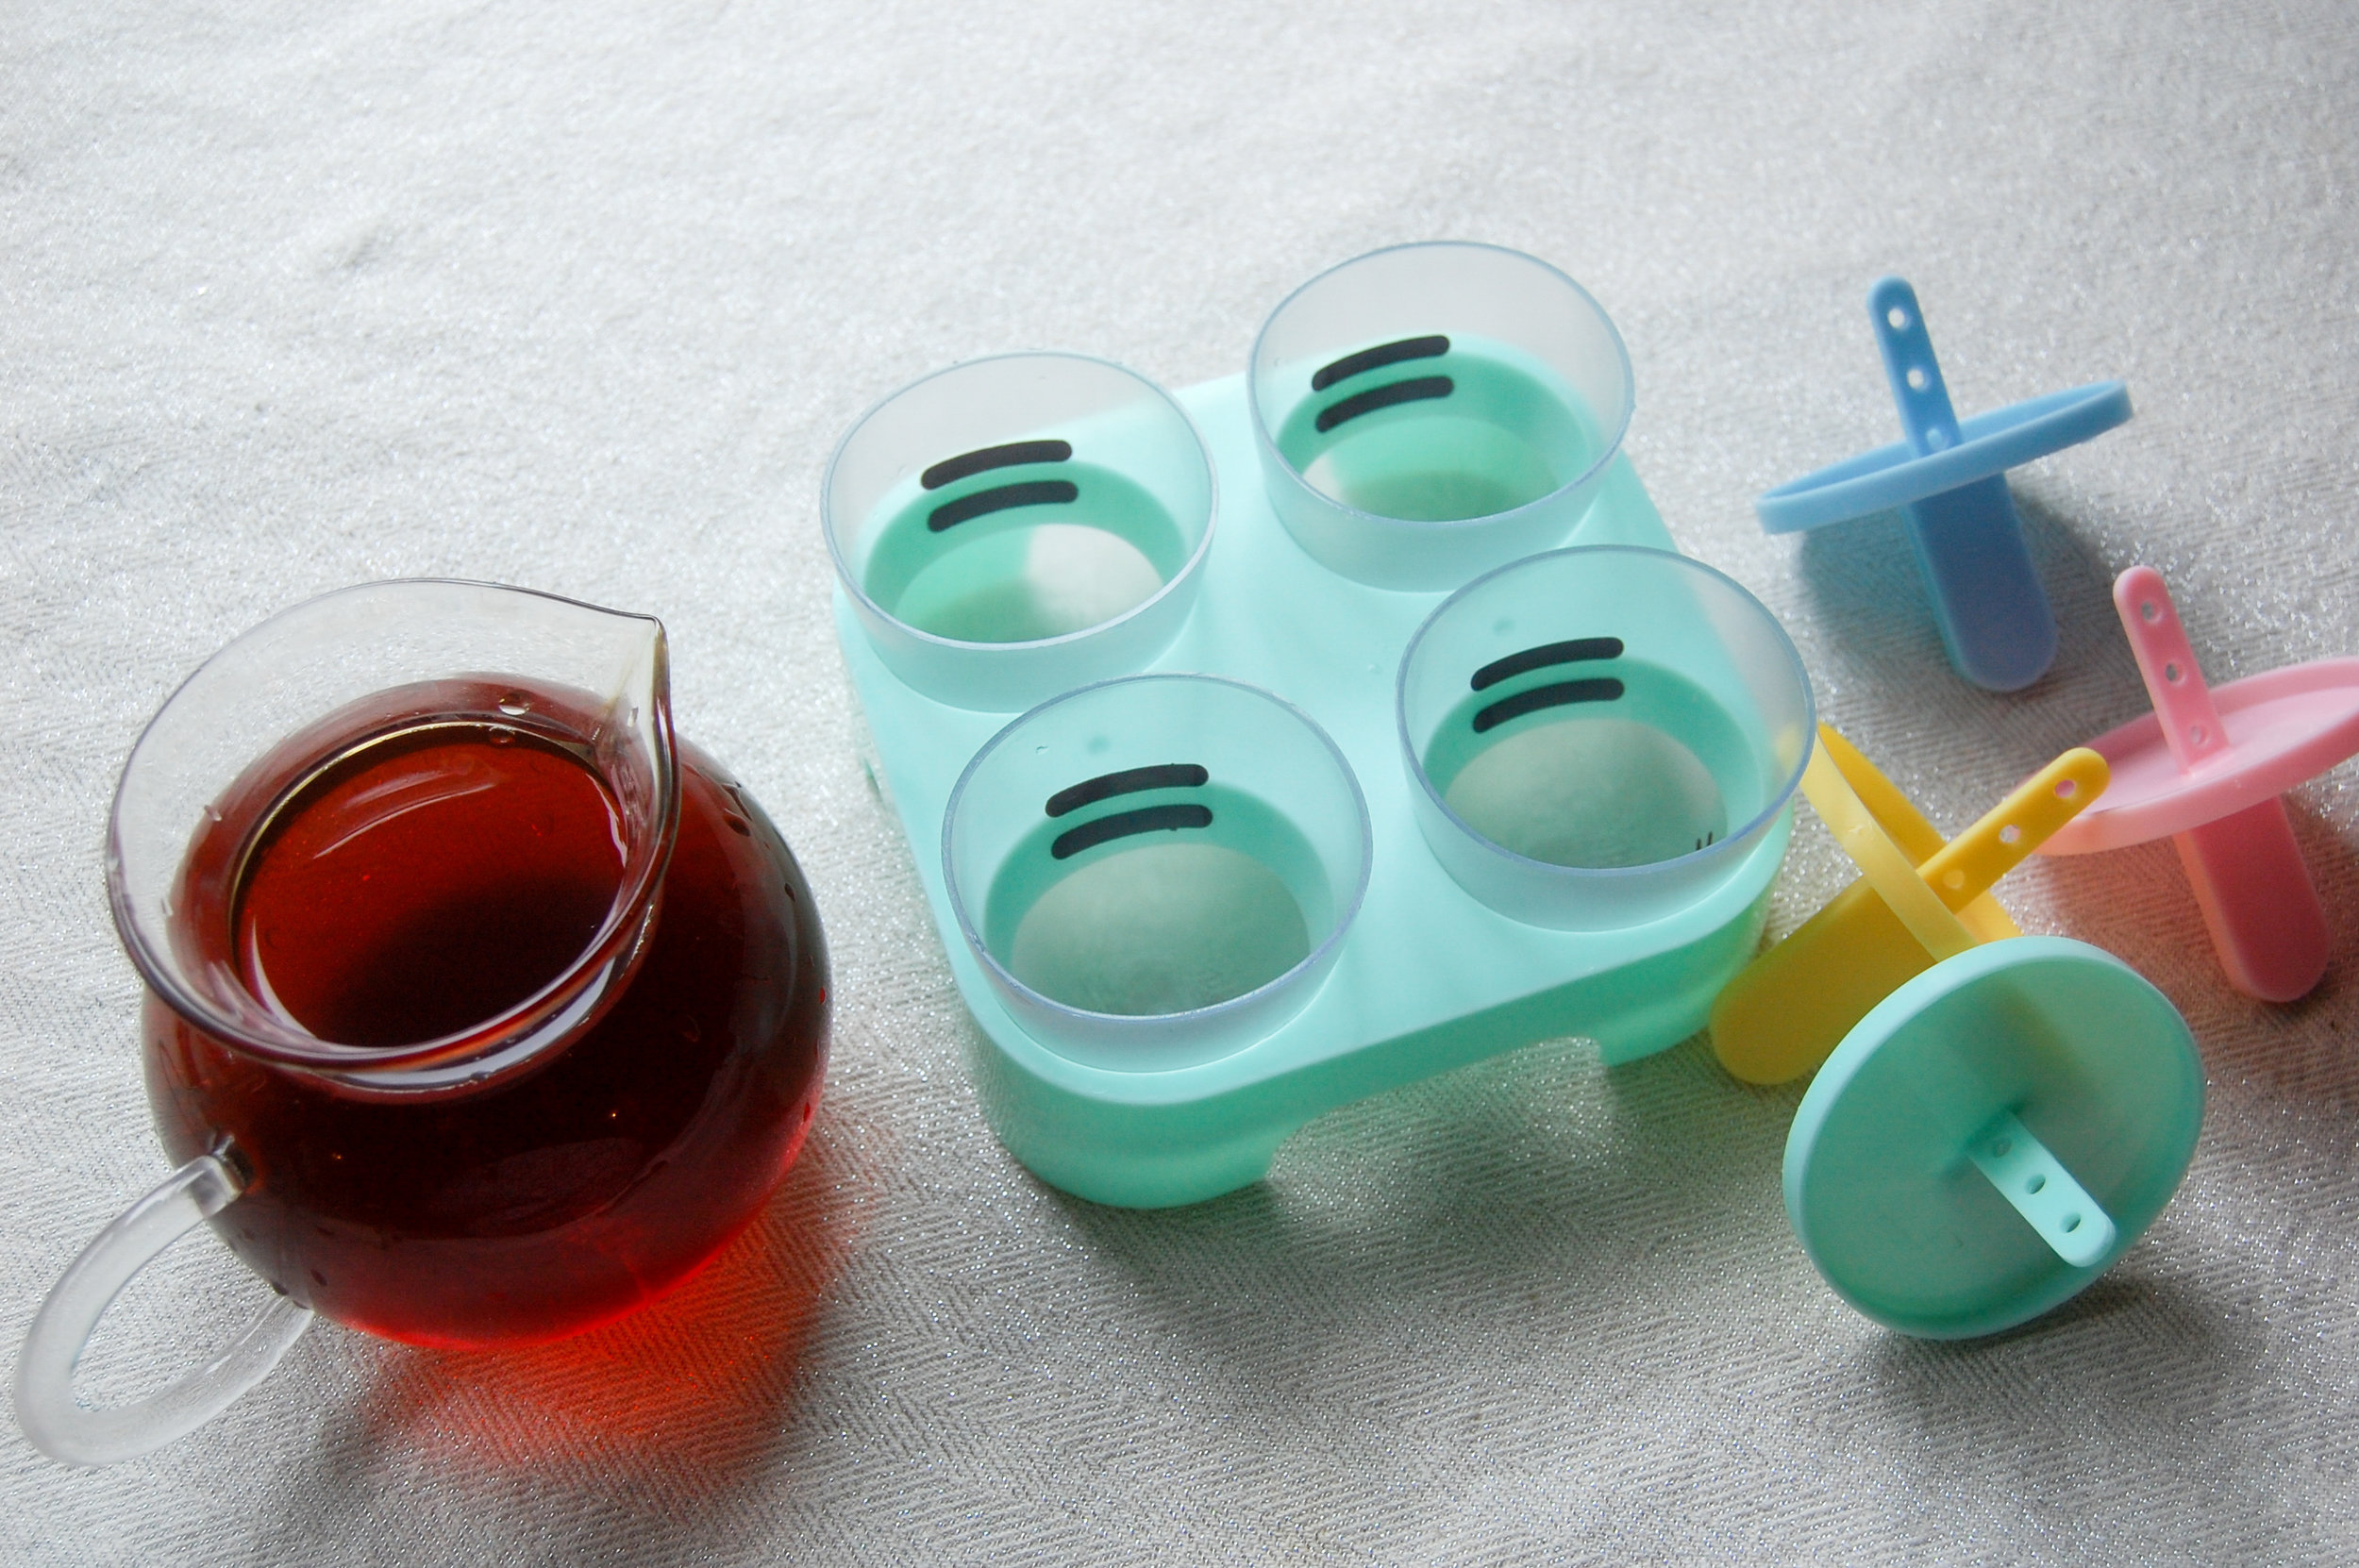
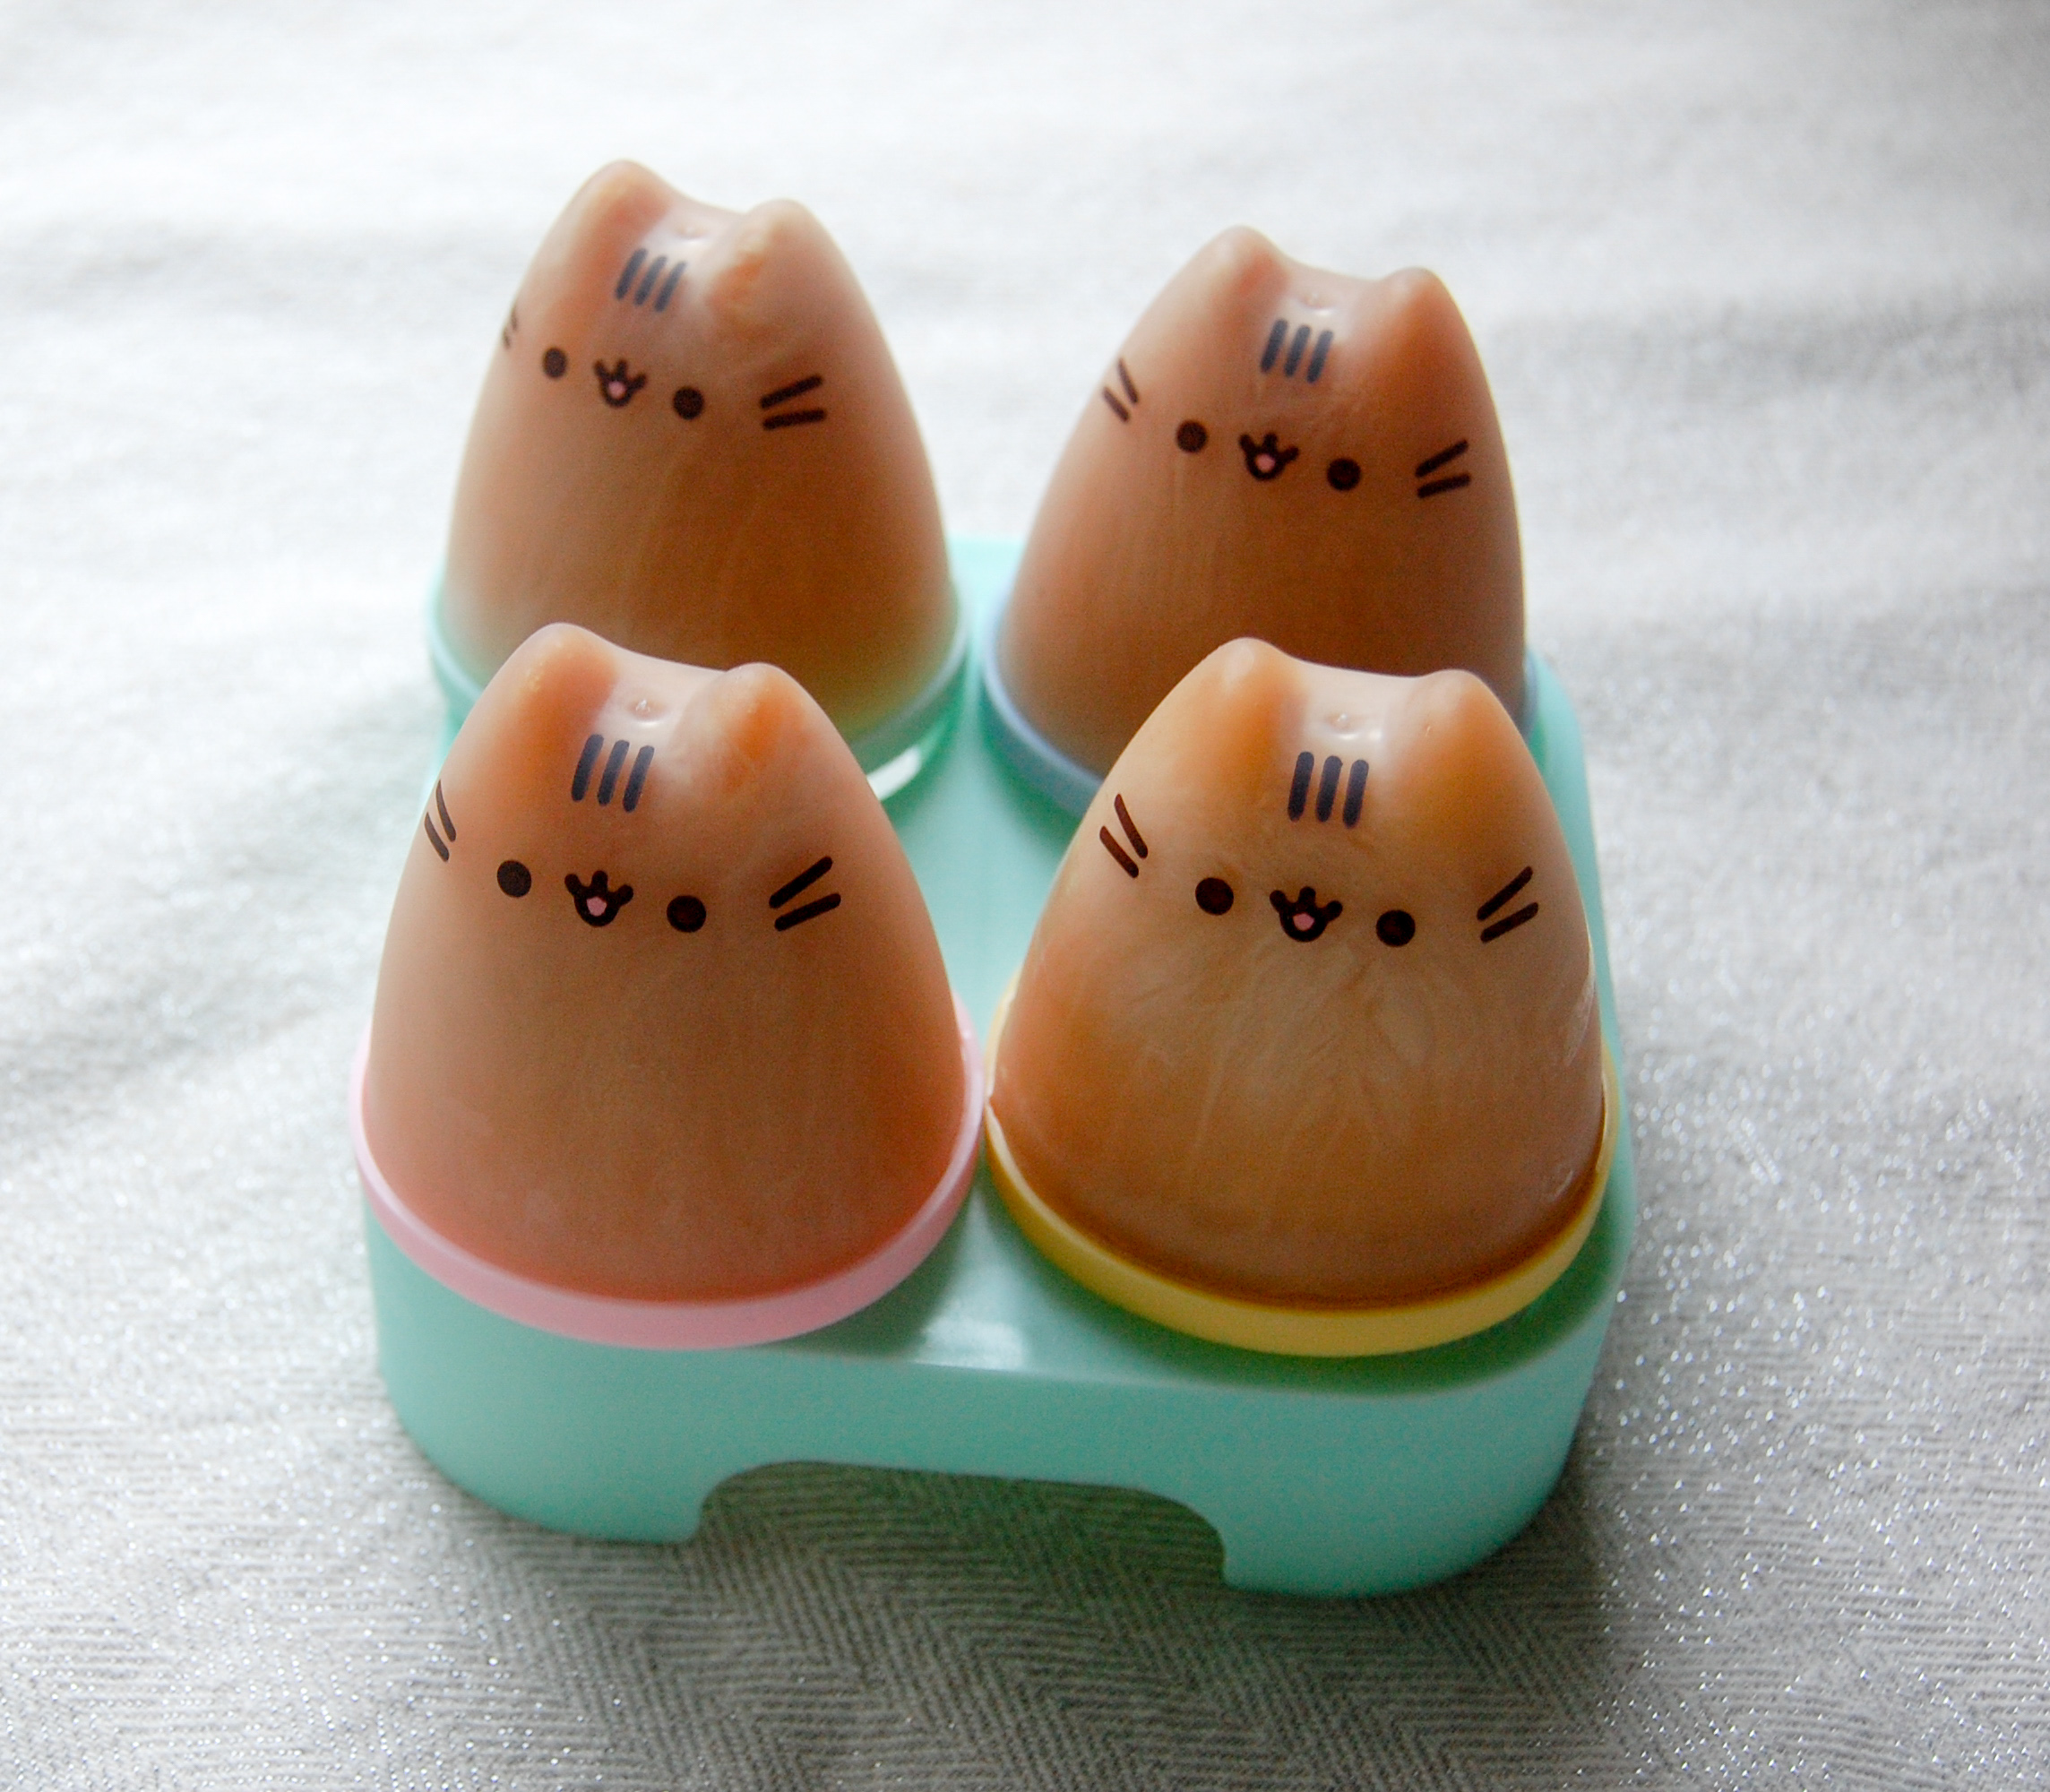
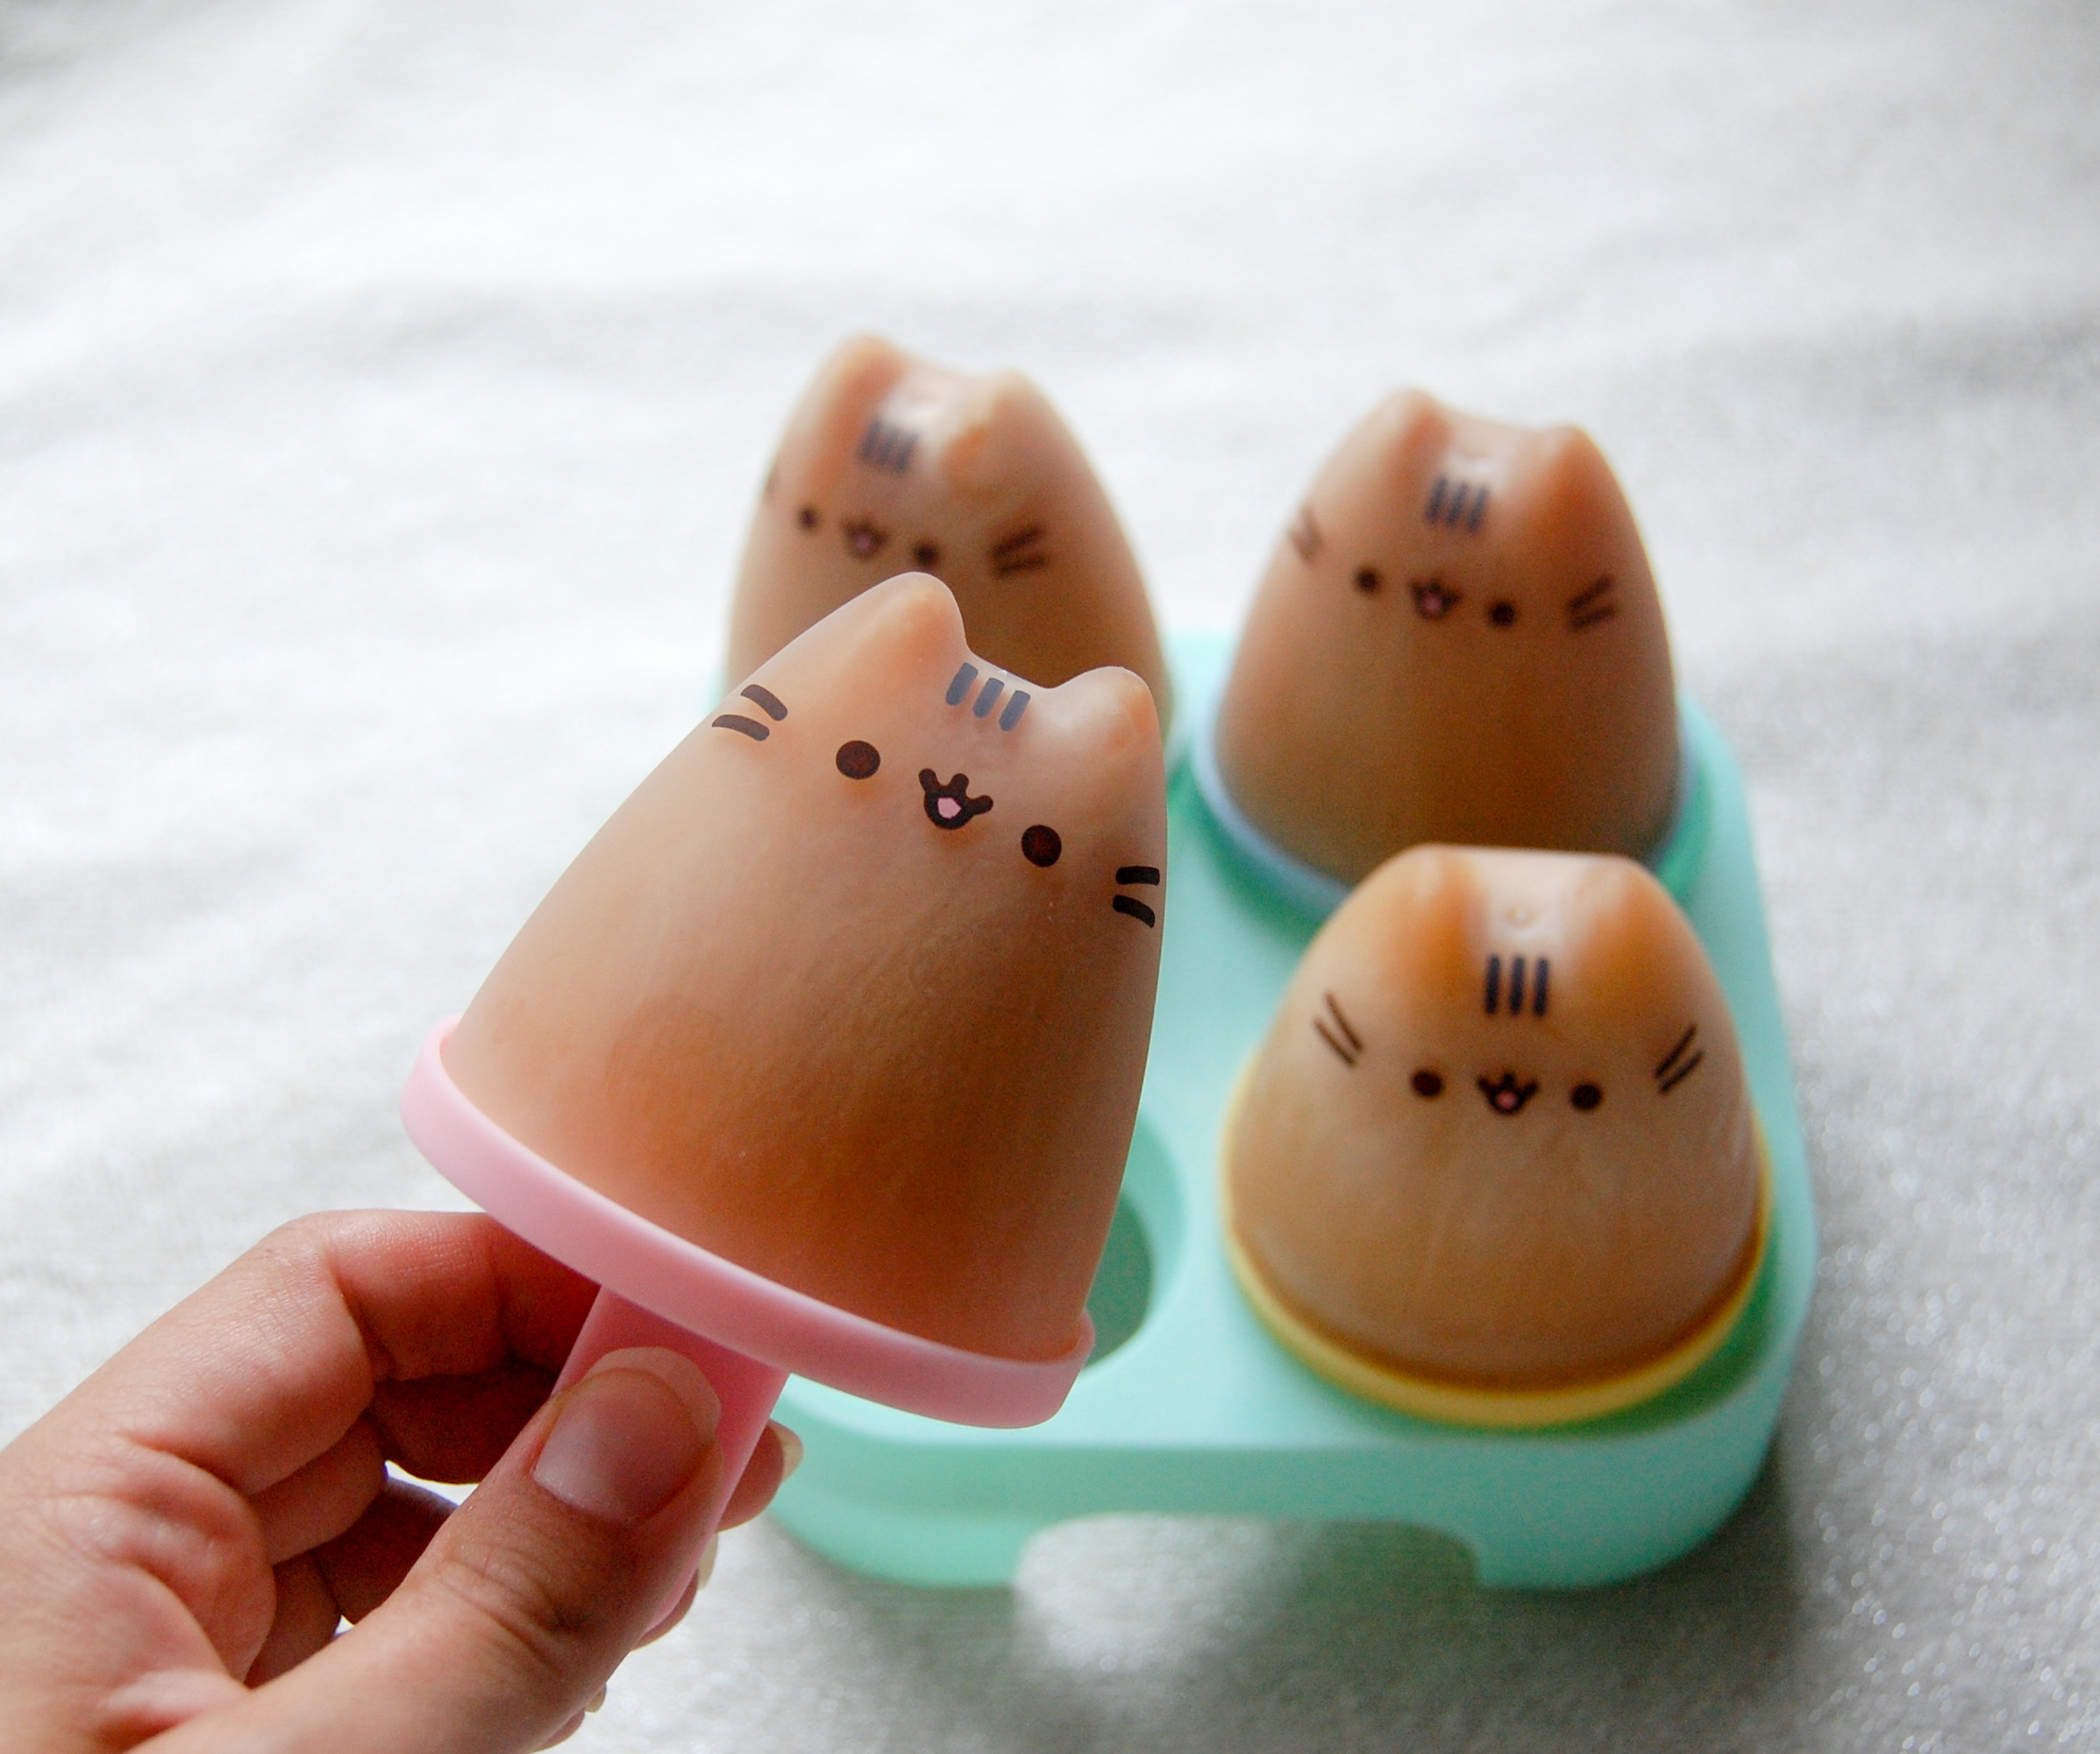
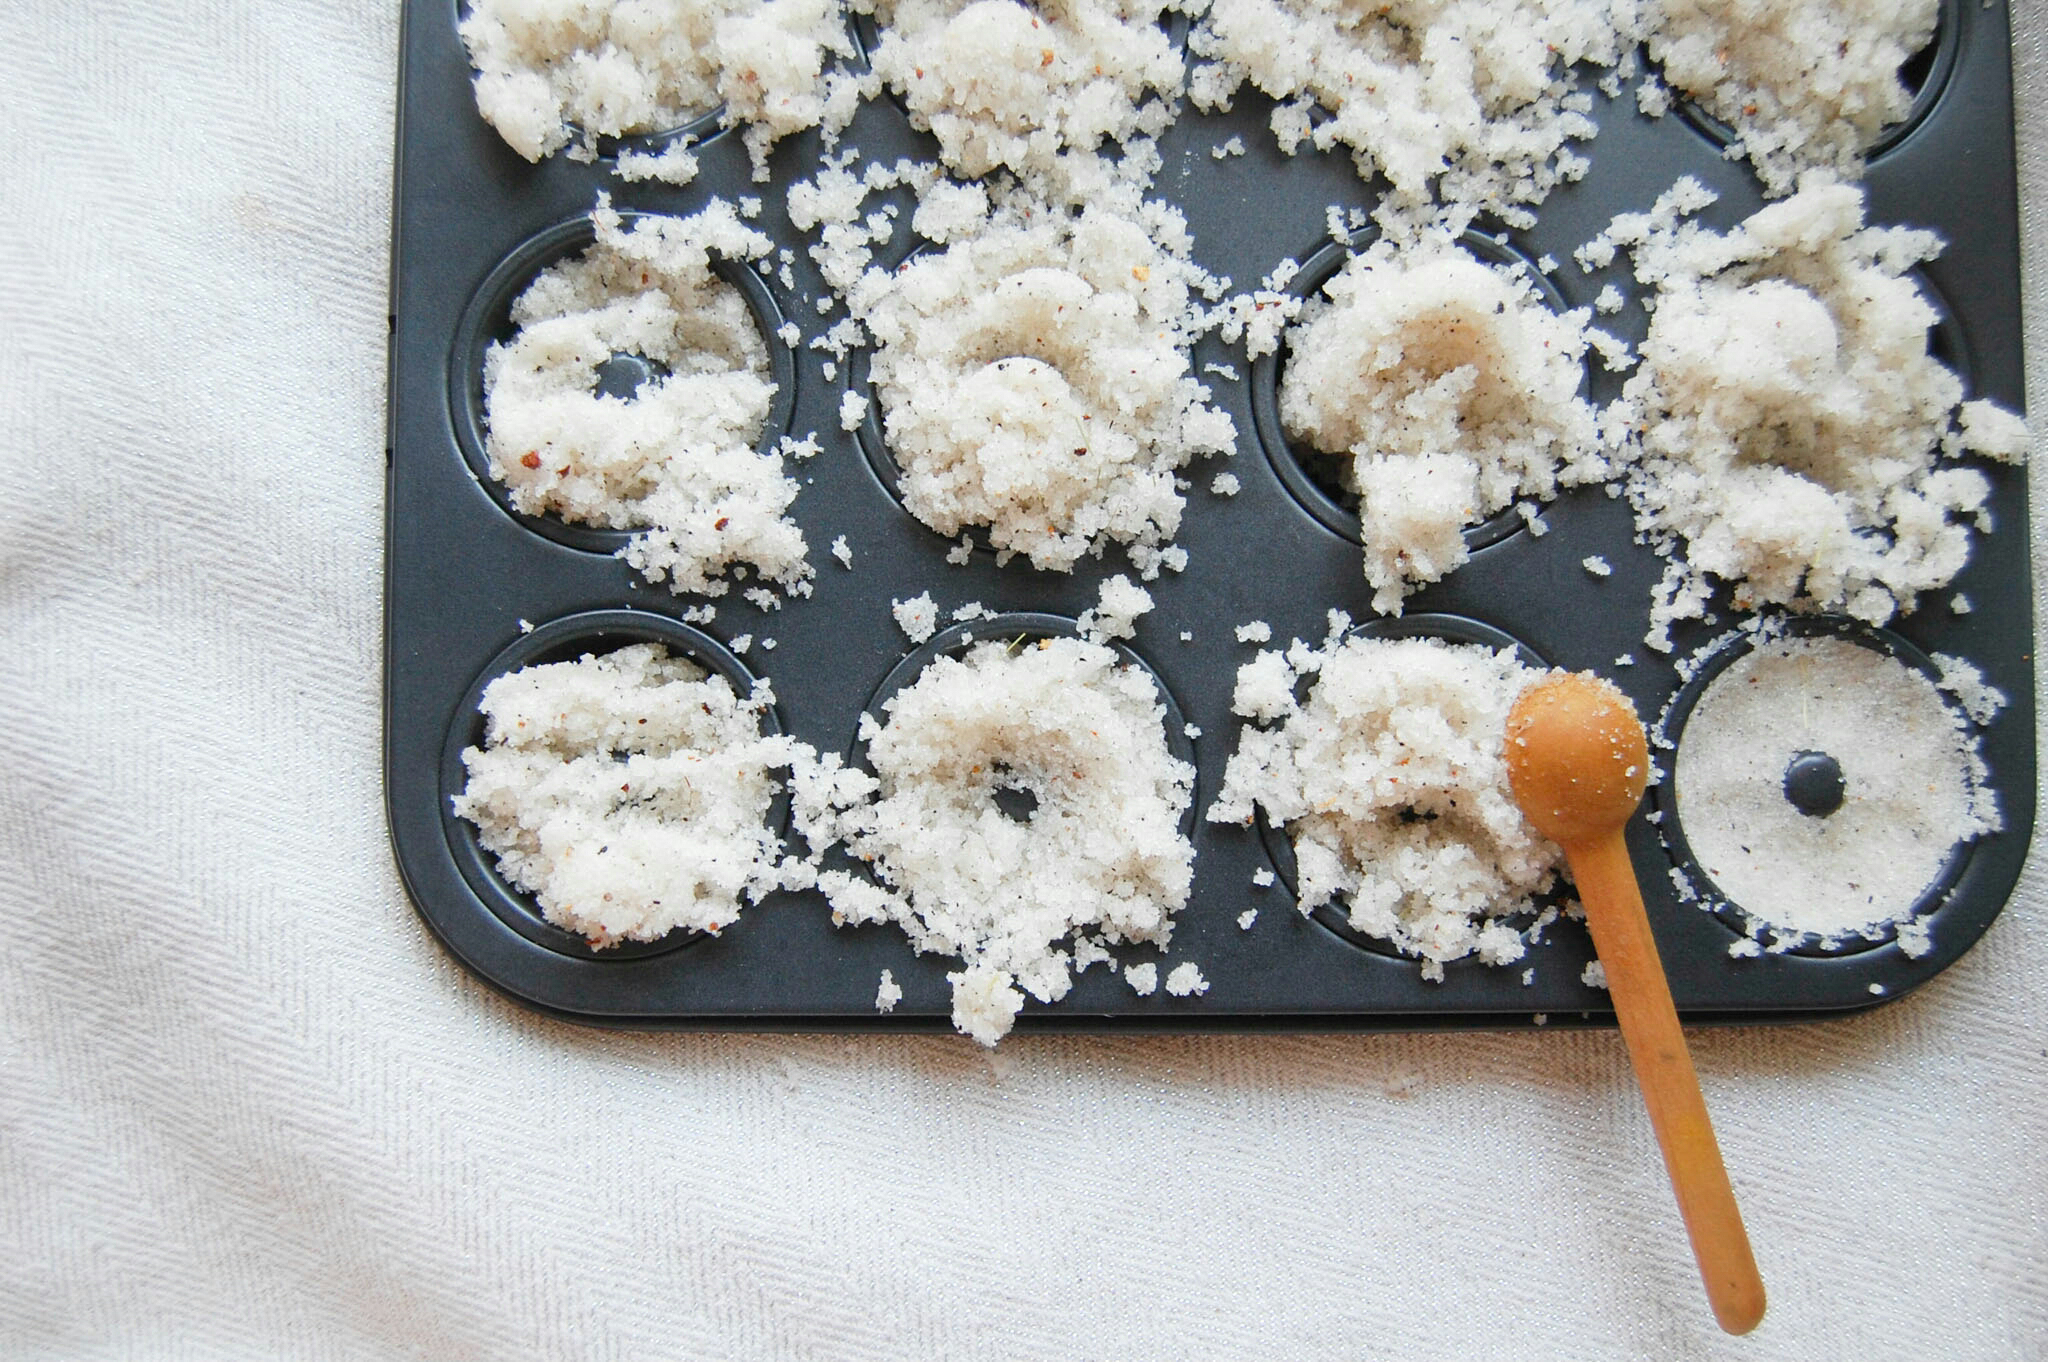
I used this mini donut tray that I have for baking but you can use anything! These are quite large for a sugar cube so I would suggest finding a small candy mold if you can. 

1403-2018-045769501176272483.jpeg

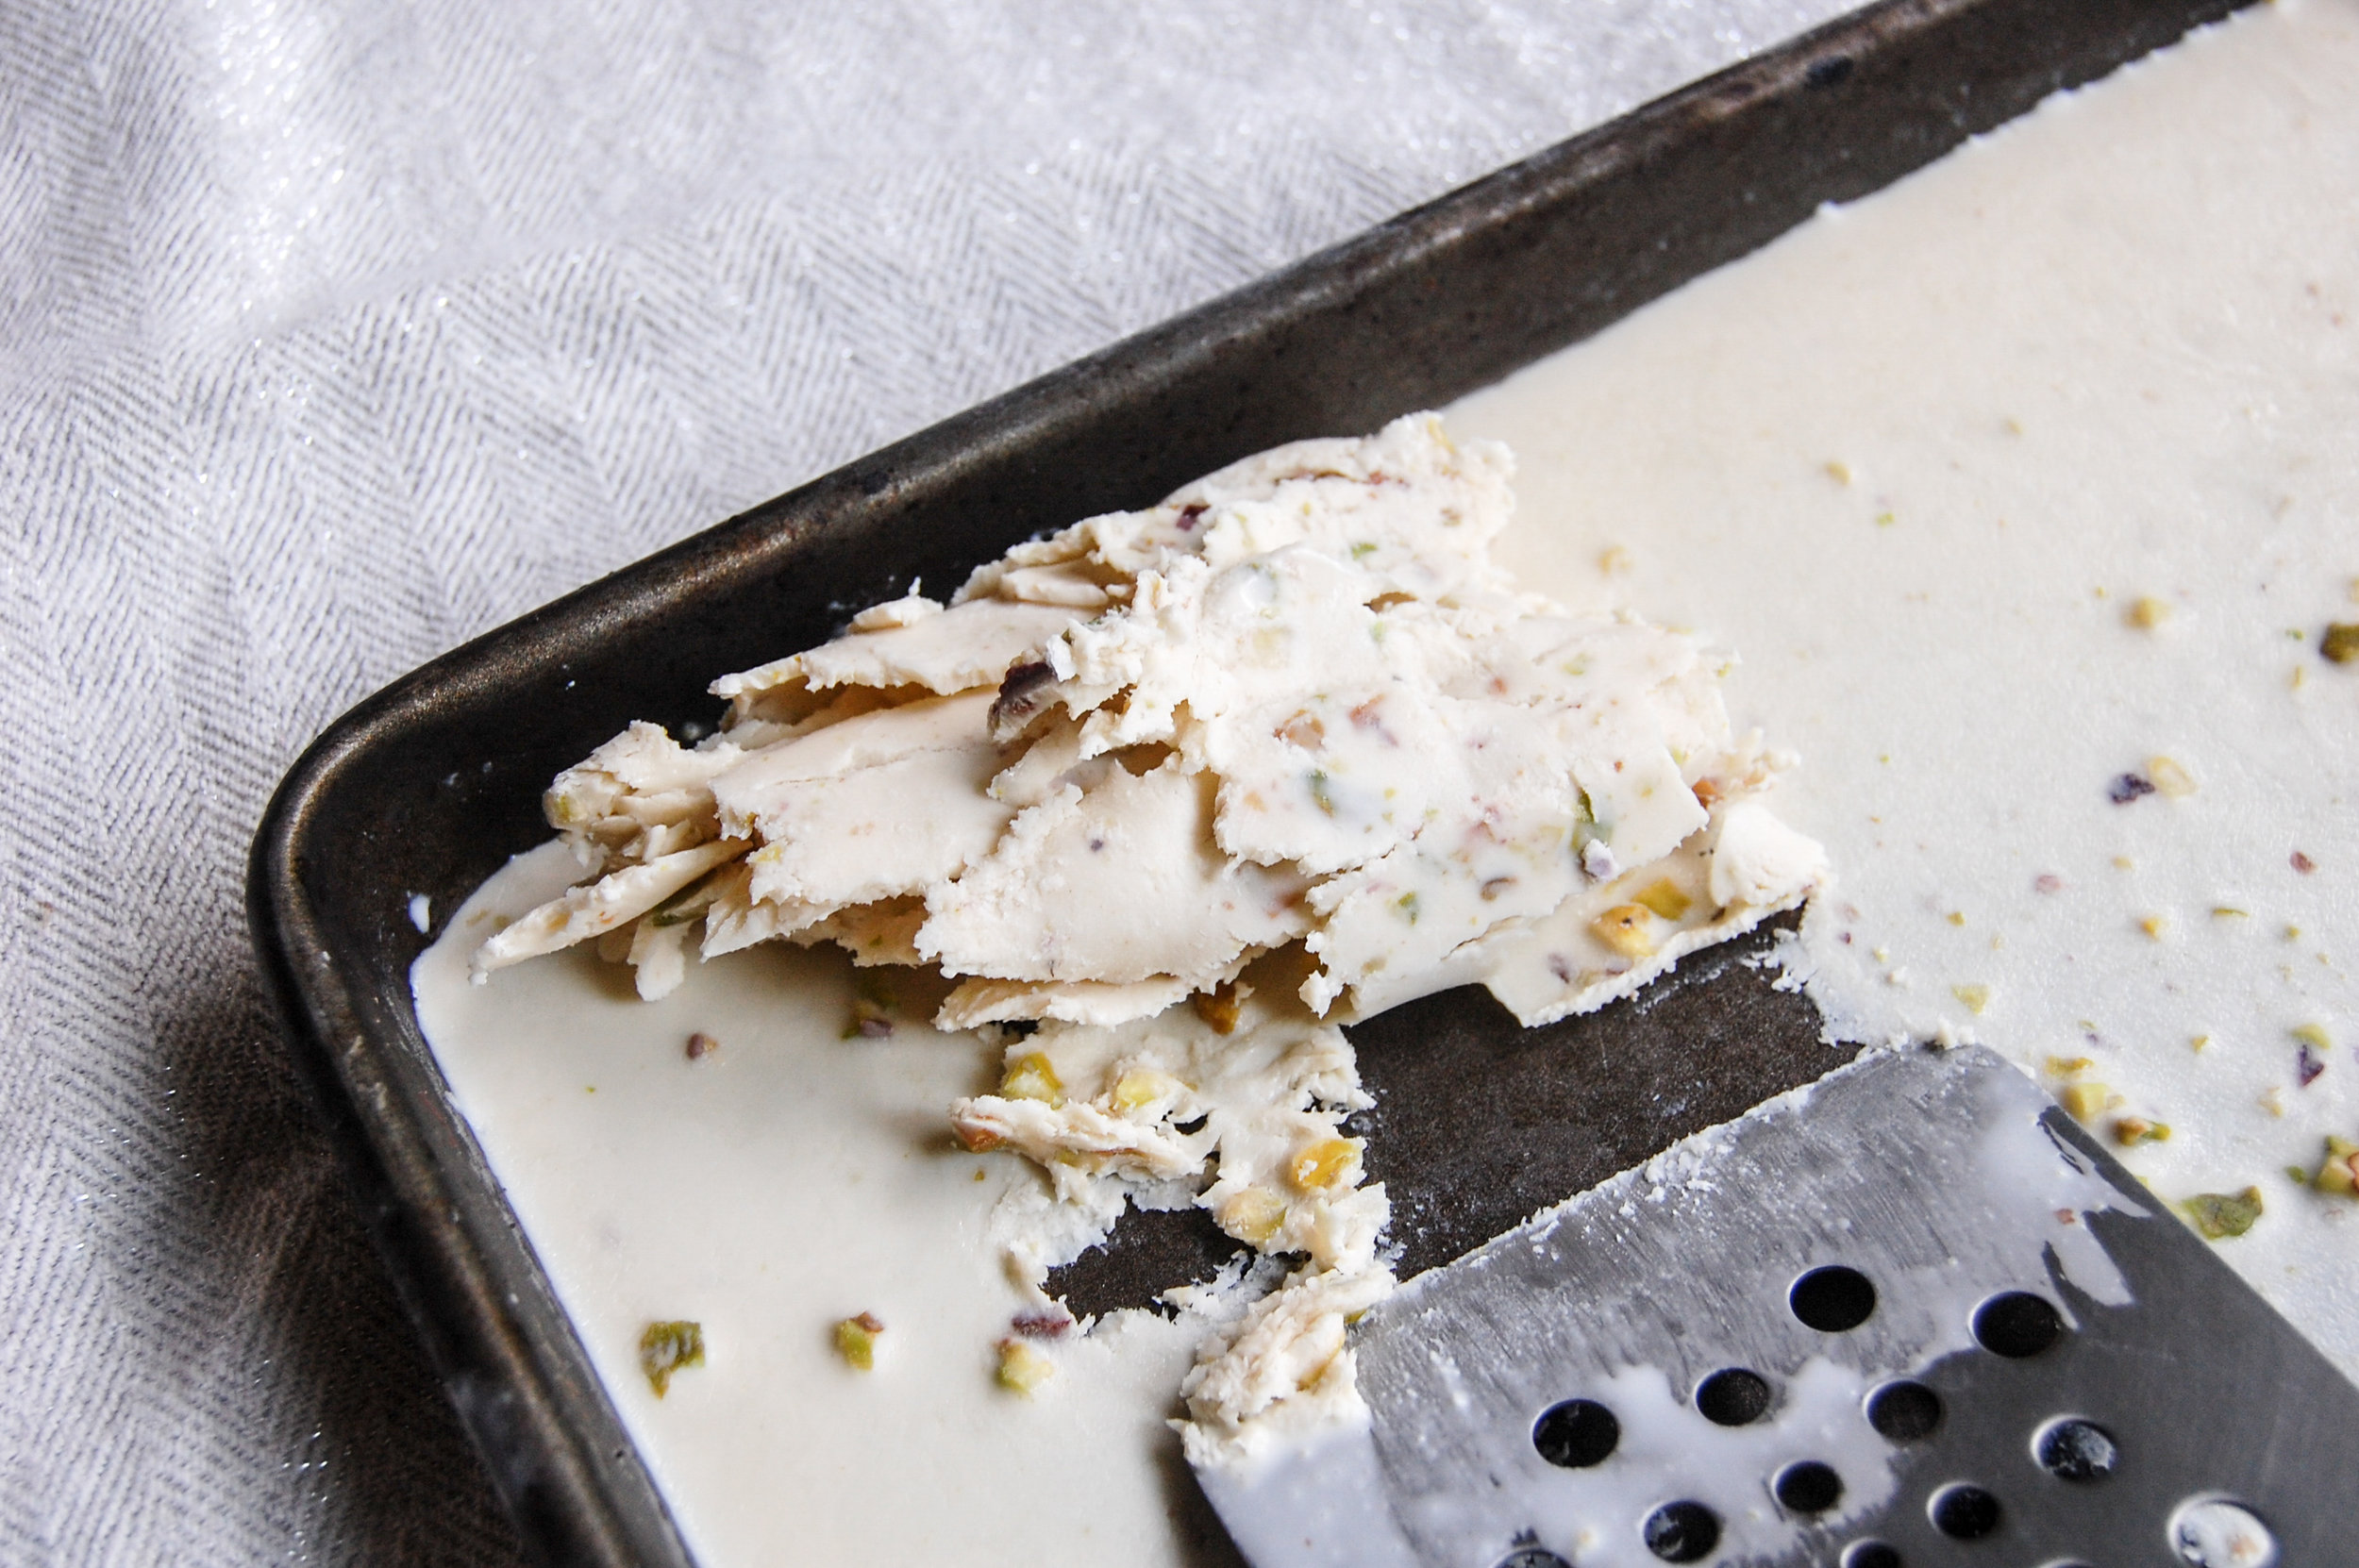
The best tool that I found for packing these is my hand! Get your fingers a little sugary so that you can really put pressure on the sugar and pack it in!

1403-2018-045669499945499776.jpeg

I put my mold near my heater to speed up the drying process but you don't have to! Smaller molds will definitely be ready quicker. 

1403-2018-045569498773368786.jpeg

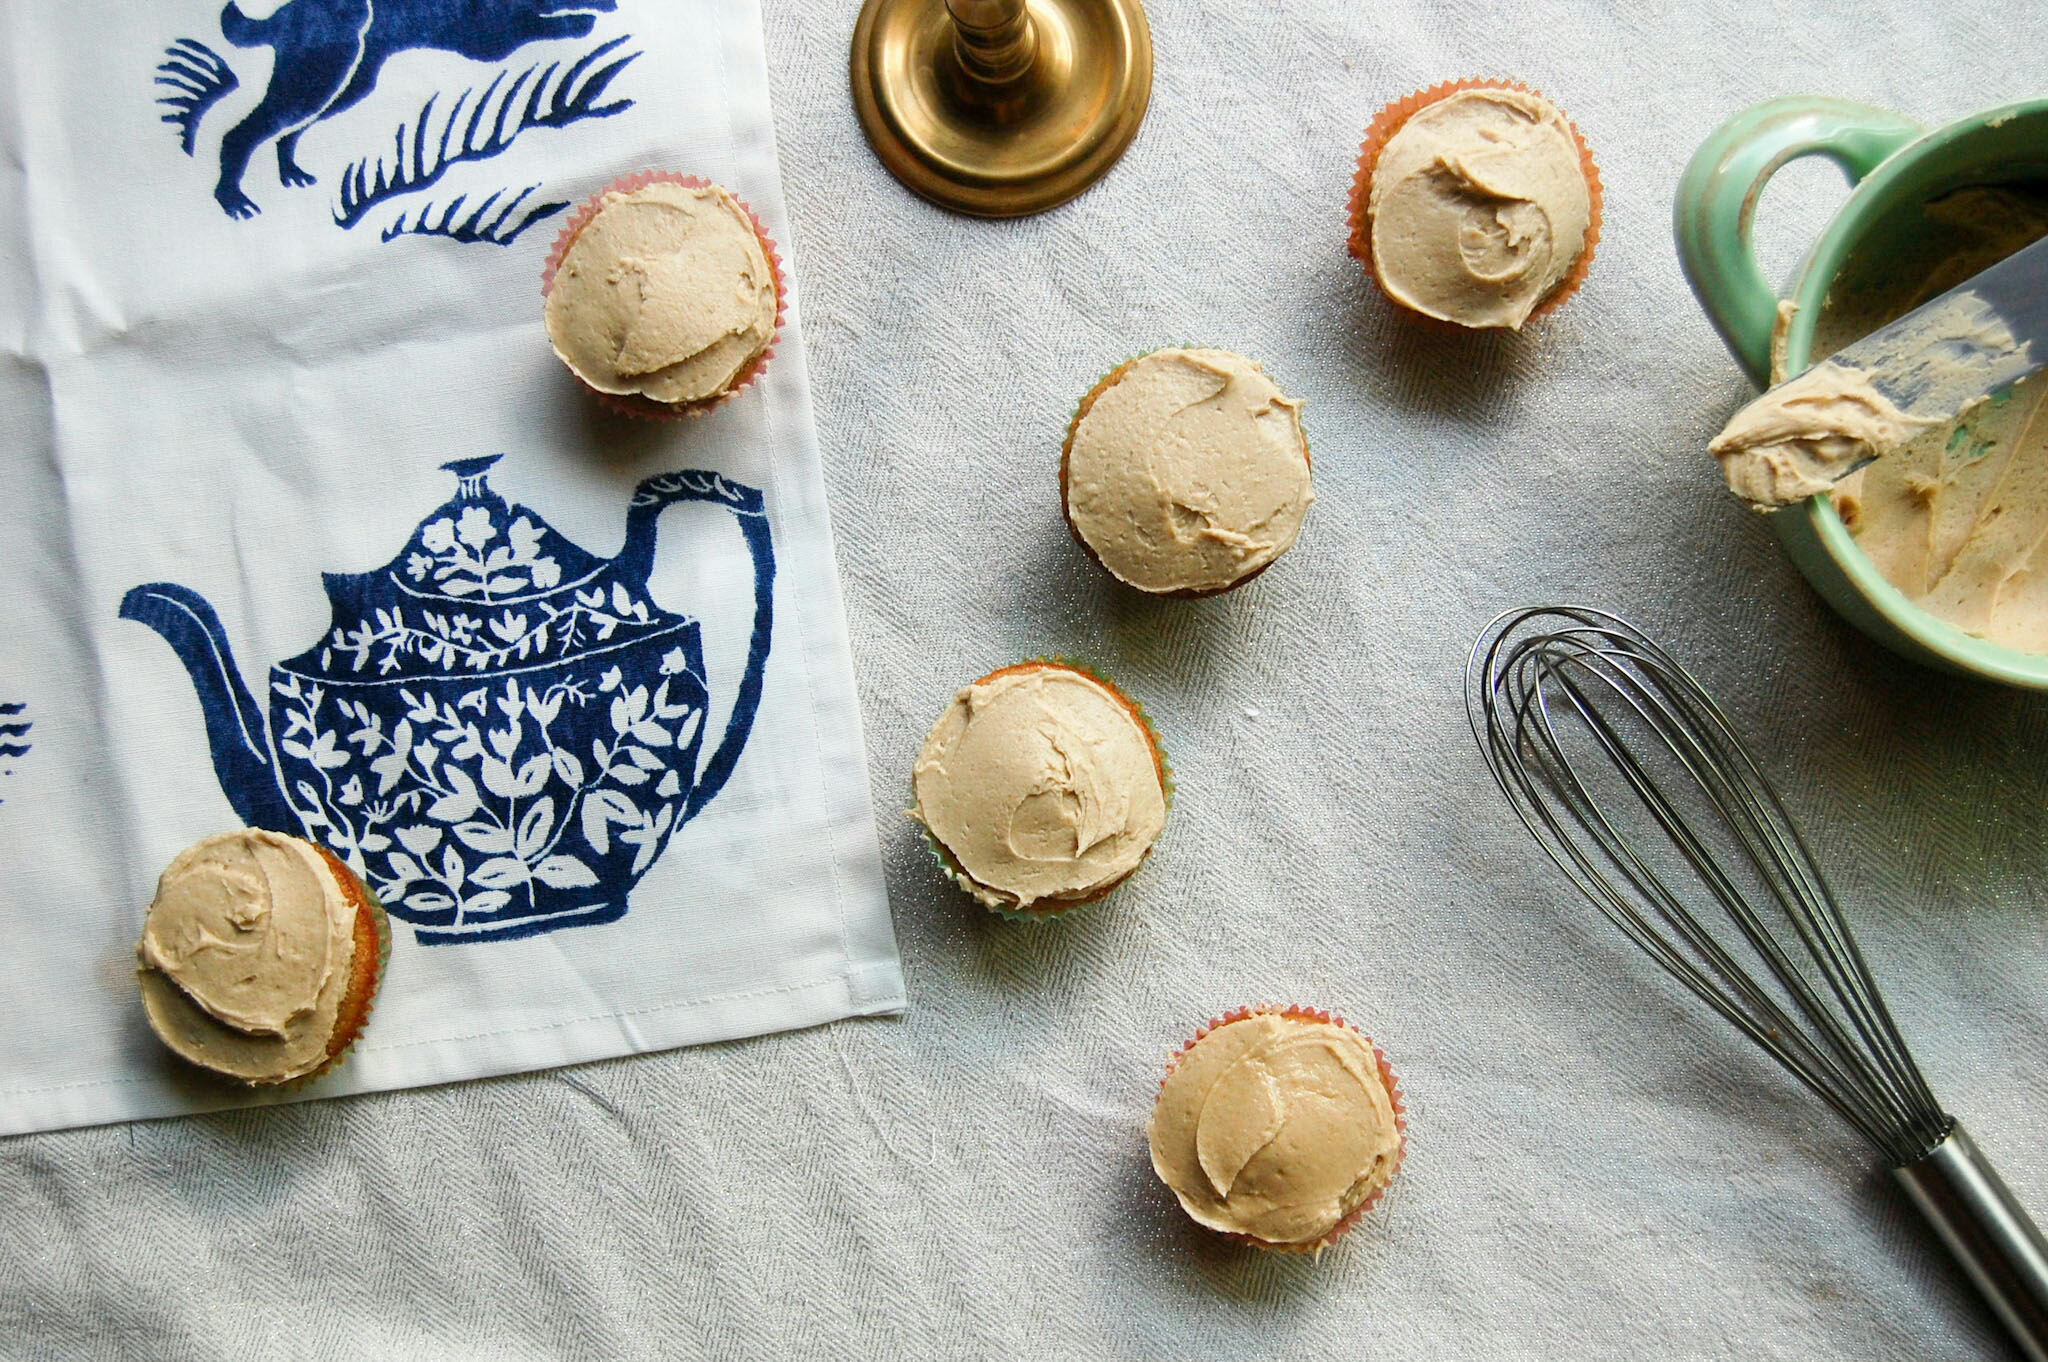
These are super cute and fragrant! I think they would be a great gift as well :) 

1403-2018-040669509872925241.jpeg
1403-2018-040569508603782429.jpeg
afternoon tonic (1).jpg

Chai Cookie Sandwiches with Cinnamon Buttercream Filling

Oh my Chai. 

Soooooo, I know those butter cookies with the heart cutouts and jelly centers are a popular choice on valentine's day but I decided to go a different route...chai! I posted these cookies on my instagram on 2/14 without the recipe because I mentioned how it was "selfish" baking aka I didn't take a lot of photos and I didn't write the recipe. I made a batch of these to give out to my family, friends and coworkers on valentine's day. After asking on instagram if people would be interested in the recipe, all the YES PLEASE comments convinced me to write it up!

1902-2018-111522937332723783.jpeg

Something to note about cutting shapes with this dough, it's not easy. There is a high butter content in this dough so it's very soft. I used flour on the rolling pin, work surface and the dough itself to make rolling this dough out a little easier. Even with the flour, you have to be very careful when working with this dough so that it doesn't break! If you want to avoid the hassle, I would suggest balling up small amounts of dough and gently flatening them (not all the way) to make the two halves of the sandwich! 

1902-2018-110122923112894621.jpeg

In terms of your choice of chai, it's up to you. Remember that when you infuse tea in butter It really gets the flavor of whatever tea you're working with! For these I used a chai I had which is a white chocolate pumpkin chai, the pumpkin flavor came through well. If you need a reminder on how to infuse the butter with tea, it's very simple! Melt the butter in a pan, once it's melted take it off the stove and place your tea in the butter. I like to keep the tea in the butter until it's fragrant! Strain your tea and then let the butter solidify, I find it useful to put in the freezer to make the process faster. 

1902-2018-112022942133034562.jpeg

Don't throw away your tea leaves after you strain the butter! What I did to get this fun texture is took some of the leaves, chopped them up fine and threw them in the dough. Be careful to take out any hard chunks like cardamom, pepper etc. This is totally optional but I thought it added a pretty design to the cookies!

These are the heart shaped cookies I made on valentine's day, very festive! Making the heart shapes was definitely easier than making the teapot shapes!

1902-2018-111722938860707168.jpeg

Just for reference, in one of these batches I used bread flour because it was all I had and all I did differently was use 2 egg yolks instead of one egg, the cookies were just as good and soft :) 

1902-2018-111922940449015708.jpeg

Did I mention that the best part about these cookies is how soft they are?? It's very easy to take a bite out of them! No crunching here!

1902-2018-110622927779200400.jpeg

I wasn't specific about the filling because everyone has their own preferences. I beat the butter then gradually added cinnamon and powdered sugar until it was stiff enough to stay but not runny when spreading. If you get to a point where you overdid the sugar and it's too stiff, add a tiny bit of milk of your choice to loosen it up. 

1902-2018-111222933602310138.jpeg

I was a little lazy with the designs, I had on hand these store bought frosting that come in an easy squeeze bag and used that to make the swirls on both sets of cookies :) 

1902-2018-111022932184518889.jpeg
chai cookie sandwiches (1).jpg

Yaupon Infused Cinnamon Rolls!

Tea Rolls.

So as you might have noticed, I don't do a lot of bread type baking. There's a simple reason for that, I'm not very good at it!! I one time made a braided pesto loaf and it was really good but all other attempts at bread have been failures. 

DSC_0080.JPG

I really wanted to infuse the yaupon I had into bread because I think it has a great flavor for bread. With Valentine's day being tomorrow I thought I would try a fun heart shaped bread. Essentially, I brewed the tea and let it cool down slightly until it was warm and used the warm tea as the base to put the yeast in!

DSC_0078.JPG

Enter the idea for cinnamon rolls! I modified a recipe from Paula Deen that seemed simple upon searching with tea and also slightly different ingredients. 

DSC_0087.JPG

One thing that I've often gotten wrong with bread is the rising of the dough. This is probably an issue with the yeast but I was never really sure what I was doing wrong. I knew this would be different because at every step, the dough was looking and feeling the way it should!

DSC_0084.JPG
DSC_0465.JPG

I cut the dough into regular slices and used some of those but to make the heart I just unrolled one side and pinches the bottom to make the point. 

DSC_0470.JPG

I think the next time I do this, I'll put something in the little space of the heart to keep the shape better. 

DSC_0476.JPG

FINALLY! These came out well and they tasted pretty good! I would mention that I feel as though I didn't put enough filling in the middle and would be more generous the next time I make these!

These cute harry potter pusheen toppers are made by the lovely Ali from paperlypress. I thought they were such a cute addition to the rolls. Check her out for all your party supplies needs!

DSC_0478.JPG
DSC_0487.JPG

I didn't include the glaze in the recipe but it's just a mixture of powdered sugar and almond milk until I got a good consistency! 

Copy of Blueberry Basil.jpg

Blood Orange Smoothie Madeleines

New and improved! 

A while ago I saw a recipe for madeleines from one of my favorite food bloggers, A cozy Kitchen. I worked from this recipe to create madeleines that were tea infused but they were a bit of a mess, especially since I didn't have the proper pan!

2610-2017-063837737951880232.jpeg

I received some blood orange smoothie tea from The Tea Spot in my recent Sipsby box and knew that was the best tea to use! This blend has red rooibos tea, orange peel, hibiscus, rosehips, safflowers, rose petals, natural orange & vanilla flavors. 

In A Cozy Kitchen's recipe she uses "browned butter" which you can read a bit more about in her post. Instead, I used the normal infusing method of melting the butter and throwing the tea in here. You want to add the melted butter to your batter before it congeals!

One of the tweaks I made was to add the zest of lemon to the recipe as well. I think lemon paired well with the other ingredients like rosehip and hibiscous. 

You do want to let the batter cool slightly before putting it into a piping bag! If you use a bag that's fine but you can also just use a ziploc bag with the tip cut off. This makes it easier to fill the molds on the pan. One lesson I learned: even if you have a non stick pan, use either butter or flour or both on the pan before putting the batter in. 

2610-2017-063137688299444051.jpeg

My pan was non stick but it was a bit difficult to get the madeleines out without breaking them! 

2610-2017-063037687051535669.jpeg

I was really excited about how they turned out! Nice and plump! Remember to touch the madeleines to see if they spring back a bit. You do want them to get a bit golden but not too much so you don't burn the bottoms! 

2610-2017-061337669843339268.jpeg

It's my personal opionion that these taste best warm!

2610-2017-062637683202001399.jpeg

Glaze is totally optional but I wanted to try it and it helped cover up some patches from some of the madeleines I butchered :) I made an orange glaze by simply mixing fresh orange juice and confectioner's sugar! 

2610-2017-061837675452465464.jpeg

OMG. SO. GOOD. If you don't like orange, stay awayyyy! My mom actually called me to tell me how good these were. 

2610-2017-062037676865381766.jpeg

100% will be making again! 

Madeleins.jpg

Matcha Pumpkin Pie

Green Pie.

UPDATED NOTES: I baked this recipe again recently and one way to stop it from cracking it seems is to crack the oven in the last 15 minutes to allow for the pie to slowly cool. It turned out great! If you do this, make sure to keep an eye on your pie!

I'm in full fall mode. I'm already thinking about the leaves changing, what costume to wear for Halloween and going to the pumpkin patch! This means that I'm also brainstorming about all the fall recipes! I want to start baking a bunch of pies and naturally I decided to start with pumpkin.  

DSC_0613.JPG

This pumpkin pie has 2 twists. First, there isn't a regular crust! The crust is made from crushed up biscoff cookies and held together with melted butter...mmmm. 

DSC_0615.JPG

The second twist is, AH it's green! This is kinda perfect for Halloween too don't ya think?! So why is a pumpkin pie green you might ask? Matcha matcha matcha!!! I recently restocked my matchaeologist matcha with their culinary grade Midori (*Affiliate link*). I got a huge tin so that I can bake all fall and winter.  

DSC_0620.JPG

I love the taste of matcha and I think it goes well in a lot of things but I'll be honest, I wasn't sure how this would come out. Pumpkin is a strong flavor and is pumpkin pie really a pumpkin pie if it isn't that beautiful deep orange color? Oh well, this is a tea blog and we will bake with tea! 

1109-2017-105445779682013153.jpeg

I figured if all else fails, the biscoff crust would totally save the entire pie because they are so incredibly delicious! A quick note about the crust, I don't have a food processor currently so I crushed them up by hand and they were a little chunky. If you have a food processor I would use that so that they can get crushed well. That will make it easier for the butter to hold them together!

1109-2017-105045775337550602.jpeg

This pie has the same texture and consistency as pumpkin pie but it's green! As far as flavor, it is true to the spices you taste in a pumpkin pie but the flavor of matcha is definitely present! 

You can also control how green the pie gets. What I did was mix the condensed milk and pumpkin together and then added the tablespoons of matcha one at a time. One table spoon of matcha still makes the pie green but not as green as it is here. I hadn't added the eggs yet at this point you can also taste the pie to see if there is enough matcha flavor in it yet. 

1109-2017-105145776316122424.jpeg

Something I learned about baking time: Make sure that the pie is set all the way through! When the top of the pie set and there was no wiggling left I thought this was done. I'm not sure if the matcha had anything to do with it but I think there was a false sense of the pie being done so make sure to use a toothpick and check the middle of the pie as well.  

1109-2017-104545770665128416.jpeg

I think the matcha adds a nice rich and bold flavor to the pumpkin that will make a great addition to a fall party! 

Matcha Pumpkin Pie.jpg

Green Tea Passion Fruit Cupcakes W/ Ginger Buttecream Icing

Spicy Frosting.

I had a bunch of these pique tea packets left and they were so fun to work with, I decided to try another recipe! Last time I made this cocktail with them. I knew this tea would be great in a cupcake, all I had to decide what kind of frosting to create with it!

0709-2017-021889887934589845.jpeg

I know what ginger is a fun flavor with green tea and I thought, ginger buttercream? Why not?! I'm not blogging to be boring, I want to be adventurous!

All you have to do is mix the pique tea crystals with the milk in the recipe. I encourage you to use whatever amount you think is best but I honestly like to have a strong flavor so I used 4 packets in the 1 1/4 cup of milk! Do this step first before starting the recipe and place your tea infused milk into the fridge until it's time to add it to the batter. You don't need to heat your milk, but you can if you'd like!

0709-2017-022489893942834374.jpeg

I tried  a little experiment using mini cup cake papers but honestly I wouldn't do it again. Use full cupcake liners, you'll make less than is what is shown here but they will have a better shape.  

0709-2017-021989889026201927.jpeg

This tea has fragrance has such a wonderful and it's apparent in both the batter and when they're baked!

0709-2017-021489884099486877.jpeg

You may have seen the "spicy frosting" heading at the start of this post. I won't lie to you, with 2 tablespoons, this frosting had a KICK. If you want the ginger flavor with less of the kick I would mix everything together and gradually add in ginger to your taste. 

0709-2017-022289891546442916.jpeg

But let me tell you something about this spicy frosting...IT IS AMAZING. I thought it would be a bit strange but I really liked the spiciness contrasted by the sweet cupcake and the flavor of green tea! 

0709-2017-021689885267239481.jpeg

Yes, cupcakes were harmed ...I mean eaten...in this process!

0709-2017-022989898657734111.jpeg

Another note about the actual cupcake. These are THICK. If you want them to be a little less thick you can add a tiny bit more milk, try a few additional teaspoons. I actually loved how thick they are because they are a perfect for pairing with tea! I wanted to add this note though because not everyone likes cupcakes to be this way. 

0709-2017-021389883074838076.jpeg

As always, I suggest that you enjoy these cupcakes with tea :) 

0709-2017-021789886527461615.jpeg

You can check out Pique Tea here and see all their teas! These last a while because there are a bunch of packets in one box and I think theyre great for on the go tea without sacrificing the flavor! 

ginger buttercream (1).jpg

Homemade Matcha Sprinkles

Tea Sprinkles.

One of my favorite food bloggers is Adrianna from A Cozy Kitchen and the other day she posted a recipe for homemade sprinkles! She made them these beautiful  colors and I got to excited at how simple the recipe was so I decided to make my own! 

0409-2017-08475709901482372.jpeg

When I look at a recipe that I want to incorporate tea into I look for butter, milk or water to infuse the tea into. This recipe only has a few tablespoons of water so I decided to use tea in powder form, aka MATCHA! wooohooo!

0409-2017-08435705847585446.jpeg

I used Adrianna's recipe as inspiration but cut it down quite a bit. It still made a lot of sprinkles!

0409-2017-08495712568684297.jpeg

I also refrigerated them overnight but I'm sure letting them set for several hours will be ok as well. I used Adrianna's advice and used a wilton #2 tip. The tip is small so the sprinkles are the perfect size but it's VERY tiring to pipe it all out!

0409-2017-08415704171883207.jpeg

I know that white chocolate and matcha is the common pairing but I honestly don't like white chocolate very much! I made this fudge frosting for a roasted blueberry cake and the matcha tasted SO GOOD !

0409-2017-08445706893575445.jpeg

Depending on what your piping skills are like, you could make all sorts of shapes with this mixture! 

0409-2017-08455708102149456.jpeg

Now, a word about the matcha usage. I used Matchaeologist (warning: affiliate link!) I used two tablespoons in the mixture and that gives them a very STRONG matcha flavor. If you want something more subtle use less and the color will also be lighter green. 

0409-2017-08465708945743986.jpeg
0409-2017-08485710830042423.jpeg

These are very elegant sprinkles that can be used for fun or a great gift! 

tea noodles (1).jpg

Darjeeling Pusheen Pops

Pusheen Pops!

If you've followed me on instagram you probably know that I'm a pusheen fan! In the summer pusheen box, I got a bunch of cool items including super cute popsicle molds! On the same day I also go my monthly Sipsy by box and knew that I HAD to create another popsicle recipe. I love the way black tea popsicles so I chose this Darjeeling from Harney & Sons

I wanted to give the popsicles a bit of "spice" so I decided on fresh cinnamon and to sweeten them a bit I also added rock sugar. This is an optional part of the recipe and you can put as little or as much as you'd like depending on how sweet you want the popsicles. 

These molds are BPA free but they are made of plastic so you want to make sure your tea is cool before pouring teas into the molds. 

I filled these up not all the way to the top so there is space to pour some milk in later on! 

I kept checking on these and when they were semi frozen I poured a splash of milk in each one. You can kind of see the streaks of white on the pops! I added milk to give these a bit of a creamy taste so they aren't just frozen ice. 

Are these not the cutest popsicle molds??! 

Not advertising for pusheen box, I just loved what I got so much! Not pictured, pusheen ice pack, backpack, vinyl figure, luggage tag and passport holder!

Sage Rose White Rolled Ice Cream

Rose Roll Up. 

I had a familiar friend on the menu recently, Sage Rose White from Wight Tea Co! I used this tea in a post a while ago. This tea is so nice because it's light and floral thanks to the white tea and rose, it also has such a wonderful fragrance!

I know and love Wight Tea Co so much and was super excited that they are now a brand partner with Sipsby!  I mean, check out this tea. It is BEAUTIFUL! P.s. You can use code teathoughts to get 50% your first box! 

This tea is also delicate, so make sure to not over brew it. I have in my instructions to let it sit in the heated milk and cream for 2 minutes. Usually when I cook with teas, I like to increase the brewing time to make sure that the flavor or the tea can withstand any cooking but there is no cooking required in this recipe.   

A while ago I saw a bunch of videos of "rolled ice cream." The ice cream masters (this is my nickname for them) would mix your flavors of ice cream with whatever toppings on a freezing cold flat surface then spread the ice cream very thin and shave it off with what looks like a paint scraper. Of course, I thought that 1) I wanted that ice cream and 2) I bet I can remake it! 

From what I've seen this is a traditional Thai dessert so I did some research to see if the ice cream was made a certain way. I saw a bunch of diy recipes and they all seemed to look like regular ice cream ingredients so I followed suit. 

Next, I decided on salted pistachios. It took me a LONG time to decide on what to incorporate into this ice cream. The tea already has such a wonderful flavor and I didn't want to put something like cookies or chocolate into it and overpower the tea. I had some salted pistachios at home and my Persian roots decided that pistachios and rose make a lovely combo.

I've had salted caramel and also butter pecan which can sometimes have a slight salt flavor from the pecans and I love those both. I thought, why not the same thing with pistachios?! 

When you look at the recipe below you'll see that it's very simple but the rolling part was a challenge for me! I used a regular spatula but next time I want to go out and get something very thin like a paint scraper. If you look at the "roll" on the left, that was my first attempt and the one on the right is my second which came out much better! Some advice about rolling: Be confident in your roll and don't do it too slow because I think that gives the ice cream time to break. 

This is definitely an eat immediately dessert! I wanted to give a few notes about the Almond milk and cream. I used almond milk because it's what I had and wanted to test it out but the cream definitely is the main flavor. This was very creamy and delicious which I love but I think it's totally possible to substitute the cream with coconut milk to get the same consistency but with less cream and no dairy!  

In most cases I've seen the rolls topped with other ingredients like sprinkles, hot fudge etc but I decided to keep this plain and the salted pistachios are DIVINE! What flavors would you like to get on your rolled ice cream?! 

Golden Milk Tea Pops

Gold pops.

Golden milk is all the rage thanks to turmeric! Turmeric is known to have many health benefits, including decreasing inflammation within the body which is important for so many reasons. Growing up in a Persian family, I never drank turmeric as a drink but it's a central ingredients in most dishes and has always been apart of my diet. My favorite ways to cook with turmeric are including it with rice and on meat. 

Turmeric on it's own is a very strong flavor so it makes total sense to make tea blends or to make it with milk! When I got this Turmeric Tonic from the Tea Spot in my sipsby box it was a no brainer to create fun pops with it! 

This is a super basic recipe where you infuse the tea into coconut milk, freeze and tada! While the tea is infusing into the coconut milk that is your chance to put any sweetener you'd like into the mixture if you'd like any. 

To spice these popsicles up I melted a little chocolate as a topping and it was a delicious addition to the popsicles! Make sure to let the melted chocolate cool a tiny bit and that you are only putting them on popsicles right out of the freezer. The chocolate will harden on the popsicle and they are perfect to serve immediately!